Milk Chocolate Millionaire’s Shortbread

Once upon a time traveling in England, I had an amazing wedge of shortbread covered in caramel and chocolate. The setting could not have been more perfect: a tea shop in the Lake District on a rainy, blustery day. I drank a ton of tea in England (obviously), but that shortbread stayed with me. I didn’t realize until years later watching the Great British Baking Show that the treat had a name, and its name was millionaire’s shortbread.

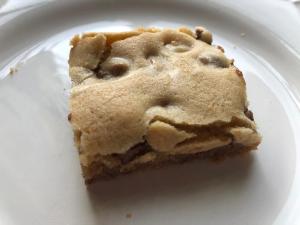
I’ve made millionaire’s shortbread once before, but this recipe, which I found at The Pioneer Woman and adapted just slightly, is an improvement on the one I’ve made before. While the base is a little crumbly for me, the caramel layer is excellent, and I decided to go with a milk chocolate ganache on the top for a sweeter, less bitter treat. I know, do you really need something sweeter with shortbread and caramel? Just ask the folks at Twix, I suppose.

Ingredients

For the base

  • 2 3/4 cups flour
  • 3/4 cup sugar
  • 1/4 cup cornstarch
  • 1/4 teaspoon sea salt
  • 1 cup plus 2 tablespoons unsalted butter, melted
  • 1 teaspoon vanilla extract

For the caramel

  • 14-ounce can sweetened condensed milk
  • 1 cup light brown sugar
  • 1/2 cup unsalted butter, cubed
  • 1/2 cup light corn syrup
  • 1/3 cup heavy cream
  • 1/2 teaspoon sea salt
  • 1 teaspoon vanilla extract

For the milk chocolate ganache

  • 1 3/4 cups milk chocolate chips
  • 100 milliliters (just above the 1/3 cup line, sorry Americans but there’s no easy conversion here) heavy cream

Preparation

Preheat oven to 350 degrees. Line a 9 x 13 baking tin with foil, extending the foil over the sides. In a large bowl, combine flour, sugar, cornstarch, sea salt, melted butter, and vanilla extract and stir until the dough comes together and becomes crumbly – be careful not to overwork it. Press dough into the pan and bake for 25-30 minutes, until edges are golden brown. Remove from oven and allow to rest while you make your caramel.

To make the caramel, combine sweetened condensed milk, brown sugar, butter, corn syrup, heavy cream, and sea salt in a medium pan and stir well. Cook over medium heat until the mixture darkens, begins to pull away from the pan, and reaches 235 degrees; I use a candy thermometer clipped to my pan and I stir constantly once the mixture begins to bubble to avoid scorching. Once the mixture reaches 235 degrees, remove from the heat and stir in the vanilla extract. Immediately pour over shortbread and allow to set at room temperature until cool.

Once the caramel is cool, make your ganache; there are different schools of thought on how best to do this, and I combined two different methods because I don’t think I got the cream warm enough on my first try. Place chocolate chips in a heatproof bowl. Place heavy cream in a small saucepan over low to medium heat and heat until it’s just about to boil – you’ll see small bubbles on the surface. Remove from heat and pour over chocolate chips; allow to sit for a few minutes to melt the chocolate, then stir vigorously until smooth. If necessary (and it was for me), place the mixture in the microwave and heat in short bursts of about 15 seconds, stirring well between each, until completely smooth. Pour over caramel layer and spread evenly with a spatula; allow to set before cutting. Slice into 2-inch x 1-inch pieces; store in airtight containers in a single layer (otherwise the layers get squished) at room temperature for 3-4 days. Makes 56.

Cinnamon Roll Blondies

cinnamonrollblondiesThe flavors of a cinnamon roll with the convenience of a blondie? Yes, please. These treats were very easy to make, though I approached the cinnamon layer somewhat differently from how the original recipe, which I found on Celebrating Sweets, was written. I also tweaked the icing to include some vanilla extract and more powdered sugar because…well, I do that.

A word about the icing: I’d probably wait to ice these until right before serving, because the cream cheese icing takes a while to set up in the fridge…causing the blondies themselves to get firmer than I’d like them to be. Still, the flavor is delicious and I’ll absolutely make these again.

Ingredients

For the blondie layer

  • 8 tablespoons butter, melted
  • 3/4 cup light brown sugar, packed
  • 1 egg
  • 1/2 teaspoon vanilla extract
  • 1 1/3 cups flour
  • 1/2 teaspoon baking powder
  • 1/4 teaspoon salt

For the cinnamon layer

  • 2 tablespoons butter, cut into cubes
  • 1/4 cup light brown sugar, packed
  • 1 1/2 teaspoons cinnamon
  • dash of salt

For the icing

  • 2 ounces very soft (almost melted) cream cheese
  • 7 tablespoons powdered sugar
  • 1 tablespoon milk
  • 1/4 teaspoon vanilla extract

Preparation

Preheat oven to 350 degrees. Line an 8 x 8 baking tin with foil and spray the foil with baking spray.

Make the blondie layer: Combine melted butter and brown sugar and whisk until well combined, about 1 minute. Add egg and vanilla, whisking to combine. Fold in flour, baking powder, and salt with a spatula; spread in the bottom of the baking tin.

Make the cinnamon layer: Melt butter and brown sugar in a small saucepan and whisk until smooth. Stir in cinnamon and salt. Spread across the top of the blondie layer.

Bake for 21 – 24 minutes, until edges are beginning to brown. Remove from oven and allow to cool before icing.

To make the icing, combine cream cheese, powdered sugar, milk, and vanilla extract in a small bowl and stir until smooth. Drizzle or pipe across the top of the bars; refrigerate bars to set the icing before cutting and store in the fridge until serving. Makes 12.

Canadian Butter Tart Squares

canadianbuttertartsquaresIn addition to hockey and maple syrup (among other good things, I’m sure), Canada has a treat called butter tarts. They’re like mini pecan pies, but with raisins or walnuts instead of pecans. While I’ve never had one, I found this recipe for a bar/square version at Just So Tasty and chose walnuts instead of raisins for my filling.

One observation – I might have under-baked these slightly, because the filling wasn’t as set as I expected it to be. They’re still delicious.

Ingredients

For the crust

  • 1 cup butter, softened
  • 1/2 cup powdered sugar
  • 2 1/4 cups flour

For the filling

  • 1/2 cup butter, softened
  • 1 cup brown sugar
  • 2 tablespoons flour
  • 4 eggs
  • 2 teaspoons vanilla extract
  • 3/4 cup dark corn syrup
  • 2 tablespoons vinegar
  • 1 cup chopped walnuts

Preparation

Preheat oven to 350 degrees. Line a 9 x 13 pan with parchment paper.

In a mixer, cream butter and powdered sugar until fluffy. Add flour and beat to combine; dough will be thick. Press into the bottom of the pan in an even layer. Bake for 15-20 minutes, until pale golden in color.

While the crust bakes, make the filling. Beat butter, brown sugar, and flour until fluffy. Add eggs and vanilla and beat to combine, then add corn syrup and vinegar and beat again. Stir in walnuts.

Once crust has baked, pour the filling over the top and bake for another 30-35 minutes, until the top is set. Remove from oven and cool completely before cutting. Makes 24.

Pumpkin Cheesecake Bars

pumpkincheesecakebarsSometimes you find a recipe online or in a cookbook that totally fails, even though you followed it to the letter. It happens to most bakers at some point or another, and we just chalk it up to a learning experience. But other times you hit the jackpot, as was my experience with these amazing treats. Billed as pumpkin streusel bars by Sally at Sally’s Baking Addiction, and incredibly reliable baker and blogger, I chose to call my version pumpkin cheesecake bars because they remind me so much of cheesecake. 

My version uses sour cream instead of Greek yogurt, and I added more nutmeg to the batter and also tossed some nutmeg into the streusel – but otherwise the recipe is the same, so Sally deserves the credit rather than me. I’ll definitely make these again and might mix some toasted pecans into the streusel next time. 

Ingredients

For the crust

  • 1 1/4 cups gingersnap cookies
  • 2 tablespoons sugar
  • 4 tablespoons butter, melted

For the filling

  • 8 ounces cream cheese, at room temperature
  • 1/2 cup sugar
  • 3 eggs
  • 2 teaspoons vanilla extract
  • 1 1/4 cups pumpkin puree
  • 1/3 cup sour cream
  • 1 1/2 teaspoons cinnamon
  • 1/4 teaspoon ginger
  • 1/4 teaspoon cloves
  • heaping 1/4 teaspoon nutmeg

For the streusel and icing

  • 1/2 cup old-fashioned oats
  • 1/3 cup packed light brown sugar
  • 1/4 cup flour 
  • 1/4 teaspoon cinnamon
  • Dash of nutmeg
  • 4 tablespoons butter, cut into small cubes
  • 1 1/2 cups powdered sugar
  • 2 – 3 teaspoons water

Preparation

Preheat oven to 325. Line an 8-inch square pan with foil, extending foil over the sides.

Make your streusel and keep in the fridge while you prepare the crust and filling: combine oats, brown sugar, flour, and spices in a small bowl. Rub (or cut) in butter until the mixture looks like coarse crumbs. Set aside in the fridge until ready to use. 

Mix the gingersnap cookie crumbs, sugar, and butter together and press into the bottom of the pan. Bake for 10 minutes; turn oven temperature up to 350 degrees. 

While crust is baking, prepare the filling. Beat cream cheese and sugar until fluffy, then add eggs, one at a time, beating after each. Beat in pumpkin, sour cream, and spices until mixture is creamy. Pour onto crust and top with streusel.

Bake for 40-45 minutes, covering the top with foil around 30-35 minutes to prevent over-browning. Bars are done when very lightly browned and the center is set; I used a cake tester to make sure they were done in the middle. Remove from oven and cool on a wire rack for about 1 hour, then chill for 3 hours in the fridge. Before serving, mix powdered sugar and water together to form a drizzly icing and drizzle over bars. 

Makes 12 or 16 bars, depending on how large you make them – mine made 16. Store in the fridge for 2-3 days – these bars become sticky after a day or so, but they are still absolutely delicious. 

Carmelitas

Carmelitas: I’ve wanted to bake them forever. And I am astonished at how easy they were to make. This recipe came from Six Sisters’ Stuff and uses pretty basic ingredients, most of which you likely have in your pantry. While the Six Sisters recommended baking this in a glass dish, I baked mine in a ceramic dish lined with foil and sprayed with baking spray for easier clean-up.

Next time, I think I’ll try this with semisweet chocolate chips to see how it turns out, and I might even add a small dash of cinnamon into the crust/topping mixture. I also recommend pressing the top crust bits into the caramel layer (using a spatula or the back of a spoon so you don’t burn your fingers) to make it stick just a bit better.

Ingredients

  • 11-ounce bag caramel bits (or 32 unwrapped caramel squares)
  • 1/2 cup heavy cream
  • 12 tablespoons butter, melted
  • 1 cup packed light brown sugar
  • 1 cup old-fashioned oats
  • 1 cup flour
  • 12-ounce package milk chocolate chips

Preparation

Preheat oven to 350 degrees. Line an 8 x 8 ceramic or glass baking dish with foil, extending the foil over the sides. Spray lightly with baking spray.

Combine caramel bits and heavy cream in a medium saucepan over low heat. Stir until caramel bits are melted and mixture is smooth; keep warm while your crust bakes. I got my caramel started and kept an eye on it while I made my crust.

To make the crust, combine melted butter, brown sugar, oats, and flour; I mixed mine with my hands to make sure it incorporated well. Press half the mixture in the baking dish and level it out; bake for 10 minutes.

Remove crust from oven and sprinkle with chocolate chips, then pour on the caramel. Sprinkle the remaining crust dough over the caramel and return to the oven, baking for about 15 minutes, until the top begins to just turn golden brown.

Remove from oven and cool completely at room temperature, or place in the fridge to speed the cooling process. You can’t cut these bars until they’re completely cool, so don’t even try – you’ll end up with a mess, from what I read in other recipes. Lift out of the pan and peel off foil; place on a cutting board and cut into 16 bars. Store in an airtight container at room temperature for 2-3 days.

Gingerbread Bars

gingerbread barsHappy winter solstice, friends! This is one of my favorite days of the year. And it’s just a few more days until Christmas, so seasonal flavors – like these gingerbread bars – are definitely in order.

Most bars I found online had a cream cheese frosting, but because Mike took them to work today I wanted to have a more stable, room-temperature-friendly frosting on them. Enter molasses buttercream, a tasty topping I’ve used on gingerbread cake before. You could also frost these with a tangy lemon buttercream, as gingerbread and lemon are good flavor friends. These bars taste absolutely amazing, but they’re just a bit more dry than I’d like. I suspect I baked them a few minutes too long, but I’m sure I’ll make them again, and can safely shorten my baking time to about 16-18 minutes, rather than 18-20. 

Ingredients

For the bars

  • 2 1/4 cups flour
  • 2 1/2 teaspoons ginger
  • 1 teaspoon cinnamon
  • 1/4 teaspoon nutmeg
  • Pinch of cloves
  • 1 teaspoon baking soda
  • 1/4 teaspoon salt
  • 12 tablespoons butter, softened
  • 1 cup packed light brown sugar
  • 1 egg
  • 3 tablespoons molasses

For the frosting

  • 8 tablespoons butter
  • 1 cup powdered sugar
  • 1 tablespoon molasses
  • 1/8 teaspoon ginger

Preparation

Preheat oven to 350 degrees. Line a 9 x 9 baking tin with foil, extending the foil over the sides.

In a medium bowl, stir together flour, ginger, cinnamon, nutmeg, cloves, baking soda, and salt; set aside.

In a mixer fitted with the paddle attachment, beat butter and brown sugar until light and fluffy. Add egg and molasses and beat to combine, then scrape down the sides of your bowl and add the flour mixture. Beat to combine completely.

Press mixture into the baking tin; you can use your palm to flatten it or the bottom of a measuring cup. Bake for 16-18 minutes, until a cake tester inserted in the center comes out clean. Remove from oven and cool on a wire rack completely before frosting.

To make the frosting, beat butter for about 1 minute, then add all the powdered sugar at once and beat on low, then medium speed until the sugar is fully incorporated into the butter. Add molasses and ginger and beat to fully combine, scraping the sides of the bowl at least a few times.

Remove bars from pan and discard the foil; frost with molasses buttercream. Cut into squares; I made small squares, so my batch yielded about 24 bars, but I think a more ideal quantity would be 16.

Pumpkin Chocolate Chip Bars

Mike’s coworkers have gone crazy for my pumpkin bars, especially this most recent iteration: the pumpkin chocolate chip bar. So far this fall I’ve made a few different varieties, and these seem to be the favorite. And strictly speaking, these bars are more cake-like than bar-like, with an excellent springy texture. 

Anyway…pumpkin and chocolate, you ask? I know, there was a time when I doubted it, too. But there’s something about the blend of pumpkin and chocolate, especially semisweet or dark chocolate, that just works. Who decided to put these flavors together, I don’t have any idea. But I’m incredibly glad that they did. Miniature chocolate chips work well in these bars, but you could use regular-sized ones if you prefer. 

Ingredients

  • 2 cups flour
  • 1 1/2 cups sugar
  • 2 teaspoons baking powder
  • 2 teaspoons cinnamon
  • 1 teaspoon baking soda
  • 1/2 teaspoon salt
  • 1/4 teaspoon cloves
  • 4 eggs, lightly beaten
  • 15 ounces pumpkin puree
  • 1 cup vegetable oil
  • 1 cup miniature semisweet chocolate chips

Preparation

Preheat oven to 350 degrees.

In a large bowl, whisk together flour, sugar, baking powder, cinnamon, baking soda, salt, and cloves until completely combined.

Add eggs, pumpkin puree, and vegetable oil, stirring well to completely combine, with no dry streaks or lumps remaining. Fold in chocolate chips.

Pour batter into an ungreased 15 x 10 x 1 pan and spread evenly. Bake for 25-30 minutes, until a cake tester comes out clean. Cool for 2 hours before cutting.  Store in an airtight container at room temperature. Makes 32.

Chocolate Chip Bars

Whenever I had to contribute some baked good to a school function as a child, my mom’s go-to treat was a pan of chocolate chip bars. She’d whip out a box store-bought cookie dough, stir in the necessary eggs, melted butter, and water, press it into a pan, and about 25 minutes later, voila: delicious cookie bars, perfect for school picnics and parties.

I’d not made chocolate chip bars until yesterday, and I’m delighted to say they turned out really well. They’re delicious, not unlike the bars of my childhood, with an almost fudgy middle. I’ve begun working chocolate back into my diet after four years of living a migraine-induced chocolate-free life, but so far, so good. I highly recommend this simple recipe if you’re craving a chocolate chip cookie, but short on time.

Ingredients

  • 2 3/4 cups flour
  • 2 1/2 teaspoons baking powder
  • 1/2 teaspoon salt
  • 13 1/3 tablespoons (2/3 cup) butter, melted
  • 2 1/4 cups brown sugar
  • 3 eggs
  • 1 1/2 teaspoons vanilla extract
  • 12-ounce package milk chocolate chips

Preparation

Preheat oven to 350 degrees. Lightly spray a 10 x 15 x 1 pan with baking spray.

In a large bowl, whisk together flour, baking powder, and salt. In a separate bowl, combine melted butter, brown sugar, and vanilla and stir until smooth. Allow to cool for a few minutes, then stir in eggs, one at a time, and add flour mixture, stirring to combine completely. Stir in chocolate chips.

Spread batter into the baking tin and bake for 24-25 minutes, until the top is shiny and edges are light golden brown. The center will look set, but a cake tester will come out with some moist crumbs; this is totally fine. Be careful not to over-bake your bars; you want the center to be a little bit gooey.

Remove from oven and cool completely before cutting into bars. Store in an airtight container at room temperature for 3-4 days. Makes 35.

Nut Bars

Read any article about healthy eating habits and it’ll tell you to keep healthy snacks like almonds not just in your pantry, but with you when you’re on the go or at your desk at work. I aspire to be a healthy snacker, but truth be told most of the nuts I buy for snacks end up in baked goods.

These nut bars, adapted from a recipe I found at Taste of Home, are definitely not in the healthy snack category. I adapted mine to include pecans instead of pistachios, but I suspect any nutty combination would work for these treats. The bar base is far more crumbly than I expected it to be, so I think I need to mix my dough better next time. In any case, they’re delicious. Next time, I might sneak a bit of maple flavoring into the honey/sugar mixture.

Ingredients

For the crust

  • 12 tablespoons butter, cut into cubes
  • 2 1/3 cups flour
  • 1/2 cup sugar
  • 1/2 teaspoon baking powder
  • 1/2 teaspoon salt
  • 1 egg, at room temperature, lightly beaten

For the topping

  • 1 cup toasted hazelnuts, cooled and chopped
  • 1 cup lightly salted cashews
  • 1 cup lightly salted almonds
  • 1 cup pecans, chopped
  • 2/3 cup honey
  • 1/2 cup light brown sugar
  • 1/4 teaspoon salt
  • 6 tablespoons butter, cut into cubes
  • 2 tablespoons heavy cream

Preparation

Preheat oven to 375 degrees. Line a 9 x 13 baking tin with foil and grease it with butter.

In a large bowl, stir together flour, sugar, baking powder, and salt. Cut in the butter until the mixture resembles coarse crumbs, then stir in egg. Press into the bottom of the baking tin and bake for 18-20 minutes, until light golden brown. Cool crust completely.

In a medium saucepan, combine honey, brown sugar, and salt over medium heat, stirring to dissolve the sugar. Bring the mixture to a boil and boil without stirring for 2 minutes; remove from heat and stir in butter and heavy cream, then return to the heat for about 1 minute, stirring constantly, until the mixture becomes smooth. Stir in nuts.

Pour over cooled crust and bake for 15-18 minutes, until topping bubbles at the edges. Remove from oven and cool on a wire rack completely; lift out of pan and cut into squares; I made small, approximately 1 x 1 squares for more bite-sized treats, but you could cut larger squares if you like. My batch yielded 48 squares.

Cappuccino Bars

We’re going to file these in the “looks ridiculous, tastes amazing” category of Amy Bakes in the ‘Burgh. Because holy cow, they look ridiculous. I mean, total amateur, what-was-she-thinking ridiculous. Fortunately they taste absolutely amazing. Almost like a tiramisu and a cappuccino got together and decided to make a whole new dessert.

Here’s what happened with this recipe, adapted from the King Arthur Flour Cookie Companion: my first layer wasn’t exactly even. So my second layer turned out wonky, and instead of covering it with glaze as recommended, I covered it with a thicker icing and tried to make a sort of fancy feathering thing happen, kind of like those patterns you see on actual cappuccinos. Oh, boy, what a disaster. I was almost too embarrassed to have Mike take them to work, but I figured something that tasted this delicious should absolutely get its chance to be enjoyed. I already have several ideas for next time, because you can bet I’ll make these again…and they won’t look like a train wreck.

Ingredients

First Layer

  • 1 3/4 cups flour
  • 1/2 teaspoon salt
  • 1 teaspoon baking powder
  • 8 tablespoons unsalted butter, slightly softened
  • 3/4 cup sugar
  • 2 eggs
  • 1/2 teaspoon vanilla extract
  • 1/3 cup instant coffee crystals

Second Layer

  • 3/4 cup sugar
  • 1/2 cup flour
  • 3 eggs
  • 1 cup heavy cream
  • 1 1/2 teaspoons vanilla extract

Icing Layers

  • 3 cups powdered sugar, divided into one 2-cup portion and one 1-cup portion
  • 2 teaspoons cinnamon
  • 1/2 teaspoon salt
  • 1/3 to 1/2 cup heavy cream

Preparation

Preheat oven to 350 degrees. Lightly spray a 9 x 13 baking tin with baking spray.

In a small bowl, combine flour, salt, and baking powder; set aside.

In a mixer fitted with the paddle attachment, cream butter and sugar until fluffy, then add eggs, one at a time, scraping the bowl well after each. Beat in the vanilla and coffee crystals, then add flour mixture and stir to completely combine.

Drop dollops of batter into the prepared baking tin and use a small offset spatula to spread it into an even layer; batter will be fairly thick. Bake for 15 minutes, until top is set; this means the sides have just started to pull away from the pan, and if you touch the center gently, your fingerprint will remain but will not break the surface of the crust.

Cool for 15 minutes while you prepare the filling. In a large measuring cup, combine sugar and flour; in a separate measuring cup, combine eggs, heavy cream, and vanilla. Add heavy cream mixture to sugar mixture and stir to combine completely, until smooth. Pour over crust and bake for 20-25 minutes, until the center is set.

Remove from oven and cool on a rack for 1 hour, then chill until completely set. Once set, make your first layer of icing; in a medium bowl, combine 2 cups powdered sugar, 2 teaspoons cinnamon, and 1/2 teaspoon salt. Add heavy cream 1 tablespoon at a time, until you reach a spreadable consistency that’s still slightly firm. Spread on bars, smoothing as much as possible.

In another bowl, place remaining 1 cup powdered sugar and add heavy cream, 1 teaspoon at a time, to reach a firm pipable consistency (mine needed about 2 1/2 teaspoons). Place in a piping bag and pipe lines across the bars; gently drag a toothpick through the lines to create feathering. Allow feathered icing to set before cutting, then cut into 30 squares.

Note: these bars cut easily, but my icing layer pulled away from my second layer a bit (contributing to the “looks ridiculous” situation). Next time, I might chill them for just a short time before cutting.

Store in an airtight container at room temperature for 1-2 days or in the fridge for 2-3 days.