The first time I baked this strawberry cake, I under-baked it slightly and had to do a second cake, having watched the middle sink because, well, it was raw in there. The exact same thing happened to me this time, too, so I really can’t stress the need to bake this cake for at least 30 to 35 minutes enough (or at least I need to, anyway – your oven might be different). This was a special treat for my mom and her twin sister, who celebrated their 80th birthday back in June. This past weekend my family and I traveled to Deep Creek, Maryland, for a little get-together in honor of the twins, and this cake was a massive hit.

This time I added a bit of lemon zest to the batter (though the man in my life says there could have been more, and I have to agree with him) and frosted the cake with a lemon buttercream. It has incredible strawberry lemonade vibes, so I’ve decided to call it strawberry lemonade cake. It’s a recipe I’ll go back to many times, for sure.
Ingredients
For the cake
- 2 3/4 cups flour
- 2 tablespoons cornstarch
- 3/4 tablespoon baking soda
- 1 teaspoon baking powder
- 1 teaspoon salt
- 3/4 cup vegetable oil
- 1/4 cup unsalted butter, melted
- 1 1/2 cups sugar
- 3 eggs
- 2 teaspoons vanilla extract
- 1/3 cup milk
- 340 grams fresh strawberries, pureed to make about 1 1/2 cups liquid
- zest of 1/2 lemon (I recommend using at least a whole lemon and will do so next time)
For the frosting and decoration
- 1 1/4 cups (2 1/2 sticks) unsalted butter, at room temperature
- 5 – 6 cups powdered sugar
- 1 teaspoon vanilla extract
- 1 teaspoon lemon extract
- 2-3 teaspoons lemon juice
- Green, pink, and red gel food coloring, for flower and leaf decorations
- Wilton M1, 2D, 21, and 352 piping tips
Preparation
Preheat oven to 350 degrees. Spray a 9 x 13 baking tin with baking spray.
In a large bowl, sift together flour, cornstarch, baking soda, baking powder, and salt; set aside. In another large bowl, whisk vegetable oil, melted butter, sugar, eggs, vanilla extract, milk, strawberry puree. and lemon zest. Add dry mixture to wet mixture and whisk gently, folding to combine until no lumps remain.
Pour into prepared baking tin and bake for 30 – 35 minutes, or until a cake tester inserted in the center comes out clean. My cake needed at least 35 minutes, and I gave it a few more, risking over-baking, just to be sure I didn’t have a raw middle yet again. Cool completely in the tin on a wire rack before frosting.
To make frosting, beat butter on medium speed for 1 minute. Add about 4 cups powdered sugar and beat on low until all the sugar is incorporated into the butter; this takes several minutes. Add vanilla extract, lemon extract, and 1 teaspoon lemon juice and beat to combine; add 1-2 additional cups powdered sugar to reach a soft but pipeable texture; add more lemon juice if desired. You can also adjust the amount of lemon extract, but be careful – you don’t want it to taste fake.
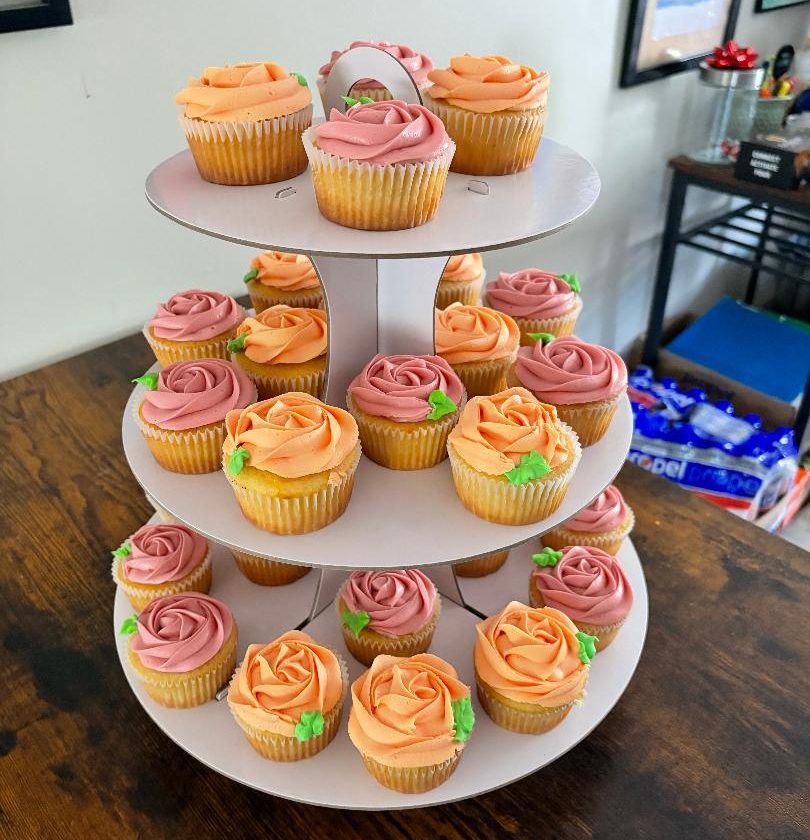
To decorate the cake, reserve a small portion of frosting and tint green for leaf accents., then tint remaining frosting varying shades of pink, red, and purple. Pipe roses and other flower shapes all over the cake, then add leaf decorations.
Store in an airtight container at room temperature; makes about 18 servings, depending on how large you slice the pieces. I do admit to giving my gentleman friend the largest slice of this one, and to having an extra little sliver myself, it was so good.