I recently found a recipe for sugar cookie bars at Crazy for Crust and thought…what if they were lemon? And a few hours later, they were! Lemon is a great summer flavor, but I’d bake these at any time of the year, and can see this recipe being adapted into many different flavors, like an almond version and a creamsicle version. One thing I really liked about this recipe was that it didn’t rise too high and create big shelf-type edges, like previous sugar cookie bars have done for me – bakers, you know what I mean. These stayed nice and even from center to edge.
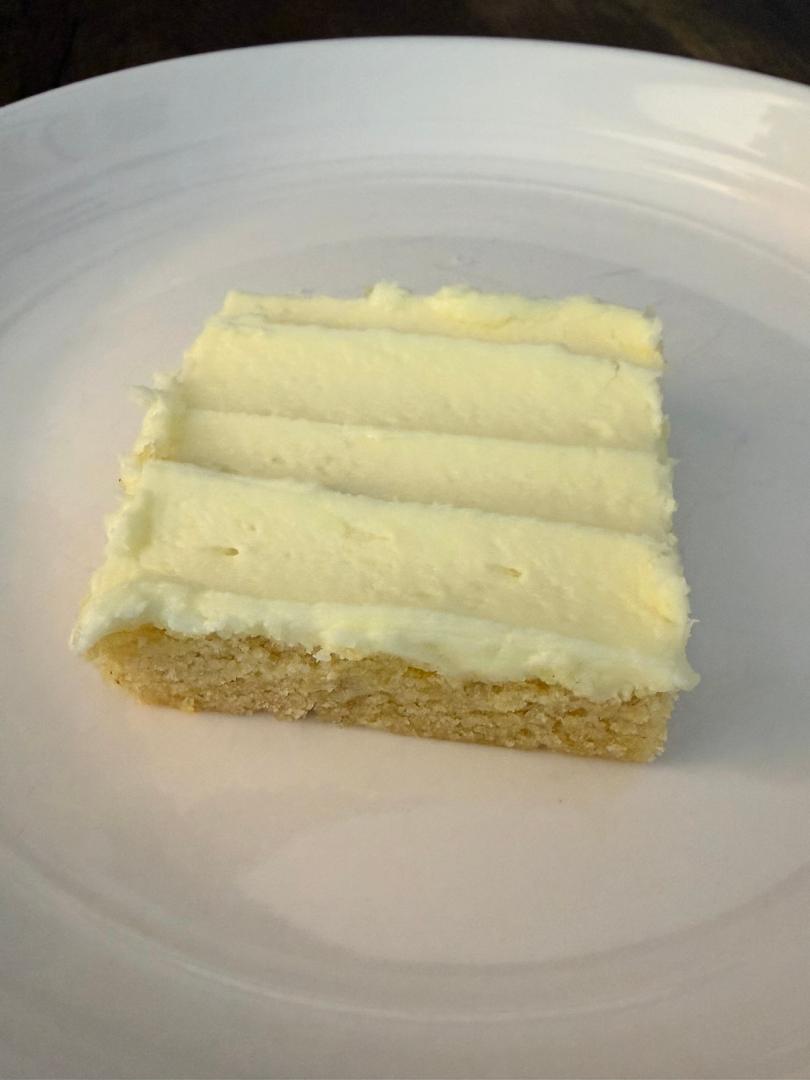
I chose to frost these bars with a sturdier icing than buttercream or just a glaze, using my grandma Zella’s icing, which involves an odd but effective combination of shortening, egg white, powdered sugar, and various flavorings. The icing kind of sets, so you get a nice bit of tension when you bite into it. These treats were very highly regarded by my gentleman friend’s family, who I bake for on a nearly weekly basis now.
Ingredients
For the bars
- 12 tablespoons unsalted butter, softened
- 3/4 cup sugar
- 1 egg, at room temperature
- 1 teaspoon vanilla extract
- Zest of 1 medium lemon
- 1/2 teaspoon baking soda
- 1/2 teaspoon cream of tartar
- 1/2 teaspoon salt
- 2 cups flour
For the frosting
- 3 tablespoons shortening
- dash of salt
- 1 egg white
- 2 cups powdered sugar
- 1 teaspoon vanilla extract
- 1/2 teaspoon lemon extract
- 1-2 teaspoons water, if necessary
- Yellow food coloring
Preparation
Preheat oven to 350 degrees. Line a 9 x 13 baking tin with foil and coat with baking spray.
In a mixer fitted with the paddle attachment, cream butter and sugar until fluffy. Add egg, vanilla extract, and lemon zest and beat to combine. Mix in baking soda, cream of tartar, and salt to combine, then add the flour with the mixer running on low, beating to just combine.
Press dough into the pan and bake for 14-19 minutes; the edges will be just golden, and the center will look a bit underdone. Allow to cool in the pan before frosting.
To make the frosting, combine shortening, salt, egg white, and one cup powdered sugar in a mixing bowl. Beat on low speed until combined, then increase speed to medium, then high, and beat for one minute.
Add additional cup powdered sugar and beat on low speed until combined, then on high speed for one minute.
Add vanilla and lemon extracts. Beat on high speed for one or two minutes, until very well combined.
Check the frosting’s texture; it should be like very, very soft peanut butter and very easily spreadable. If necessary, add one to two teaspoons of water to thin the frosting and beat well to combine.
Frost the bars using an offset spatula; allow to set before cutting. Store in airtight containers at room temperature for 1-2 days; makes 24.


 Are dark and light brown sugar interchangeable? It probably depends on who you ask, but I’d say yes, for the most part. Dark brown sugar contains more molasses, giving it a richer color and flavor than the light variety. And in my kitchen, dark brown sugar turns to a rock in a matter of days after it’s opened, so I try to use up the whole bag quickly when I do bake with it.
 My niece, Margaret, was born on Halloween. Margaret is technically my cousin, as her mom is my cousin Barb, but to her I’m Aunt Amy given the age gap. Anyway, I think having a Halloween birthday would be really cool – you get to dress up, there’s always going to be some kind of party, and spooky season is fun in a lot of ways. I like to call Margaret “Count Margula” around her birthday in a nod to Dracula, a starring figure in this season.