What better way to celebrate the royal wedding than with a traditional English dessert? I’ve wanted to bake a Victoria sponge for a while now, and yesterday’s Harry-and-Meghan-extravaganza presented the perfect opportunity.
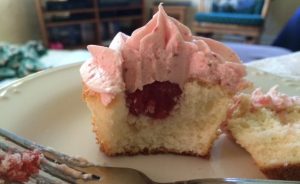
Victoria sponge, also called a Victoria sandwich or Victorian cake, was named for long-reigning British monarch Queen Victoria. This simple cake is an absolutely delicious treat; two layers of cake filled with raspberry jam and whipped cream. The cakes themselves are very easy to make, requiring only butter, sugar, eggs, self-rising flour, and baking powder; no extracts of any kind. You might wonder if they’ll turn out bland, but trust me, they don’t. The tart raspberry jam and sweet whipped cream go a long way to complement the cakes, which are a bit like pound cake. This recipe is adapted from Mary Berry’s Victoria sandwich from BBC Food; I measured all of my ingredients by weight for the cakes, rather than volume, to ensure that my ratios were correct.
Ingredients
- 8 ounces (1 cup) butter, at room temperature, plus more for pans
- 8 ounces superfine sugar*
- 4 eggs, at room temperature
- 8 ounces self-rising flour
- 2 teaspoons baking powder
- 3/4 cup raspberry jam
- 2/3 cup heavy whipping cream
- 2 tablespoons powdered sugar
*To make superfine sugar, place regular granulated sugar in a food processor and pulse to a fine consistency, like sand.
Preparation
Preheat oven to 350 degrees. Lightly grease two 8-inch round cake pans with butter, then line each with a circle of parchment.
In a mixer fitted with the paddle attachment, cream butter and sugar until combined; add eggs one at a time, beating after each addition. Mix in flour and baking powder.
Divide batter evenly between the two cake pans, leveling the tops with a spatula. Bake for 20 minutes, then check to see if cakes are done; they will be golden brown on top, have pulled away from the sides of the pan, and will spring back when pressed lightly.
Remove from oven and allow to cool in pans for 5 minutes; run a butter knife around the edge of each cake and turn onto a wire rack to cool.
Once cakes are cool, place one layer on a cake plate (handling very gently using a large spatula – my cake cracked easily when I started to move it). Top with raspberry jam.
To prepare whipped cream, place cream and powdered sugar in a mixer fitted with the whisk attachment and whip at high speed for a few minutes, until soft peaks form. Be careful not to over-whip your cream, or you’ll end up with butter!
Drop whipped cream in dollops over the jam and gently spread to cover the whole surface. Top with remaining layer of cake; dust the top with powdered sugar if desired. Store, covered, in the refrigerator for 2-3 days. Most recipes note that Victoria sponge is best eaten within about 12 hours after it’s made.