Apple Pie with Plaid Lattice Leaf Crust

apple-pie-with-lattice-leaf-crustSometimes, I use canned pie filling. Yes! You’re shocked, I know…unless you’ve already read my posts on cherry pie and peach pie, of course.

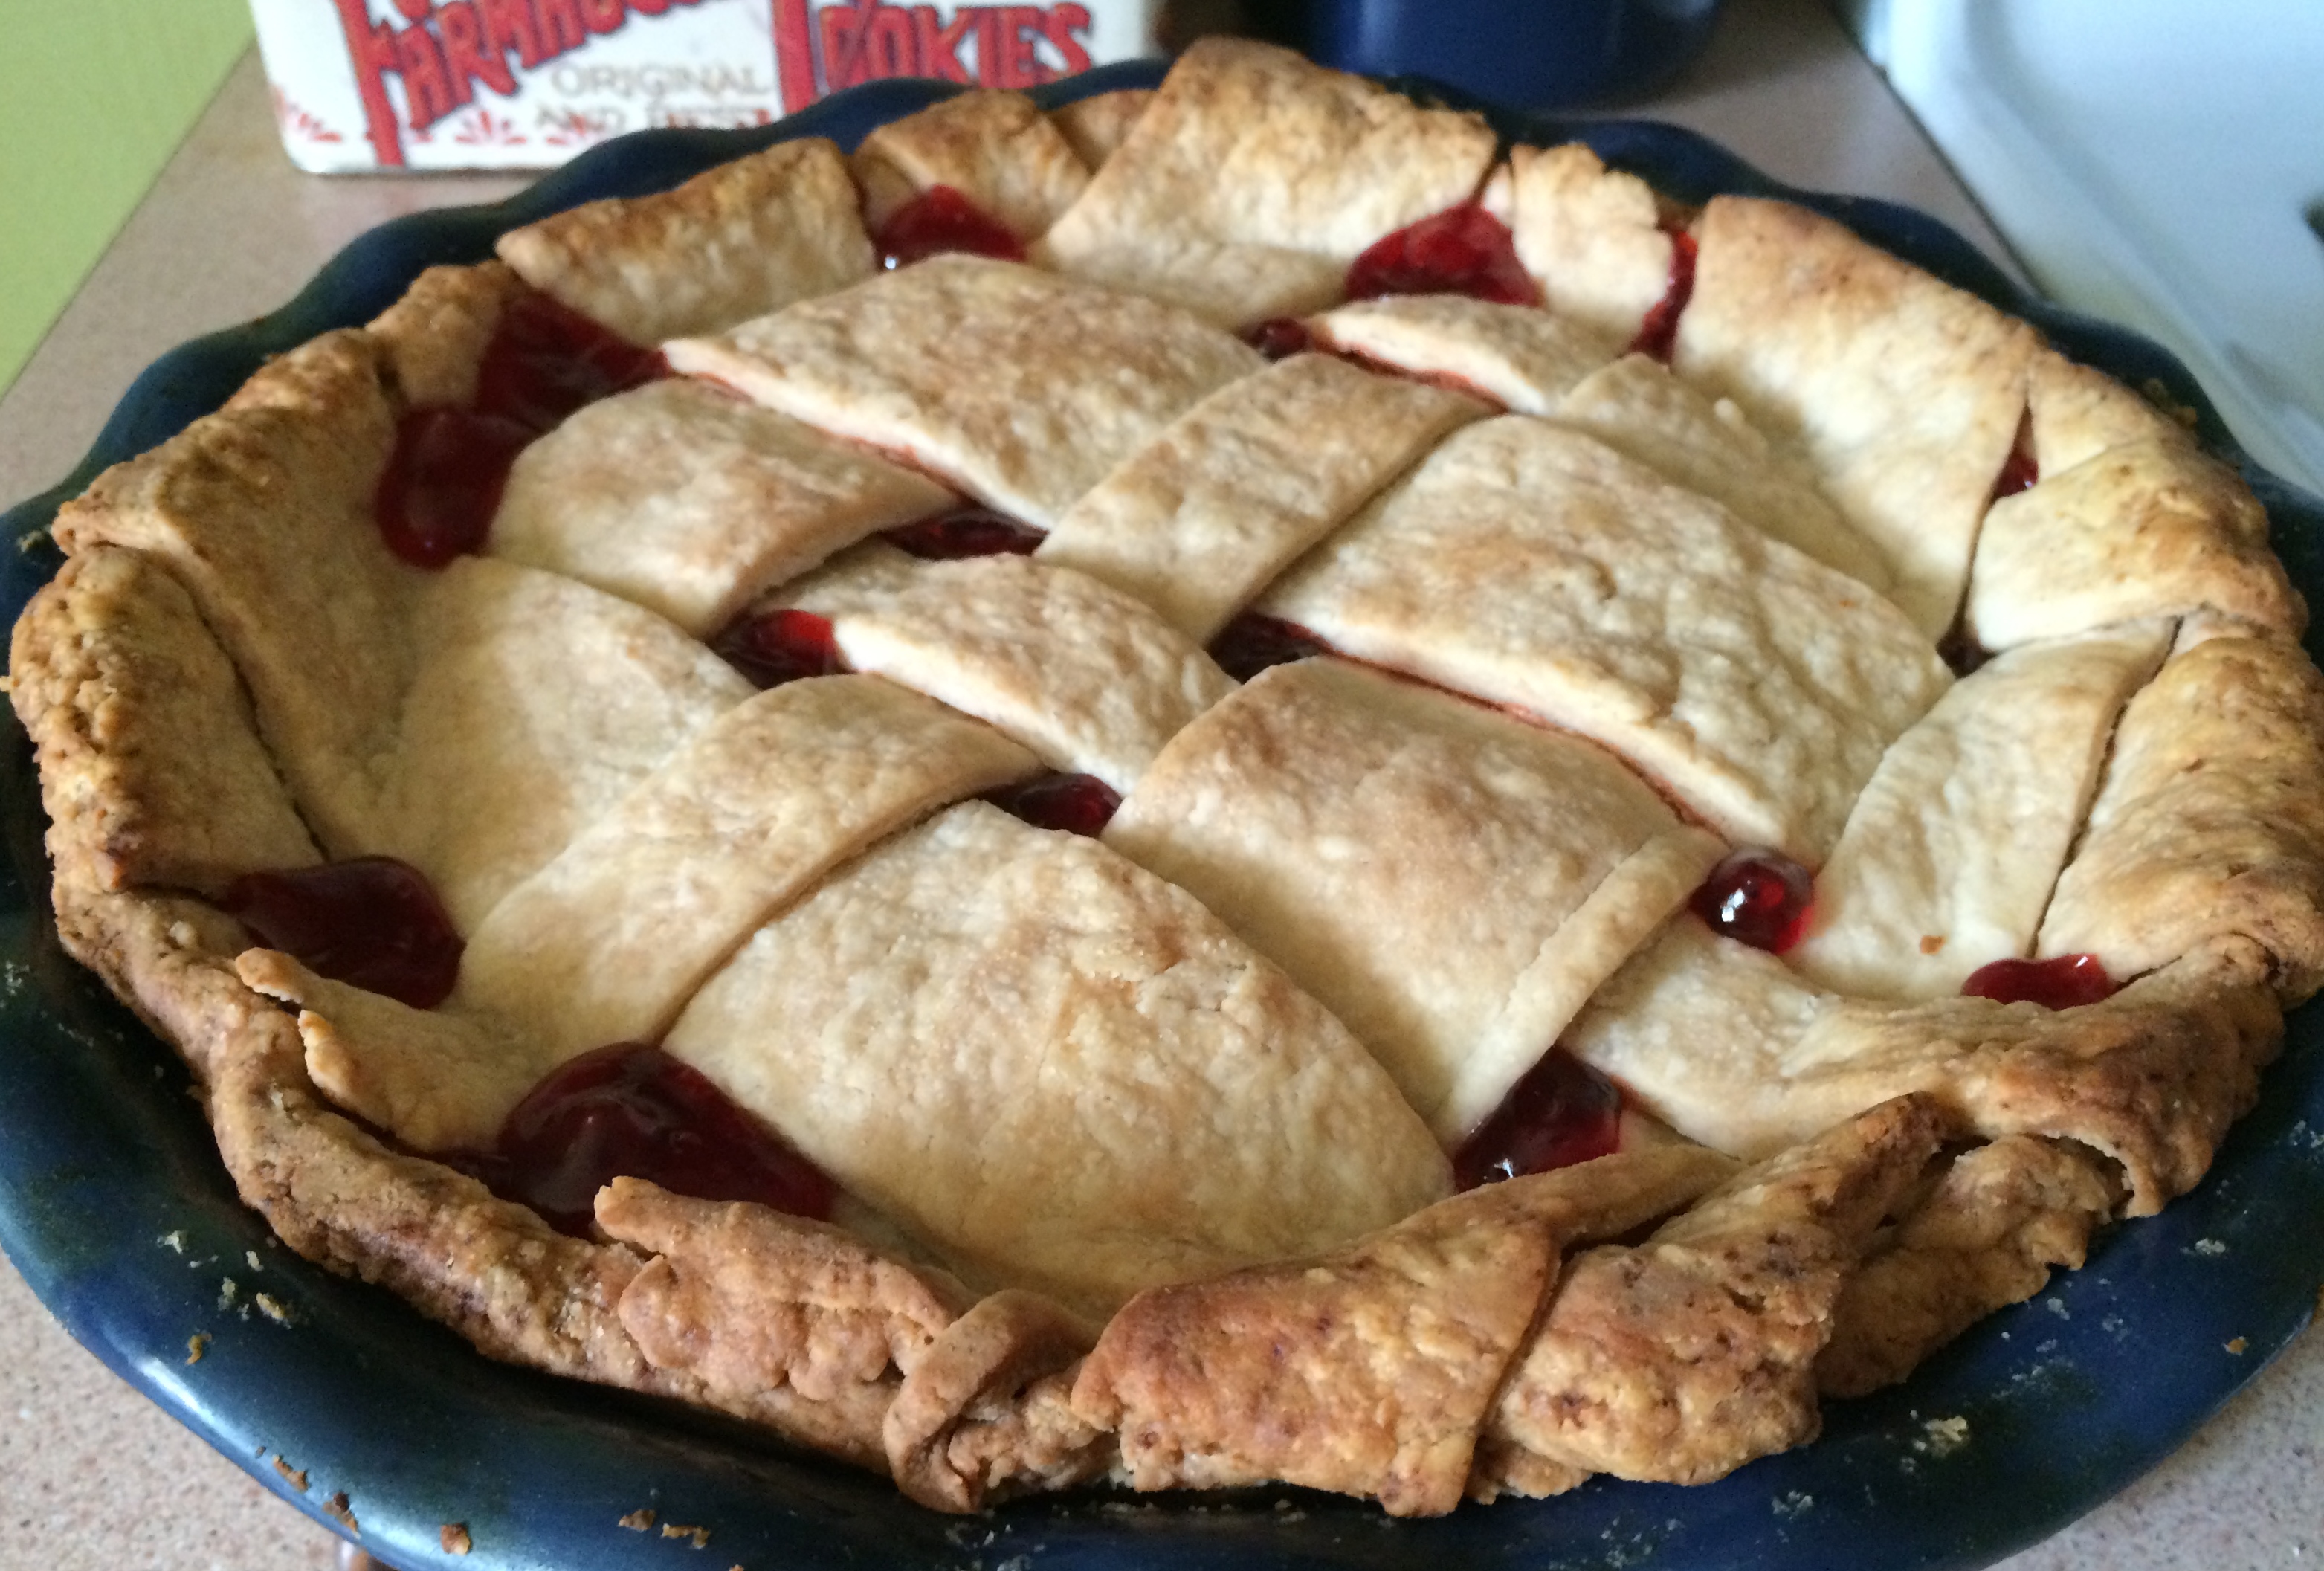
Here’s the thing: fully scratch-made pies are awesome, but I’ve already made apple pie from scratch. And today, on Thanksgiving Eve, I wanted to spend time focusing on my crust, creating a beautiful, fancy lattice and interesting edge.

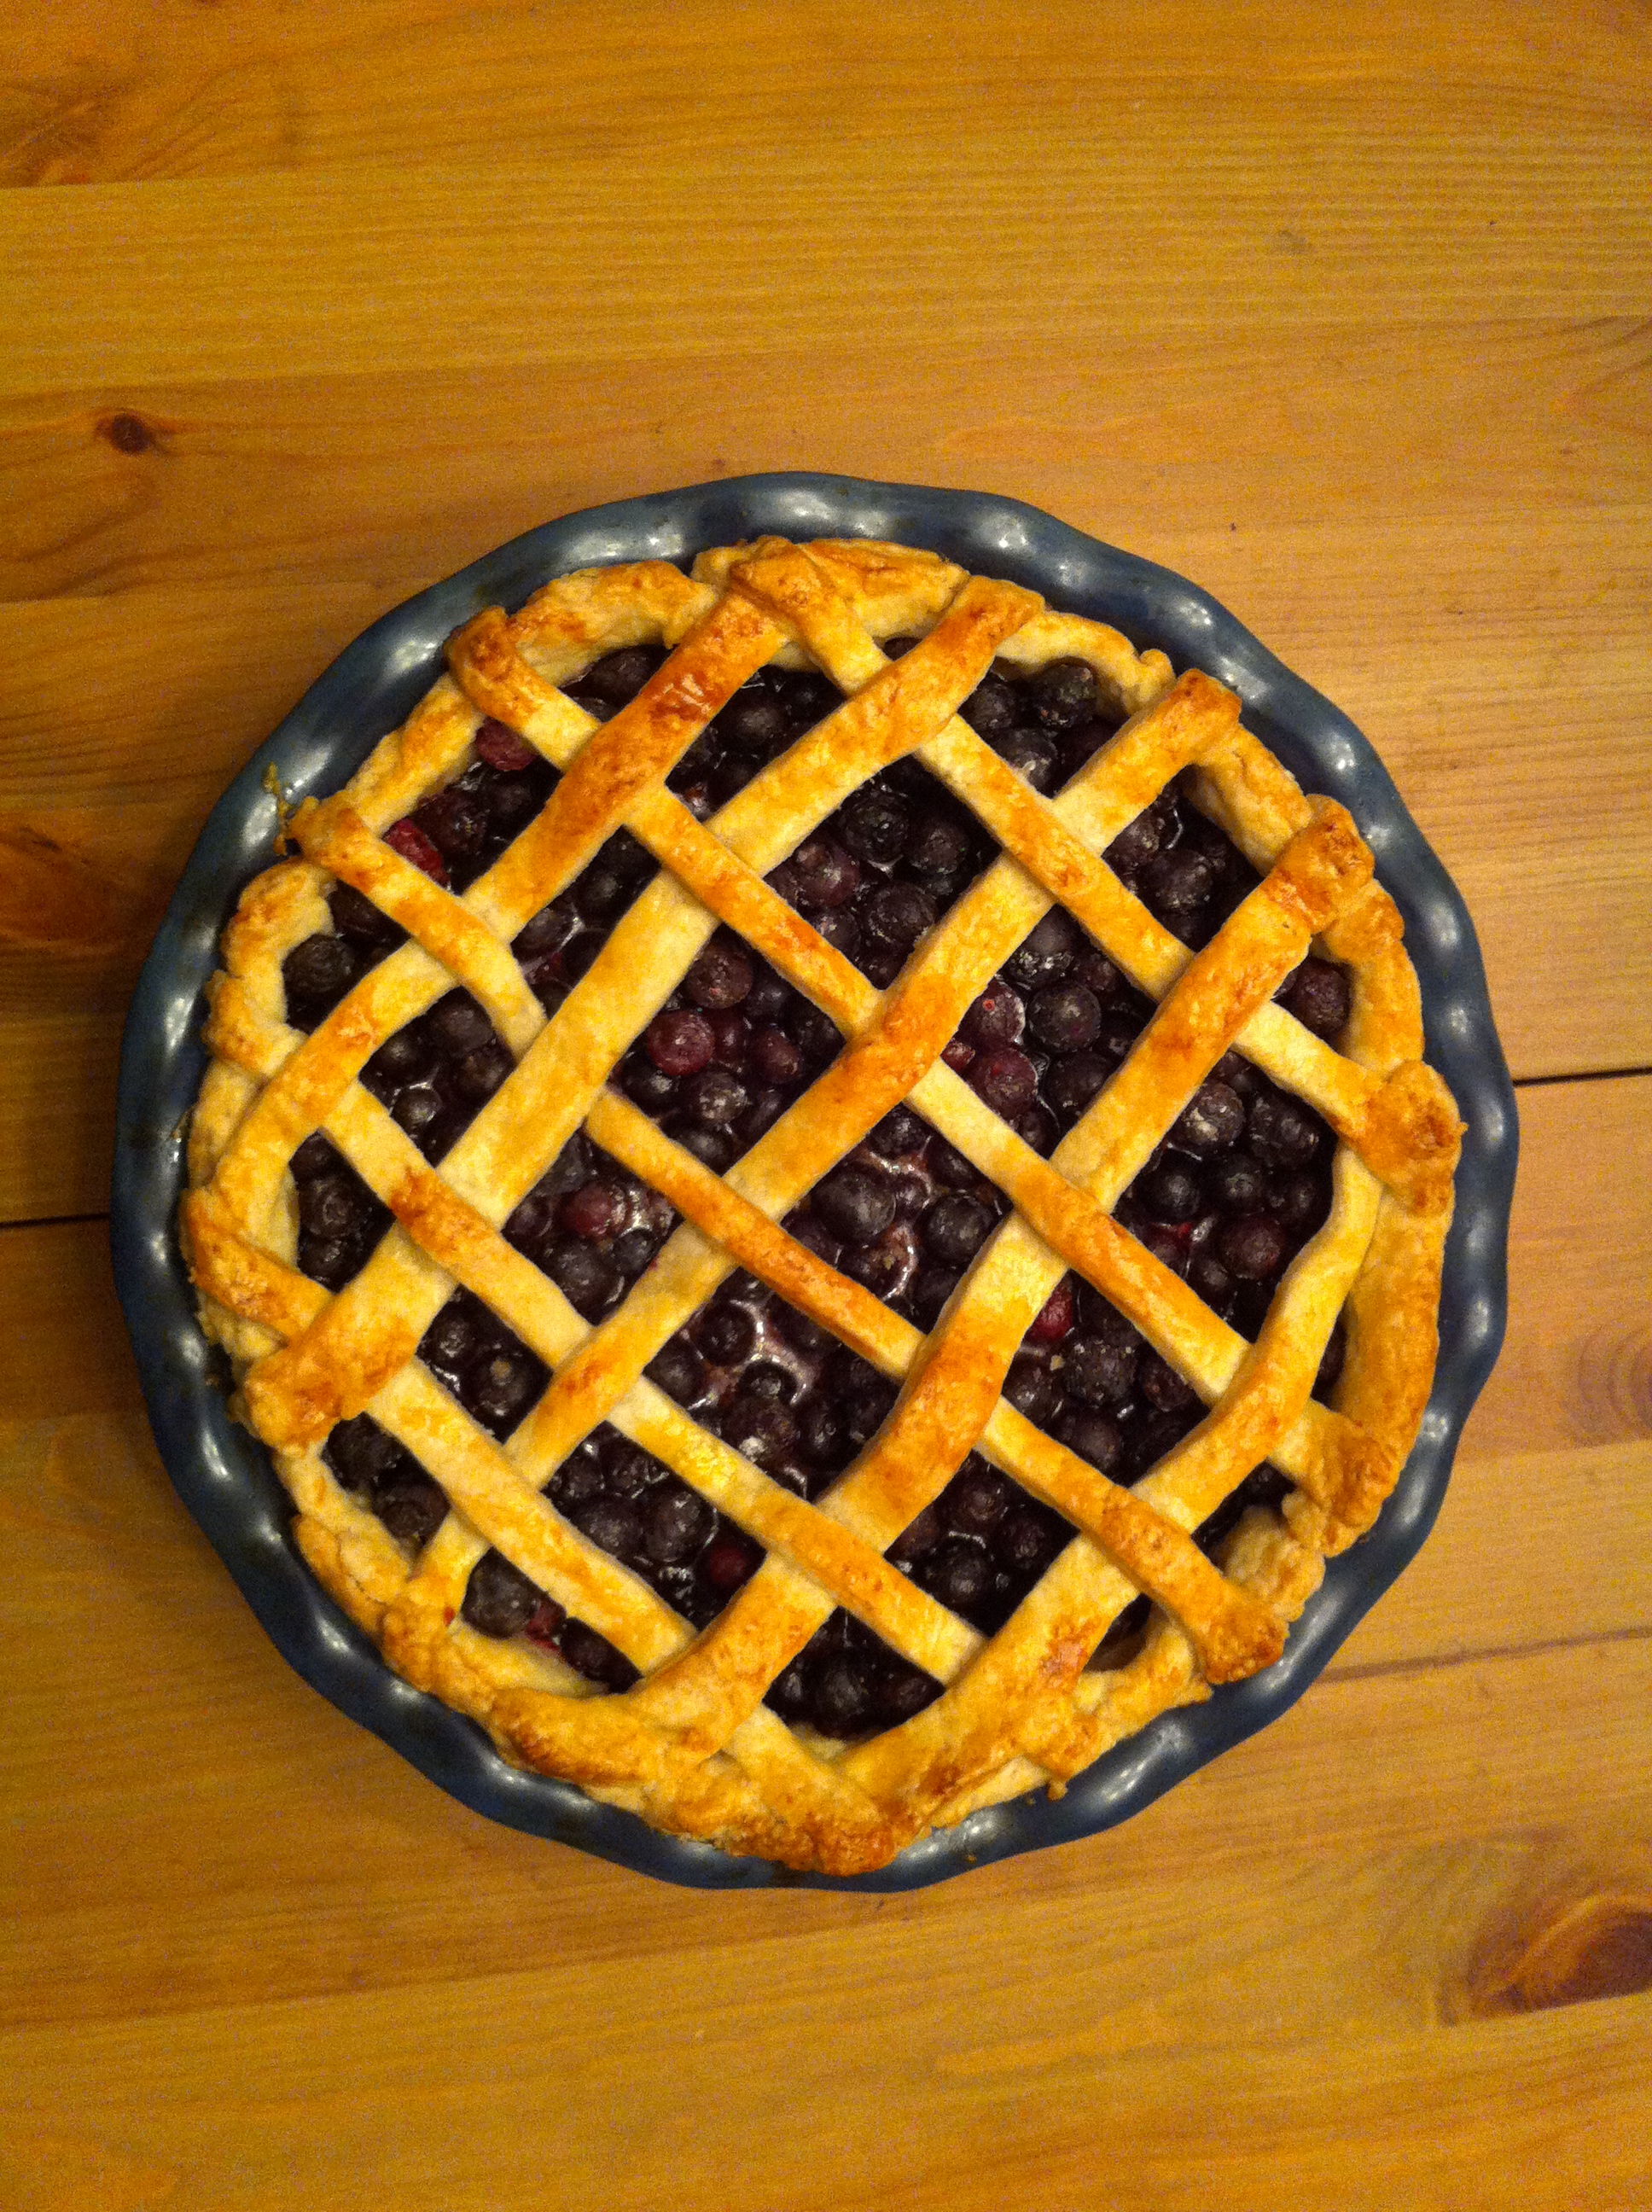
Behold, fancy lattice and interesting edge! I’m not the best crust designer, so each time I make pies now, I practice a new design. This time, I chose a thin plaid lattice of one-half and one-inch strips, then added a leaf border around the edge. I’m very pleased with the end result.

Ingredients

  • 2 pie crusts*
  • 1 20-ounce can apple pie filling
  • Dash of cinnamon
  • Dash of nutmeg

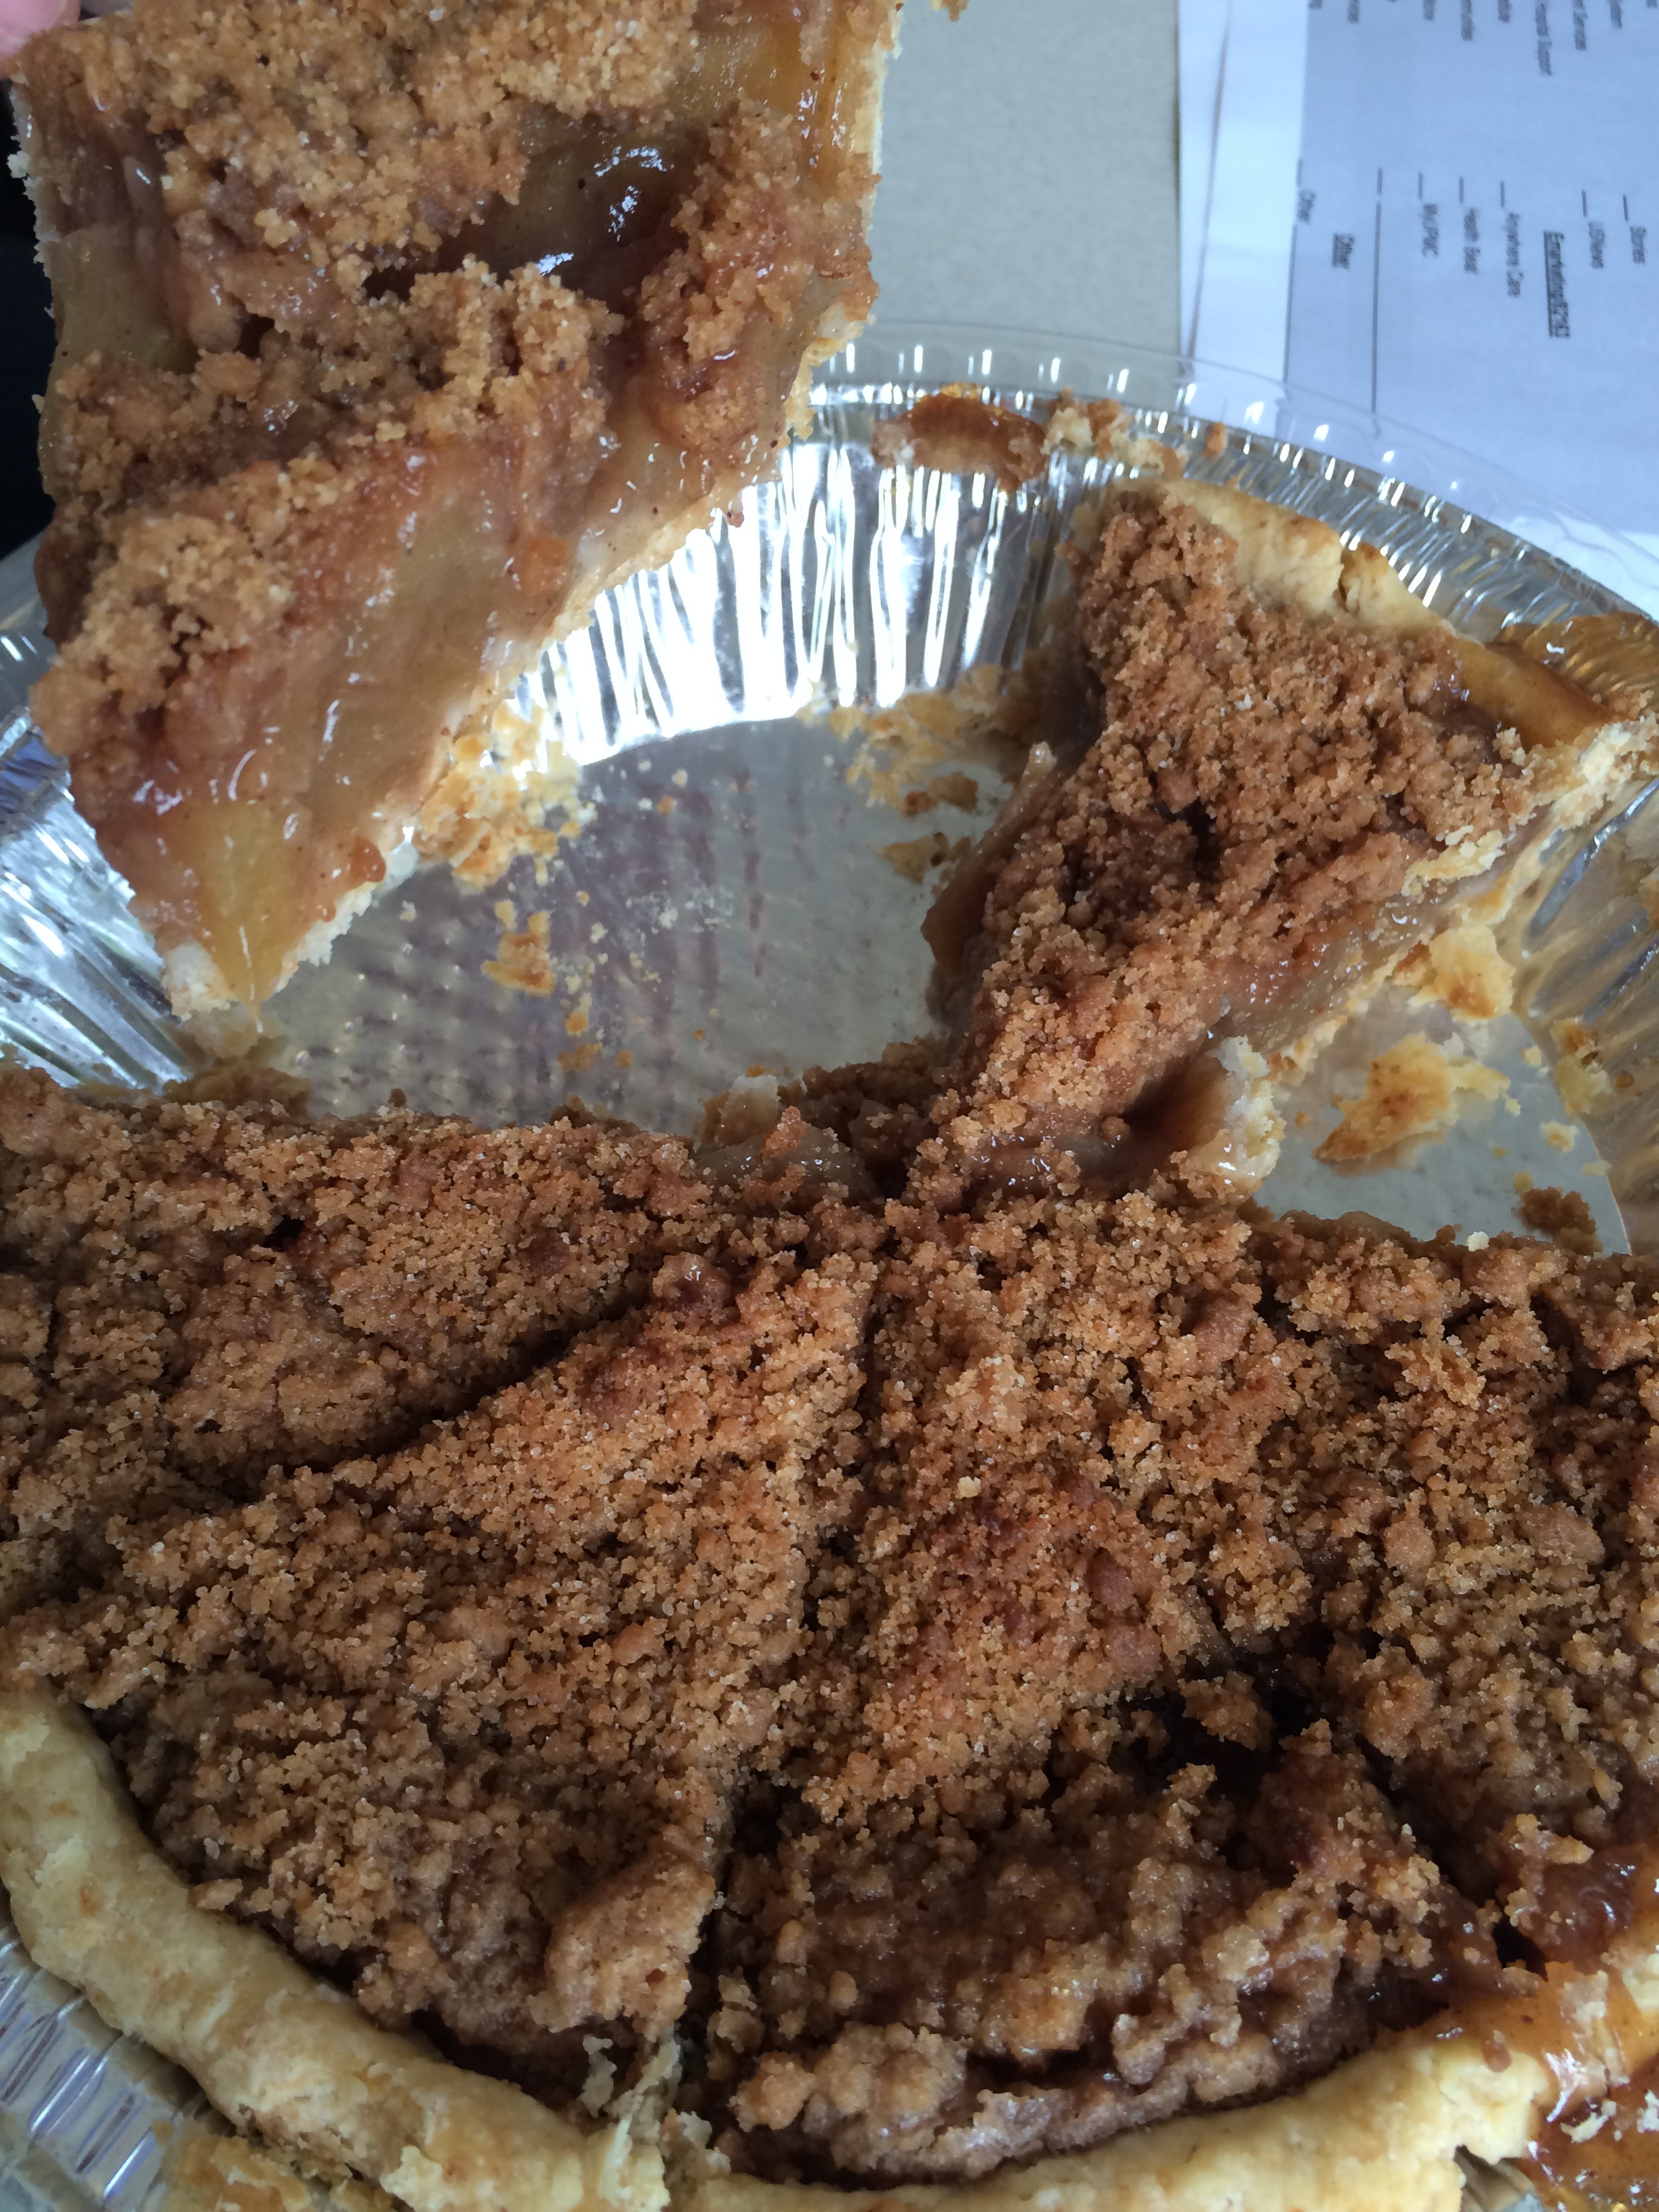
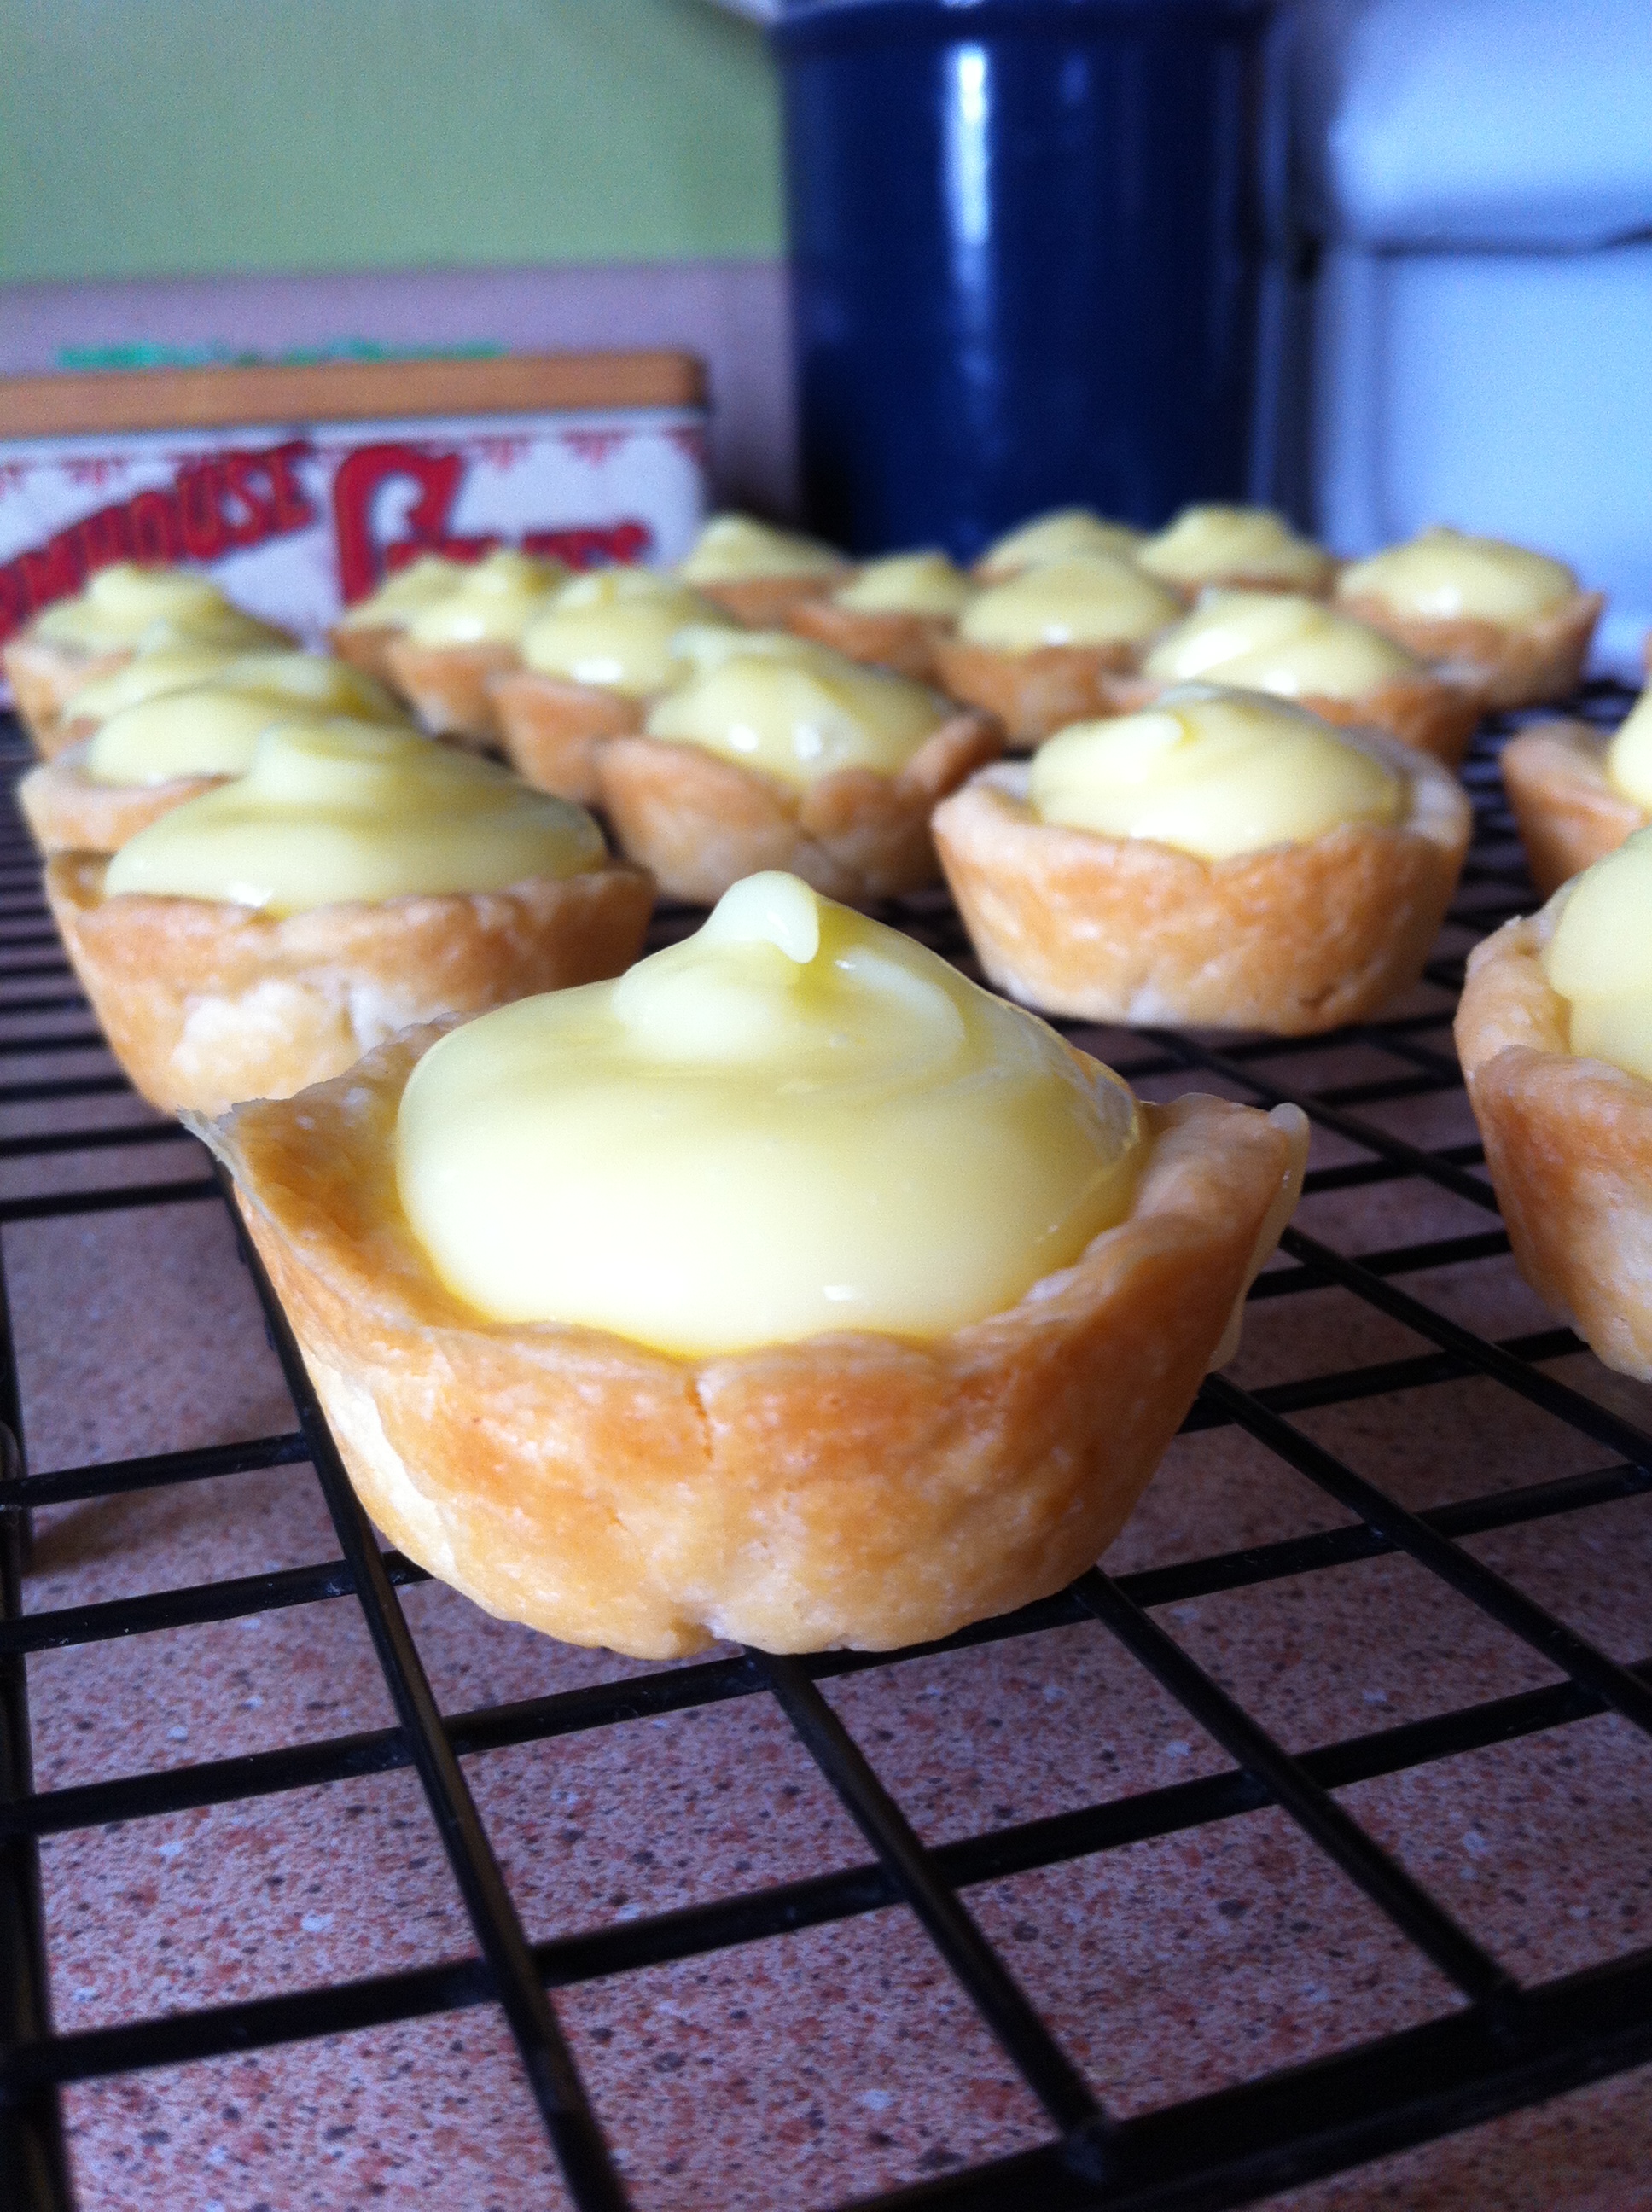
*My pie crust recipe, which I learned from my mom, yields 3 crusts. If you’re not sure what to do with the extra crust, consider apple crumb pie, chocolate pie, pecan pie, pumpkin pie, or pie crust rolls

Preparation

Mix cinnamon, nutmeg, and pie filling; set aside.

Prepare crusts; line an 8-inch pie dish with one and reserve the second for the lattice leaf top.

Roll your second crust into a rectangle at least 9 inches tall. Cut one-half and one-inch strips; you’ll need 5 one-half inch and 7 one-inch strips for this design, plus more for the leaves, and you should have plenty. I had a bit of dough left over that I’m going to turn into pie crust rolls later.

Pour filling into pie dish, then top with 7 strips of crust; start from the outside edge and alternate the one-inch strips with the one-half-inch strips.

Fold back every other strip halfway; place a one-inch strip, then a one-half-inch strip, in the opposite direction and fold the other strips back so they cover the new ones. Repeat as necessary; if you need video help for latticework, check out this video from Southern Living. Once your lattice is complete, trim your edges and fold them over to secure them.

Using a small leaf cookie cutter (I chose a teardrop-shaped leaf), cut leaves for your edge; re-roll your scraps if necessary. My edge used 24 leaves.

Gently press the leaves onto the edge of your crust, making sure they stick to the crust below.

Place a pie guard or foil around the edge of the crust; bake for 25 minutes, then remove the guard and bake another 25 minutes.

Cool pie completely, or serve warm.

Pumpkin Molasses Pie

pumpkin-molasses-pieWhat makes pumpkin pie better? Molasses. But what is molasses, exactly?

Molasses is a syrup that results from sugar production. To make sugar, sugar cane or beets are crushed to extract their juice, which is then boiled down to form sugar crystals. The crystals are taken out, and the remaining juice is molasses, which may be boiled two or three more times to extract more crystals. The most common type of molasses used in baking comes from the first boiling; it is the lightest in color and sweetest in taste. The second boiling results in dark molasses, and the third results in blackstrap molasses, which is the thickest and most bitter-tasting. Blackstrap molasses is said to have health benefits because it contains vitamin B6 and minerals like calcium and magnesium, but it’s usually not recommended for baking. In fact, I’ve read many a recipe that calls for molasses and then indicates “not blackstrap” to ensure a sweet result.

Last week, I took some pumpkin molasses cookies to work and my colleague Linda told me that she had a good recipe for pumpkin molasses pie. Naturally, I had to try it…and it was just as delicious as I expected.

Ingredients

  • 1 single pie crust, unbaked
  • 1 1/2 cups canned pumpkin puree
  • 1 cup firmly packed light brown sugar
  • 1/2 teaspoon salt
  • 2 teaspoons cinnamon
  • 1 teaspoon ginger
  • 2 tablespoons molasses
  • 3 eggs, lightly beaten
  • 1 cup evaporated milk

Preparation

Preheat oven to 425 degrees. Line an 8-inch pie dish with crust, then trim and shape edge as you like. I did a classic crimped edge for this crust.

Place your pie dish on a rimmed baking sheet lined with parchment paper to catch any spills.

In a large mixing bowl, stir together pumpkin puree, light brown sugar, salt, cinnamon, ginger, and molasses. Add eggs and evaporated milk, stirring very well to combine.

Pour filling into pie dish and place a crust shield* around the edge to prevent over-browning. Bake for 30 minutes, then remove the crust shield and continue baking another 10-15 minutes. Pie is done when a toothpick inserted in the center comes out clean; don’t worry about the little hole it will leave, as you can always cover this up with whipped cream before serving.

Remove pie from oven and cool completely before serving. Pie will be very puffy when it first comes out of the oven and will fall as it cools – this is completely fine.

Store pie in the refrigerator for up to 3-4 days.

*You can buy a crust shield at King Arthur Flour and many baking supply stores. If you don’t have one handy, take a 12-inch piece of foil and fold it into quarters. Take scissors and cut out the center, leaving a 2-inch wide ring. Carefully unfold the foil and place the guard on your pie edge. 

Peach Pie with Lattice Crust

peach pieSometimes I use canned pie filling. There, I admit it.

When you want to practice your latticework, it’s just a lot easier to make your crust from scratch, pop open a can of filling, and focus on your lattice strips than it is to worry about peeling your fruit and such. Someday, I’m sure I’ll make a peach pie from scratch, but in the meantime, my can of Lucky Leaf pie filling worked very well.

This is my third lattice-topped pie, and I think it’s the best appearance-wise. I had two crusts left over from yesterday’s lemon meringue pie adventure, and I still have a bit of crust left over from making my lattice, which I might turn into pie crust rolls later.

Ingredients

  • 2 pie crusts
  • 1 can peach pie filling
  • 1/4 teaspoon cinnamon

Preparation

Preheat oven to 425 degrees.

Mix cinnamon and pie filling; set aside.

Prepare pie crusts; line an 8-inch pie plate with one crust and reserve the second crust for the lattice top.

Roll out your second crust, then cut into 1 1/2 inch strips for the lattice. You’ll need 7 strips for this design.

Pour filling into pie dish; place four lattice strips on top. Fold back the first and third strips, then place another strip on your filling so it is perpendicular to the other strips. Fold back the strips so they cover the new strip, then repeat with remaining strips to form the lattice. If you’d like some video help, check out this tutorial from the folks at Southern Living magazine.

Fold the edges of your lattice strips over the edge of your bottom crust to seal. Gently press the tines of a fork into the crust vertically, then horizontally, all the way around your crust to create a crisscross design.

Place a pie guard or foil around the edge of your crust and bake for 25 minutes; remove pie guard and continue baking for 10 minutes.

Cool on a wire rack before serving.

Lemon Meringue Pie

lemon meringue pie

Lemon meringue pie reminds me of my grandpap, Andy Kozusko, Sr. It was his favorite, and a few times a year my grandma Zella made one for him, completely from scratch, of course.

My grandpap was a member of the Greatest Generation, born in Pittsburgh to Slovak immigrants in August 1921. He served in the Navy during World War II; he worked hard, knew how to fix everything, took great pride in his home and lawn, drove me to school, volunteered as a fireman, and served as a usher at church. He had more patience and gratitude than any person I’ve ever known.

This recipe comes from the Better Homes & Gardens Cookbook, and although the filling is kind of runny, it tastes delicious. I suspect that if my grandpap were here today, he’d thank me for making him a pie, tell me it was delicious, and ask for a second piece…because he was just that kind of man.

Ingredients

For the crust

For the filling

  • 3 egg yolks, beaten
  • 1 1/2 cups sugar
  • 3 tablespoons flour
  • 3 tablespoons cornstarch
  • dash of salt
  • 1 1/2 cups water
  • 2 tablespoons unsalted butter
  • zest of 1 medium lemon
  • 1/3 cup lemon juice

For the meringue

  • 3 egg whites, at room temperature
  • 1/2 teaspoon vanilla
  • 1/4 teaspoon cream of tartar
  • 6 tablespoons sugar

*My pie crust recipe yields 3 crusts, enough for this pie and either one or two more, depending on what you choose to make. Check out my pie ideas!

Preparation

Preheat oven to 350 degrees. Place beaten egg yolks in a large glass measuring cup next to your stove.

In a medium saucepan, combine sugar, flour, cornstarch, and salt; mix well. Slowly pour in water, stirring constantly to break up lumps. Cook and stir over medium-high heat until thickened and bubbly; once you see large bubbles break on the surface, it’s ready. Turn heat down to medium-low and continue cooking and stirring for 2 minutes more.

Gradually stir about 1 cup of hot filling into egg yolks, whisking constantly to temper. Pour the yolk/filling mixture back into the pan and bring to a gentle boil, then cook and stir for 2 minutes more.

Remove from heat and stir in lemon zest and butter, stirring until butter completely melts. Very carefully stir in lemon juice; keep filling warm while you make the meringue.

In a mixer fitted with the whisk attachment, whisk egg whites, vanilla, and cream of tartar on medium speed until soft peaks form (soft peaks will curl).  Gradually add sugar, 1 tablespoon at a time, and beat on high speed until stiff peaks form and meringue is glossy; this will take about 4 minutes.

Pour filling into pre-baked pie crust and gently top with meringue, spreading over filling and sealing to the edge of the crust to prevent it from shrinking.

Bake for 15 minutes; remove to a wire rack to cool for 1 hour, then cover and refrigerate for 3-6 hours before serving. Store in the refrigerator.


Apple Crumb Pie

applecrumbpie1Confession: as much as I love to bake apple pie, I don’t eat it. I’m not a fan of cooked fruit, except for my Aunt Liz’s skillet apples, which are kind of like apple pie filling. But when it comes to this traditional, all-American dessert, I always pass.

I’ve never made a crumb-topped pie before, but they’re a great solution if you don’t want to get fancy with your crust. This pie went into my office, and it was a big hit, especially around 2:30 p.m., when the post-lunch need for sugar kicked in.

Ingredients

For the crust

For the filling

  • 6 medium-sized apples, preferably a mix of green and red, peeled and thinly sliced
  • 3/4 cup sugar
  • 2 tablespoons flour
  • 1/2 teaspoon cinnamon
  • 1/2 teaspoon nutmeg
  • About 1 tablespoon honey

For the crumb topping

  • 1/2 cup flour
  • 1/4 cup sugar
  • 1/8 cup brown sugar
  • 1 teaspoon cinnamon
  • Dash of nutmeg
  • Pinch of salt
  • 4 tablespoons unsalted butter, cold and cut into small cubes

Preparation

Preheat oven to 425 degrees.

Prepare pie crust; line a 9-inch pie plate with crust. I left my edge plain, but you could flute yours if you like.

Prepare the filling; in a large bowl, combine flour, sugar, cinnamon, and nutmeg. Add sliced apples and toss to coat.

Pour filling into pie shell and drizzle with honey.

Prepare the crumb topping; combine flour, sugar, brown sugar, cinnamon, nutmeg, and salt. Rub in the butter (or cut in with a pastry blender) until the mixture appears as small crumbs. Cover filling with crumb topping.

Place a pie guard (or aluminum foil) around the edge of your crust to prevent over-browning; bake for 20 minutes, then remove guard and reduce temperature to 375. Bake for another 40 minutes, until apples are tender.

Cool completely, or serve warm.

Below, the pie is being divided up for my coworkers (next to some expense forms). 

applecrumbpie2

Cherry Pie

cherry pie with plaid latticeSome time ago, I mastered my mom’s pie crust recipe. While I can make a nice, flaky crust, my crust decoration skills – like latticework and fluted edges – leave a lot to be desired. Today I chose to practice latticework, based on a plaid lattice design I saw from King Arthur Flour. And because I wanted to focus my attention on the crust and not the filling, I used canned pie filling.

That’s right. Canned pie filling. Go ahead and gasp in shock, because you know how I’m a huge proponent of scratch baking and I’ve even blogged about how I couldn’t consider myself a “real” pie baker without being able to make crust from scratch.

Here’s the thing, though…sometimes, in the interest of practicing your lattice work, you want to focus on the crust and not the filling. Or, you really want a pie but your fruit of choice is out of season. Or you simply just don’t have time to peel apples or pit cherries or slice peaches. Most of us use canned pumpkin for our pumpkin pies, don’t we? We’re not roasting pumpkins and scraping out the flesh and spicing it up with cinnamon. Nope, we’re popping open a can and mixing that puree with various sugars and spices.

So, this made me wonder…when did canned pie filling come on the scene in American baking? Probably about the same time that Rosie left her kitchen to become a riveter but was still expected to run a household, pie baking included. Whatever you choose to do, I salute you, fellow pie bakers. If you have any good tips on mastering latticework, please let me know!

Ingredients

Preparation

Preheat oven to 425 degrees.

Prepare pie crusts; line an 8-inch pie plate with one crust and reserve the second crust for the lattice top.

Roll out your second crust, then cut into strips for the lattice. I cut mine into four 2-inch strips and four 1-inch strips.

To make the lattice, place two 2-inch strips and two 1-inch strips onto your filling, alternating two-inch, then one-inch, then two-inch, then one-inch. Fold back half of the strips and lay another 2-inch strip on your filling so that it is perpendicular to the other strips. Fold the other set of strips back so they cover the new strip, then repeat with the remaining strips (again, using the two-inch, then one-inch pattern) to form the lattice. This diagram at King Arthur Flour works very well as a guide for latticework.

Fold the edges of your lattice strips over the edge of your bottom crust and crimp the edges as desired.

Place a pie guard or foil around the edge of your crust and bake for 20 minutes.

Remove the pie guard or foil and reduce oven temperature to 375, then bake for another 30-35 minutes. You may need to place your pie guard back on again for the last 10 minutes of baking.

Remove from the oven and allow to cool before serving.


Custard Pie

custard pieEvery now and then, you’ll have a mishap in your kitchen. Such was my experience with today’s custard pie.

This was my first experience with custard pie and boy, when they say to carefully pour the filling into the shell, they’re really not kidding. Armed with my large measuring glass filled with the most liquid pie filling I’ve ever encountered, I placed my pie dish on a rimmed baking sheet on my oven rack. Not giving much thought to the fact that my oven rack rarely slides back into the oven perfectly, I poured in my filling and gently pushed the rack back into the oven, only to hit an invisible snag and watch in horror as a miniature tsunami of filling soared over the edge of the pie dish and onto the baking sheet, then splash into the bottom of my oven.

For a moment, I may have sounded a bit like Yosemite Sam. Amid a stream of incomprehensible expressions of frustration, I whisked my baking sheet from the oven and mopped up the mess thereon while the filling in the bottom of my oven burnt to a crisp and filled the first floor of my house with a light film of smoke. Not to be deterred, I wiped down my baking sheet and the bottom of the pie plate (very carefully, of course) and returned them both to the oven, with the rack already in place.

At present, this pie is chilling in my fridge waiting for Mike to get home from his lodge meeting and try a slice. After today’s adventures, I sincerely hope it tastes good.

Ingredients

  • 1 unbaked pie crust
  • 4 eggs
  • 1/2 cup sugar
  • 1 1/2 teaspoons vanilla
  • 1/8 teaspoon salt
  • 2 1/2 cups milk
  • nutmeg

Preparation

Preheat oven to 450 degrees.

Prepare pie crust; line the bottom of a 9-inch pie dish with crust, then line the crust with two layers of foil and fill with pie weights or dried beans. Note: the original recipe did not call for pricking the bottom and sides of the crust with a fork during blind baking, but in hindsight, I’d recommend doing so because once I removed the beans in the next step, my crust puffed up quite a bit.

Bake for 8 minutes, then remove beans and foil and continue baking for another 5 minutes. Remove from oven for filling.

In a large, 4-cup glass measuring cup, beat eggs with a fork, then add sugar, vanilla, and salt and mix well.

Slowly add milk, blending well.

Place pie dish on a rimmed baking sheet and pour in filling, then sprinkle with nutmeg. Cover the edge of the pie with a guard or foil to prevent over-browning.

Very, very carefully transfer the baking sheet to your oven; I found it best to keep my oven rack all the way in the oven and gently slide the sheet onto it after the tsunami incident.

Reduce oven temperature to 350 degrees and bake for 25 minutes. Remove guard and bake another 20 minutes, until a knife inserted in the center of the pie comes out clean. The edges may look a bit wobbly, but that’s okay.

Cool on a wire rack; refrigerate after two hours.


Blueberry Pie

blueberry pieSummer began yesterday, and summer solstice is one of my favorite days of the year. People have been celebrating the sun since the beginning of time, so why not join in?

One of summer’s great fruits is the blueberry, a delicious superfood packed with manganese, vitamin C, vitamin K, and fiber. I’ll concede that blueberries are probably better eaten when not in pie form, but Mike requested a blueberry pie this weekend, so there you have it. I sought a recipe that used his preferred whole berries, not a pureed-type recipe, and found one that I have to admit has some flaws.

Here’s the problem, from what I can tell: blueberries have a high water content, and this recipe calls for 6 cups of them.There’s also sugar and cornstarch in the filling, but I suspect the cornstarch quantity is well below what it should be because no thickening occurred during baking. Although Mike had a piece and really enjoyed it, I’m afraid that the bottom crust will be a soggy mess today. I’ve never needed a pie dam, but I really could have used one for this.

If anyone out there has a good blueberry pie recipe, please do share it with me. I’d love to try again!

Ingredients

  • 2 pie crusts
  • 6 cups fresh blueberries, rinsed and dried
  • 3/4 cup sugar
  • 1/4 cup cornstarch
  • Zest of 1/2 of a medium lemon
  • 1/4 teaspoon cinnamon
  • 1/8 teaspoon nutmeg
  • 1/8 teaspoon cloves
  • 1/8 teaspoon salt
  • 1 tablespoon butter, cut into small squares
  • 1 egg yolk
  • 1 tablespoon milk

Preparation

Prepare pie crusts; line the bottom of an 8-inch pie pan with one and reserve the other for lattice top.

In a large bowl, combine sugar, cornstarch, lemon zest, cinnamon, nutmeg, cloves, and salt. Add blueberries and toss to coat, stirring gently.

Pour filling mixture into crust and dot with butter.

Create the lattice top crust, sealing the edges well, and refrigerate the pie for 20 minutes before baking.

Preheat oven to 400 degrees; place the oven rack in the lower third of the oven.

Place pie pan on a rimmed baking sheet to catch any drips.

Whisk together egg yolk and milk, then brush on the lattice and crust edges.

Bake for 20 minutes, then turn temperature down to 350 degrees and bake for another 35-40 minutes, until the crust is golden brown and the filling is bubbly.

Cool for 2-3 hours before serving.


Pie Crust Rolls

piecrust rollsWhen I was a kid, my mom occasionally made a treat from pie crust, butter, cinnamon, and sugar. This usually happened when she’d made an apple pie around the holidays and needed to use up the third crust from her recipe, which is an exercise in both creativity and thrift-two things I sincerely admire.

Last week, I used one store-bought crust for the remainder of my Meyer lemon tartlets, so I had one crust left over. I don’t usually use store-bought crust anymore now that I’ve mastered my mom’s recipe, but it’s very convenient if you’re trying out new recipes and you’re short on time.

My recipe below uses a slightly different process than the one my mom used to make, so I’ve outlined both ways in case you’d like to try her way too. Next time, I’ll give her process a try!

Ingredients

  • 1 pie crust
  • 2 tablespoons butter, melted
  • Sugar
  • Cinnamon

Note: the sugar and cinnamon quantities will vary according to your preference. You can also mix them together before you sprinkle them on the crust if you like.

Preparation: Amy’s Version

Preheat oven to 350 degrees. Line a baking sheet with foil.

Unroll pie crust and brush with melted butter. Sprinkle with sugar, then cinnamon, then more sugar.

Roll up to create a log; gently press down the top of the log to flatten slightly.

Slice into half-inch slices and place on the prepared baking sheet. Brush tops with remaining melted butter.

Bake for 30 minutes, until golden brown. Cool on a wire rack.

Preparation: Genny’s Version

Preheat oven to 350 degrees. Line a baking sheet with foil.

Brush pie crust with melted butter. Sprinkle with sugar, then cinnamon, then more sugar.

Roll up to create a log; gently press down the top of the log to flatten slightly.

Place the entire log on the prepared baking sheet. Brush top with remaining melted butter.

Bake for 30 minutes, until golden brown. Cool on a wire rack, then slice into half-inch portions.


Meyer Lemon Tartlets

meyer lemon tartletsToday is one of the days I wish I wasn’t fasting from sugar. I can avoid sweets when I put my mind to it, passing up all manner of cookies, cupcakes, and other treats out of the sheer determination to do so. I usually give up sweets for Lent, missing out on Cadbury Eggs, jelly beans, and Reese’s peanut butter eggs until Easter Sunday. But right now, as I’m looking at the photo of the adorable little lemon tartlets in this post, I sincerely wish I could eat one.

Last week I made some Meyer lemon curd, and tartlets are a natural fit for such a treat. I’ve never made them before, and I’ll definitely employ some different techniques next time. Full disclosure: I made my second batch using store-bought pie crust to experiment with the thickness of the tartlet shells, and I think they came out better than the cream cheese dough I used for the first batch. Although the instructions in my recipe recommended scooping balls of dough, then pressing them into the wells in the pan, I’d recommend rolling out your dough and cutting it with a cookie cutter instead.

I also just realized, when reviewing my curd recipe, that I used whole eggs and not just egg yolks this time. The end result was a creamier, lighter-colored curd than I’ve made in the past (and according to Mike, it is delicious regardless). The curd recipe here yields 2 cups; you’ll have enough for about 40 tartlets, so if you’re using the cream cheese tartlet shell recipe below you’ll want to double it to have enough.

Meyer Lemon Curd

Ingredients

  • 4 eggs
  • 3/4 cup sugar
  • 4 teaspoons cornstarch
  • 1/2 cup lemon juice (I used 4 small/medium-sized Meyer lemons)
  • zest of 4 lemons
  • 8 tablespoons butter

Preparation

Lightly beat eggs and pass them through a fine sieve to remove the albumin. Set aside in a medium bowl (or a large, 4-cup glass measuring cup for easy pouring) close to the stove for easy access; thoroughly wash your sieve and place it nearby for a second straining once the curd has cooked.

In a medium saucepan, whisk together cornstarch, sugar, lemon juice, and lemon zest until completely combined. Add butter and cook on medium heat until thickened and bubbly.

Working quickly, pour about half of the hot lemon mixture into the eggs, whisking constantly to temper. Pour egg mixture back into the pan and cook and stir for 2 minutes more.

Pour mixture through your sieve to remove the zest; press waxed paper (or plastic wrap) onto the surface to prevent a skin from forming. Once curd is completely cooled, place in an airtight container. According to various food safety websites and other food blogs, lemon curd should last in the refrigerator for a few weeks.

Cream Cheese Tartlet Shells

Ingredients

  • 3 ounces cream cheese, softened
  • 8 tablespoons butter, softened
  • 1 cup flour

Preparation

Preheat oven to 350 degrees.

In a mixing bowl, beat cream cheese and butter until well-combined and almost fluffy. Add flour and beat until a soft dough forms, scraping the sides of the bowl as necessary. Form dough into a ball and refrigerate at least 15 minutes.

Scoop 1-inch balls of dough into the wells of a mini cupcake pan. Press down to fill each well; I found it helpful to turn the pan several times to distribute the dough as evenly as I could.

Bake for about 15 minutes, until shells are golden brown. Remove from oven and allow to cool in pan for several minutes; remove from pan and place on a wire rack to cool completely before filling.

To fill: place about 1 teaspoon of lemon curd into each shell. Store in an airtight container in the refrigerator.

Pie Crust Alternative

Use a store-bought pie crust for tartlet shells; unroll the crust and cut using a 2 1/2 inch round or fluted cookie cutter. You’ll have about 16 rounds if you re-roll the scraps two or three times to use as much dough as you can.

Press circles of dough into the wells of a mini cupcake pan; bake for about 15 minutes, until shells are golden brown. Cool in pans for several minutes; remove from pan and place on a wire rack to cool completely before filling.