Cherry Pie

cherry pie with plaid lattice
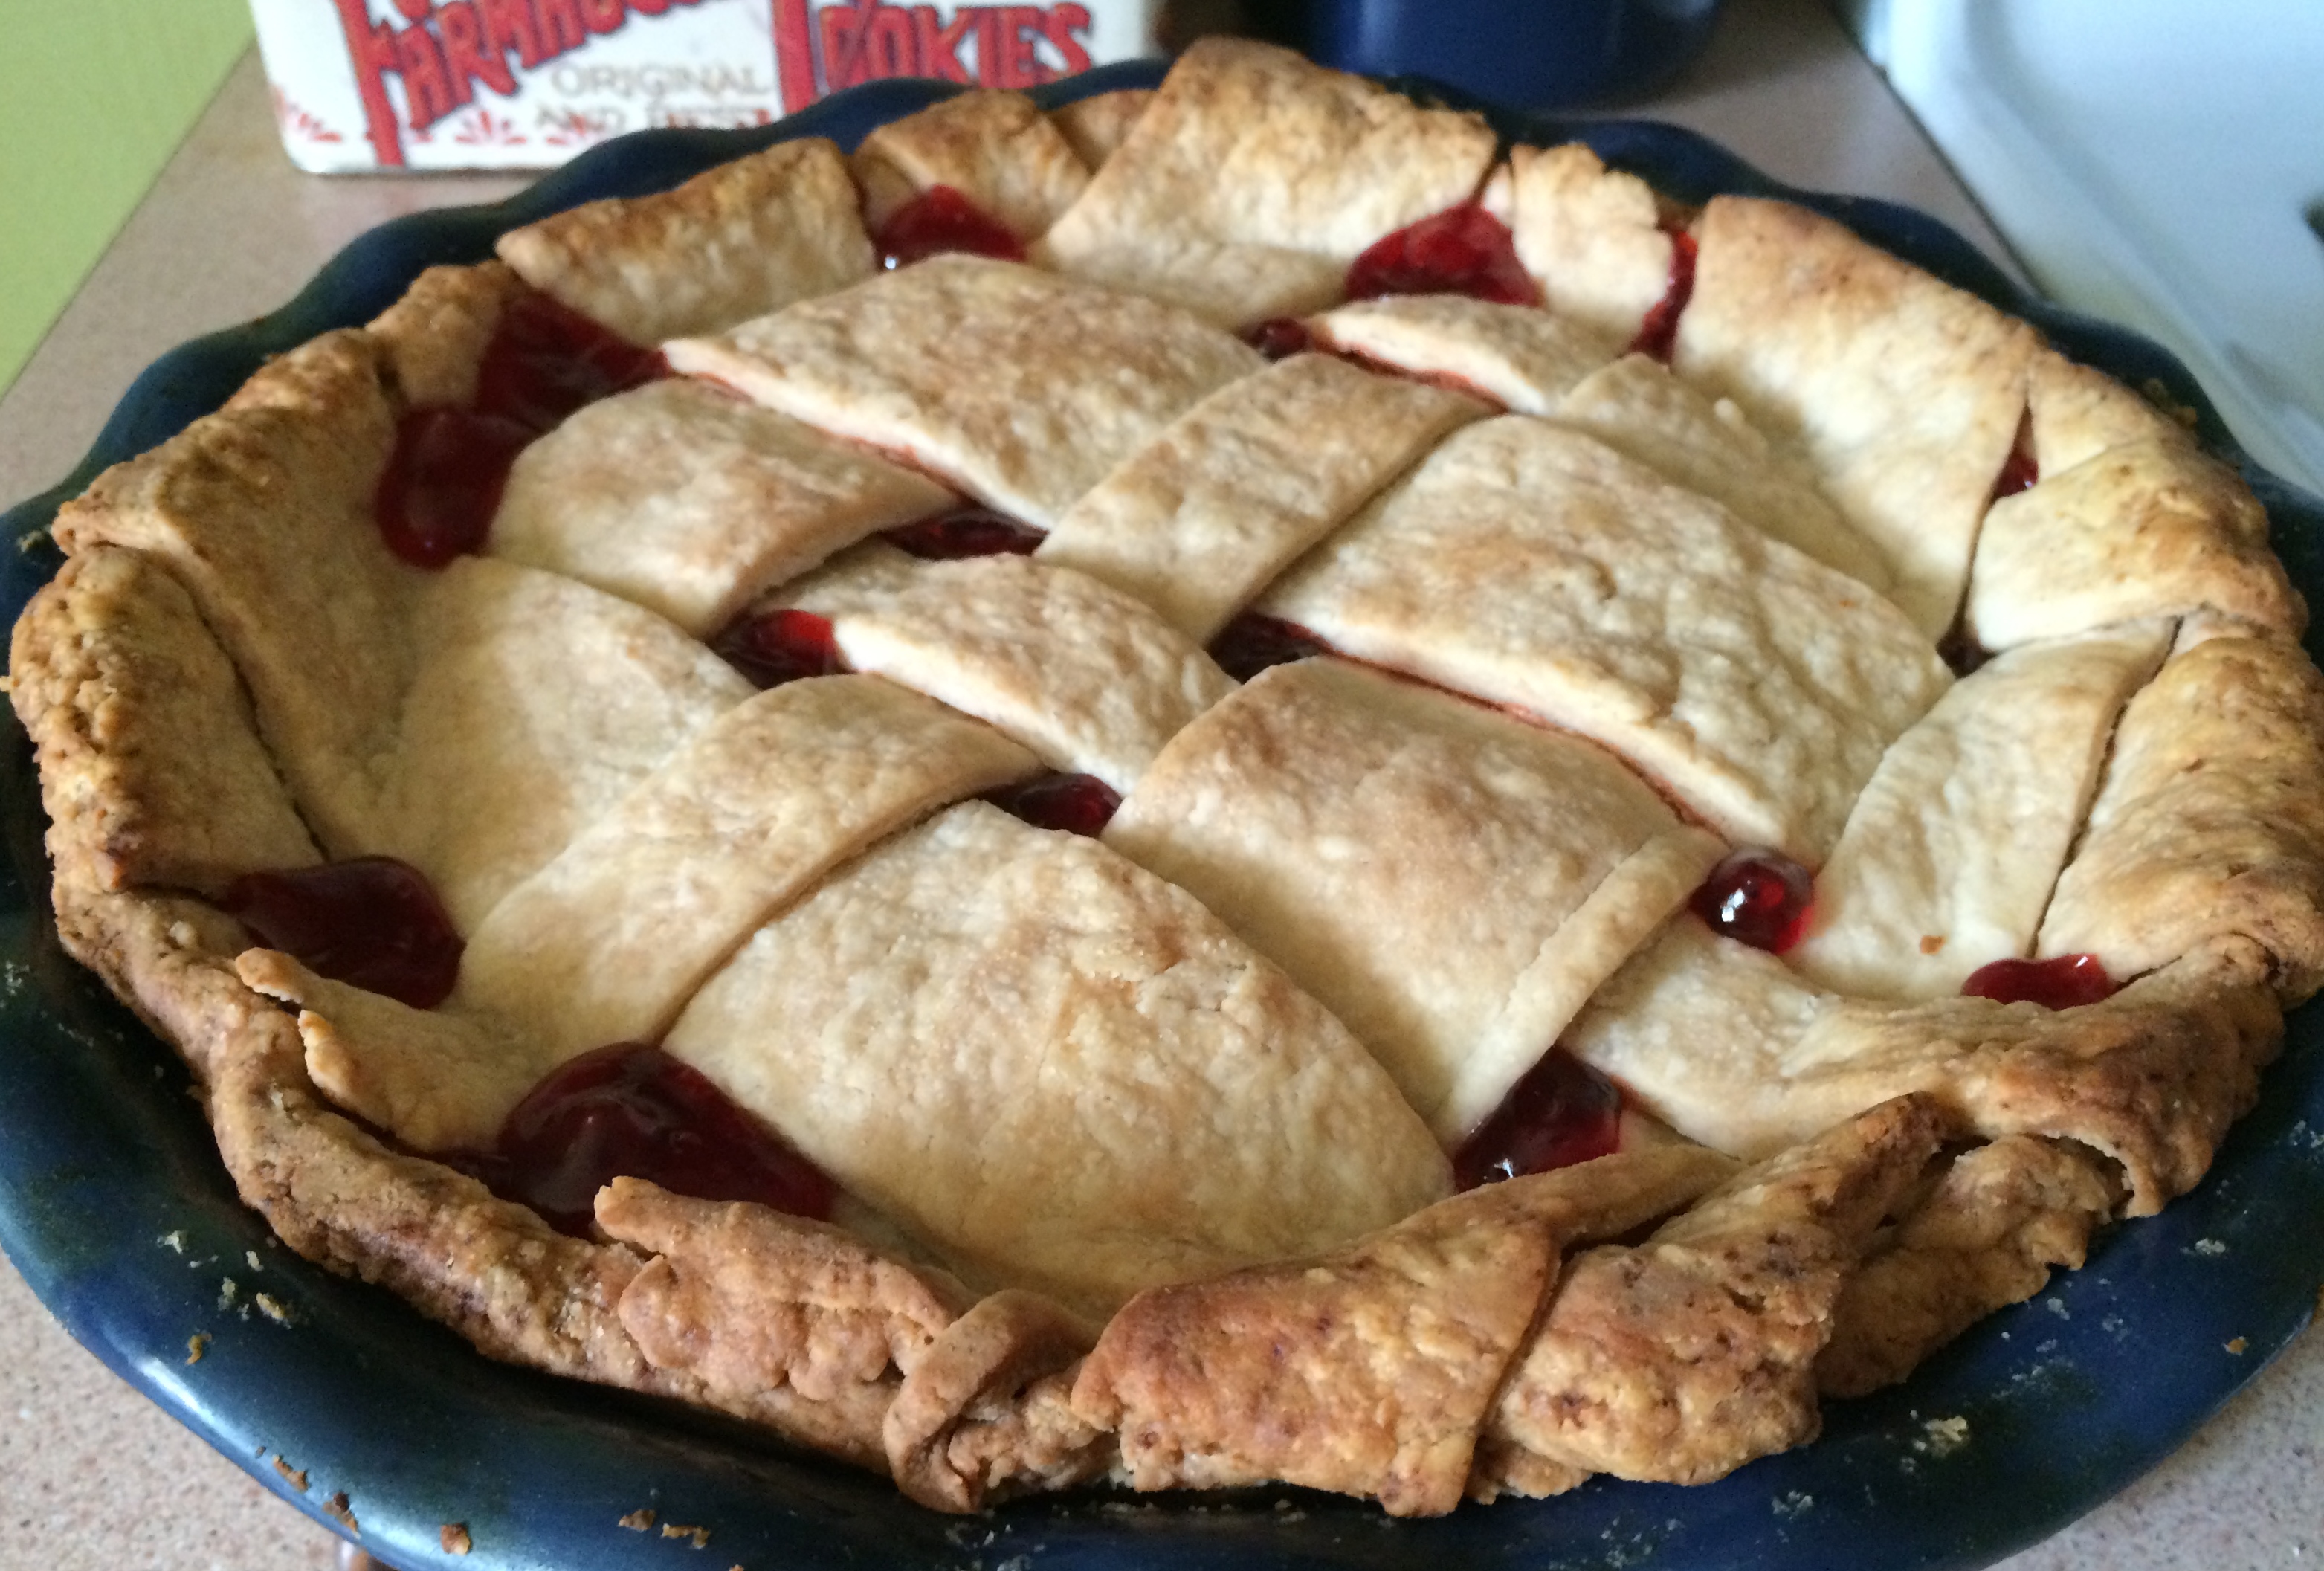
Some time ago, I mastered my mom’s pie crust recipe. While I can make a nice, flaky crust, my crust decoration skills – like latticework and fluted edges – leave a lot to be desired. Today I chose to practice latticework, based on a plaid lattice design I saw from King Arthur Flour. And because I wanted to focus my attention on the crust and not the filling, I used canned pie filling.

That’s right. Canned pie filling. Go ahead and gasp in shock, because you know how I’m a huge proponent of scratch baking and I’ve even blogged about how I couldn’t consider myself a “real” pie baker without being able to make crust from scratch.

Here’s the thing, though…sometimes, in the interest of practicing your lattice work, you want to focus on the crust and not the filling. Or, you really want a pie but your fruit of choice is out of season. Or you simply just don’t have time to peel apples or pit cherries or slice peaches. Most of us use canned pumpkin for our pumpkin pies, don’t we? We’re not roasting pumpkins and scraping out the flesh and spicing it up with cinnamon. Nope, we’re popping open a can and mixing that puree with various sugars and spices.

So, this made me wonder…when did canned pie filling come on the scene in American baking? Probably about the same time that Rosie left her kitchen to become a riveter but was still expected to run a household, pie baking included. Whatever you choose to do, I salute you, fellow pie bakers. If you have any good tips on mastering latticework, please let me know!

Ingredients

Preparation

Preheat oven to 425 degrees.

Prepare pie crusts; line an 8-inch pie plate with one crust and reserve the second crust for the lattice top.

Roll out your second crust, then cut into strips for the lattice. I cut mine into four 2-inch strips and four 1-inch strips.

To make the lattice, place two 2-inch strips and two 1-inch strips onto your filling, alternating two-inch, then one-inch, then two-inch, then one-inch. Fold back half of the strips and lay another 2-inch strip on your filling so that it is perpendicular to the other strips. Fold the other set of strips back so they cover the new strip, then repeat with the remaining strips (again, using the two-inch, then one-inch pattern) to form the lattice. This diagram at King Arthur Flour works very well as a guide for latticework.

Fold the edges of your lattice strips over the edge of your bottom crust and crimp the edges as desired.

Place a pie guard or foil around the edge of your crust and bake for 20 minutes.

Remove the pie guard or foil and reduce oven temperature to 375, then bake for another 30-35 minutes. You may need to place your pie guard back on again for the last 10 minutes of baking.

Remove from the oven and allow to cool before serving.


Advertisement

Pie Crust Rolls

piecrust rollsWhen I was a kid, my mom occasionally made a treat from pie crust, butter, cinnamon, and sugar. This usually happened when she’d made an apple pie around the holidays and needed to use up the third crust from her recipe, which is an exercise in both creativity and thrift-two things I sincerely admire.

Last week, I used one store-bought crust for the remainder of my Meyer lemon tartlets, so I had one crust left over. I don’t usually use store-bought crust anymore now that I’ve mastered my mom’s recipe, but it’s very convenient if you’re trying out new recipes and you’re short on time.

My recipe below uses a slightly different process than the one my mom used to make, so I’ve outlined both ways in case you’d like to try her way too. Next time, I’ll give her process a try!

Ingredients

  • 1 pie crust
  • 2 tablespoons butter, melted
  • Sugar
  • Cinnamon

Note: the sugar and cinnamon quantities will vary according to your preference. You can also mix them together before you sprinkle them on the crust if you like.

Preparation: Amy’s Version

Preheat oven to 350 degrees. Line a baking sheet with foil.

Unroll pie crust and brush with melted butter. Sprinkle with sugar, then cinnamon, then more sugar.

Roll up to create a log; gently press down the top of the log to flatten slightly.

Slice into half-inch slices and place on the prepared baking sheet. Brush tops with remaining melted butter.

Bake for 30 minutes, until golden brown. Cool on a wire rack.

Preparation: Genny’s Version

Preheat oven to 350 degrees. Line a baking sheet with foil.

Brush pie crust with melted butter. Sprinkle with sugar, then cinnamon, then more sugar.

Roll up to create a log; gently press down the top of the log to flatten slightly.

Place the entire log on the prepared baking sheet. Brush top with remaining melted butter.

Bake for 30 minutes, until golden brown. Cool on a wire rack, then slice into half-inch portions.


Apple Pie

This summer Mike made a huge career change, leaving the office world behind for the fresh air at Soergel Orchards, a local, family-owned farm market. Soergel’s is a fun place for both kids and grown-ups; if you live in the Pittsburgh area and have never been, you must go—not just for the experience, but for the produce.

Soergel’s has helped me realize why locally-grown produce is the best choice, both gastronomically and economically. Because local fruit and vegetables spend no time in transit, they don’t have to be preserved and waxed like their commercial counterparts. Taste-wise, there is no comparison—you haven’t tasted an apple, or a strawberry, or a butternut squash until you’ve had one from a local field. Economically, buying local keeps money in your community and supports families who work incredibly hard, doing what they love, in order to bring fresh, nutritious, high-quality food to your table.

The apples in this pie are Jonagold and Mutsu from Soergel’s orchards. Using two different kinds of apples, one tart and one sweet, adds an interesting dimension of flavor.

Ingredients

  • 2 9-inch pie crusts, unbaked
  • 6 medium to large apples, preferably a mix of red and yellow or green, peeled and thinly sliced
  • 3/4 cup sugar
  • 2 tablespoons flour
  • 1/2 teaspoon cinnamon
  • 1/2 teaspoon nutmeg

Preparation

Preheat oven to 375 degrees.

Line a 9-inch pie dish with crust and place on a rimmed baking sheet to catch any overflow.

In a large bowl, combine sugar, flour, cinnamon, and nutmeg.

Add apple slices and toss to coat.

Pour into prepared pie dish; cover with top crust and trim edges. Gently prick the top crust with a fork to allow steam to escape.

Cover the edge of the pie with a guard or foil to prevent over-browning.

Bake for 25 minutes, then uncover the edge and bake another 25-30 minutes, until crust is evenly browned.

Serve warm or cool.

Pie Crust


“I can’t make much, but I can make pie crust,” said my mother. A few days ago, as we discussed Thanksgiving plans, I expressed my concern at making a homemade crust for the pies Genny requested. I’ve never found a recipe that worked well, and so for years I’ve resorted to (dramatic pause) store-bought crust. But not this year! One cannot use store-bought crust if she wishes to be taken seriously as a baker. And so, I wrote down Genny’s recipe and hoped for the best.

My mom swears that the vinegar in her recipe makes the crust flaky. During the past week, as I scoured the internet in an attempt to earn a doctorate in pie crust, I learned that the acid in the vinegar breaks down the gluten in the flour just enough to make the dough more pliable. And because flakiness tends to result from bits of fat (butter, shortening, or lard) melting between layers of flour to create pockets, I don’t know if we can credit the vinegar for contributing to flakiness here. Although, more pliable dough means less rolling and easier handling, and we know well that over-handling dough can make it tough. Perhaps the vinegar can take some credit for flakiness.

This recipe is large enough to make three 9-inch pie crusts; you can always freeze what you don’t use.

Ingredients

  • 4 cups flour
  • 1 tablespoon sugar
  • 2 teaspoons salt
  • 1 3/4 cups shortening
  • 1 tablespoon white vinegar
  • 1 egg
  • 1/2 cup cold water

Preparation

In a large bowl, combine flour, sugar, and salt.

Measure out the shortening and break it up into tablespoon-sized lumps; add to the flour mixture and cut in using a pastry blender until the mixture resembles coarse crumbs.

In a small bowl, combine egg, vinegar, and water; whisk together and add to the flour/shortening mix.

Using a fork, blend together until a soft dough forms; gently combine with your hands if necessary.

Divide dough into three even portions and roll into balls, then flatten slightly into discs.

Place each disc in its own large Ziploc bag and roll out to flatten slightly.

Freeze crusts for 20 minutes before baking; crusts can be stored in the fridge or freezer until they are ready to use.

Pie Crust Tips

  • Coarse crumbs are very subjective; you just want to be sure the shortening is well-incorporated, with no large pieces remaining.
  • When cutting in the shortening and later incorporating the egg mixture, use your hands if necessary, but be very, very gentle. Overworked dough = tough dough.
  • I use ice water when working with pastry; just fill a large measuring cup with ice and water, then pour it into a smaller measuring cup when you need to combine it with the egg.
  • Make sure your egg is cold, too. Pastry likes cold.