Lemon Poppy Seed Layer Cake

Today I turned 41. And while it feels like I was 17 years old about five minutes ago, I’ve never been intimidated by getting older. Not everyone gets to get older, right? And so to celebrate entering my “early forties,” I baked myself this lemon poppy seed layer cake.

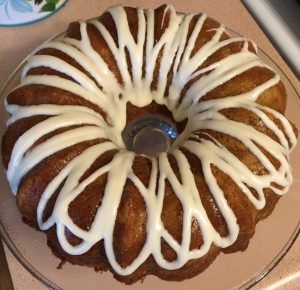
This past week I weighed my birthday cake options, considering a caramel cake, a lemon raspberry cake, and a spice cake with maple buttercream. Then yesterday, Mike mentioned something about a lemon poppy cake, and here we are. It’s one of my favorite cakes I’ve ever made. And being a proud Pittsburgher, I do love that it’s black and gold.

Ingredients

For the lemon poppy seed cake

  • 1 cup flour
  • 1 teaspoon baking powder
  • dash of salt
  • 8 tablespoons butter, softened
  • 3/4 cup sugar
  • 2 eggs
  • 1 teaspoon vanilla extract
  • 1 teaspoon lemon extract
  • zest of 1 small lemon
  • 6 tablespoons milk
  • 1/2 tablespoon poppy seeds
  • About 1 cup poppy seed filling*
  • About 1/2 cup lemon curd*

For the lemon curd buttercream frosting

  • 6 tablespoons butter, at room temperature
  • 3 cups powdered sugar
  • 1/4 cup plus 1 tablespoon lemon curd
  • 1 tablespoon vanilla extract

*Truth: I used bottled filling this time, because I’ve never made my own poppy filling and my homemade lemon curd went awry. Even experienced bakers have mishaps in the kitchen, my friends. 

Preparation

Preheat oven to 350 degrees. Lightly grease two 6-inch round cake pans, line each with a parchment circle, and lightly grease the parchment.

In a small bowl, combine flour, baking powder, and salt; set aside.

In a mixer fitted with the paddle attachment, cream together the butter and sugar until very well-blended. Add eggs, vanilla extract, lemon extract, and lemon zest and beat well to combine, scraping the sides of your bowl a few times.

Add flour and milk alternatively in two batches, beginning and ending with the flour and beating until completely combined. Stir in poppy seeds.

Pour batter into prepared pans and bake for 18-22 minutes, until a cake tester comes out clean. Remove from oven and allow cakes to cool in the pan for about 5 minutes, then carefully turn out onto a wire rack to cool completely.

To make the frosting: in a mixing bowl, beat butter on medium speed for 1-2 minutes. Add 2 cups powdered sugar and beat on low, then medium speed, until the sugar is fully incorporated into the butter. Add lemon curd and beat on medium speed for about 2 minutes, then slowly add remaining cup powdered sugar and vanilla extract. Beat on medium speed for another 2-3 minutes; you want a spreadable consistency that is not too soft or firm.

To assemble the cake:

Slice each cake in half lengthwise to create four layers. Place the first layer on your cake stand – I anchored my cake with a blob of buttercream to help it stay in place. Spread about 1/2 cup poppy seed filling on the first layer, leaving about a 1/4 inch border at the edge of the cake; some of your filling will spread further once the other layers are added.

Top with the second layer, then spread that layer with lemon curd, again leaving a bit of a border around the edge. Repeat with the third layer, topping it with poppy seed filling, then place the final layer on the top of the cake.

Frost the entire cake with a thin crumb coat and refrigerate for 15 minutes. Remove from the fridge and frost to completely cover the crumb layer; you don’t need to put the frosting on too thick, as it will take away from the flavors in the cake itself. I chose to add some flower decorations to the top of my cake because I had a bit of frosting left over.

Store in an airtight container in the refrigerator for up to 3 days.

Summertime Swiss Roll

Having watched a great deal of The Great British Baking Show in recent months, I’m inspired to bake more creative treats. This Summertime Swiss Roll features a delicious combination of lemon almond sponge cake, lemon buttercream, and raspberry filling. I’m not sure how this cake would fare in the tent with Paul and Mary as judges, but it was absolutely delicious.

Swiss roll is another term for jelly roll; it’s a sponge-type cake with jam, preserves, buttercream, pudding, or a combination of fillings. I made a “plain” vanilla cake/strawberry preserves jelly roll earlier this summer and decided to branch out to a lemon, almond, and raspberry creation. I had some extra raspberry sauce that I served on the side of each slice; you could also garnish with fresh berries if you like.

Ingredients

For the cake

  • 3/4 cup flour
  • 3/4 teaspoon baking powder
  • 1/4 teaspoon salt
  • 4 eggs, at room temperature
  • 3/4 cup sugar
  • 3/4 teaspoon almond extract
  • 1/4 teaspoon lemon extract
  • 1 tablespoon lemon zest

For the filling

  • 6 tablespoons unsalted butter, at room temperature
  • 1/2 teaspoon lemon extract
  • 1 teaspoon lemon zest*
  • 1-2 teaspoons milk
  • About 3/4 cup raspberry filling

*You can omit the zest if you like and use a full teaspoon of lemon extract if you prefer. 

Preparation

Preheat oven to 400 degrees. Line a 10 x 15 x 1 pan with parchment. Place a lint-free tea towel on a heatproof surface (I use a cutting board) near your oven and lightly dust it with powdered sugar.

In a small bowl, sift together flour, baking powder, and salt; set aside. In a mixer fitted with the whisk attachment, beat eggs until foamy, then slowly add the sugar, beating on medium speed until the mixture is thick and a light lemon color, about 5-7 minutes; add almond and lemon extracts and lemon zest just before you stop beating. When the batter is done, it will fall from the whisk in a ribbon, then mound on top of the batter before blending back in. Gently fold the flour mixture in (I used my whisk attachment for easy clean-up).

Pour batter into prepared pan, spreading with a spatula to create an even layer. Bake for 12-14 minutes, until the top is golden brown and springs back when you touch it. Remove from oven, then quickly and carefully flip your cake onto the powdered sugar-sprinkled tea towel. Gently peel the parchment away, then starting at one of the short ends, roll the cake up in a tight spiral and allow to cool on a wire rack completely before filling.

To make the buttercream, in a mixer fitted with the paddle attachment, beat butter on medium speed for about 1 minute. Add powdered sugar and beat on low speed until the sugar is fully incorporated into the butter, about 3-5 minutes. Add lemon extract, 1 teaspoon milk, and lemon zest, if using; continue to beat on medium-high speed for another 1-2 minutes. Add remaining milk if necessary.

To fill, unroll the cake and spread with buttercream, then raspberry filling; roll back up and wrap in plastic; chill for about 30 minutes to help filling set. Store, covered, in the refrigerator for up to 3 days.

Winter Wonderland Cake

When most people think about Christmas desserts, they probably think of cookies. And while there are some amazing cookie recipes out there, I like to get creative for our Christmas desserts. This year, I wanted to do something peppermint-based, and this little vanilla peppermint cake turned out very well.

I found several recipes for pine tree/winter wonderland cakes online, but decided to make my own from recipes I’ve previously baked. To make the pine trees, I melted some vanilla candy coating (rather than using candy melts, as I don’t really like the way they taste) and tinted them green with candy coloring.  It’s important to use candy coloring, which is oil-based and available at cake shops, rather than liquid or gel-based food coloring. Oil-based coloring will blend into your melted coating very well, while liquid or gel-based coloring will make the coating clumpy.

Ingredients

Candy Pine Trees

Ingredients

  • 4 ounces vanilla candy coating*
  • Green candy coloring
  • 10 lollipop sticks
  • Nonpareils

*I use CandiQuik vanilla candy coating, available at Target.

Preparation

Line two baking sheets with waxed paper; set aside.

Chop candy coating into pieces, then place in a microwave-safe bowl. Microwave for 2 to 2 1/2 minutes, stirring every 30 seconds to distribute the heat.

Add green candy coloring and stir well.

Dip the top of each lollipop stick into the melted coating, then place several inches apart on the prepared baking sheets. Spoon candy coating into a zip-top bag; carefully snip off one corner and pipe coating onto lollipop sticks in tree shapes.

Sprinkle nonpareils on trees while they are still wet; allow to set completely, then carefully peel off waxed paper. Trim stick bottoms, leaving about 1 inch to insert into the cake.

Vanilla Cake

Ingredients

  • 1 cup flour
  • 1 teaspoon baking powder
  • dash of salt
  • 8 tablespoons butter, softened
  • 3/4 cup sugar
  • 2 eggs
  • 2 teaspoons vanilla extract
  • 6 tablespoons milk

Preparation

Preheat oven to 350 degrees. Lightly grease two 6-inch round cake pans, line each with a parchment circle, and lightly grease the parchment.

In a small bowl, combine flour, baking powder, and salt; set aside.

In a mixer fitted with the paddle attachment, cream together the butter and sugar until very well-blended. Add eggs and vanilla extract and beat well to combine, scraping the sides of your bowl a few times.

Add flour and milk alternatively in two batches, beginning and ending with the flour and beating until completely combined.

Pour batter into prepared pans and bake for 18-22 minutes, until a cake tester comes out clean. Remove from oven and allow cakes to cool in the pan for about 5 minutes, then carefully turn out onto a wire rack to cool completely.

Peppermint Vanilla Buttercream

Ingredients

  • 8 tablespoons butter, softened
  • 3 1/4 cups powdered sugar
  • 2 teaspoons peppermint extract
  • 1 1/2 tablespoons vanilla extract
  • About 2 tablespoons milk
  • White cupcake pearls, optional

Preparation

Place butter in a mixing bowl and beat on medium speed for 1 minute using a paddle attachment. Add powdered sugar and beat on low speed until the sugar is fully incorporated; this will take several minutes. I cover my mixer with a kitchen towel to prevent a powdered sugar storm.

Scrape the sides of the bowl and add peppermint extract, vanilla extract, and 1 tablespoon milk. Beat until well combined, scraping sides of the bowl frequently; beat in additional milk and continue beating for 1-2 minutes for a smooth, even consistency.

To assemble the cake:

Place the bottom layer on your cake stand and frost the top, then top with remaining layer and frost the top and sides. Place remaining frosting in a zip-top bag; snip off one corner and set aside.

Press trees into cake top, starting at the back, and piping additional buttercream around the bottoms as you work toward the front of the cake. Sprinkle with cupcake pearls.

Store in an airtight container at room temperature for 2-3 days.

Vanilla Bean Cake

As I’ve mentioned before, I’m the kind of gal who bakes her own birthday cake. This year I went back and forth between several ideas, and finally settled on a two-layer, 6-inch cake decorated with a buttercream hydrangea. Happy birthday to me, eh?

A while back I’d bought this color swirl piping set, and it was a total disaster. This time, I tinted my buttercream three different shades of purple and blue, then put them in three separate 12-inch piping bags, all of which went into an enormous, 18-inch piping bag. It worked incredibly well; see more photos of the cake below. A word of caution, though: I actually think this cake would be even more delicious without buttercream frosting. The next time I make it, I think I’ll bake it in a regular 8-inch round pan and either drizzle it with a powdered sugar icing or just serve it with fruit and whipped cream.

Vanilla Bean Cake

Ingredients

  • 1 cup flour
  • 1 teaspoon baking powder
  • dash of salt
  • 8 tablespoons butter, softened
  • 3/4 cup sugar
  • 2 eggs
  • 1 vanilla bean, seeds scraped*
  • 6 tablespoons milk

*Save the pod and make vanilla sugar – just add the pod to a jar of white sugar and let it infuse the sugar with vanilla-ness!

Preparation

Preheat oven to 350 degrees. Lightly grease two 6-inch round cake pans, line each with a parchment circle, and lightly grease the parchment.

In a small bowl, combine flour, baking powder, and salt; set aside.

In a mixer fitted with the paddle attachment, cream together the butter and sugar until very well-blended. Add eggs and vanilla seeds and beat well to combine, scraping the sides of your bowl a few times.

Add flour and milk alternatively in two batches, beginning and ending with the flour and beating until completely combined.

Pour batter into prepared pans and bake for 18-22 minutes, until a cake tester comes out clean. Remove from oven and allow cakes to cool in the pan for about 5 minutes, then carefully turn out onto a wire rack to cool completely.

Vanilla Almond Buttercream

Ingredients

  • 1 1/2 cups butter, at room temperature
  • 5 cups powdered sugar
  • 1 1/2 tablespoons vanilla extract
  • 1 1/2 tablespoons almond extract
  • 1 tablespoon heavy cream
  • Purple, sky blue, and leaf green gel food coloring

Preparation

In a mixing bowl, beat butter for about 2 minutes. Add powdered sugar all at once and beat on low speed until all of the sugar is fully incorporated into the butter; this will take a few minutes.

Add vanilla and almond extracts and beat on medium, then medium high speed for about 2 minutes. Scrape down your bowl, then add the heavy cream and beat for another 2-3 minutes.

To frost and decorate your cake, place one cake on your cake stand and top with buttercream, spreading almost to the edge. Top with the second cake and frost the top and sides, smoothing the buttercream as much as you can.

Divide your remaining frosting into one small portion (about 1/4 cup) and tint leaf green; set aside. Divide the rest into three equal portions and tint one dark purple, another light purple, and the other sky blue.

Place dark purple, light purple, and sky blue frosting into separate 12-inch piping bags. Fit an 18-inch piping bag with a Wilton M1 tip and place the 12-inch bags inside. Pipe petals in a few layers (I did three, and it was a ton of frosting) to make your hydrangea flower, then pipe petals around the bottom edge of the cake.

Fit a small piping bag with a leaf tip and fill with leaf green frosting; pipe leaves on each side of your hydrangea flower, then pipe a few leaves around the bottom of the cake.

Store in a domed cake stand at room temperature for up to 3 days. Makes about 6 slices.

Here’s a detail of the flower.  


If you look closely you can see the tiny vanilla seeds in the cake. 


Chesapeake Bay Cake

chesapeake-bay-cake-1Mike turned 40 yesterday, and I threw him a Maryland-themed birthday party, complete with this Chesapeake Bay-inspired cake. Funny difference between Marylanders and Pennsylvanians: most Marylanders have an abundant amount of state pride, while Pennsylvanians seem to be prouder of their local connections. I, for example, am a Pittsburgher first and a Pennsylvanian second. Not so in the Old Line State, where folks fly the Maryland flag outside their homes right alongside the American flag. Mike would probably do that here if I’d let him (which I won’t).

I’m not much of a decorator, so I went with a simple design for this cake. The crab outline came from my crab cookie cutter, and I used a leaf tip to pipe seaweed, a plain tip to pipe sand, then added some flower-shaped sprinkles for shells, rocks, and starfish (as seen in the photo below – I decided after I took the photo above that it needed just a few more fun details). This cake was a big hit at his party last night, along with my steamed crab cookies.

Ingredients

Dark Chocolate Cake

  • 3 cups flour
  • 6 tablespoons cocoa powder
  • 2 cups sugar
  • 2 teaspoons baking soda
  • 1 teaspoon salt
  • 2 tablespoons vinegar
  • 2 teaspoons vanilla
  • 6 tablespoons vegetable oil
  • 2 cups water

Vanilla Almond Buttercream

  • 1 1/2 cups unsalted butter (2 1/2 sticks), at room temperature
  • 4 1/2 cups powdered sugar
  • 3 teaspoons vanilla extract
  • 1 teaspoon almond extract
  • 1 teaspoon milk
  • Blue, green, and brown food coloring
  • Miniature chocolate chips for crab eyes
  • Flower-shaped sprinkles for shells, rocks, and starfish

Preparation

For the cake

Preheat oven to 350 degrees. Spray two 8-inch round cake pans with baking spray. Line the bottom of each pan with a circle of parchment, and spray a second time.

In a large mixing bowl, combine flour, cocoa powder, baking soda, and salt. Make three wells; place vinegar in one, vanilla in the second, and vegetable oil in the third. Add water and stir very well to combine; the batter will bubble up just slightly as the ingredients come together. Your batter will be fairly thin, but should be mostly lump-free.

Divide batter evenly between the pans. Bake for 25-30 minutes, until a cake tester comes out clean. Be careful not to over-bake; the sides of these cakes set up pretty quickly and can burn if you let them go too long.

Remove cakes from oven and carefully run a knife around each edge to loosen them from their pans if they’ve stuck at all. Allow to cool for about 10 minutes in the pans, then carefully flip out onto wire racks (removing the parchment for each cake bottom) to cool completely.

For the frosting

Place butter in a stand mixer fitted with the paddle attachment and beat on medium speed for 1-2 minutes. Add powdered sugar all at once and beat on low until the sugar is completely incorporated into the butter (this will take several minutes).

Scrape down the bowl, then add vanilla, almond extract, and milk and beat for 3 minutes on medium speed, scraping the sides of the bowl a few times.

To decorate:

Reserve about 1 1/2 cups frosting in a small bowl, then tint the remaining frosting light blue.

Remove about 1/4 cup of light blue frosting and tint dark blue for the crab.

Divide the remaining frosting in half and tint one portion green and the other portion a light sand color.

Flip one cake upside-down onto your cake plate; spread a medium-thin layer of frosting on top. Carefully place your second cake on top of the first layer and frost the top, then the sides.

Using a crab cookie cutter, make an indentation in the top of the cake so you have an outline; remove the cutter.

Fit a small piping bag with a small plain tip and fill with dark blue frosting, then pipe the outline of the crab. Switch to a larger tip to fill in the crab body, then use a small offset spatula to smooth out your piping. Add miniature chocolate chip eyes.

Fit a medium piping bag with a leaf tip and fill with green frosting. Pipe seaweed up from the bottom of your cake.

Fit a medium piping bag with a large plain tip and fill with sand-colored frosting. Pipe sand along the base of the cake, covering the bottoms of your seaweed.

Add flower sprinkles for shells, rocks, and starfish; I used white, blue, and orange sprinkles.

Store on a domed cake stand for up to 3 days.

chesapeake-bay-cake-2Here’s a photo of the cake with the flower sprinkle additions – I’m very glad I added them, as the cake looked a bit too plain otherwise. 


Gingerbread Cake with Molasses Cream Cheese Frosting

gingerbread-cakeThis Christmas, I wanted to make something different for dessert, and I found this amazing recipe on Pinterest. Sometimes you never know with Pinterest recipes – but this one is top-notch.

Adapted from a recipe at Great Grub, Delicious Treats (which was adapted from a recipe from Better Homes & Gardens), this cake and frosting are absolutely delicious. I added allspice and cloves to my batter in addition to the ginger and cinnamon, and I’m very glad I did. My mom and I couldn’t decide whether we liked the cake or the frosting best, and Mike is yet to weigh in. Either way, this cake was a huge hit after our Christmas dinner yesterday.

I cut the original recipe in half for a single layer for just the three of us, and I cut the frosting recipe in half as well, but it was still far too much. The measurements below are adapted further for what I believe would be an appropriate amount of frosting for a single layer 9-inch cake; I have a ton left over in my fridge, which will probably go in cupcakes this week.

Gingerbread Cake

Ingredients

  • 1 1/2 cups all purpose flour
  • 3/4 tsp cinnamon
  • 3/4 tsp ginger
  • 1/4 teaspoon allspice
  • 1/8 teaspoon cloves
  • 1/2 teaspoon baking powder
  • 1/2 teaspoon baking soda
  • 8 tablespoons butter, at room temperature
  • 6 tablespoons brown sugar
  • 1/2 cup molasses
  • 1 egg
  • 1/2 cup water

Preparation

Preheat oven to 350 degrees. Lightly grease a 9-inch round cake pan and line with a circle of parchment; lightly grease the parchment.

In a medium bowl, combine flour, cinnamon, ginger, allspice, cloves, baking powder, and baking soda; set aside.

In a mixing bowl fitted with the paddle attachment, cream together butter and brown sugar until fluffy, about 2-3 minutes, scraping the sides of the bowl well. Add molasses and egg and beat well to combine.

Add flour mixture and water alternatively in three batches, starting and ending with the flour and mixing to combine between each.

Pour batter into prepared pan and bake for 28-32 minutes, until a cake tester comes out clean. Be careful not to over-bake this cake, as the sides can easily burn.

Cool in the pan for about 20 minutes, then remove to a wire rack to cool completely before frosting.

Molasses Cream Cheese Frosting

Ingredients

  • 4 ounces cream cheese, at room temperature
  • 2 tablespoons butter, at room temperature
  • 1 tablespoon molasses
  • 1 1/2 teaspoons vanilla extract
  • 2 cups powdered sugar

Preparation

In a mixing bowl fitted with the paddle attachment, beat butter and cream cheese until combined, about 2-3 minutes.

Add molasses and vanilla, beating well to combine. Scrape down your bowl well.

Add powdered sugar, 1 cup at a time, beating to completely combine; continue to beat for 1-2 minutes, scraping the bowl well, to reach an easily spreadable consistency.

Frost top and sides of cake.

Store in the refrigerator, but let the cake sit at room temperature for about 30-45 minutes before serving.


Halloween Cake

halloween-cakeYesterday’s witch’s brew cupcakes left me with about a cup and a half of cauldron-worthy green frosting and some bat mix sprinkles, so I decided to whip up a one-layer cake for Mike to take to his office tomorrow.

The cake recipe comes from the Better Homes & Gardens Cookbook and is called “busy day cake,” aptly named for its ease in preparation. You just put your ingredients into a mixing bowl beat them for a few minutes, then pour the batter – which will be lumpy, but that’s fine – into your pan and bake it. The original recipe called for a broiled coconut topping on this cake, which I may make someday.

Ingredients

  • 1 1/3 cups flour
  • 2/3 cup sugar
  • 2 teaspoons baking powder
  • 2/3 cup milk
  • 1/4 cup butter, softened
  • 1 egg
  • 1 teaspoon vanilla extract
  • About 1 1/2 cups vanilla buttercream, tinted yellow-green (cut the original recipe in half to yield this amount)
  • Wilton Bat Sprinkles

Preparation

Preheat oven to 350 degrees. Lightly grease an 8-inch round cake pan.

In a mixing bowl, combine flour, sugar, and baking powder. Add milk, butter, egg, and vanilla; beat on low speed until combined, then beat on medium for 1 minute.

Pour batter into prepared pan and bake for 25 to 30 minutes, until a cake tester comes out clean.

Cool in the pan for about 30 minutes, then turn out onto a wire rack to cool completely.

Prepare frosting, then frost top and sides of cake.

Pour bat sprinkles into a bowl and gently place the bats on the top and sides of the cake. Sprinkle remaining orange and green sprinkles over the top of the cake.

Store in an airtight container at room temperature for up to 3 days.

Apple Honey Cake

apple-honey-cake

L’shana tovah, friends! Rosh hashanah began tonight at sunset, and we’re celebrating the new Jewish year. Tonight we begin the Days of Awe, also known as the High Holy Days, which end at yom kippur, the Day of Atonement. Although I’m the Catholic one in our interfaith household, I absolutely love this time of year.

Sweet foods figure heavily in rosh hashanah celebrations, in keeping with wishes for a sweet new year. This apple honey cake combines two traditional rosh hashanah foods, apples and honey, in a delicious treat. The recipe below comes from the fine folks at chabad.org, and I added a thick powdered sugar drizzle icing just to dress it up a bit.

This cake is a dense, almost bread pudding-like treat with great apple, honey, and cinnamon flavor. Next time, I’ll probably add more allspice to the batter, and Mike has requested raisins as well (although I’d rather add something like pecans). Whatever you choose, I hope you have a sweet new year!

Ingredients 

For the cake

  • 2 1/2 cups cake flour
  • 1 teaspoon baking powder
  • 1 teaspoon baking soda
  • 1 teaspoon kosher salt
  • 1 teaspoon cinnamon
  • 1/4 teaspoon allspice
  • 1/2 cup sugar
  • 1/2 cup brown sugar
  • 1 cup unsweetened applesauce
  • 2 eggs
  • 3/4 cup honey
  • 1 teaspoon vanilla extract
  • 4 apples, peeled, cored, and grated (I used 2 Granny Smith and 2 Gala; you want a combination of sweet and tart)

For the drizzle

  • 1 cup powdered sugar
  • 1/4 teaspoon vanilla extract
  • 1 1/2 teaspoons water

Preparation

Preheat oven to 325 degrees. Generously grease a bundt pan (or spray with baking spray).

In a medium bowl, combine flour, baking powder, baking soda, salt, cinnamon, and allspice; set aside.

In a mixing bowl, beat sugars and applesauce to combine. Add eggs, one at a time, beating well after each. Add honey and vanilla and beat to combine.

Add flour mixture and beat to combine. Fold in grated apples.

Pour batter into prepared bundt pan and bake for 45-50 minutes, until a cake tester inserted into the thickest part of the cake comes out clean.

Cool in pan for about 15 minutes, then turn onto a rack or cake plate to cool completely. I cooled my cake on a wire rack, and the bottom did stick to it a bit; this was fine in the end, because after all, you serve a bundt round-side-up anyway.

A few hours before serving, prepare the drizzle. Combine powdered sugar, vanilla, and water in a small bowl until you have a thick drizzling consistency. Pour drizzle into a pastry bag fitted with a plain tip (or use a small zip-top bag with the corner cut off) and drizzle over cake.

Store at room temperature for up to 3 days; the moisture in the cake will make the bottom a bit gooey, but with all of the moisture in this cake, that’s not a surprise.

Lemon Blackberry Cake

lemon blackberry cake 4Today, in an effort to ramp up my piping skills, I bought a basic Wilton cake decorating book at the craft store. In it, I found a cute berry-and-vine cake and was inspired to make this lemon blackberry cake.

I found a great recipe for lemon cake at My Cake School, then divided the recipe in half to make one single 8-inch round. I don’t usually double-fill cakes, but my blackberry filling made less than I was hoping for, so I thought it needed a bit of a boost; next time, I’ll double the filling recipe.

Once filled, I frosted the top only for a more rustic look, then piped on some vines, leaves, and blackberries. The end result is delicious, light, and perfect for summer. If you’d like to frost the sides of your cake as well, I’d increase the frosting recipe by at least one quarter to ensure that you have enough for piping.

Lemon Cake

Ingredients

  • 6 tablespoons butter, slightly softened but still cool
  • 3/4 cup sugar
  • 2 eggs, at room temperature
  • 1 1/2 cups cake flour
  • 1/4 teaspoons salt
  • 3/4 teaspoon baking powder
  • 1/4 teaspoon baking soda
  • 1/2 cup milk
  • 2 tablespoons lemon juice
  • 2 tablespoons vegetable oil
  • 1/2 tablespoon lemon extract
  • zest of 1 lemon

Preparation

Preheat oven to 350 degrees. Lightly grease an 8-inch round cake pan, line the bottom with parchment, then grease the parchment and lightly flour the pan.

In a glass measuring cup, combine eggs, milk, vegetable oil, lemon extract, and lemon zest. Whisk to combine; set aside.

In your stand mixer, combine the cake flour, sugar, baking powder, and salt; beat for 30 seconds to combine. With the mixer running on low, add butter one pat at a time, until the mixture looks like coarse sand.

Add half the egg mixture and beat on medium speed for 1 1/2 minutes, then scrape down the bowl and add the remaining egg mixture in two batches, beating for about 30 seconds after each.

Pour batter into prepared pan and bake for 25-30 minutes, until a cake tester comes out clean.

Cool in pan for about 10 minutes, then remove from pan and place on a wire rack to cool completely before filling and frosting.

Blackberry Filling

Ingredients

  • 6 ounces blackberries, mashed
  • 3/4 cup powdered sugar
  • 2 teaspoons cornstarch
  • 1 teaspoon lemon juice

Preparation

In a medium saucepan, stir together blackberries, powdered sugar, cornstarch, and lemon juice. Cook over medium-high heat until mixture boils, then allow to boil for 1 minute, stirring well, until the mixture thickens.

Remove from heat and press through a fine sieve to filter out the seeds. Allow to cool before using; makes about 1/3 cup.

Creamy Vanilla Frosting

Ingredients

  • 12 tablespoons butter, at room temperature
  • 3 cups powdered sugar
  • 1 1/2 tablespoons vanilla extract
  • 1 tablespoon heavy cream
  • Leaf green food coloring
  • Purple food coloring
  • Black food coloring

Preparation

In a mixing bowl, beat butter on medium speed for about 3 minutes, until light and fluffy. Add powdered sugar all at once, then beat on low speed until all of the sugar is incorporated into the butter; this will take a few minutes. Scraped down the bowl, then beat on medium speed for 2-3 minutes.

Add vanilla and heavy cream, then beat for another 1-2 minutes.

To assemble the cake:

Reserve about 1/2 cup frosting for tinting. Divide the reserved portion and tint half green and the other half purple/black; I started with purple and added black until I reached my desired blackberry shade.

Slice the cake in half length-wise; place one half on your cake plate.

Top with blackberry filling, spreading within about 1/2 inch of the edges. Top the filling with frosting, spreading gently to within about 1/4 inch of the edges. The filling is slippery, so as you spread the frosting it will mix with the filling a bit, and that’s fine.

Top with the second half of your cake and frost the top using the white frosting.

Fit a piping bag with a plain tip and fill with green frosting; pipe on vines, then switch to a leaf tip and pipe on leaves.

Fit a second piping bag with a plain tip and fill with purple/black frosting; pipe on blackberries.

Store in an airtight container at room temperature for up to three days.

Below is a detail of the blackberries and vines and a slice of the cake so you can see the filling.

lemon blackberry cake 2 lemon blackberry slice

Cake for One

cake for oneFor the longest time, I’ve wanted to find a recipe for one 6-inch cake. Just a single 6-inch round, a cake for one, for those times you literally want a little cake.

Most recipes can be cut down, but the single-layer cakes I’ve made before call for one egg – and I didn’t want to figure out how to halve an egg. Instead, I chose a recipe without eggs and cut it in half; this recipe for crazy vanilla cupcakes, which makes one dozen cupcakes or an 8-inch round, has no dairy at all. I’m delighted to report that it turned out very well,  just enough for four servings.

I cut my cake in half and turned it into a two-layer, but you could easily skip that step if you like. I also tinted my frosting a light pink and added some sprinkles for an extra bit of color.

Ingredients

For the cake 

  • 3/4 cup plus 1 1/2 tablespoons flour
  • 1/2 cup sugar
  • 1/2 teaspoon baking soda
  • 1/4 teaspoon salt
  • 1/2 teaspoon white vinegar
  • 3/4 teaspoon vanilla extract
  • 2 1/2 tablespoons vegetable oil
  • 1/2 cup water

For the frosting

  • 4 tablespoons unsalted butter, at room temperature
  • 1 3/4 cups powdered sugar
  • 1 teaspoon vanilla extract
  • 1/2 teaspoon almond extract
  • 3 teaspoons heavy cream
  • Food coloring, if desired
  • Sprinkles, if desired

Preparation

Preheat oven to 350 degrees. Lightly grease a 6-inch round cake pan; line with a parchment circle, then lightly grease the parchment and flour the pan.

In a medium bowl, combine flour, sugar, baking soda, and salt. Make three wells for the wet ingredients; add vinegar to one, vanilla to another, and vegetable oil to the third. Add water and stir until batter is very well-combined.

Pour batter into prepared pan and bake for 20-22 minutes, until a cake tester comes out clean.

Remove from oven and allow to cool in pan for a few minutes, then turn onto a wire rack to cool completely.

Make the frosting: In a mixing bowl, beat butter on medium speed for about 3 minutes, until light and fluffy. Add powdered sugar all at once, then beat on low speed until all of the sugar is incorporated into the butter; this will take a few minutes. Scraped down the bowl, then beat on medium speed for 2-3 minutes.

Add vanilla extract, almond extract, and heavy cream, then beat for another 1-2 minutes.

Add food coloring if desired; I used a few drops of red for a light pink shade.

Slice cake into two layers; place a dab of frosting on your cake plate to help the bottom layer stay in place during frosting. Place the bottom layer on the plate and top with a thin layer of frosting. Top with the second layer; frost the top and sides. If desired, add rainbow sprinkles.

Store in an airtight container at room temperature.