Vanilla Bean Cake

As I’ve mentioned before, I’m the kind of gal who bakes her own birthday cake. This year I went back and forth between several ideas, and finally settled on a two-layer, 6-inch cake decorated with a buttercream hydrangea. Happy birthday to me, eh?

A while back I’d bought this color swirl piping set, and it was a total disaster. This time, I tinted my buttercream three different shades of purple and blue, then put them in three separate 12-inch piping bags, all of which went into an enormous, 18-inch piping bag. It worked incredibly well; see more photos of the cake below. A word of caution, though: I actually think this cake would be even more delicious without buttercream frosting. The next time I make it, I think I’ll bake it in a regular 8-inch round pan and either drizzle it with a powdered sugar icing or just serve it with fruit and whipped cream.

Vanilla Bean Cake

Ingredients

  • 1 cup flour
  • 1 teaspoon baking powder
  • dash of salt
  • 8 tablespoons butter, softened
  • 3/4 cup sugar
  • 2 eggs
  • 1 vanilla bean, seeds scraped*
  • 6 tablespoons milk

*Save the pod and make vanilla sugar – just add the pod to a jar of white sugar and let it infuse the sugar with vanilla-ness!

Preparation

Preheat oven to 350 degrees. Lightly grease two 6-inch round cake pans, line each with a parchment circle, and lightly grease the parchment.

In a small bowl, combine flour, baking powder, and salt; set aside.

In a mixer fitted with the paddle attachment, cream together the butter and sugar until very well-blended. Add eggs and vanilla seeds and beat well to combine, scraping the sides of your bowl a few times.

Add flour and milk alternatively in two batches, beginning and ending with the flour and beating until completely combined.

Pour batter into prepared pans and bake for 18-22 minutes, until a cake tester comes out clean. Remove from oven and allow cakes to cool in the pan for about 5 minutes, then carefully turn out onto a wire rack to cool completely.

Vanilla Almond Buttercream

Ingredients

  • 1 1/2 cups butter, at room temperature
  • 5 cups powdered sugar
  • 1 1/2 tablespoons vanilla extract
  • 1 1/2 tablespoons almond extract
  • 1 tablespoon heavy cream
  • Purple, sky blue, and leaf green gel food coloring

Preparation

In a mixing bowl, beat butter for about 2 minutes. Add powdered sugar all at once and beat on low speed until all of the sugar is fully incorporated into the butter; this will take a few minutes.

Add vanilla and almond extracts and beat on medium, then medium high speed for about 2 minutes. Scrape down your bowl, then add the heavy cream and beat for another 2-3 minutes.

To frost and decorate your cake, place one cake on your cake stand and top with buttercream, spreading almost to the edge. Top with the second cake and frost the top and sides, smoothing the buttercream as much as you can.

Divide your remaining frosting into one small portion (about 1/4 cup) and tint leaf green; set aside. Divide the rest into three equal portions and tint one dark purple, another light purple, and the other sky blue.

Place dark purple, light purple, and sky blue frosting into separate 12-inch piping bags. Fit an 18-inch piping bag with a Wilton M1 tip and place the 12-inch bags inside. Pipe petals in a few layers (I did three, and it was a ton of frosting) to make your hydrangea flower, then pipe petals around the bottom edge of the cake.

Fit a small piping bag with a leaf tip and fill with leaf green frosting; pipe leaves on each side of your hydrangea flower, then pipe a few leaves around the bottom of the cake.

Store in a domed cake stand at room temperature for up to 3 days. Makes about 6 slices.

Here’s a detail of the flower.  


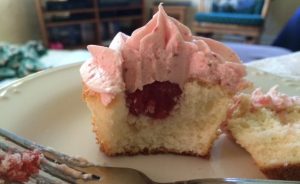
If you look closely you can see the tiny vanilla seeds in the cake. 


Strawberry Vanilla Cupcakes

Filled cupcakes became a big deal a few years back, but as I’ve mentioned on this blog before, my grandma Zella made filled cupcakes back in the ’80s and ’90s. Long before shows like Cupcake Wars appeared on television, Zella scooped out her cupcake centers and filled them with lemon curd, pudding, and pie fillings. I think this strawberry vanilla cupcake would have made her proud.

If you’re using a fruit or pudding-like filling, you’ll want a sturdier cupcake so that a) the cupcake doesn’t fall apart when you take a bite and b) the filling doesn’t get too absorbed into the cake. These cupcakes are on the drier side, more like a pound cake and able to hold the strawberry filling very well. When paired with a fresh strawberry buttercream, the flavor combination is a delightfully summery treat. I recommend making your filling first and allowing it to cool completely before you bake your cupcakes and make your frosting to save time during assembly.

Strawberry Filling

Ingredients

Ingredients

  • 12 ounces strawberries, pureed
  • 1 1/2 cups powdered sugar
  • 4 teaspoons cornstarch
  • 2 teaspoons water

Preparation

In a medium saucepan, stir together strawberry puree, powdered sugar, cornstarch, and water. Cook over medium heat until the mixture boils, then allow it to boil for 1 minute, stirring well, until the mixture thickens.

Remove from heat and press through a fine sieve to filter out the seeds – this will take a few minutes, but is absolutely worth it. Allow to cool at room temperature before using; makes about 1 cup.

Old-Fashioned Vanilla Cupcakes

Ingredients

  • 1/2 cup whole milk
  • 1 teaspoon vanilla extract
  • 1/2 cup plus 6 tablespoons cake flour
  • 1/2 cup plus 2 tablespoons flour
  • 1 cup sugar
  • 1 1/2 teaspoons baking powder
  • Scant 1/2 teaspoon salt
  • 8 tablespoons butter, cut into cubes, at room temperature
  • 2 eggs, at room temperature

Preparation

Preheat oven to 350. Line two cupcake pans with paper liners.

Combine milk and vanilla extract; set aside.

In a mixing bowl, combine cake flour, flour, sugar, baking powder, and salt. Beat on medium speed for 2 minutes, then reduce mixer speed to low and add butter a few cubes at a time. Continue to beat for about 2 minutes, until the mixture looks like coarse sand.

Add eggs, one at a time, beating well between each. With the mixer running on low, slowly pour in the vanilla milk mixture.

Return to medium speed and continue to beat for 2 minutes. Scrape down the sides and bottom of the bowl well.

Using a 2-inch cookie scoop, drop scoops of batter into prepared cupcake pans, filling about 1/2 to 2/3 full.

Bake for 20-25 minutes, until a cake tester comes out clean. Remove from pans immediately and cool completely on a wire rack before filling and frosting.

Fresh Strawberry Buttercream

Ingredients

  • 8 tablespoons butter, at room temperature
  • 1 teaspoon vanilla extract
  • 2 to 3 cups powdered sugar
  • Scant ¼ cup strawberry puree

Preparation

In a stand mixer fitted with the paddle attachment, beat butter and vanilla extract on low speed until smooth and creamy, about 2 minutes.

Gradually add powdered sugar, in half-cup increments, beating until fully incorporated.

Slowly add strawberry puree, mixing until completely incorporated, about 1-2 minutes. If your mixture is too thin, slowly add more powdered sugar, about 1/4 cup at a time, until you reach a consistency that will be easy to pipe.

To assemble your cupcakes:

Use a melon baller to scoop out a small amount of cake from the center of each cupcake.

Using a pastry bag fitted with a large plain tip, pipe strawberry filling into each cupcake.

Fit a large pastry bag with a Wilton M1 tip and pipe generous swirls of frosting onto the top of each cupcake. Store in an airtight container in the refrigerator for up to 2 days, but bring to room temperature before serving.

Makes 24 cupcakes.

Here’s a photo of the inside! 

Almond Raspberry Cupcakes

Baking requires instincts, and I should know by now not to ignore mine. Usually when I fill cupcakes with a custard or fruit filling, I scoop out the centers with a melon baller and pipe the filling into the divot, yielding a nice filling-to-cupcake ratio. For cream fillings, I place the filling in a piping bag and injecting it into the cupcake, because cream fillings are heavy enough to push the cake out a bit and yield the same nice filling-to-cupcake ratio.

Because I wanted to save a bit of time, I decided to use the injection method with my raspberry filling in these cupcakes. After I’d frosted them and tried one (because what kind of baker doesn’t engage in quality control?) I realized that the injection method had failed me: my cupcake had a sad little tunnel of filling, not nearly enough for a good flavor or texture balance. I wondered for a moment if I should drizzle the tops with raspberry jam to ramp up the flavor, then decided to use the leftover raspberry filling for drizzling. Another mistake. It looked ridiculous, far too thick and amateurish.

Eager to maintain my baking cred at the office, I carefully scraped the filling off the tops and replaced it with some raspberry jam to cover the gashes in the frosting. My colleagues enjoyed them very much, but I’ve learned my lesson: my instincts are important, and the next time I get the idea not to follow them, I’ll remember these cupcakes.

Ingredients

For the almond cupcakes

  • 1 cup flour
  • 1 teaspoon baking powder
  • dash of salt
  • 8 tablespoons butter, softened
  • 3/4 cup sugar
  • 2 eggs
  • 1/2 teaspoon vanilla extract
  • 1 teaspoon almond extract
  • 1/4 cup plus 2 tablespoons milk

For the raspberry filling

  • 6 ounces fresh raspberries, mashed
  • 3/4 cup powdered sugar
  • 2 teaspoons cornstarch
  • 1 teaspoon water

For the almond frosting and raspberry jam drizzle

  • 8 tablespoons butter
  • 2 1/2 cups powdered sugar
  • 1/2 tablespoon vanilla extract
  • 1 tablespoon almond extract
  • Red food coloring
  • About 1/4 cup seedless raspberry jam

Preparation

Preheat oven to 350 degrees. Line a 12-count cupcake tin with paper liners.

In a small bowl, combine flour, baking powder, and salt; set aside.

In a mixer fitted with the paddle attachment, cream together the butter and sugar until very well-blended. Add eggs, vanilla extract, and almond extract and beat until combined; scrape down the sides of your bowl a few times during this step.

Add flour and milk alternatively in two batches, beginning and ending with the flour and beating until completely combined.

Using a 2-inch cookie scoop, scoop batter into cupcake wells, dividing evenly and filling about 2/3 to 3/4 full.

Bake for 18-22 minutes, until a cake tester comes out clean. Remove from oven and remove cupcakes from the tin; cool completely on a wire rack before filling and frosting.

While the cupcakes bake, make your filling. Stir together raspberries, powdered sugar, cornstarch, and water in a medium saucepan. Cook over medium heat until the mixture boils, then allow it to boil for 1-2 minutes, stirring well, until the mixture thickens.

Remove from heat and press through a fine sieve to filter out the seeds. Allow to cool before using; makes about 1/2 cup.

Once both the filling and cupcakes are cool, use a melon baller to scoop out a small amount of cake from the center and pipe or spoon filling into each.

For the frosting, place butter in a mixer fitted with the paddle attachment and beat on medium speed for 1-2 minutes.

Scrape down the bowl and add powdered sugar all at once, beating on low speed until the sugar is completely incorporated into the butter; this will take a few minutes. Continue beating on medium-high speed for 2 minutes.

Add vanilla extract and almond extract, then beat on medium-high for another 2-3 minutes. Add a few drops of red food coloring to tint a light pink.

Fit a large piping bag with a Wilton 1M tip and pipe frosting in swirls on the tops of each cupcake.

Stir raspberry jam to make it smooth, then fit a small piping bag with a small plain tip and twist the bottom of the bag near the tip so the jam won’t run out when you pour it in. Untwist the bag and pipe jam over the tops of the cupcakes.

Store in an airtight container in the refrigerator but bring to room temperature before serving.

Patriotic Cupcakes

Happy Independence Day, Americans! I haven’t done a lot of red, white, and blue baking, so this year I thought I’d whip up some patriotic cupcakes and practice my frosting tinting and piping skills while I was at it. I also experimented with a new buttercream, based on a Wilton recipe that uses both butter and shortening. I’m pleased to say it turned out very well!

Tint-wise, I wanted to make “colonial” colors – darker blue and red than what you’d get with your standard gel food coloring. To make a color darker, you need a hint of black, and let me stress the word “hint” here – it’s really a teeny, tiny amount. While my colonial blue turned out very well, my colonial red turned out more like raspberry. I’ll use it on something else, but I was glad to have plenty of white frosting for a second batch of red – this red is just your standard red gel food coloring, though in a very generous amount. Design-wise, the flag cupcakes are my favorites; alas, my fireworks cupcakes (the ones on the center ends in the photo above) look far too much like something that contains genetic material for my liking. Oh well…we pipe, and we learn.

Ingredients

For the vanilla cupcakes

  • 1 cup flour
  • 1 teaspoon baking powder
  • dash of salt
  • 8 tablespoons butter, softened
  • 3/4 cup sugar
  • 2 eggs
  • 1 teaspoon vanilla extract
  • 1/4 cup plus 2 tablespoons milk

For the Wilton-inspired buttercream

  • 6 tablespoons butter, at room temperature
  • 6 tablespoons vegetable shortening
  • 3 1/2 cups powdered sugar
  • 1 tablespoon vanilla extract
  • 1 –  1 1/2 tablespoons heavy cream or milk
  • Royal blue gel food coloring
  • Red gel food coloring
  • Black gel food coloring

Preparation

Preheat oven to 350 degrees. Line a 12-count cupcake tin with paper liners.

In a small bowl, combine flour, baking powder, and salt; set aside.

In a mixer fitted with the paddle attachment, cream together the butter and sugar until very well-blended. Add eggs and vanilla and beat until combined; scrape down the sides of your bowl a few times during this step.

Add flour and milk alternatively in two batches, beginning and ending with the flour and beating until completely combined.

Using a 2-inch cookie scoop, scoop batter into cupcake wells, dividing evenly and filling about 2/3 to 3/4 full.

Bake for 18-22 minutes, until a cake tester comes out clean. Remove from oven and remove cupcakes from the tin; cool completely on a wire rack before frosting.

To make the frosting, place butter and shortening in a stand mixer fitted with a paddle attachment and beat for 1-2 minutes, until very well-combined. Add powdered sugar, 1 cup at a time, mixing very well between each addition. Add vanilla and heavy cream, beating for 1-2 minutes on medium-high speed; if your frosting is too thick, add another 1/2 tablespoon of heavy cream.

Divide frosting into three portions. Reserve 1 portion for white; using an offset spatula, frost the tops of each cupcake with a base of white.

Tint one portion colonial blue using royal blue and a very, very small amount of black. Tint the other portion red.

Fit two pastry bags with small star tips and pipe designs as you like. I chose the following:

  • Stars (top left and bottom ends in the photo above) – pipe a ring of blue around the edge of the cupcake, then fill in with red stars
  • Fireworks (center ends) – pipe red and blue stars with tails
  • Waves (top right) – pipe alternating red and blue waves
  • Flags (center) – pipe a patch of blue on the upper left-hand side, then add red stripes
  • Full coverage stars (bottom center) – pipe blue stars to totally cover the top of your cupcake, then add red star accents

Store cupcakes in an airtight container at room temperature for up to 2 days. Makes 12.


Chocolate Cupcakes with Vanilla Cream Filling

Today’s snickerdoodle sandwich cookies left me with about a cup and a half of vanilla cream filling, and I could think of nothing better to do with it than to pipe it into some dark chocolate cupcakes, Hostess-style. You remember the Hostess cupcake…dark chocolate cake, fluffy filling, waxy (in a good way) chocolate icing and that signature white loopy swirl. I actually preferred the orange version to the chocolate version, but both were quite a treat.

These cupcakes are a take on the classic store-bought version, minus the white loopy swirl (though I really want to do that next time). Mike proclaimed them better than the Hostess version, without intending any offense to the fine folks of Hostess, of course.

Ingredients

Preparation

Bake cupcakes and allow to cool completely before filling and frosting. Make filling; reserve leftover portion for another use.

Fill a pastry bag fitted with a 1/4 inch plain tip with about 1 1/2 cups filling. Insert the tip into each cupcake, piping in filling until the top of the cupcake starts to puff up.

Prepare icing; using a teaspoon from your flatware, scoop about 1 teaspoon of filling onto each cupcake and quickly frost with a small offset spatula.

Store cupcakes in an airtight container at room temperature for up to 3 days. Makes 15.


What to Do with Leftover Filling

Sometimes, you’ll have leftover filling from cookies or cakes. What should you do with your filling? In some cases – like that of lemon curd or dulce de leche – you can just eat it with a spoon. But what if your filling needs to be baked, or would be better put to use in another treat? As a super-thrifty baker, I always advocate repurposing your filling so you don’t waste ingredients or money, and I found one very simple way to do so.

Yesterday I made a big batch of pecan rugelach and had about 1/3 to 1/2 cup of pecan filling left over (I didn’t measure it exactly). I decided to bake it into what I call crescent cupcakes, which are based on the Easy King Cake Cupcakes I made for Mardi Gras and are very easy to assemble. You may need more tubes of crescent rolls depending on how much filling you have left, but you can always bake any unused rolls as you would normally and serve them with dinner.

Ingredients

  • 1 regular-sized tube PillsburyTM crescent rolls
  • Leftover filling (I had about 1/3 to 1/2 cup)
  • 1/2 cup powdered sugar
  • Dash of cinnamon
  • 1 teaspoon water

Preparation

Preheat oven to 350 degrees. Place 4 cupcake liners into a cupcake pan.

Unroll the tube of crescent rolls and divide the roll into four rectangles. Press the perforated edges together to seal.

Divide your filling evenly between all four rectangles, leaving a border around the edges.Fold the top of the rectangle down toward the middle, then fold the bottom of the rectangle toward the middle, letting the dough overlap. Fold the right side in toward the middle, then the left side.

Place rolls spiral-side up in cupcake wells and bake for 18-22 minutes, until golden brown.

Remove from cupcake tin and cool completely before glazing.

To make glaze, combine powdered sugar and cinnamon (or whatever spice you like) in a small bowl. Add water 1/4 teaspoon at a time to reach a thick glazing consistency; you don’t want the glaze to drip down the sides. Glaze each treat and allow glaze to set before serving, or serve warm if you prefer.

Store in an airtight container at room temperature for up to 2 days; after that, they get stale.

Makes 4.

King Cake Cupcakes (Easy Version)

king-cake-cupcakesEvery year before Mardi Gras, I think: this year, I’ll make a king cake. If you’re not familiar with the king cake, it’s a traditional treat associated with Mardi Gras, or Fat Tuesday, the day before the somber, reflective season of Lent begins. King cake involves brioche and a filling of some kind, and because I do so little work with yeast, I always decide to forego the king cake for another year.

This year, I went an easy, semi-homemade route for these king cake cupcakes. They’re adapted from a recipe that I found at Crave. Indulge. Satisfy., and I would definitely do a few things differently next time, like waiting for them to cool completely before glazing them with icing, and greasing my cupcake tins instead of using paper liners (because warm cupcakes + glaze icing + paper liners = a gooey mess). The recipe below is written how I’d recommend you bake it, based on my trials last night. To me, they taste like a delicious Pillsbury treat (not that there’s anything wrong with that), but if you’re going for a more traditional king cake flavor, you’ll want to bake the real thing.

Ingredients

  • 6 tubes PillsburyTM crescent rolls
  • 1 1/2 cups packed light brown sugar
  • 2 teaspoons cinnamon
  • 1 cup chopped pecans
  • 3 cups powdered sugar
  • 3 tablespoons milk
  • Purple, yellow, and green sugar sprinkles

Preparation

Preheat oven to 350 degrees. Grease two 12-count cupcake tins.

In a medium bowl, stir together brown sugar, cinnamon, and pecans; set aside.

Unroll one tube of crescent rolls at a time and divide the rolls into four rectangles. Press the perforated edges together to seal.

Place 2 tablespoons of filling down the center of each rectangle, leaving a border around the edges. Fold the top of the rectangle down toward the middle, then fold the bottom of the rectangle toward the middle, letting the dough overlap. Fold the right side in toward the middle, then the left side.

Place rolls spiral-side up in cupcake wells and bake for 18-22 minutes, until golden brown.

Remove from oven and allow to cool in pans, then remove to wire racks.

Once cupcakes are cool, make glaze; combine powdered sugar and milk in a medium bowl and mix until completely smooth.

Working with about 3 cupcakes at a time, pour glaze over cupcakes and sprinkle with purple, yellow, and green sugar. If you try to glaze all of the cupcakes at once, the glaze will harden before you can get the sprinkles on. Continue glazing and sprinkling until all of your cupcakes are done.

Store in an airtight container at room temperature for up to 2 days. Makes 24.

Chesapeake Bay Cake

chesapeake-bay-cake-1Mike turned 40 yesterday, and I threw him a Maryland-themed birthday party, complete with this Chesapeake Bay-inspired cake. Funny difference between Marylanders and Pennsylvanians: most Marylanders have an abundant amount of state pride, while Pennsylvanians seem to be prouder of their local connections. I, for example, am a Pittsburgher first and a Pennsylvanian second. Not so in the Old Line State, where folks fly the Maryland flag outside their homes right alongside the American flag. Mike would probably do that here if I’d let him (which I won’t).

I’m not much of a decorator, so I went with a simple design for this cake. The crab outline came from my crab cookie cutter, and I used a leaf tip to pipe seaweed, a plain tip to pipe sand, then added some flower-shaped sprinkles for shells, rocks, and starfish (as seen in the photo below – I decided after I took the photo above that it needed just a few more fun details). This cake was a big hit at his party last night, along with my steamed crab cookies.

Ingredients

Dark Chocolate Cake

  • 3 cups flour
  • 6 tablespoons cocoa powder
  • 2 cups sugar
  • 2 teaspoons baking soda
  • 1 teaspoon salt
  • 2 tablespoons vinegar
  • 2 teaspoons vanilla
  • 6 tablespoons vegetable oil
  • 2 cups water

Vanilla Almond Buttercream

  • 1 1/2 cups unsalted butter (2 1/2 sticks), at room temperature
  • 4 1/2 cups powdered sugar
  • 3 teaspoons vanilla extract
  • 1 teaspoon almond extract
  • 1 teaspoon milk
  • Blue, green, and brown food coloring
  • Miniature chocolate chips for crab eyes
  • Flower-shaped sprinkles for shells, rocks, and starfish

Preparation

For the cake

Preheat oven to 350 degrees. Spray two 8-inch round cake pans with baking spray. Line the bottom of each pan with a circle of parchment, and spray a second time.

In a large mixing bowl, combine flour, cocoa powder, baking soda, and salt. Make three wells; place vinegar in one, vanilla in the second, and vegetable oil in the third. Add water and stir very well to combine; the batter will bubble up just slightly as the ingredients come together. Your batter will be fairly thin, but should be mostly lump-free.

Divide batter evenly between the pans. Bake for 25-30 minutes, until a cake tester comes out clean. Be careful not to over-bake; the sides of these cakes set up pretty quickly and can burn if you let them go too long.

Remove cakes from oven and carefully run a knife around each edge to loosen them from their pans if they’ve stuck at all. Allow to cool for about 10 minutes in the pans, then carefully flip out onto wire racks (removing the parchment for each cake bottom) to cool completely.

For the frosting

Place butter in a stand mixer fitted with the paddle attachment and beat on medium speed for 1-2 minutes. Add powdered sugar all at once and beat on low until the sugar is completely incorporated into the butter (this will take several minutes).

Scrape down the bowl, then add vanilla, almond extract, and milk and beat for 3 minutes on medium speed, scraping the sides of the bowl a few times.

To decorate:

Reserve about 1 1/2 cups frosting in a small bowl, then tint the remaining frosting light blue.

Remove about 1/4 cup of light blue frosting and tint dark blue for the crab.

Divide the remaining frosting in half and tint one portion green and the other portion a light sand color.

Flip one cake upside-down onto your cake plate; spread a medium-thin layer of frosting on top. Carefully place your second cake on top of the first layer and frost the top, then the sides.

Using a crab cookie cutter, make an indentation in the top of the cake so you have an outline; remove the cutter.

Fit a small piping bag with a small plain tip and fill with dark blue frosting, then pipe the outline of the crab. Switch to a larger tip to fill in the crab body, then use a small offset spatula to smooth out your piping. Add miniature chocolate chip eyes.

Fit a medium piping bag with a leaf tip and fill with green frosting. Pipe seaweed up from the bottom of your cake.

Fit a medium piping bag with a large plain tip and fill with sand-colored frosting. Pipe sand along the base of the cake, covering the bottoms of your seaweed.

Add flower sprinkles for shells, rocks, and starfish; I used white, blue, and orange sprinkles.

Store on a domed cake stand for up to 3 days.

chesapeake-bay-cake-2Here’s a photo of the cake with the flower sprinkle additions – I’m very glad I added them, as the cake looked a bit too plain otherwise. 


Almond Cake for Date Night – Serves Two

almond-cake-for-date-nightMike and I will celebrate our 17th wedding anniversary this year. We married one week after graduating college – because, why wait? – and are now those boring married people whose “date night” means a Saturday night catching up on the TV shows we’ve recorded during the week.

For last night’s date night, I whipped up this adorable little almond cake. It’s perfect for two, yielding two slices of cake for each of us. The icing is just an almond glaze, topped with sugar-toasted almonds, which are much easier to make then they may sound. Next time, I may slice the cake in half and add some pastry cream or raspberry filling between the layers.

Ingredients

For the cake

  • 1/2 cup flour
  • 1/2 teaspoon baking powder
  • dash of salt
  • 4 tablespoons butter, softened
  • 6 tablespoons sugar
  • 1 egg
  • 1/4 teaspoon vanilla extract
  • 3/4 teaspoon almond extract
  • 3 tablespoons milk

For the toasted almonds

  • 6 tablespoons sliced almonds
  • 1 tablespoon plus one teaspoon sugar
  • 1 tablespoon water

For the almond glaze

  • About 1 1/2 cups powdered sugar
  • 1 teaspoon almond extract
  • 1 tablespoon water

Preparation

Preheat oven to 350 degrees. Lightly spray a 6-inch round cake pan with baking spray, line it with a parchment circle, and spray the parchment.

In a small bowl, combine flour, baking powder, and salt; set aside.

In a mixer fitted with the paddle attachment, cream together the butter and sugar until very well-blended. Add egg, vanilla, and almond extract and beat until combined.

Add flour and milk alternatively in two batches, beginning and ending with the flour and beating until completely combined.

Pour batter into prepared pan and bake for 18-22 minutes, until a cake tester comes out clean. Remove from oven and allow cake to cool in the pan for about 5 minutes, then carefully turn out onto a wire rack to cool completely.

While your cake cools, prepare your toasted almonds. Place almonds in a small bowl and add sugar and water, mixing well to coat. Place in a saute pan over medium heat and cook, stirring frequently, for about 5-7 minutes until almonds start to turn a light golden brown. Almonds will start out looking wet and will appear dry when they are almost done. Remove from heat and pour onto a plate to cool completely before using.

Once your cake and almonds are cool, make your almond glaze. Place powdered sugar in a small bowl and add almond extract and water, stirring until smooth. You want a thick glaze consistency, so you may need to add a bit more powdered sugar to thicken it. Pour glaze over cake and top with toasted almonds.

Store in an airtight container at room temperature for up to 3 days. Makes 4 servings.


Heart Month Cupcakes

heart-month-cupcakesIt’s American Heart Month! As some of you know, I manage heart and vascular marketing for a medical center in Pittsburgh, and Heart Month is a big deal. We have events all throughout February that encourage people to get heart screenings so they can learn about heart disease risks. My cube is decked out with heart decorations, and I’m featuring daily heart tips on my dry erase board all month long.

Okay, so maybe it’s a little strange that the heart marketing gal is also the office baker. While cupcakes could never be construed as heart-healthy, being baked with butter, sugar, and eggs, they do make people happy. And happiness is an important part of heart health, so…you be the judge. These cupcakes make a large batch of 30, so they’d also be great for a Valentine’s Day party.

Ingredients

For the cupcakes

  • 2 1/2 cups flour
  • 2 1/2 teaspoons baking powder
  • 1/2 teaspoon salt
  • 10 2/3 tablespoons butter, slightly softened
  • 1 3/4 cups sugar
  • 1 1/2 teaspoons vanilla
  • 2 eggs
  • 1 1/4 cups milk

For the frosting

  • 1 cup butter, at room temperature
  • 3 1/2 cups powdered sugar
  • 1 1/2 tablespoons vanilla extract
  • 3/4 tablespoon almond extract
  • 1 1/2 tablespoons milk
  • Wilton Fill Your Heart sprinkles*

*I found these sprinkles at Joann; craft stores are always a great source of holiday-themed baking supplies. 

Preparation

Preheat oven to 375 degrees. Line three cupcake tins with paper liners; if you don’t have three, just let one of your tins cool down after baking one of your batches before you do your last batch.

In a medium bowl, combine flour, baking powder, and salt; set aside.

In a mixing bowl, beat butter on medium speed for one minute. Add sugar and vanilla and beat until well combined.

Add eggs, one at a time, beating for one minute after each.

Add flour mixture and milk alternatively, beating until combined.

Using a two-inch cookie scoop, scoop batter into prepared muffin cups, filling about half-full.

Bake for 18-20 minutes, until a toothpick inserted in the center comes out clean.

Cool on a wire rack before frosting.

To make the frosting, place butter in a mixing bowl and beat for a few minutes using the paddle attachment.

Add 3 cups powdered sugar.  With your mixer on low, beat until all of the sugar is incorporated into the butter. This will take a few minutes, and I find that placing a kitchen towel over the mixer during this stage prevents a powdered sugar blizzard.

Once all of the sugar is incorporated, scrape down your bowl and beat on medium-high speed for 2-3 minutes.

Add vanilla extract, almond extract, and 1 tablespoon milk and beat on medium for another 2 minutes.

Scrape down your bowl, then add the remaining half-cup of powdered sugar and half-tablespoon milk, beating for another 1-2 minutes until completely combined.

Fit a 14-inch piping bag with a Wilton M1 tip and pipe swirls of frosting onto each cupake; you’ll have enough for all 30 cupcakes as long as you don’t go too overboard with your portions.

Sprinkle each cupcake with Wilton Fill Your Heart sprinkles (or other heart-shaped sprinkles). Note: I don’t recommend dipping the cupcakes in the sprinkles, as this will result it sprinkle overload. Because these sprinkles are so large, it’s best to literally sprinkle them onto each cupcake.

Store in an airtight container at room temperature for 3-4 days.

Makes 30.