My goddaughter Maureen, also known as Mo, just turned three. Mike and I traveled to Maryland this weekend for her party and Mo and I baked these cupcakes together, which was great fun. She’s very good at mixing, but even better at eating. At the end of her party, she sat down by herself at the table and proceeded to eat all of the icing off of two cupcakes…a girl after my own heart.
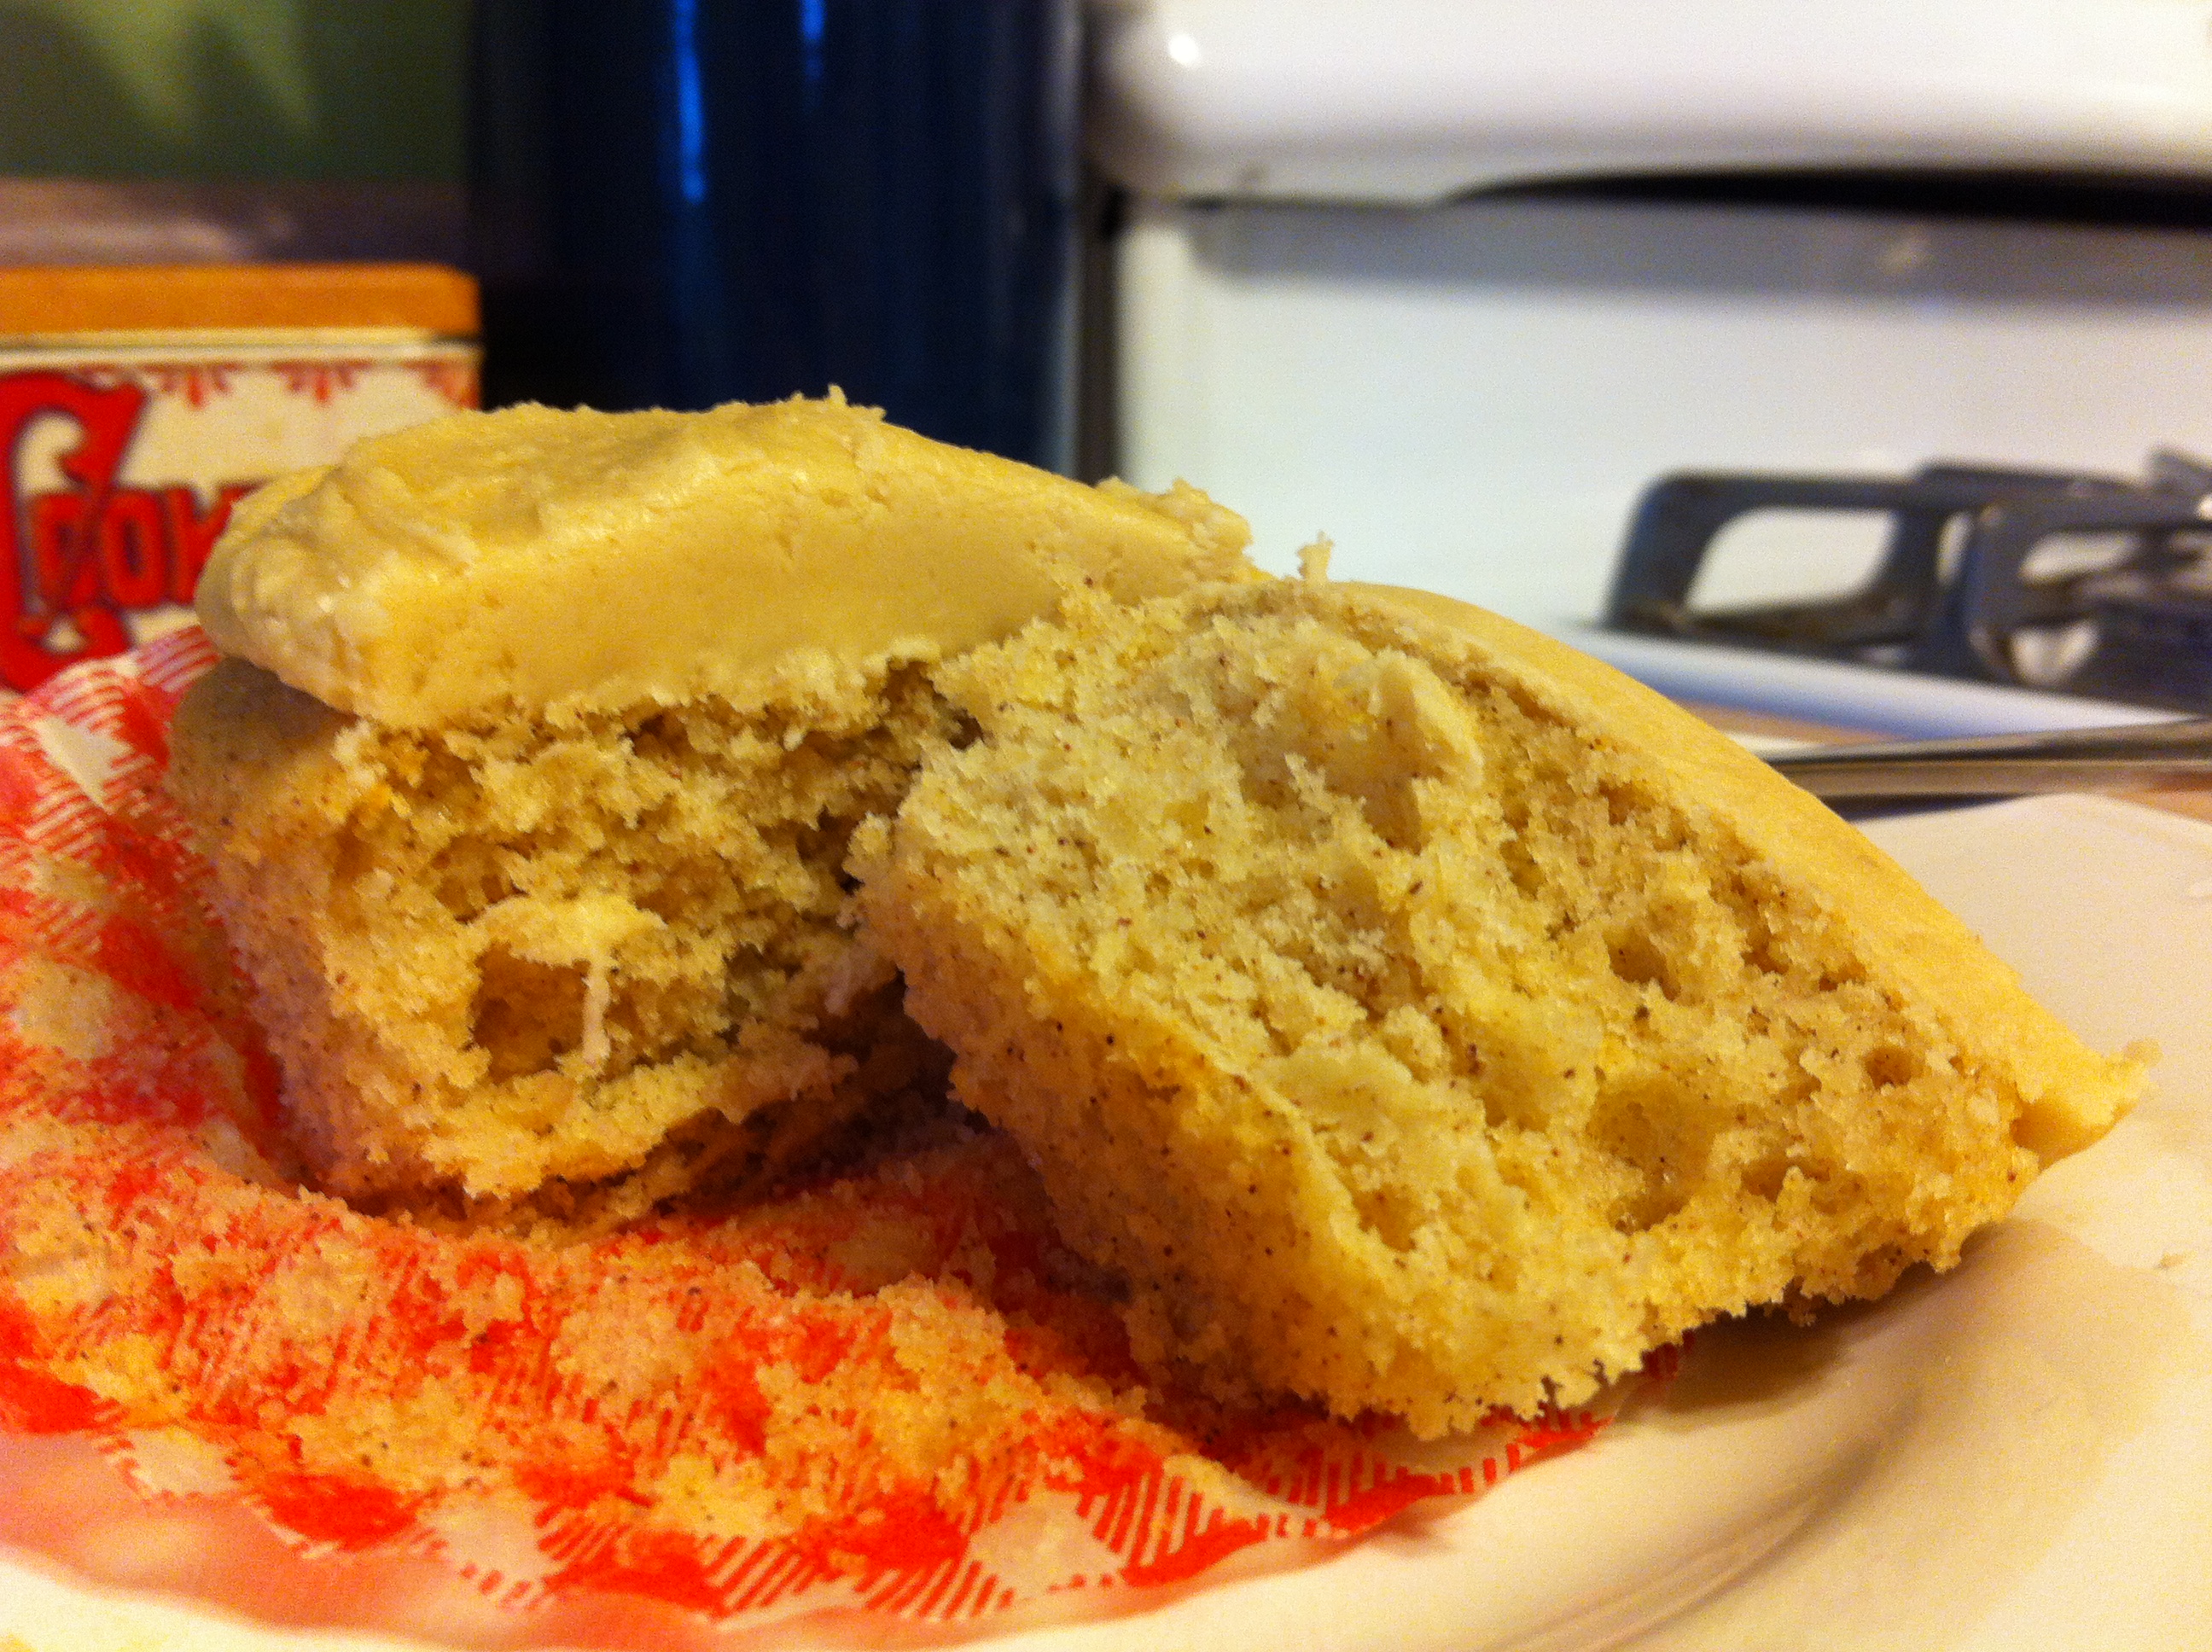
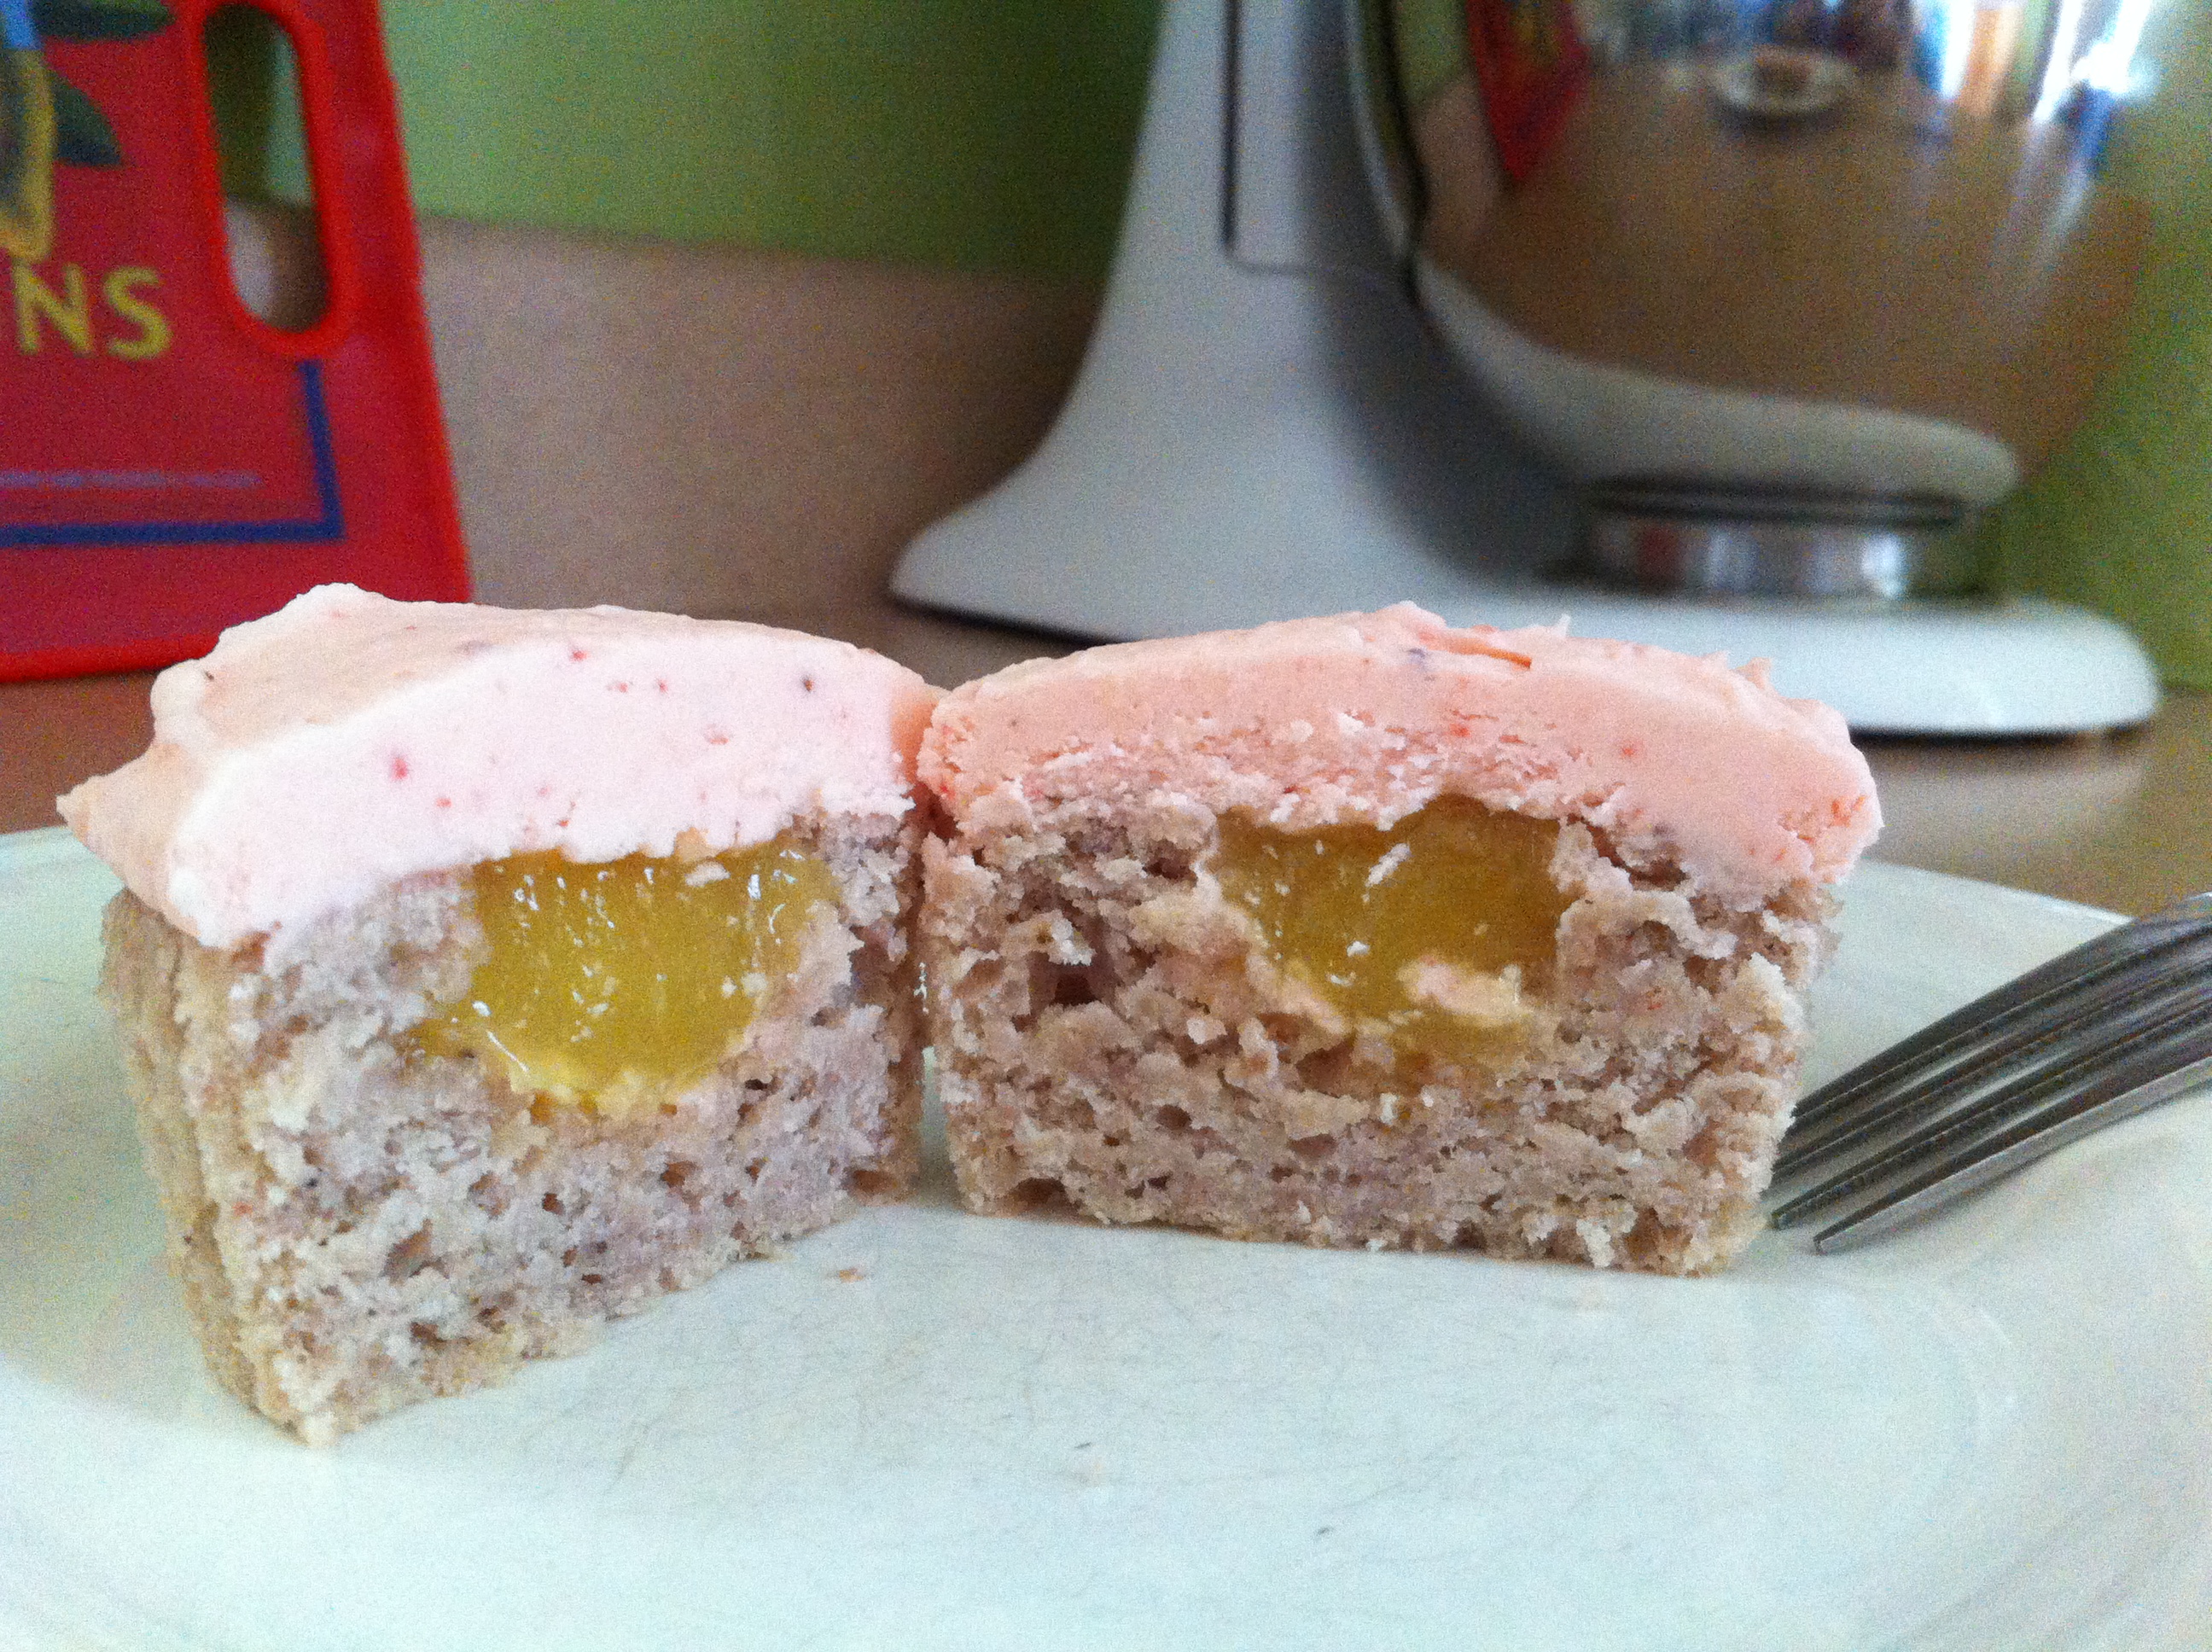
Mo’s mom, my cousin Barb, sought a recipe that was both dairy-free and egg-free to accommodate some guests with food allergies, and she got this recipe from a friend whose sons can’t have milk or eggs. Cakes like these are also known as Depression Cakes, given the scarcity of dairy products and eggs during the Great Depression. As always, the resourcefulness of bakers never ceases to amaze me; the end result of this recipe is a delicious, moist cake that reminds me somewhat of devil’s food, but better. And, because there are no animal products in either the cake or frosting recipes, these treats are vegan!
Note: the recipe below yields 36 cupcakes with enough frosting for generous portions on each cupcake.
Crazy Chocolate Cupcakes
Ingredients
- 4 1/2 cups flour
- 9 tablespoons unsweetened cocoa powder
- 3 cups sugar
- 3 teaspoons baking soda
- 1 1/2 teaspoons salt
- 3 tablespoons vinegar
- 3 teaspoons vanilla extract
- 15 tablespoons vegetable oil (7.5 ounces, just shy of one cup)
- 3 cups water
Preparation
Preheat oven to 350 degrees. Line muffin tins with paper liners.
In a large bowl, combine flour, cocoa powder, sugar, baking soda, and salt. Mix until well-blended, then make three wells for the wet ingredients.
Place vinegar, vanilla, and vegetable oil in the wells; add water and mix until batter is smooth. The mixture will bubble slightly when you add the water; just keep mixing until you get a smooth consistency in the batter, which will be fairly thin.
Using a 1/4 cup measure, fill each cupcake about half-full. Bake for 13-15 minutes, until a cake tester comes out clean.
Cool completely before frosting.
Vanilla Frosting
Ingredients
- 1 cup shortening
- 3 teaspoons vanilla extract
- 1/2 cup water
- 8 cups powdered sugar
Preparation
In a mixing bowl, combine shortening, 1 teaspoon vanilla, water, and 4 cups powdered sugar. Mix on low speed, then increase to medium-high and beat for 10 minutes, until smooth. Add remaining powdered sugar and additional teaspoons of vanilla extract, beating until smooth.
About Maureen
 Mo is an active three-year old who loves her parents, her dog Sukey, making messes, and referring to herself in third-person. She’s an avid fan of bacon, enjoys watching Octonauts, and has been known to wear tutus over skinny jeans.