Chocolate Peppermint Crinkles

chocolatepeppermintcrinklesNow and then my Aunt Liz sends me recipes in the mail, clipped from magazines or newspapers. This Thanksgiving she came to Pittsburgh bearing a copy of Southern Living magazine with recipes she thought I’d like, and boy, was she right. The issue features page after page of beautiful cakes, desserts, and cookies for the holidays, including these chocolate peppermint crinkles.

Chocolate crinkle cookies are a Christmas staple, and these chocolate peppermint crinkles are a delicious twist on the classic. If you’re not a peppermint fan you can easily substitute the peppermint extract for vanilla extract. This batch makes 18 cookies and could be easily doubled for a larger batch.

Ingredients

  • 3/4 cup flour
  • 1/4 cup unsweetened cocoa powder, sifted
  • 1 teaspoon baking powder
  • 2 ounces unsweetened baking chocolate, chopped
  • 2 tablespoons butter, cut into small pieces
  • 1/4 teaspoon salt
  • 1 cup sugar
  • 1/2 teaspoon peppermint extract
  • 2 eggs
  • About 3/4 cup powdered sugar, sifted

Preparation

In a medium bowl, combine flour, cocoa powder, and baking powder; set aside.

Combine baking chocolate, butter, and salt in a small saucepan and melt over very low heat, stirring well to combine.

Pour mixture into a medium bowl and add sugar, stirring well.

Add peppermint extract and eggs; stir very well to combine.

Add flour mixture and stir until completely combined; mixture will thicken.

Cover with plastic wrap and chill for at least 1 hour, until easier to handle.

Preheat oven to 350 degrees. Line two baking sheets with parchment paper.

Using a one-inch cookie scoop, scoop generous portions of dough and roll into balls, then dip in powdered sugar and toss to coat very well.

Place cookies about 2 inches apart on baking sheets and bake for 11 minutes; remove from oven and allow to cool on baking sheets for about 4-5 minutes before removing to wire racks to cool completely.

Store in an airtight container at room temperature.

Tip: if you don’t want a huge mess on your counter tops, place a kitchen towel or paper towels beneath the cooling racks to catch the excess powdered sugar while your cookies cool.

Advertisement

Chocolate Raspberry Thumbprints

chocolateraspberrythumbprintLaura, my cube wall-mate, accepted a new job in our company and is moving to a new office. In case you’re not familiar with the cube wall-mate (CWM), this is the person who sits on the other side of the wall that separates one section of office cubes from another, who you can hear but not see, as opposed to your cube mates, who are in the same cube row as you. Laura has been an awesome CWM; she’s very good at selective eavesdropping, always willing to say “hey, I wasn’t trying to listen in but I couldn’t help hearing and you actually need to talk to so-and-so about that,” has a top-notch sense of humor, and shares my fondness of kooky sayings like “those cookies are the bee’s knees.”

Laura and I have talked extensively about baking – she makes a mean chocolate pots de creme – and she requested a chocolate raspberry combo as her celebratory farewell cookies. And so, we have these chocolate raspberry thumbprints. The original recipe from Good Housekeeping neglected one very important note in preparation…you have to melt your 2 ounces of baking chocolate before you incorporate it into the dough. Which makes me wonder…how many people tried to make this recipe without melting their chocolate?

Farewell, Laura! We shall meet again on social media and in outside-work-life!

Ingredients

  • 2 3/4 cups flour
  • 1/4 teaspoon baking soda
  • 1/4 teaspoon salt
  • 1 cup butter, slightly softened
  • 3/4 cup sugar
  • 1 egg
  • 1 teaspoon vanilla extract
  • 2 ounces unsweetened baking chocolate, melted and slightly cooled
  • 1/4 cup cocoa powder
  • About 1/2 cup seedless raspberry jam

Preparation

Preheat oven to 350 degrees. Line three baking sheets with parchment paper.

In a large bowl, combine flour, baking soda, and salt; set aside.

In a mixing bowl, beat butter on medium speed for 1 minute. Scrape down the sides of the bowl and add sugar; beat until well-combined and fluffy, about 2-3 minutes. Add egg, vanilla, chocolate, and cocoa powder mixing well, scraping the sides of the bowl a few times.

Slowly add flour mixture, beating until fully incorporated.

Using a 1-inch cookie scoop, scoop dough and roll into balls. Place about 2 inches apart on baking sheets.

Using your 1/4 teaspoon measuring spoon, press a thumbprint well into the center of each cookie. Fill with 1/4 teaspoon raspberry jam.

Bake for 14 minutes, until jam is bubbly at the edges. Remove from oven and cool for 1-2 minutes on the baking sheets, then remove to a wire rack to cool completely.

Store in an airtight container at room temperature; if stacking, place waxed paper between the layers.

Buttermilk Chocolate Cupcakes

IMG_4941Happy World Chocolate Day! Let’s celebrate with some buttermilk chocolate cupcakes and cocoa frosting. If you want to add a scoop of vanilla ice cream on the side, that would be a great idea too.

Can you imagine a world without chocolate? I can, but I certainly don’t want to. This delicious creation is a culinary wonder, pairing easily with a range of flavors both sweet and savory. When you think about it, I bet you have at least one favorite treat that involves chocolate in some way, even if it’s a basic chocolate chip cookie or a tender chocolate cake.

These cupcakes remind me a bit of devil’s food, and the original recipe came from Taste of Home, one of my new favorite sites. I cut that recipe in half to make a dozen and chose to pair them with my favorite cocoa frosting, which uses simple ingredients you’re likely to have in your pantry. You could definitely go with the one in the original recipe, or use a vanilla frosting instead – but given that it’s World Chocolate Day, we’re going to go all-out chocolate.

Ingredients

For the cupcakes

  • 3/4 cup flour
  • 1/4 cup cocoa powder
  • 1/2 teaspoon baking soda
  • 1/8 teaspoon salt
  • 4 tablespoons butter, at room temperature
  • 3/4 cup sugar
  • 1 egg
  • 1/2 teaspoon vanilla extract
  • 1/4 cup buttermilk
  • 1/4 cup water

For the frosting

  • 4 tablespoons butter, melted
  • 1/3 cup cocoa powder, sifted
  • 1 3/4 cup powdered sugar, sifted
  • 3 tablespoons milk
  • 1 tablespoon vanilla
  • rainbow sprinkles, if desired

Preparation

Preheat oven to 375 degrees. Line a 12-well cupcake tin with paper liners.

In a small bowl, combine flour, cocoa powder, baking soda, and salt; set aside.

In a glass measuring cup, combine buttermilk and water; set aside.

In a mixing bowl, cream together butter and sugar until light and fluffy. Add egg and beat until well-combined, then add vanilla extract and beat until well-combined, scraping the sides of the bowl a few times.

Add flour mixture and buttermilk/water mixture alternatively in two batches, beating well after each.

Using a 2-inch cookie scoop, scoop dough into prepared cupcake wells, filling about 2/3 full.

Bake for 18-2o minutes, until a cake tester comes out clean. Remove from oven and cool in the pan for a few minutes (the original recipe suggests 10 minutes, but I cooled mine for about half that time), then remove to a wire rack to cool completely before frosting.

For the frosting: in a small bowl, combine melted butter and cocoa powder, whisking until smooth. Place mixture in the bowl of a stand mixer fitted with the paddle attachment; beat on low speed for 1 minute, then on medium speed for 2 minutes.

Add 1 cup powdered sugar and 1 tablespoon milk and beat until very well-combined, scraping the sides of the bowl well a few times. Add remaining powdered sugar and 1 more tablespoon milk and beat for about 1 minute; add vanilla and beat 1 minute more, then add final tablespoon of milk and beat for 2 minutes, until lighter in color and fluffy.

Fit a piping bag with a large star tip; pipe frosting onto cupcakes. Top with sprinkles if desired; store in an airtight container at room temperature.

Chocolate Whoopie Pies

chocolatewhoopiesThe whoopie pie: cake, cookie, or pie? To me, certainly not a pie; more of a cross between a cake and a cookie.

Whatever you call them, they come in many varieties. I’ve tried several, and have personally made chocolate peanut butter whoopie pies, lemon raspberry whoopie pies, and vanilla whoopie pies with chocolate filling. Despite this, nothing quite compares to the classic chocolate-cookie-with-fluffy-white-filling whoopie pie. This is my first attempt at the classic version, and I have to say: they are delicious. And enormous. And definitely not heart-healthy. But it’s not like you’ll eat them every day, right?

The recipe below is adapted from Cinnamon-Spice & Everything Nice, incorporating more powdered sugar into the filling to mellow out the sweetness of the marshmallow creme. That probably sounds impossible, but it’s true; a bit more powdered sugar cuts the sticky sweetness of the creme very well, and also stabilizes the filling a bit. Don’t skip the step where you let your filling chill in the refrigerator for just a few minutes; it sets up very nicely and yields a fluffy texture that complements the tender cookies very well.

Ingredients

For the chocolate cookies

  • 2 cups all-purpose flour
  • 1/2 cup unsweetened cocoa powder
  • 1 1/4 teaspoons baking soda
  • 1 teaspoon salt
  • 1 cup buttermilk
  • 1 teaspoon vanilla extract
  • 8 tablespoons butter, softened
  • 1 cup firmly packed brown sugar
  • 1 egg, at room temperature

For the fluffy white filling

  • 8 tablespoons butter, softened
  • 2 1/4 cups powdered sugar
  • 1 7-ounce jar marshmallow creme
  • 2 teaspoons vanilla extract

Preparation

Preheat oven to 350 degrees. Line three baking sheets with parchment paper; my recipe yielded 20 individual cookies for 10 complete whoopie pies.

In a medium bowl, combine flour, cocoa powder, baking soda, and salt; set aside.

In a medium glass measuring cup, combine buttermilk and vanilla; mix and set aside.

In a mixing bowl, beat butter on medium speed for 1 minute. Add brown sugar and cream until light and fluffy, about 2-3 minutes.

Scrape down your bowl very well and add the egg, then beat until well-combined.

Add flour mixture and buttermilk mixture alternatively, beginning and ending with the flour, mixing until combined after each.

Using a 2-inch cookie scoop, scoop very generous, heaping scoops of batter onto prepared sheets; you should have 6 cookies per sheet and need to leave a few inches of space between them, as they’ll spread as the bake.

Bake for 10-12 minutes, until tops are set and spring back lightly when touched. Remove from oven and cool on baking sheets for a few minutes before removing to a wire rack to cool completely before filling.

To make the fluffy white filling, beat butter on medium speed for 2 minutes, until light and fluffy. Add vanilla and marshmallow creme, beating for about 2 minutes to combine. Add powdered sugar 1 cup at a time, beating well to combine.

Chill filling for about 5 minutes in your refrigerator; this will allow it to set up slightly and provides a sturdier texture.

Flip cookies over and divide filling evenly among half of them; using a small offset spatula, spread filling slightly, then place another cookie on top.

Wrap each whoopie pie in plastic wrap for easy serving and storage. Since they are so large, it’s nice to be able to eat half of one and save the other half for later.


Chocolate Nutmeg Donuts

chocolatenutmegdonutsA donut for dessert? Why not?

I wonder who decided which treats went with, or after, which meals. What makes a donut, croissant, or coffee cake more appropriate for breakfast than dessert, and a cupcake, or a slice of pie, more appropriate for dessert than breakfast? Not that I’m advocating eating cupcakes for breakfast…although if the truth be told, I did have more than one breakfast of Little Debbie’s Swiss Cake Rolls in college.

Tonight, I wanted a chocolate donut for dessert, and not the kind you get at a chain. I wanted a cakey, tender, lightly glazed creation of chocolate and the slightest hint of spice. Nutmeg is a key ingredient in achieving that bakery donut flavor; without nutmeg, these donuts would taste more like chocolate cake than chocolate donuts.

The serving of Cool Whip in the photo here is optional, of course…but this was my dessert tonight. And it was delicious.

Ingredients

For the donuts:

  • 1 cup flour
  • 1/4 cup cocoa powder
  • 1/2 teaspoon baking soda
  • 1/4 teaspoon salt
  • 1/4 teaspoon nutmeg
  • 1/2 cup packed light brown sugar
  • 1/2 cup sour milk (see note below)
  • 1 egg
  • 4 tablespoons unsalted butter, melted
  • 1 teaspoon vanilla

For the glaze:

  • 1 cup powdered sugar
  • 3 teaspoons milk
  • 1 teaspoon vanilla

Preparation 

Preheat oven to 325 degrees. Spray a 6-well donut pan with baking spray.

Make sour milk; place 1/2 tablespoon white vinegar in a glass measuring cup. Add enough milk to equal 1/2 cup, then stir and let stand for 5 minutes.

In a large bowl, combine flour, cocoa powder, baking soda, salt, and nutmeg.

In a medium bowl, combine brown sugar, sour milk, egg, melted butter, and vanilla; stir until smooth, then add all at once to flour mixture. Stir until just combined and no dry streaks or large lumps remain.

Fill a piping bag or large zip-top bag with batter; pipe into wells, filling about 3/4 full.

Bake for 13-15 minutes; remove from oven and immediately remove donuts from wells. Cool on a wire rack before glazing.

To make the glaze, combine powdered sugar and milk, 1 teaspoon at a time, mixing until completely smooth. Add vanilla and stir well; you want a very thin glaze. Dip tops of donuts in glaze and allow to set before serving.

If you like, top donuts with a spoonful of whipped cream or other whipped topping just before serving.


Neapolitan Cupcakes

neapolitan cupcakes
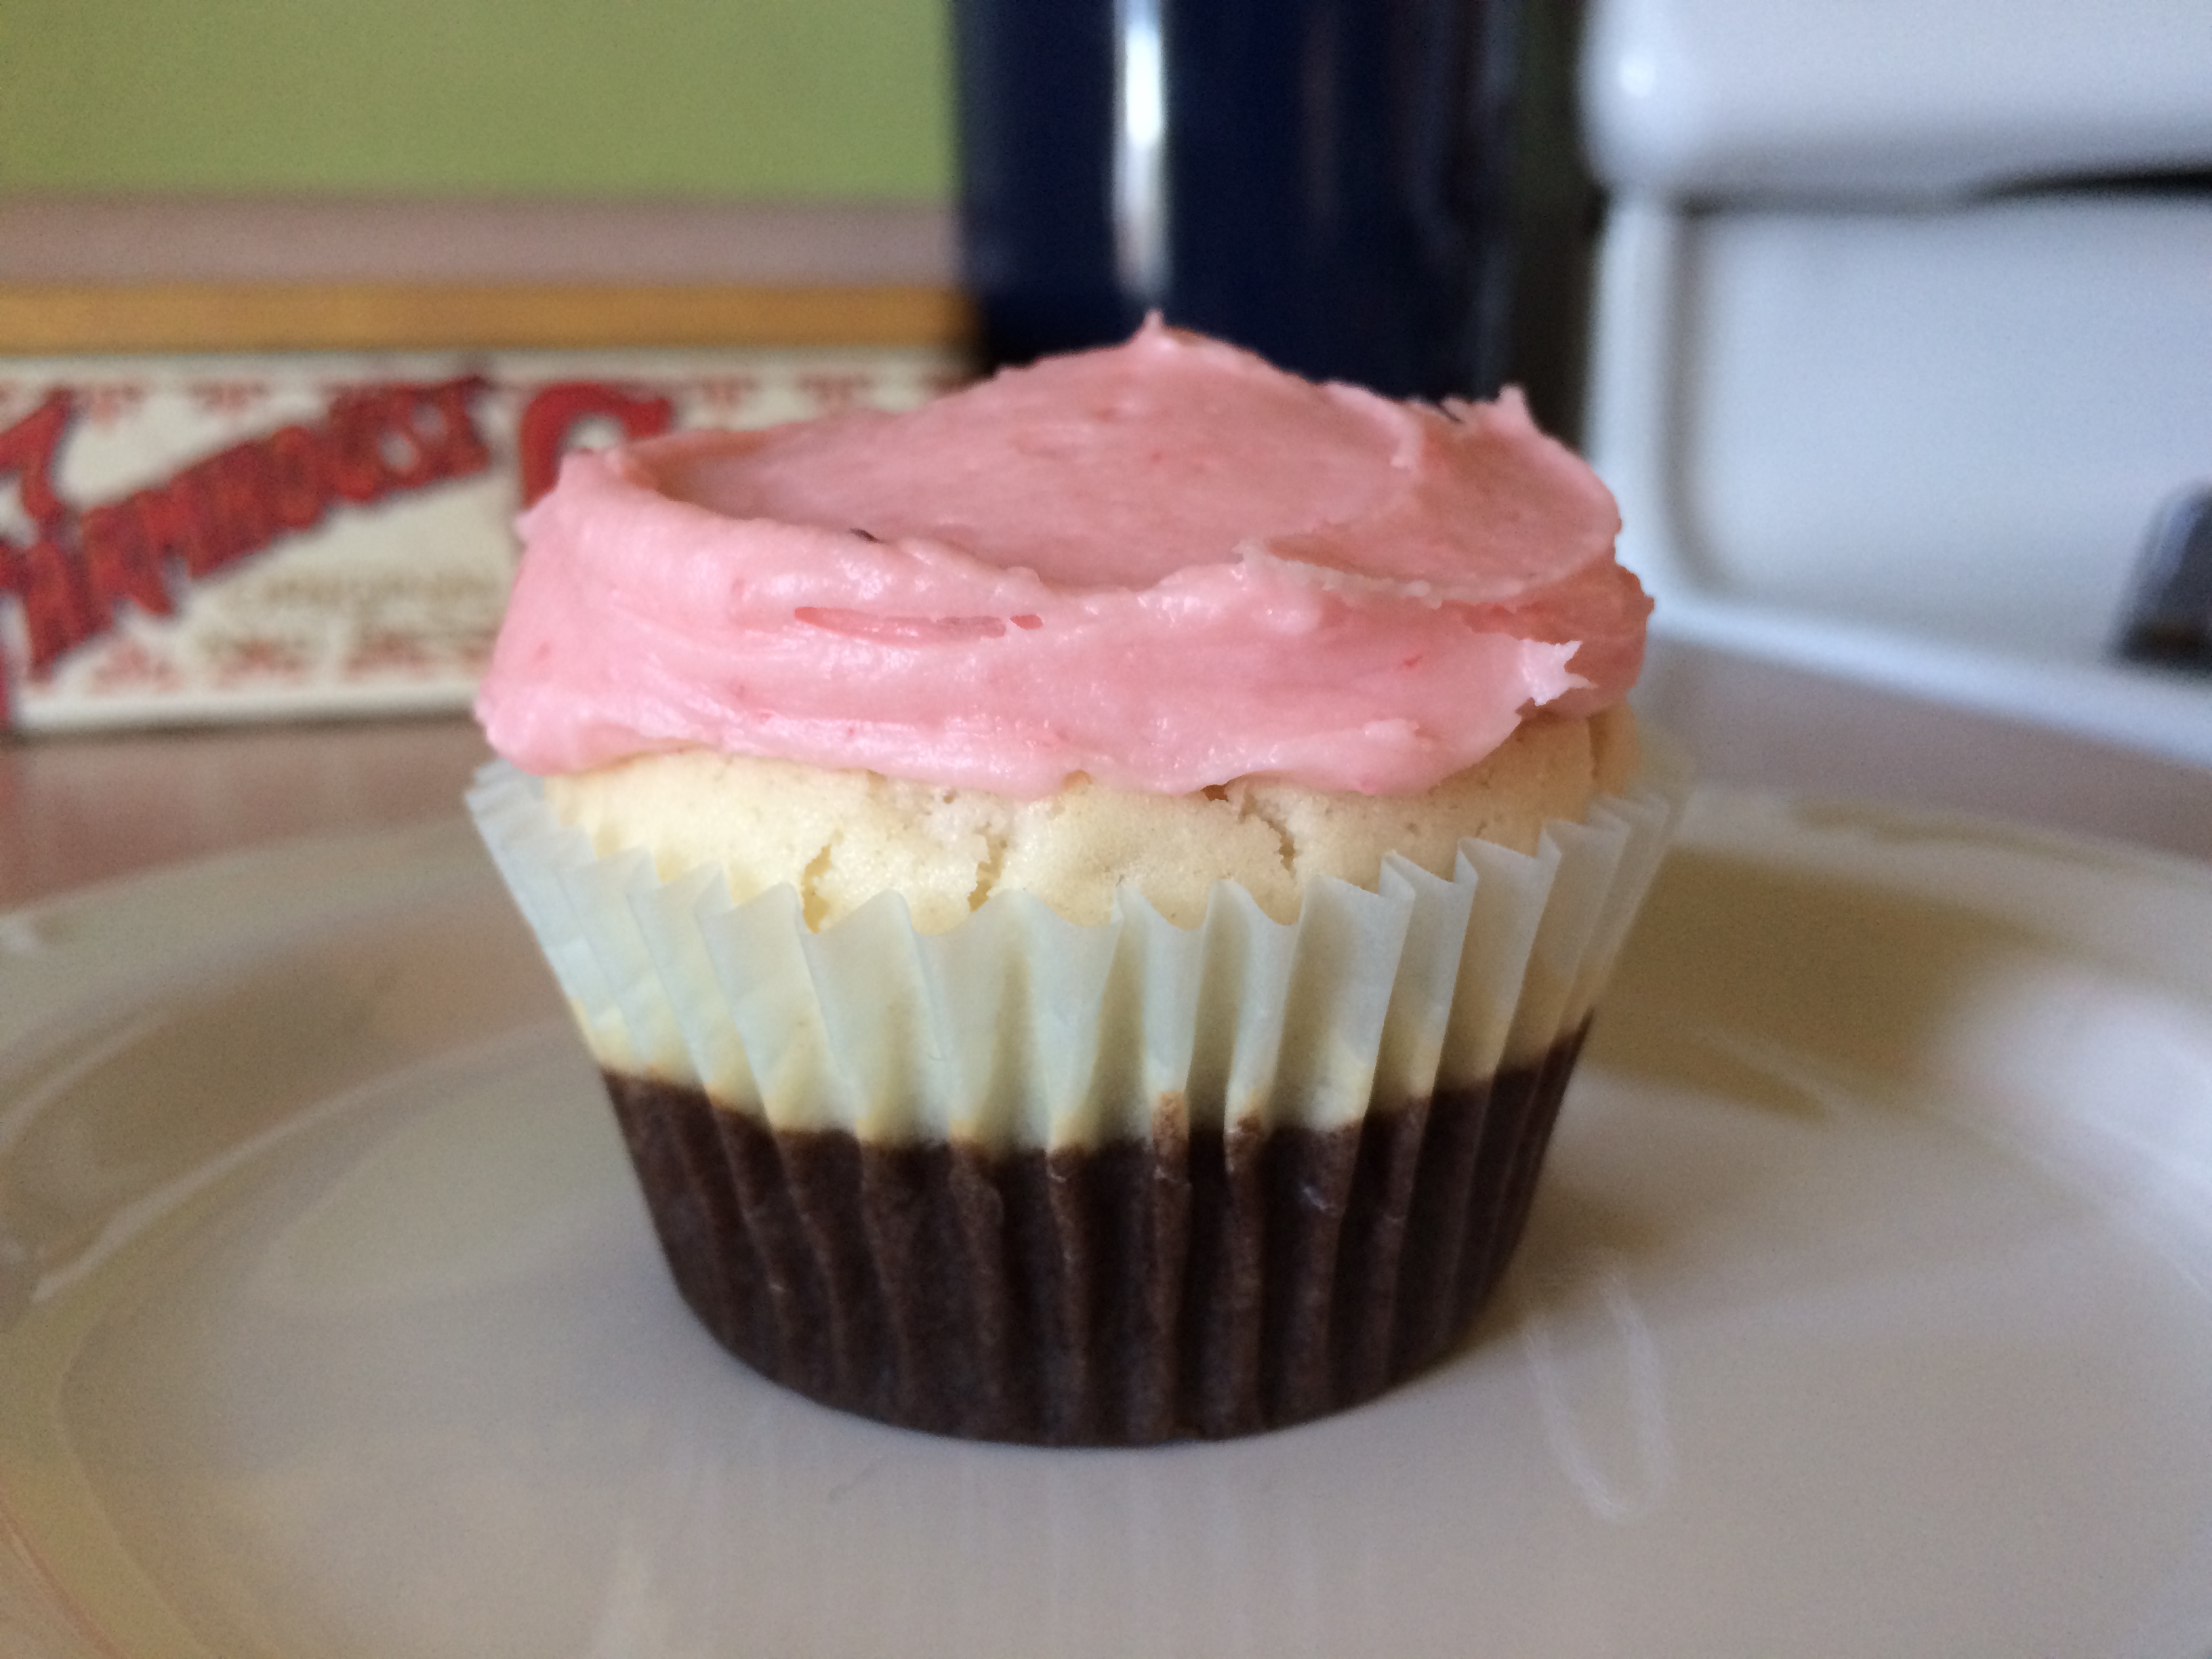
Meet the most adorable cupcakes I’ve ever baked. I wanted to make something challenging today, and I must say: mission accomplished.

These treats are a many bowl, multi-step endeavor, but they are worth it. I adapted this recipe in both ingredients and process from one I originally saw on another blog called Cooking Classy, using vanilla extract instead of scraped seeds from a vanilla bean and a different recipe for the strawberry frosting altogether.

The two batters have very different textures, and you’ll want to make sure you use the “spread with a toothpick” method to get the vanilla layer to fully cover the chocolate layer as I’ve outlined in the instructions below. While I did have some specs of chocolate pop through the top of my vanilla layer, it’s easy to cover those with frosting.

I’ve also included plenty of tips that saved me time (and dishes, being a baker without a dishwasher) throughout the process. I recommend reading through the recipe a few times to get familiar with it, as well as with your ingredients, before you start. You’ll end up with a few extra egg yolks from this, but you can reserve those for another use (mine are destined for lemon curd).

Ingredients

Vanilla Cupcake Layer

  • 1 1/2 cups cake flour
  • 1 1/2 teaspoons baking powder
  • 1/4 teaspoon salt
  • 7 tablespoons butter, room temperature
  • 3/4 cup sugar
  • 1/2 cup milk (any kind but skim)
  • 1 teaspoon vanilla extract
  • 3 egg whites (reserve one of your yolks for the yolk in the chocolate layer)

Chocolate Cupcake Layer

  • 1/3 cup unsweetened cocoa powder
  • 1/2 teaspoon baking soda
  • 1/2 cup boiling water
  • 4 tablespoons melted butter
  • 2 1/2 tablespoons vegetable oil
  • 3/4 cup granulated sugar
  • 1/4 cup heavy cream
  • 1 teaspoon vanilla extract
  • 1 whole egg
  • 1 egg yolk
  • 1 cup flour

Strawberry Buttercream Frosting

  • 8 tablespoons butter, at room temperature
  • 1/3 cup strawberry puree
  • About 3 cups powdered sugar

Preparation

Preheat oven to 350 degrees. Line two 12-cup cupcake tins with paper liners. Good news: this recipe makes exactly 24 cupcakes.

To make the cupcakes, begin by making the chocolate base for your chocolate batter first, then as it is cooling, make your vanilla batter and finish your chocolate batter once your base is cool. This will save time, believe me!

In a small mixing bowl, combine cocoa powder and baking soda. Add boiling water and whisk until smooth; allow to cool while you prepare the vanilla batter.

Prepare the vanilla batter:

In a small bowl, sift together cake flour, baking powder, and salt; set aside. In a glass measuring cup, combine milk, egg whites, and vanilla extract and whisk together until well-combined.

In a mixing bowl, combine butter and sugar. Cream together until light and fluffy.

Add the flour mixture and milk mixture alternatively in three batches, beginning and ending with the flour mixture. You want to scrape your bowl very, very well and frequently throughout the process. Your vanilla batter will be light and fluffy when it is finished; almost mousse-like. Set vanilla batter aside while you make the chocolate batter.

Prepare the chocolate batter:

In a mixing bowl, combine melted butter, vegetable oil, sugar, and mix until well-combined. Add egg, egg yolk, and vanilla; mix until combined. Add chocolate base, then heavy cream, mixing after each addition. Add flour, beating on low speed until combined.

Using a 2-inch cookie scoop, scoop chocolate batter into each cupcake well. If you don’t have a cookie scoop, you can use 2 tablespoons of batter in each well.

Using the 2-inch cookie scoop again, scoop vanilla batter and carefully layer over the chocolate batter. Use a toothpick to gently spread the vanilla batter, which is much lighter and fluffier than the chocolate batter, over the chocolate layer completely. Your wells should be about three-quarters full.

Bake for 18-20 minutes, until a cake tester comes out clean. Remove from oven, and remove cupcakes from the pans onto wire racks to cool completely.

Prepare the strawberry buttercream:

If you’ve never made strawberry puree, it is very easy. Place strawberries in a food processor (or blender) and puree until smooth. You can pass the puree through a sieve to remove the seeds if you like, but I leave mine in.

In a mixing bowl, beat butter on medium speed for about 1 minute. Add the first 2 cups of powdered sugar about 1/2 cup at a time, mixing until very well-combined.

Add strawberry puree in small batches, mixing well between each addition, then add enough additional powdered sugar – mine took about 1 cup – to make a stable buttercream.

Frost cupcakes using a small offset spatula. You can pipe them if you prefer, but I like the old-fashioned look of a hand-frosted cupcake.
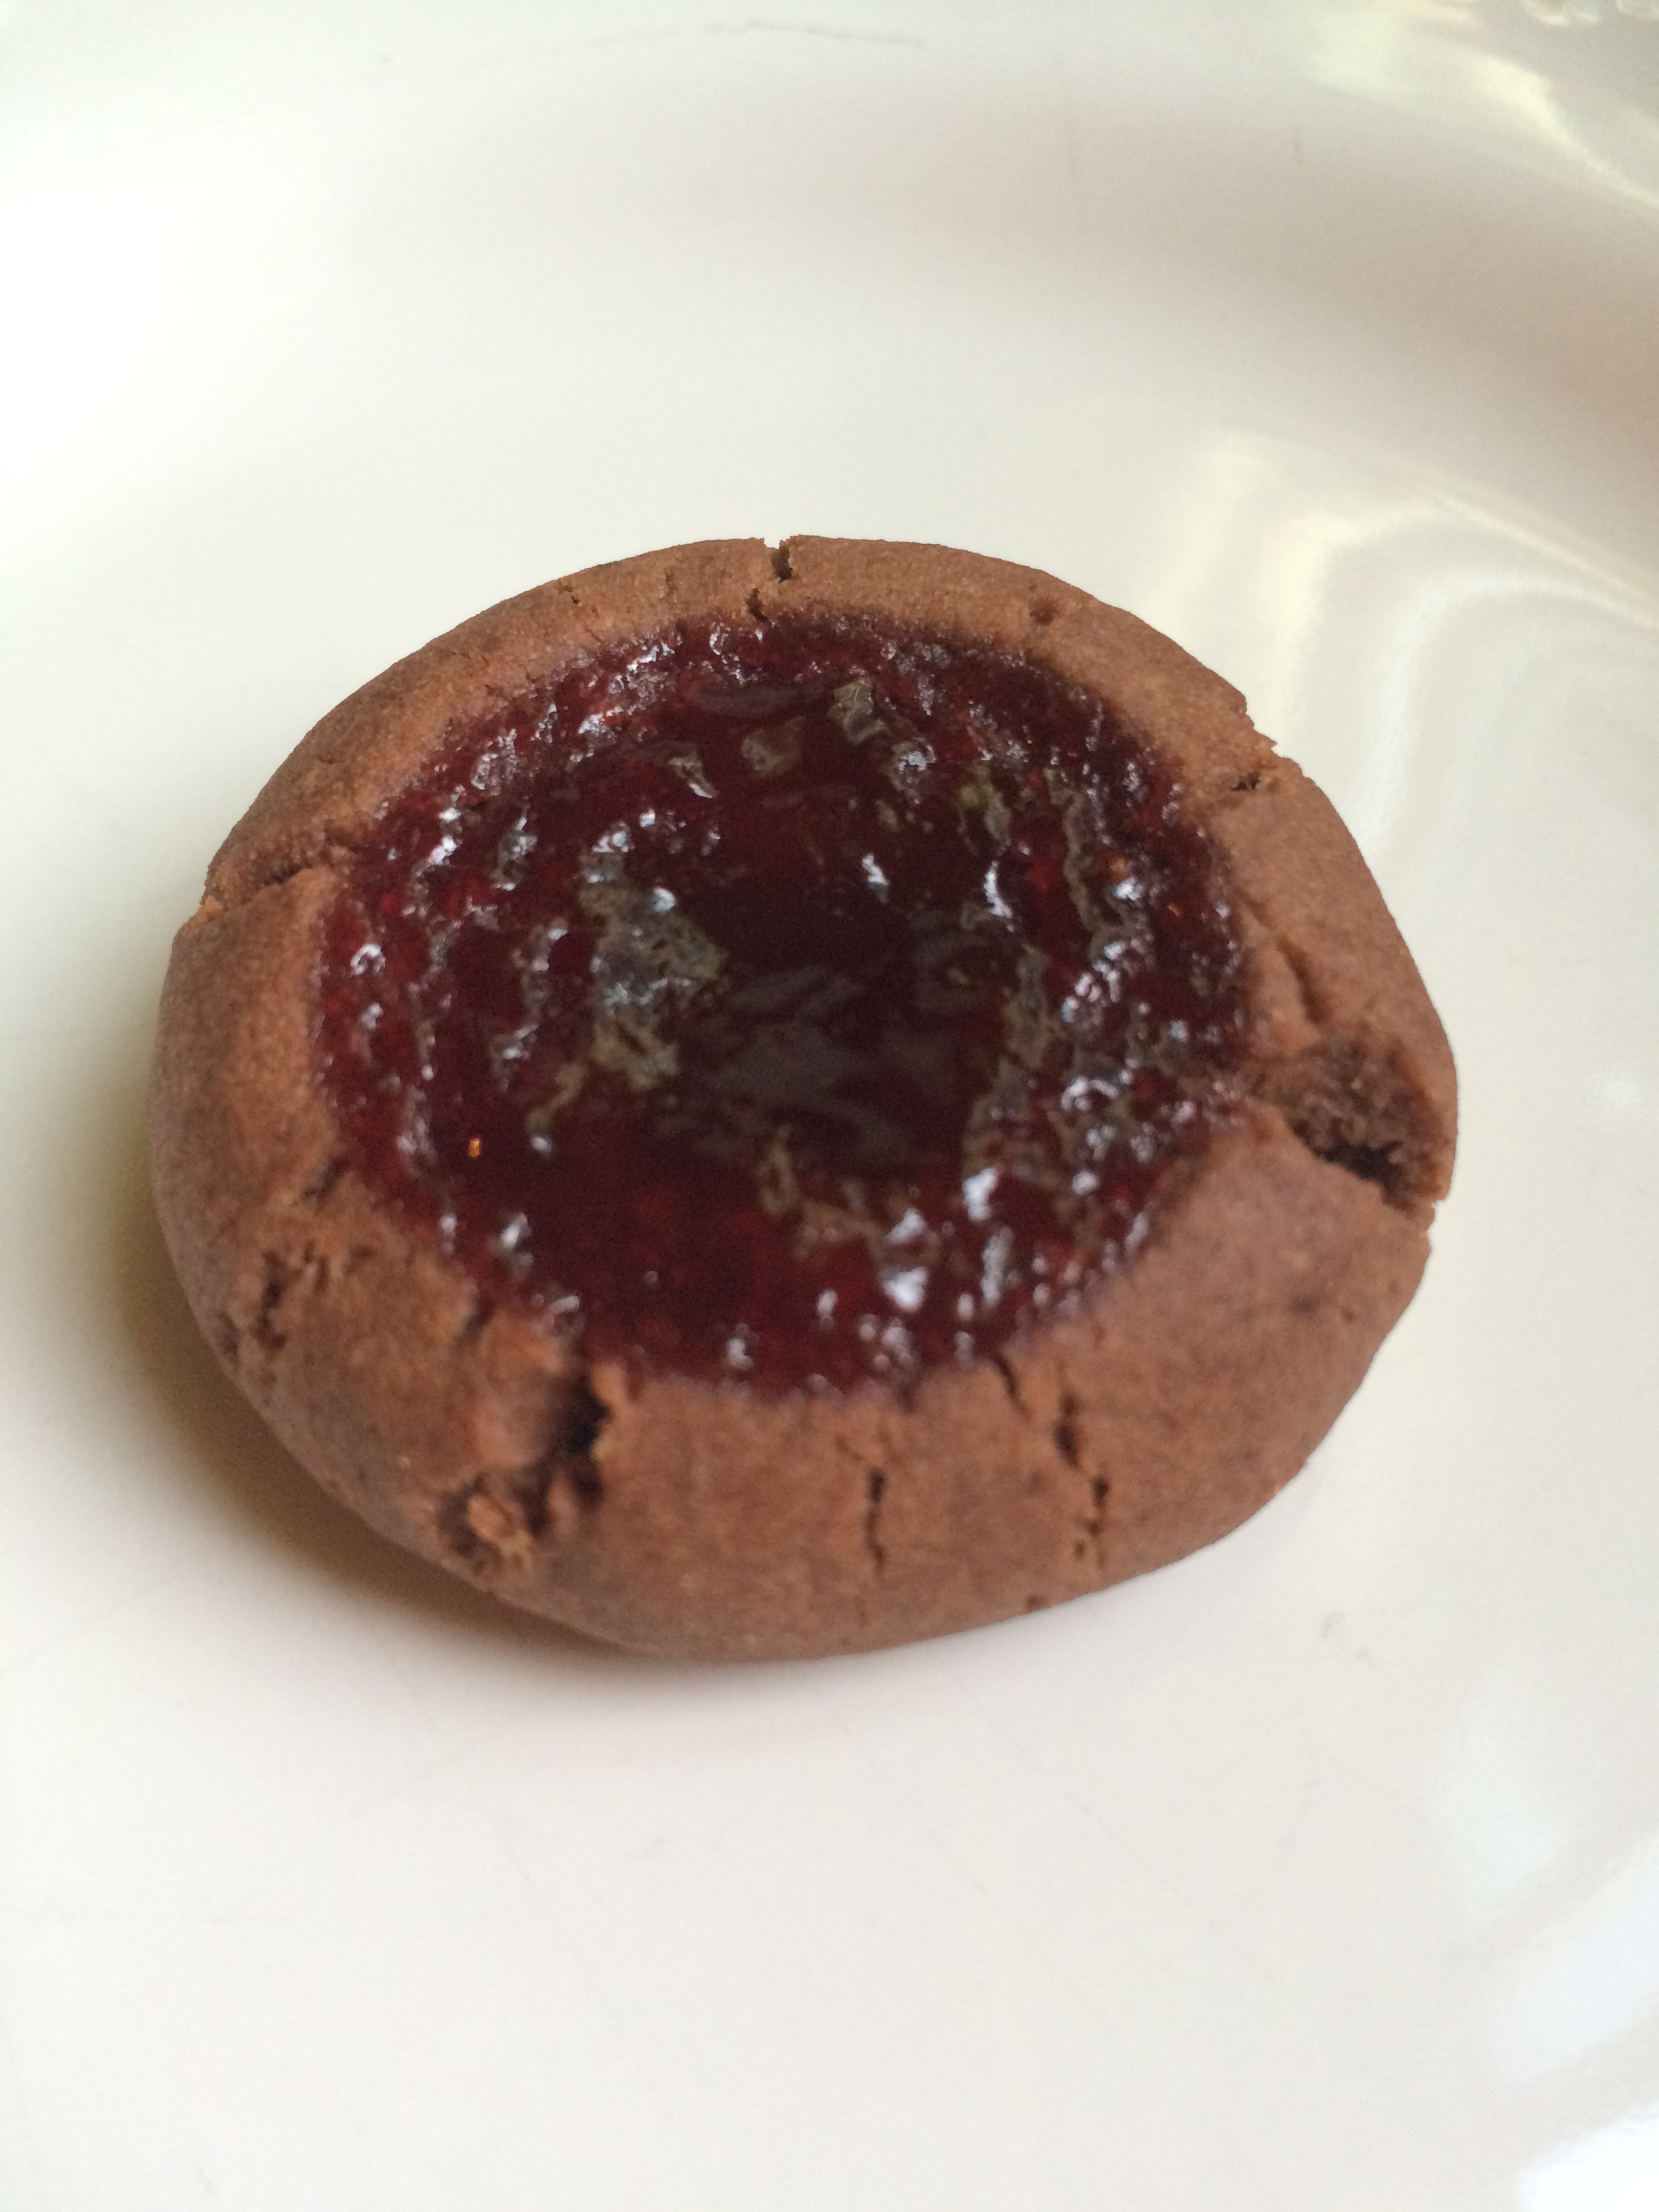
 

Mint Chocolate Brownies

mintbrowniesMy cousin-in-law Robb recently made a mint chocolate brownie and shared the recipe with me. This is the first time I’ve ever made brownies with chocolate syrup, and it definitely won’t be the last. The brownies themselves are fudgy and cake-like at the same time, a texture I’ve never before achieved.

I can see this recipe getting adapted for raspberry or strawberry buttercream and a semisweet or bittersweet chocolate layer on the top. While the original mint recipe Robb sent to me calls for creme de menthe, I didn’t have any in our liquor cabinet (as I would imagine most people don’t). I did a bit of internet searching and found another recipe that incorporated peppermint instead, so I’ve used that here. I also tweaked the peppermint layer to taste, adding vanilla and milk, to soften the mint flavor slightly. The end result is something like an Andes candy, but way, waaay better.

Ingredients

For the brownie layer

  • 8 tablespoons butter, softened
  • 1 cup sugar
  • 4 eggs, beaten
  • 1 16-ounce can chocolate syrup
  • 1 teaspoon vanilla
  • 1 cup flour

For the mint layer

  • 8 tablespoons butter, softened
  • 2 cups powdered sugar
  • 1 tablespoon peppermint extract
  • 1 1/2 teaspoons vanilla extract
  • 1 1/4 tablespoons milk
  • green liquid food coloring

For the chocolate layer

  • 6 ounces milk chocolate chips
  • 6 tablespoons butter

Preparation

Preheat oven to 350 degrees. Grease a 9 x 13 baking pan or spray with baking spray.

In a mixing bowl, cream butter and sugar together until fluffy. Add eggs, chocolate syrup, and vanilla and beat on low, then medium speed, until combined. Add flour and beat until combined. Batter will be quite thin. Pour into prepared pan.

Bake for 30 minutes; the top will look shiny and wet, but a cake tester should come out clean.

Cool brownies completely in the pan before adding the mint and chocolate layers.

To make the mint layer, beat butter and powdered sugar on low, then medium speed, until fully incorporated. Add peppermint extract, vanilla, and milk; add green food coloring to tint to a light green color.

Spread evenly over brownies.

To make the chocolate layer, melt chocolate chips and butter together on a very low flame. Cool to room temperature, then pour over mint layer, spreading with an offset spatula to cover completely.

Allow chocolate layer to set before serving.


Chocolate Caramel Cookies

chocolate caramelRolos have been around since 1937. Originally manufactured in Britain, they are made by Nestle everywhere except the United States, where the fine folks at Hershey’s produce them alongside other heavenly treats like Reese’s Peanut Butter Cups, Kit Kats, and Mr. Goodbars.

So, what happens when you take a Rolo and wrap chocolate cookie dough around it? You get a delicious treat, like these cookies.

The original recipe I found included a salted caramel drizzle, and the next time I make these, I’ll definitely include it. While they’re certainly delicious on their own, I think these cookies could benefit from an extra kick of caramel and a sprinkle of sea salt.

Ingredients

  • 2 3/4 cups flour
  • 3/4 cup cocoa powder
  • 1 teaspoon baking soda
  • 1/4 teaspoon salt
  • 1 cup butter, softened
  • 1 cup sugar
  • 1 cup packed light brown sugar
  • 2 eggs
  • 2 teaspoons vanilla
  • 36 Rolo candies, unwrapped

Preparation

Preheat oven to 375 degrees. Line several baking sheets with parchment paper.

In a medium bowl, combine flour, cocoa powder, baking soda, and salt; set aside.

In a mixing bowl fitted with the paddle attachment, beat butter on medium speed for 30 seconds.

Add sugar and brown sugar, beating until light and fluffy, scraping the sides of the bowl frequently.

Add eggs, one at a time, beating until combined, then add vanilla and beat until combined.

Add flour mixture about a half-cup at a time, mixing well between each addition and scraping the sides of the bowl frequently.

Using a 2-inch cookie scoop, shape dough into balls and press a Rolo into each center, shaping dough around the candy to enclose it.

Place cookies about 2 inches apart on prepared sheets and bake for 10 minutes, until edges are firm. Remove from oven and allow to cool for a few minutes on cookie sheets, then remove to a wire rack to cool completely.

Store in an airtight container at room temperature.

Milk Dud Brownies

milk dud browniesDespite my overwhelming appreciation for chocolate and caramel, I rarely eat Milk Duds. This year, one of our Halloween candy mixes included miniature boxes of them, and because it rained on Halloween we had plenty left over. What’s one to do with leftover Milk Duds? Turn them into brownies, of course.

This recipe comes from Bakeaholic Mama and reminds me of a flourless chocolate cake – the finished product is very dense, very chewy, and quite delicious. My only challenge was cutting them – once they were cool, I was able to score them well, but actually removing them from the pan without having them crumble was next to impossible. Next time, I might add one additional teaspoon of flour to stabilize them a bit.

Ingredients

  • 5 1/2 teaspoons butter, melted
  • 3/4 cup sugar
  • 1/8 teaspoon salt
  • 1/2 teaspoon vanilla extract
  • 1 egg
  • 3 tablespoons flour
  • 1/2 cup cocoa powder
  • 1/2 cup Milk Duds, chopped

Preparation

Preheat oven to 350 degrees. Spray the bottom of an 8 x 8 pan with baking spray.

In a medium bowl, mix butter, sugar, salt, vanilla, and egg until well-combined.

Add flour and cocoa powder and stir to combine; fold in Milk Duds.

Spread batter in pan and bake for 15-20 minutes, until a cake tester comes out clean.

Cool in pan before cutting.

Chocolate Sour Cream Cake

sour cream chocolate cakeI love recipes that employ old-fashioned methods in preparation; melting chocolate on a low flame, beating an egg with a fork, actually mixing batter by hand. This is one such recipe, put to use because I had a container of sour cream staring at me from next to the buttermilk I’d been baking with all last week. Somewhere along the line, I began keeping sour cream on hand in the same way that I always have various baking chocolates, canned pumpkin, and molasses in my pantry. I never know when inspiration will strike and require a cultured dairy product.

This recipe comes from one of my favorite books, Miriam’s Kitchen, an exploration of the connections between food, family, and cultural identity. I read Miriam’s Kitchen at least once a year, usually in the fall, and I’ve been wanting to try this recipe for some time. The end result has great chocolate flavor, but is slightly drier than I’d like it to be – such can be the case with chocolate cakes, and is perhaps why they’re often paired with fudgy icing. This icing is a thick version of a chocolate drizzle; if I make this cake again, I might use a chocolate buttercream or a fudge frosting instead to add a bit of moisture.

Ingredients

For the cake

  • 8 tablespoons unsalted butter
  • 2 1/2 ounces unsweetened baking chocolate
  • 1 egg, beaten
  • 1 cup sugar
  • 1 cup sour cream
  • 1/4 teaspoon baking soda
  • 1 1/4 cup cake flour

For the icing

  • 3 tablespoons butter
  • 2 tablespoons unsweetened cocoa powder
  • 2 cups powdered sugar
  • 1 teaspoon vanilla
  • 2 tablespoons milk

Preparation

Preheat oven to 350 degrees. Grease a bundt pan very well and flour lightly.

In a small saucepan, melt butter and chocolate on very low heat, stirring frequently to combine.

In a large mixing bowl, combine egg and sugar; beat with a fork to combine, then add sour cream and beat again to combine. Scrape the sides of the bowl with a spatula as necessary.

Place a sieve over the mixing bowl and sift in cake flour and baking soda, then mix with a wooden spoon until combined.

Add melted chocolate and butter, mixing with the wooden spoon until combined.

Pour batter into prepared bundt pan; bake for 35-40 minutes, until a cake tester comes out clean. Cool completely in the pan, then turn out onto a wire rack.

Prepare the icing: in a medium saucepan, melt butter. Add cocoa powder and stir until smooth. Remove from heat; add 1 cup powdered sugar and stir until smooth; add vanilla, milk, and remaining powdered sugar to reach a thick drizzling consistency. Pour over cake and spread with an offset spatula; icing will set fairly quickly.