Turtle Cookies

turtlecookiesChocolate + caramel + pecans = one of my favorite things ever. Earlier this summer I baked pecan turtle cupcakes, and within a few weeks these turtle cookies from The First Year Blog came across my Pinterest feed. They looked amazing in the photo…but when I baked them, wow. The photo you see here is of one of the very few that didn’t turn out to look like a total mutant. See below for the mutants, they’re actually quite entertaining. Also, there’s no Teenage Mutant Ninja Turtles pun intended here, but haha.

What happens is that the caramel pieces melt, then explode out of the cookies at whatever random point they see fit. One of my cookies looked like the Millennium Falcon from Star Wars, which was actually pretty cool. Anyway…these treats are insanely delicious, but really, really rich. If I make them again, I’ll use caramel bits instead of chopping up caramel squares (how much does caramel stick to a knife? Too much, thanks.) and will use a one-inch cookie scoop so they’re smaller, just a few bites each.

Ingredients

  • 1 1/4 cups flour
  • 1/4 cup cocoa powder
  • 1/2 teaspoon salt
  • 1/2 teaspoon baking soda
  • 8 tablespoons butter, softened
  • 1/2 cup light brown sugar
  • 1/2 cup granulated sugar
  • 1 egg
  • 1 teaspoon vanilla extract
  • 1/2 cup semisweet chocolate chips
  • 1/2 cup chopped caramel squares, or caramel bits
  • 1/2 cup chopped pecans

Preparation

Preheat oven to 350 degrees. Line several baking sheets with parchment paper.

In a small bowl, stir together chocolate chips, chopped caramel pieces, and chopped pecans; set aside. In a medium bowl, stir together flour, cocoa powder, salt, and baking soda; set aside.

Cream butter and sugars until light and fluffy. Add egg and vanilla and beat to combine. Add in flour mixture and beat on low to combine; stir in chocolate chip/caramel/pecan mixture.

Scoop dough using a two-inch cookie scoop and roll into balls; place about two inches apart on baking sheets and bake for 10-14 minutes; tops will crack, but edges will be set. Remove from oven and cool on the baking sheets for about 4-5 minutes, then place on a wire rack to cool completely. Makes about 21.

mutantturtlesMutant cookies! Check out the Millennium Falcon on at the top. 

Chocolate Crinkles

chocolatecrinkles

Chocolate crinkles are a classic…but typically coated in powdered sugar. And while this is totally fine with me at Christmas, I wondered what they’d be like coated in regular granulated sugar, like a peanut butter cookie. The result, I’m happy to report, is really delicious.

This recipe is based on the chocolate peppermint crinkles I made many years ago; I’d like to try a chocolate orange version as well, so stay tuned. If you prefer to coat these in powdered sugar, go for it, but bear in mind that powdered sugar-coated things don’t fare terribly well at the height of summer.

Ingredients

  • 3/4 cup flour
  • 1/4 cup unsweetened cocoa powder, sifted
  • 1 teaspoon baking powder
  • 2 ounces unsweetened baking chocolate, chopped
  • 2 tablespoons butter, cut into small pieces
  • 1/4 teaspoon salt
  • 1 cup sugar
  • 1 1/2 teaspoons vanilla bean paste (or extract)
  • 2 eggs
  • Granulated sugar for coating

Preparation

In a medium bowl, combine flour, cocoa powder, and baking powder; set aside.

Combine baking chocolate, butter, and salt in a small saucepan and melt over very low heat, stirring well to combine. Pour mixture into a medium bowl and add sugar, stirring well, then add vanilla bean paste and stir until smooth. Add flour mixture and stir until completely combined; mixture will thicken. Cover with plastic wrap and chill for at least 1 hour, until easier to handle.

Preheat oven to 350 degrees. Line two baking sheets with parchment paper.

Using a one-inch cookie scoop, scoop generous portions of dough and roll into balls, then dip in sugar and toss to coat very well. Place cookies about 2 inches apart on baking sheets and bake for 11 minutes; remove from oven and allow to cool on baking sheets for about 4-5 minutes before removing to wire racks to cool completely.

Store in an airtight container at room temperature. Makes 18.

Brownie Cookies

browniecookiesSo, all the benefits of a brownie in cookie form? Yeah, sign me up. I don’t know who thought of this, but they’re a genius and deserve some type of Nobel Prize. Wouldn’t it be awesome if there were a Nobel Prize for baking? Anyway…

Not to be confused with the brookie, which is a combination of a brownie and a chocolate chip cookie, these brownie cookies are literally brownies in cookie form. They’re fudgy without being gooey – an important aspect of brownie-ness in my opinion – and just really, really delicious. The original recipe comes from Erren’s Kitchen, and I left out the optional sprinkle of sea salt because I didn’t have it – but I’m glad I didn’t, because I feel like these treats are perfect without it.

Ingredients

  • 1 1/4 cups flour
  • 1/4 cup cocoa powder
  • 1 teaspoon baking powder
  • 1/2 teaspoon salt
  • 1 cup semisweet chocolate chips
  • 8 tablespoons butter
  • 1 teaspoon instant coffee granules
  • 1 teaspoon vanilla extract
  • 2 eggs
  • 1 cup light brown sugar
  • 1/4 cup granulated sugar

Preparation

Sift together flour, cocoa powder, baking powder, and salt; set aside. In a medium saucepan over low heat, combine chocolate chips, butter, coffee granules, and vanilla and stir until melted and smooth; set aside to cool for a few minutes. In a mixer, beat eggs, brown sugar, and granulated sugar until light in color, about 3-4 minutes. Beat in the chocolate/butter mixture, then fold in the flour mixture. Cover your bowl with plastic wrap and let it sit at room temperature for about 30 minutes.

Preheat oven to 350 degrees. Line several baking sheets with parchment paper. Using a 2-inch cookie scoop, drop scoops of dough onto the baking sheets, leaving about 2 inches between each – I baked 6 cookies per sheet.

Bake for 10-12 minutes, until edges are set and tops are puffy. Remove from oven and cool on baking sheets for 5 minutes, then place on a wire rack to cool completely. Makes about 27.

Monster Cookies

monstercookiesI’ve baked for most of my life and blogged recipes for more than 10 years now. But never until today have I made monster cookies, one of those staple recipes that you find in almost any baking book. And let me tell you: I have been missing out. These things are delicious.

Apparently they’re called monster cookies because they combine so many different ingredients, like Frankenstein’s monster. Despite this macabre analogy, they are amazing – a peanut butter oatmeal cookie with chocolate chips and M&Ms. You can also add butterscotch chips or other ingredients if you want to, but I really had enough going on in my dough with just the basics. You’re also supposed to bake these in monstrous size – using a 1/4 cup measuring cup to portion out the dough – but I used a 2-inch cookie scoop. Seriously, I don’t think I’ll ever be the same again.

Ingredients

  • 1 1/2 cups old-fashioned oats
  • 1/2 cup flour
  • 1/2 teaspoon baking soda
  • 1/4 teaspoon salt
  • 8 tablespoons butter, at room temperature
  • 1/2 cup peanut butter (I used crunchy)
  • 1/2 cup sugar
  • 1/2 cup brown sugar
  • 1 egg
  • 2 teaspoons vanilla extract
  • 3/4 cup milk chocolate chips
  • 3/4 cup M&Ms, plus more for topping

Preparation

Preheat oven to 350 degrees. Line four baking sheets with parchment paper.

Combine oats, flour, baking soda, and salt in a medium bowl; set aside.

In a mixer fitted with the paddle attachment, beat butter, peanut butter, and sugars until smooth. Add egg and vanilla and beat to combine; scrape your bowl a few times to make sure everything incorporates. Stir in flour mixture, then chocolate chips and M&Ms.

Using a 2-inch cookie scoop, drop scoops of dough onto the baking sheets, leaving about 2 inches between each cookie. Bake for 10-12 minutes, until edges are golden but tops are still puffy. Remove from oven and press a few M&Ms into the tops of the cookies if you like. Cool on the baking sheets for 3-4 minutes, then remove to a wire rack to cool completely. Makes about 25.

Chocolate Peanut Butter Cookies

chocolatepbcookies
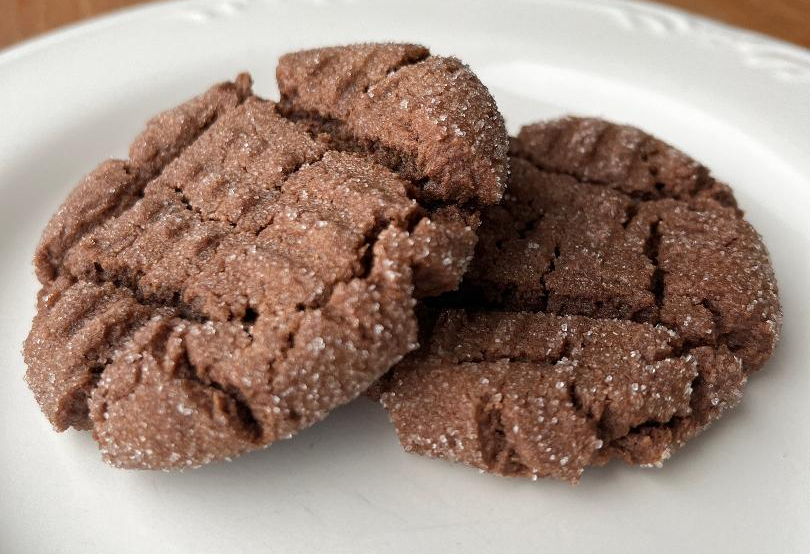
So, peanut butter cookies. Delicious, yeah? How about adding some cocoa powder to them? I’ve seen a bunch of chocolate peanut butter cookie recipes on Pinterest lately and took it as a sign from the universe to bake some myself.

This recipe comes from Kitchen Fun, and you can make them with either shortening or butter. I’ll use butter next time, and I also recommend rolling the cookies in sugar before baking them, like you would a regular peanut butter cookie. Be careful not to over-bake them; they’ll still look puffy and kind of underdone when you pull them from the oven, but they continue to bake on the sheets for a few minutes while they cool.

Ingredients

  • 1/2 cup shortening
  • 3/4 cup creamy peanut butter
  • 1 1/2 cups packed light brown sugar
  • 3 tablespoons milk
  • 1 teaspoon vanilla extract
  • 1 egg
  • 1 1/4 cups flour
  • 1/2 cup unsweetened cocoa powder
  • 1 teaspoon baking soda
  • 1/2 teaspoon salt
  • Granulated sugar, for rolling

Preparation

Preheat oven to 375 degrees. Line several baking sheets with parchment paper.

In a mixer with a paddle attachment, beat shortening, peanut butter, brown sugar, milk, and vanilla until smooth. Add egg and beat, then scrape down your bowl and beat in flour, cocoa powder, baking soda, and salt.

Scoop 1-inch balls of dough and roll in granulated sugar, then place on baking sheets. Press down with a fork to make the crisscross pattern like on a regular peanut butter cookie. Bake for 7-8 minutes, until edges are just set. Remove from oven and cool on baking sheets for 2-3 minutes, then place on a wire rack to cool completely Makes 36.

Brown Sugar Cookies

brownsugarcookies
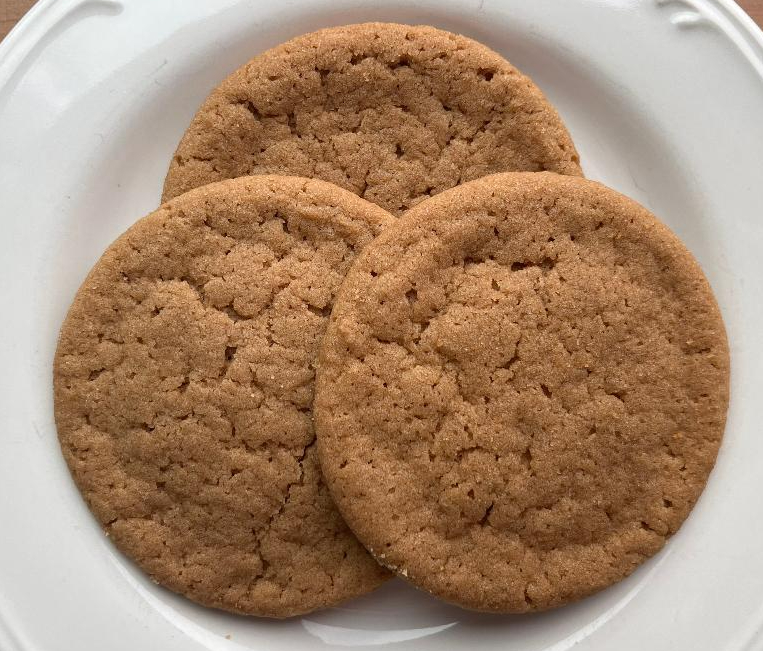
What happens when you make sugar cookies with dark brown sugar? Magic, that’s what.

Dark brown sugar has a higher quantity of molasses than light brown sugar, so anything baked with it has a more caramelly (is that a word? It is now) flavor, which is definitely true of these treats. A word of caution, though: these cookies are incredibly soft and bendy, so I’d recommend baking them a little longer than the original 8 minutes in the recipe, which I found at C&H Sugar. They need about 12-14 minutes, along with about 5 minutes of cooling time on the baking sheets once they’re out of the oven. And also, if you spread peanut butter on them, they taste a lot like Mary Janes, so a peanut butter-filled sandwich version of these certainly isn’t a bad idea.

Ingredients

  • 2 cups dark brown sugar
  • 8 tablespoons butter, softened
  • 8 tablespoons shortening
  • 1 teaspoon baking soda
  • 1 teaspoon cream of tartar
  • 1/4 teaspoon salt
  • 1 egg, at room temperature
  • 1/2 teaspoon vanilla extract
  • 1 3/4 cups flour

Preparation

Preheat oven to 300. Line four baking sheets with parchment paper.

In a mixer fitted with the paddle attachment, beat dark brown sugar, butter, and shortening at medium speed for two minutes. Add baking soda, cream of tartar, and salt and beat until combined, then beat in egg and vanilla. Add flour and mix until combined.

Using a two-inch cookie scoop, drop dough onto baking sheets and flatten slightly. Bake about 12-14 minutes (start checking them around 8-9 minutes), until edges are golden brown. Remove from oven and let rest on the baking sheets for five minutes, then place on a wire rack to cool completely. Store at room temperature for 2-3 days; these treats are really soft and will start to fall apart (quite literally) after just a few days, but they’re absolutely worth baking. Makes about 24.

Amaretti

amaretti
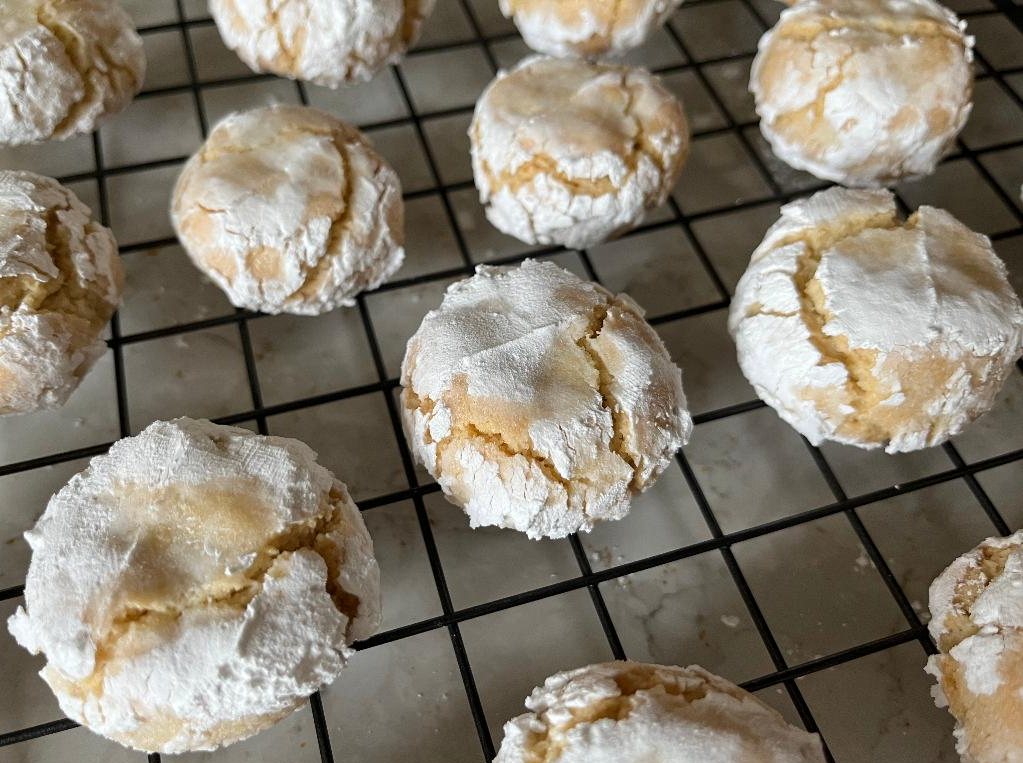
Are amaretti the OG gluten-free cookies? Maybe. According to a random internet source, they apparently go all the way back to the 17th or 18th century. Regardless of how long they’ve been around, these little nuggets of Italian cookie goodness are like a rustic version of the macaron, and they are way, waaaay less work.

To make amaretti you mix six ingredients in a bowl. Then you chill the dough, scoop it, coat it in powdered sugar, and bake it. No triple sifting of almond flour, no room temperature egg whites, no piping bag, no letting things “cure” to form that shiny macaron top. They’re crunchy on the outside and chewy on the inside, and apparently the textures get more intense after a few days. I don’t think they’ll last long enough for anyone to find out, though.

Ingredients

  • 3 cups almond flour
  • 2/3 cup sugar
  • 6 tablespoons powdered sugar, plus more for coating
  • 1/4 teaspoon salt
  • 2 large egg whites
  • 1/2 teaspoon almond extract

Preparation

In a large mixing bowl, stir together almond flour, sugar, powdered sugar, and salt. Add egg whites and almond extract and mix until the dough comes together like a paste. Flatten into a disc and wrap in plastic, then chill for about 1 hour.

Preheat oven to 325; line two baking sheets with parchment and place additional powdered sugar into a shallow bowl. Scoop and roll the dough into 1-inch balls, then toss to coat in the powdered sugar. Place on the baking sheets and flatten slightly.

Bake for 25-30 minutes, until golden brown. Remove from oven and allow to cool on the baking sheets for 5 minutes, then place on a wire rack to cool completely. Makes 28.

Vanilla Sugar Cookies

vanillasugarcookiesHere’s a classic: the sugar cookie. But not one of those way-too-sweet, only-take-a-few-bites sugar cookies you can find at almost any bakery. These (admittedly enormous, at four inches wide) sugar cookies have nutmeg and vanilla bean paste in them, which means they’re just delicious without being too sugary and have a more mellow flavor. These treats also have great texture, with a crispy edge and soft middle.

One caveat: be careful not to overbake these. Pull them from the oven when the middles are still puffy and look just a bit underdone but the edges are golden, as they’ll continue to bake while they cool.

Ingredients

  • 12 tablespoons butter, slightly softened
  • 3/4 cup sugar
  • 1/2 cup light brown sugar
  • 2 teaspoons vanilla extract
  • 1/4 teaspoon nutmeg
  • 1 1/2 teaspoons baking powder
  • 1/2 teaspoon baking soda
  • 1/2 teaspoon salt
  • 1 egg
  • 2 1/2 cups flour
  • 1/4 cup sugar for coating

Preparation

Preheat oven to 375. Line several baking sheets with parchment paper. Place 1/4 cup sugar in a small bowl; set aside.

In a mixing bowl, beat butter on medium speed for about 1 minute; add sugar, brown sugar, vanilla extract, nutmeg, baking powder, baking soda, salt, and egg and beat until well combined. Add flour and beat to combine.

Using a 2-inch cookie scoop, scoop dough, roll into balls, and dip in sugar to coat completely.

Place cookies at least 2 inches apart on baking sheets; they will spread some when baking. I put 6 cookies per sheet, and that worked well.

Bake for 10 minutes, until edges are barely beginning to brown and centers still look puffy. Cool on baking sheets for 5 minutes, then remove to a wire rack to cool completely. Store in an airtight container at room temperature. Makes 22 four-inch cookies; you can use a one-inch cookie scoop if you’d like smaller treats and a bigger batch.

Dolci di Noci (Walnut Cookies)

dolcidinoci
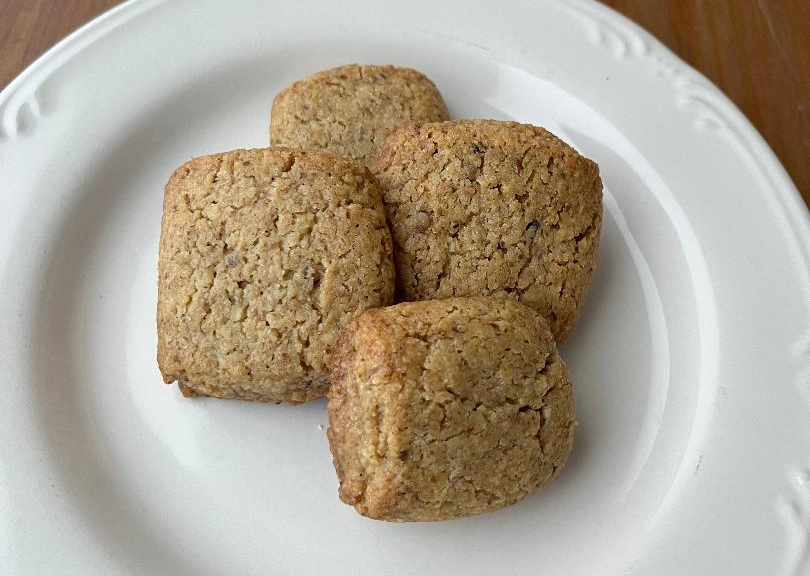
Despite not being Italian, I always end up baking Italian treats at Easter. So here we are with some dolci di noci, walnut cookies made with just three basic ingredients. They’re easy to make, and also gluten-free if that’s your thing.

There are various recipes online for this treat with varying quantities of sugar, but all you need for these are walnuts, sugar, and an egg. No need for a mixer either – just a food processor (or blender) and a bowl. I wonder how you say “easy” in Italian.

Ingredients

  • 2 3/4 cups walnuts
  • 1/2 cup sugar
  • 1 large egg, at room temperature

Preparation

Preheat oven to 375. Line two baking sheets with parchment paper.

Combine walnuts and sugar in your food processor; pulse until fine, like sand. Pour into a bowl and add egg, then mix to form a paste. Divide into four equal portions and roll into 9-inch logs, then cut each log into 6 pieces. Place on baking sheets about 2 inches apart and bake for 11-13 minutes, until the edges are just brown and cookies are set. Remove from the oven and cool on the baking sheets for a few minutes, then place on a wire rack to cool completely. Makes 24.

Oatmeal Peanut Butter Toffee Cookies

pbtoffeeoatmealcookies
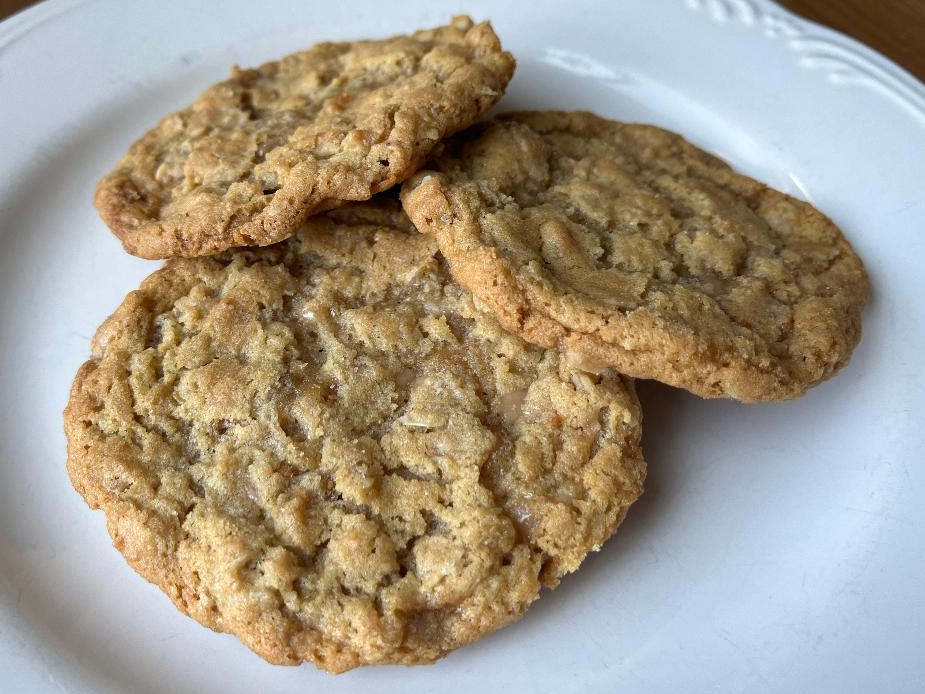
Oatmeal is good for you. Probably less so when blended with flour and sugar and turned into a cookie that also happens to include toffee bits (read: little nuggets of brown sugar and butter cooked beyond the stage of caramel or butterscotch), but let’s not get too technical.

This recipe comes from The Cafe Sucre Farine, another baking blogger I found on Pinterest. I used my stand mixer for this, but if you’ve softened your butter enough so that you can blend it by hand, go for it. I altered the recipe slightly to include just a half-cup of peanut butter and an 8-ounce bag of toffee bits; the end result is delicious twist on a classic oatmeal cookie. I’m curious to see what this recipe would be like with chocolate-covered toffee bits, so stay tuned.

Ingredients

  • 1 1/2 cups flour
  • 2 teaspoons baking soda
  • 1/2 teaspoon salt
  • 1 cup butter, at room temperature
  • 1/2 cup creamy peanut butter
  • 3/4 cup light brown sugar
  • 3/4 cup white sugar
  • 2 eggs, at room temperature
  • 1 teaspoon vanilla extract
  • 1 1/2 cups old-fashioned (rolled) oats
  • 8-ounce bag plain toffee bits (I use Heath Bits O’Brickle)

Preparation

Preheat oven to 350 degrees. Line several baking sheets with parchment paper.

In a medium bowl, combine flour, baking soda, and salt; set aside.

In a mixer fitted with the paddle attachment, cream butter and peanut butter until light and fluffy, about 2 minutes. Add sugars and beat to combine, then add eggs and vanilla and beat to fully incorporate. Add flour mixture and beat to combine, then stir in oats and toffee bits.

Using a two-inch cookie scoop, drop scoops of dough onto the baking sheets, leaving a few inches between; I baked 8 cookies at a time first, then 6 cookies at a time; I think the smaller batches turned out better and browned more evenly. Bake for 13 – 17 minutes, until edges are set but centers still look puffy and a bit wet. Remove from oven and allow to cool on the baking sheets for a few minutes, then remove to a wire rack to cool completely. Store in an airtight container at room temperature for several days. Makes 40.