 Last week was Shark Week, an annual event on the Discovery Channel that aims to educate people about these often-feared aquatic creatures. As I’ve posted before, I actually love sharks, even if Jaws and great whites in general scare the living daylights out of me. But whenever I visit an aquarium, the sharks are always my favorite creatures, gliding serenely through the tanks. I aspire for the level of serenity I imagine them to have.
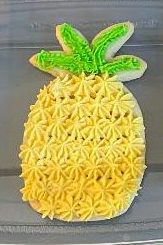
Anyway…these treats are an easy bake as standard sugar cookie cut-outs, but boy, do they take a while to decorate. They’re also massive; I didn’t chill my dough long enough before baking them and they spread immensely in the oven, but they were delicious nonetheless.
For the cookies
- 1 cup butter, softened
- 2 cups sugar
- 2 eggs
- 4 cups flour
- 4 teaspoons baking powder
- 1 teaspoon salt
- 3 teaspoons vanilla extract
For the icing
- 6 tablespoons shortening
- dash of salt
- 2 egg whites
- 4-5 cups powdered sugar
- 2-3 teaspoons vanilla extract
- 1 – 2 teaspoons water, if necessary*
- Blue food coloring
- Miniature chocolate chips, for eyes
*Sometimes your egg whites will be larger than others, so you may not need the extra liquid for the frosting. You can always add a few teaspoons of water if you need to, but do so sparingly – once you add it, you can’t take it back out!
Preparation
Stir together flour, baking powder, and salt in a medium bowl; set aside.
Cream together butter and sugar until fluffy. Add egg and beat well. Add vanilla and about half the flour mixture, beating until combined; beat in remaining flour. If your dough is still crumbly, add 1-2 teaspoons of water.
Divide dough in half and knead each just slightly. Form each half into a disc and place on plastic wrap; cover with another piece of plastic wrap and roll out to flatten into about 1/4 inch thickness. This helps later on, so you don’t have to work your dough as much when rolling and re-rolling after cutting, making your cookies more tender. Refrigerate until just barely firm, about 20-30 minutes. If you refrigerate overnight, let your dough stand at room temperature for about 15 minutes before you roll it out.
Preheat oven to 375 degrees. Line several baking sheets with parchment paper. Remove dough from fridge and roll to about 1/8 inch thickness. Cut into shapes and place on baking sheets, leaving room for the cookies to spread; I baked 6 sharks on each sheet.
Bake for 8-10 minutes, until just golden at the edges. Cool on a wire rack completely before frosting.
To make the frosting, combine shortening, egg whites, salt, and one cup powdered sugar in a mixing bowl. Beat on low speed until combined, then increase speed to medium, then high, and beat for 1 minute. Add remaining powdered sugar, one cup at a time, beating for about 1 minute each time – you can add as much as 5 whole cups of powdered sugar but may need a little extra extract or water to keep the consistency as easily spreadable. Add extracts and beat; if your frosting is too thick, add 1-2 teaspoons of water. You want a smooth consistency that’s easy to pipe.
Reserve about 1/3 cup of white frosting; tint the remainder light blue (or if you want to make grey, use a few drops of black food coloring). Using a small offset spatula, frost the bellies of the sharks white, then frost the remainder of the body and bottom fin with blue. Add a mini chocolate chip eye; allow frosting to set before storing cookies between sheets of waxed paper at room temperature. Makes about 36.

 Sugar cookies can be whatever flavor you want them to be, from vanilla to
 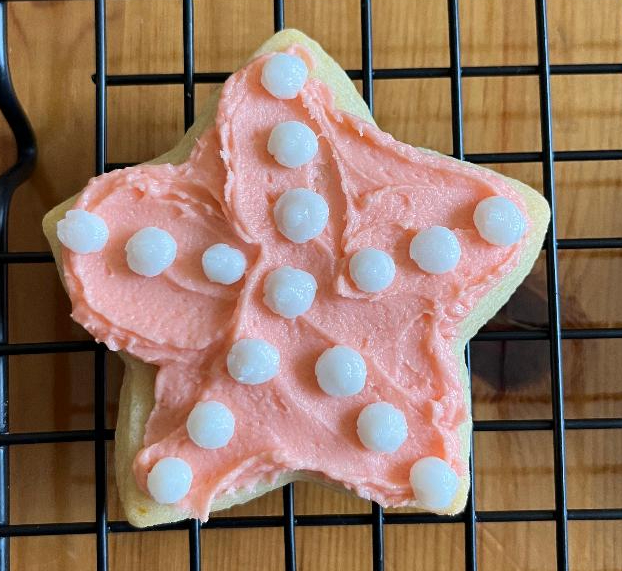 My last bit of beach-themed baking included these creamsicle starfish cut-out cookies, using orange zest and an awesome ingredient called fiori di sicilia. It’s a potent citrus-vanilla type of extract, which I always buy from
  Here’s a classic: the sugar cookie. But not one of those way-too-sweet, only-take-a-few-bites sugar cookies you can find at almost any bakery. These (admittedly enormous, at four inches wide) sugar cookies have nutmeg and vanilla bean paste in them, which means they’re just delicious without being too sugary and have a more mellow flavor. These treats also have great texture, with a crispy edge and soft middle.
 This weekend I stood in the baking aisle of my local craft store, staring at the “sorry, we’re out” tag hanging from the rod where the green sanding sugar should have been. To the left were dinosaur sprinkles; to the right, some type of “cactus mix.” And while I’d love to bake with dino and cactus sprinkles someday, I really needed plain old green sanding sugar for my sparkling shamrock cut-outs. To the grocery store I went, only to meet the same fate.
 Do cookies ship well? I certainly hope so. I send them around the country to various friends and family members, and I sincerely hope they all arrive in one piece. Some cookies, like sugar cut-outs, are more conducive to shipping if you coat them in sugar instead of frosting them. Especially in summer, I wouldn’t trust frosted cookies to fare well through the mail.
 For some, Valentine’s Day brings the opportunity to go all out with romantic gestures and elaborate plans, while others grumble that it’s a made-up holiday meant to sell cards, candy, and flowers. For me, Valentine’s Day usually means baking something heart-themed, and this time it was a simple batch of sugar cut-out cookies coated in sparkling red sugar for my favorite Maryland girls, Maureen and Margaret.
 To some people, frosting dozens of cut-out cookies might be stressful. But for me, it’s Zen time; this endeavor allows me to be completely focused on one task. And that task, when complete, will bring joy to others. It’s a win-win for my mental health, I’d say.