Millionaire’s Shortbread

millionairesshortbreadSo, millionaire’s shortbread. A shortbread cookie base with a layer of caramel and a layer of chocolate. Rich, right? You really have no idea just how rich until you try this recipe, which I found at Sugar Spun Run. Millionaire’s, indeed. More like billionaire’s in my opinion. Just a few bites are perfect, so cut small. And don’t skip the sprinkle of sea salt on top, either. You want a little salt with all of this sugar.

While these bars taste pretty good, I don’t think the textures are quite right – everything is very soft. I wanted a crispy shortbread base, so next time I think I’ll go with a different base layer and also scale back the chocolate to balance things out a bit more.

Ingredients

For the base

  • 1 cup unsalted butter
  • 1/3 cup granulated sugar
  • 1/3 cup packed light brown sugar
  • 1 egg yolk
  • 1 teaspoon vanilla extract
  • 1/2 teaspoon salt
  • 2 1/4 cups flour

For the caramel layer

  • 2 14-ounce cans sweetened condensed milk
  • 14 tablespoons unsalted butter
  • 1 cup packed light brown sugar
  • 1/3 cup light corn syrup
  • 3/4 teaspoon salt
  • 1 teaspoon vanilla extract

For the chocolate layer

  • 1 1/2 cups semisweet chocolate chips
  • 1/3 cup heavy cream
  • Sea salt

Preparation

Preheat oven to 350 degrees. Line a 9 x 13 pan with parchment paper, extending up the sides.

Make the base: In a mixer, beat butter and sugars until fluffy. Add egg yolk and vanilla and beat, scraping down the sides of your bowl a few times. Add flour about 1/2 cup at a time, beating to just combine; when you’ve added about half of the flour, sprinkle in the salt with your mixer running. You don’t need your dough to be smooth; it can be a bit crumbly. Press into the bottom of your pan and bake for 20-25 minutes, until edges are just golden. Remove from the oven and allow the crust to cool while you make your caramel.

Make the caramel: This is going to take a while, friends. In a medium saucepan, combine sweetened condensed milk, butter, brown sugar, corn syrup, and salt. Heat over medium and stir until everything is melted; once melted, keep stirring and bring the mixture to a boil, then turn it down to a simmer. Continue simmering, stirring constantly, until you reach 225 degrees on a candy thermometer; this took me about 25 minutes. The mixture will turn darker in color – like the color of peanut butter – and pull away from the sides as you stir it when it’s almost ready. Also, you may get brown flecks in your caramel as you stir, and this is totally fine.

Once you’ve reached 225 degrees, remove the caramel from the heat and stir in your vanilla extract. Pour the caramel over your base and spread it out in an even layer; set it aside to cool completely before adding the chocolate. You can chill it in the fridge or just leave it out at room temp (which is what I did) for a few hours.

For the chocolate layer, place chocolate chips and heavy cream in a microwave-safe bowl and heat in 20-second intervals, stirring between each, until the chocolate melts. Stir the mixture until it’s smooth, then pour it over your caramel layer and spread it out. Let the chocolate set for a few minutes, then top with sprinkles of sea salt and let cool completely before cutting. You can pop it into your fridge for a bit, which is what I did, or just let it sit at room temperature.

Cut into very small bars – mine made about 44 – and store in an airtight container at room temperature or in the fridge if you prefer.

Mini Oatmeal Cream Pies

oatmealceampiesAdmit it: You have a favorite Little Debbie snack cake. The Swiss roll, maybe? Or the Christmas tree cake? If you’re a star crunch person, I really don’t get it, but I’m not here to judge. Anyway, the oatmeal cream pie was one of my favorites as a kid, and today I made a mini version.

So, these really don’t taste like the Little Debbie treats…they’re essentially just a soft oatmeal cookie with vanilla buttercream filling, but they’re still pretty good. Next time I’d like to try a different recipe and use a marshmallow buttercream in the middle, which I think might be a bit closer to the original.

Ingredients

For the cookies

  • 1 1/2 cups flour
  • 1 teaspoon baking soda
  • 1 teaspoon cinnamon
  • 1/2 teaspoon salt
  • 1 cup butter, at room temperature
  • 3/4 cup light brown sugar
  • 1/2 cup granulated sugar
  • 2 eggs, at room temperature
  • 1 tablespoon molasses
  • 1 teaspoon vanilla extract
  • 3 cups quick-cooking oats

For the filling

  • 12 tablespoons butter, at room temperature
  • 2 1/2 cups powdered sugar
  • 1 teaspoon vanilla
  • 1 tablespoon heavy cream

Preparation

Preheat oven to 350. Line several baking sheets with parchment paper.

Combine flour, baking soda, cinnamon, and salt in a medium bowl; set aside. In a mixer, cream butter and sugars until very light and fluffy, about 3-4 minutes. Add molasses, vanilla, and eggs and beat well to combine. Add flour mixture and beat to fully incorporate, then stir in oats.

Using a 1-inch cookie scoop, drop scoops of dough onto baking sheets about 2 inches apart; I baked 9 cookies on each sheet. Bake for 9-10 minutes, until just golden at the edges. Remove from oven and cool on the baking sheets for a few minutes, then place on a wire rack to cool completely.

To make the filling, beat butter and powdered sugar on low speed until the sugar is fully incorporate into the butter. Add vanilla and heavy cream and beat 1-2 minutes until fluffy. Place in a large piping bag and snip off the tip; it’s much easier to pipe the filling in than to spread it.

To fill, flip all your cookies over and pipe a blob of filling onto half, then top with the other cookie. Makes 30 sandwiches. You’ll have some filling left over, and since it’s vanilla buttercream, you can save it for something else (or spread it on graham crackers, or eat it with a spoon, whatever works for you).

Chocolate Peanut Butter Swirl Cupcakes

chocolatepbswirlcupcakesOver the summer I made marble cupcakes with swirled chocolate/vanilla frosting, and a chocolate/peanut butter version also seemed like a really good idea. While swirled frosting looks fancy, I promise, it’s not. All you need are two different kinds of buttercream, a sheet of plastic wrap, and a piping bag. For real, that’s all.

This recipe uses a classic chocolate cupcake I’ve made a million times, along with my standard chocolate buttercream and a peanut butter buttercream I found at Sally’s Baking Addiction and tweaked slightly. These cupcakes are for my brother, Andy, who is visiting from North Carolina for the holidays.

Ingredients

For the cupcakes

  • 1 1/2 cups flour
  • 3 tablespoons cocoa powder
  • 1 cup sugar
  • 1 teaspoon baking soda
  • 1/2 teaspoon salt
  • 1 tablespoon vinegar
  • 1 teaspoon vanilla
  • 3 tablespoons vegetable oil
  • 1 cup water

For the frostings and decoration

Chocolate Buttercream

  • 8 tablespoons butter, at room temperature
  • 1 3/4 cups powdered sugar
  • 1/4 cocoa powder
  • 1/2 tablespoon vanilla extract
  • 2-3 tablespoons heavy cream

Peanut Butter Buttercream

  • 5 tablespoons butter, at room temperature
  • 1 cup creamy peanut butter
  • 1 1/2 to 1 3/4 cups powdered sugar
  • 1/3 cup heavy cream
  • 1/2 tablespoon vanilla extract
  • pinch of salt

Miniature Reese’s Peanut Butter Cups, for garnish

Preparation

Preheat oven to 350 degrees. Line cupcake pans with paper liners; this recipe makes 13-15 cupcakes, depending on how much batter you place in each well.

In a large mixing bowl, combine flour, cocoa powder, sugar, baking soda, and salt. Mix until well-blended, then make three wells for the wet ingredients.

Place vinegar, vanilla, and vegetable oil into the wells; add water and orange zest and mix until the batter is smooth. The mixture will bubble up slightly when you add the water, so just keep mixing until you get a smooth consistency in the batter, which will be fairly thin.

Using a 1/4 cup measure, fill cupcake wells about half full. Bake for 15-17 minutes, until a cake tester comes out clean. Cool in pan for a few minutes, then remove from pan and cool completely on wire racks. Cool completely before frosting.

Make the frostings: for chocolate buttercream, place butter in a mixing bowl and beat for a few minutes using the paddle attachment. Add powdered sugar and cocoa powder and beat on low speed until the sugar and cocoa are fully incorporated into the butter. Add vanilla extract and beat; add heavy cream 1 tablespoon at a time; you may not need all 3 tablespoons.

For the peanut butter buttercream, place butter and peanut butter in a mixing bowl and beat for a few minutes using the paddle attachment. Add 1 cup powdered sugar and beat until the sugar is fully incorporated; add heavy cream, vanilla, and salt and beat to combine. Add remaining 1/2 to 3/4 cup powdered sugar – start with less, as you may not need it all. You want a smooth, pipeable consistency that isn’t too dry, which peanut butter frosting can be.

To frost: Place a sheet of plastic wrap on your counter top and spoon the frostings side by side down the length of the sheet. Wrap it up, snip off one end, and place it in a piping bag fitted with a large star tip like the Wilton 1M. Pipe a swirl onto a plate first, until both kinds are visible. Pipe swirls onto cupcakes and top with mini Reese’s Peanut Butter Cups.

White Christmas Cupcakes

whitechristmascupcakes
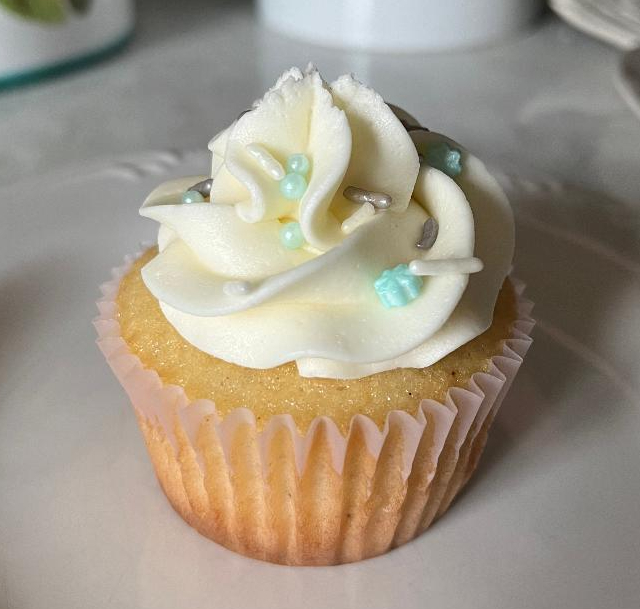
So, I planned to bake sugar plum cupcakes today using a vanilla nutmeg cupcake and buttercream with sugar plum jam. My jam was more like preserves, though – complete with chunks of plum. Who wants that in a frosting? Not me…hence the pivot to what I’m calling White Christmas cupcakes. Add some snowflake-themed sprinkles, and we’re in business.

The cupcake in this recipe is one I’ve used before, but this time I added nutmeg to the batter for a little bit of spice. It turned out really well, and the vanilla buttercream is all it needed. 

Ingredients

For the cupcakes

  • 1 2/3 cups flour (spooned and leveled)
  • 1/2 teaspoon baking powder
  • 1/4 teaspoon baking soda
  • 1/2 teaspoon salt
  • 1/4 teaspoon nutmeg 
  • 1/2 cup unsalted butter, melted
  • 1 cup sugar
  • 1 egg, at room temperature
  • 1/4 cup vanilla yogurt
  • 3/4 cup milk
  • 1 1/2 tablespoons vanilla bean paste (or vanilla extract)

For the frosting

  • 12 tablespoons butter, at room temperature
  • 3 cups powdered sugar
  • 2 teaspoons vanilla extract
  • 1 teaspoon milk 
  • Snowflake sprinkles 

Preparation

Preheat oven to 350 degrees. Line two cupcake tins with paper liners; my batch made 18 cupcakes.

In a large bowl, combine flour, baking powder, baking soda, salt, and nutmeg; set aside. In a microwave-safe bowl, melt butter, then add sugar and stir to combine; mixture will be grainy. Refrigerate for 1 minute, then remove and add egg, yogurt, milk, and vanilla bean paste. Stir in flour mixture until no lumps remain.

Using a 2-inch cookie scoop, scoop batter into tins and fill about 2/3 to 3/4 full. Bake for 20-24 minutes, until a cake tester comes out clean. Remove from oven and place cupcakes on wire racks to cool completely.

To make buttercream, place butter in a mixing bowl and beat for a few minutes using the paddle attachment. Add powdered sugar and beat on low speed until the sugar is fully incorporated into the butter. Add vanilla extract and milk, then beat to combine.

Fit a large piping bag with a large open star tip (I use the Wilton 1M) pipe swirls of frosting onto cupcakes; top with sprinkles if desired. 


Peppermint Cupcakes

peppermintcupcakesChristmas baking is underway, and in the last 72 hours, I’ve baked 11 things. Today’s efforts included these peppermint cupcakes, based on a recipe I’ve used before, but a decoration idea I saw a few weeks back while searching for fun Christmas cupcakes.

Two-toned frosting isn’t difficult, despite how it looks. All you need are two colors, some plastic wrap, and an enormous piping bag. I piped blobs straight into my cupcakes, then pressed them into sanding sugar to flatten them out and make them look like the peppermints that inspired these treats.

Ingredients

For the cupcakes

  • 1 cup plus 2 tablespoons flour
  • 3/4 cup sugar
  • 3 tablespoons Dutch process cocoa powder
  • 3/4 teaspoon baking soda
  • 1/4 teaspoon baking powder
  • 1/2 teaspoon salt
  • 3/4 cup water
  • 1/4 cup plus 2 tablespoons vegetable oil
  • 1 teaspoon vanilla extract
  • 1/4 teaspoon peppermint extract

For the frosting

  • 1 cup butter, softened
  • 3 cups powdered sugar
  • 1/2 tablespoon milk
  • 1/8 to 1/4 teaspoon peppermint extract, to taste
  • Red food coloring
  • Sanding sugar

Preparation

Preheat oven to 350 degrees. Line a cupcake tin with paper liners; my recipe made 13 cupcakes.

In a mixing bowl, combine flour, sugar, cocoa powder, baking soda, baking powder, and salt. Stir together, then add water, oil, vanilla extract, and peppermint extract. Beat on low speed for about 2 minutes, until the batter is smooth; it will be thin.

Using a two-inch cookie scoop, scoop batter into prepared cupcake tin, filling wells about 2/3 full. Bake for 18-22 minutes, until a cake tester comes out clean. Remove from cupcake tin and allow to cool on a wire rack completely before frosting.

To make frosting, beat butter on low speed for about 2 minutes, until fluffy. Add powdered sugar and beat on low until all the sugar is incorporated into the butter; this takes a few minutes. Add milk and 1/8 teaspoon peppermint extract and beat for another 1-2 minutes. Add additional peppermint extract to taste; my frosting used just under 1/4 teaspoon.

Divide frosting in half; tint one half red. Lay out a sheet of plastic wrap and pipe (or just spoon) red and white frosting in alternating lines down the plastic wrap; roll it up into a log, snip off the end, and place in a large (I used an 18-inch) piping bag fitted with a large plain tip.

Pipe blobs of frosting onto each cupcake; place sanding sugar in a shallow bowl and press each cupcake into the sugar to flatten your frosting.

Brookies

brookiesWhat super genius decided to combine brownies and chocolate chip cookies? I don’t know, but the brookie inventor deserves some sort of Nobel Prize.

I’ve never even had a brookie before, let alone made them, but this recipe from Preppy Kitchen did not disappoint. I swapped out the semisweet chocolate chips in the cookie layer for milk chocolate ones, because that’s what I use in my regular chocolate chip cookies. They’re the absolute best of both worlds; fudgy, but also with that crispy cookie texture from the chocolate chip dough. They belong in a hall of fame, for real.

Ingredients

For the brownie layer

  • 8 tablespoons butter, melted
  • 3/4 cup semisweet chocolate chips
  • 1/2 cup granulated sugar
  • 1/2 cup light brown sugar, packed
  • 1/3 cup cocoa powder
  • 1 teaspoon vanilla extract
  • 1/2 teaspoon salt
  • 2 eggs, at room temperature
  • 1/2 cup flour

For the chocolate chip cookie layer

  • 8 tablespoons butter, at room temperature
  • 1/2 cup granulated sugar
  • 1/4 cup light brown sugar
  • 1 teaspoon vanilla
  • 1 egg
  • 1/2 teaspoon salt
  • 1/2 teaspoon baking powder
  • 1/4 teaspoon baking soda
  • 1 1/3 cup flour
  • 1 cup milk chocolate chips

Preparation

Preheat oven to 350 degrees. Line a 9 x 13 baking tin with foil; lightly spray with baking spray. I also always sprinkle the bottom of my pan with sugar for a crunchy bottom layer to my brownies.

Make the brownie batter: Combine melted butter and cocoa powder, then whisk in sugar and salt. Add eggs and vanilla and beat well, then stir in the flour mixture and chocolate chips. Pour into the pan, spreading in an even layer.

Make your cookie dough: Cream the butter and sugars on medium speed until light and fluffy. Add eggs and vanilla and beat, scraping the sides of your bowl. Add salt, baking soda, and baking powder and beat to combine, then beat in flour on low speed until just combined. Stir in chocolate chips.

Drop cookie dough in blobs over the brownie batter; you don’t need to cover it completely, because you want some of the brownie layer to poke through. Cover with foil and bake for 20 minutes, then remove foil and continue baking another 20 minutes.

Remove from oven and allow brookies to cool completely before cutting into squares. Makes 24.

Brown Butter Almond Cookies

brownbutteralmondcookiesI first heard about brown butter on the Great British Baking Show several years ago, and now I see recipes using it everywhere. To make it, you melt butter then continue cooking it to “toast” the milk solids, bringing out a different flavor.

These brown butter almond cookies – which I found at Lovely Little Kitchen – remind me a bit of amaretti. I tweaked the original recipe to add more almond extract and omit the powdered sugar coating (because that’s just messy). They’re destined for my dear friend Diana, one of the very few people in my life who also bakes for me.

Ingredients

  • 10 tablespoons butter
  • 1 cup granulated sugar
  • 1/4 cup light brown sugar, packed
  • 2 eggs, at room temperature
  • 1 teaspoon vanilla extract
  • 1 teaspoon almond extract
  • 2 1/2 cups flour
  • 1 teaspoon baking powder
  • 1/2 teaspoon salt
  • Granulated sugar, for rolling

Preparation

Make the brown butter: In a medium saucepan, melt your butter over medium heat. Continue to cook, swirling the pan occasionally, until the mixture turns brown; it will foam, then start to form brown flecks, after about 3-4 minutes, but keep an eye on it so it doesn’t burn. Pour into another bowl to cool completely before using.

In a mixer fitted with your paddle attachment, beat brown butter and sugars to combine. Beat in vanilla extract, almond extract, and eggs. Add the flour, baking powder, and salt and beat on low speed to combine. Cover and chill your dough for about 1 hour.

Preheat oven to 350 degrees. Line three baking sheets with parchment paper. Place granulated sugar in a small bowl.

Remove dough from fridge and scoop 1 1/2 inch portions, then roll into balls and coat in granulated sugar. Place about 2 inches apart on your baking sheets and bake for 12-14 minutes, until cookies are set. Remove from oven and allow to cool on the baking sheets for a few minutes, then cool completely on wire racks. Makes about 30 cookies.

Chocolate Snickerdoodles

chocolatesnickerdoodlesDo you need to chill cookie dough? Sometimes yes, sometimes no – it depends on the ingredients, and what the end result of the cookie is meant to be. When you chill dough, it allows the butter (or other fat) to solidify, preventing the cookies from spreading too much as they bake.

I didn’t chill today’s chocolate snickerdoodle dough, but I wish I had – and I will next time. These cookies are delicious, but flat and thin, not exactly the texture I wanted. The chocolate/cinnamon combination is amazing, though; I made a small batch of just about 16, so you could easily double the quantities below for a regular amount. Also, the preparation directions below include what I’d recommend for chilling time.

Ingredients

  • 1 cup flour
  • 1/4 cup cocoa powder
  • 1/2 teaspoon baking soda
  • 1/2 teaspoon cream of tartar
  • 1/2 teaspoon cinnamon
  • 1/4 teaspoon salt
  • 8 tablespoons butter, at room temperature
  • 1/2 cup brown sugar, packed
  • 1 egg
  • 1/2 teaspoon vanilla extract
  • 2 tablespoons granulated sugar
  • 1/2 teaspoon cinnamon

Preparation

In a medium bowl, whisk together flour, cocoa powder, baking soda, cream of tartar, cinnamon, and salt; set aside. In a mixer, cream butter and brown sugar until light and fluffy; add egg and vanilla and beat to combine, Add flour mixture and beat to fully combine. Chill dough for about 30 minutes.

Preheat oven to 350 degrees. Line two baking sheets with parchment paper.

In a small bowl, combine granulated sugar and 1/2 teaspoon cinnamon. Using a 1-inch cookie scoop, scoop dough and roll into balls, then dip in cinnamon sugar to coat. Place on baking sheets about 2 inches apart; bake for 8-10 minutes, until edges are set but centers are still puffy. Remove from oven and allow to cool on the baking sheets or a few minutes, then remove to a wire rack to cool completely. Makes about 16 cookies.

Apple Cider Cupcakes with Caramel Buttercream

spicedapplecupcakesLet’s talk about fall spice mixes for a minute. Thrilling stuff, I know. Pumpkin spice is on every menu right now, and it’s a blend of cinnamon, ginger, allspice, nutmeg, and cloves. Its cousin, apple pie spice, has everything but the ginger. You can buy spice mixes or make your own and naturally, I make my own.

These cupcakes use apple pie spice instead of just cinnamon, along with apple cider and a caramel buttercream. I thought the caramel/apple combination would work well, and they taste just fine – but they’re not exactly what I wanted. Next time, I’ll go with a cinnamon buttercream instead, or apple pie spice buttercream. We’ll see.

Ingredients

For the cupcakes

  • 2 cups flour
  • 2 teaspoons baking powder
  • 1 teaspoon apple pie spice
  • 1/2 teaspoon salt
  • 8 tablespoons butter, softened
  • 2/3 cup sugar
  • 1 teaspoon vanilla extract
  • 1 cup apple cider

For the frosting

  • 12 tablespoons butter
  • 2 1/2 cups powdered sugar
  • 1 teaspoon vanilla extract
  • 4 tablespoons salted caramel sauce
  • Apple chips, for garnish

Preparation

Preheat oven to 350 degrees. Line two cupcake tins with paper liners; this recipe makes 18 cupcakes.

In a medium bowl, stir together flour, baking powder, apple pie spice, and salt; set aside. In a mixer, cream together butter and sugar until light and fluffy. Add vanilla and apple cider and beat on low to combine, then stir in flour mixture.

Using a two-inch cookie scoop, fill cupcake wells about 2/3 full with batter. Bake for 17-20 minutes, until a cake tester comes out clean. Remove from oven and remove cupcakes from tins; cool on a wire rack before frosting.

To make frosting, beat butter and powdered sugar on low speed until all of the sugar is incorporated into the butter. Add vanilla and caramel sauce and beat to completely combine. Fit a large piping bag with a large open start tip (I use the Wilton 1M) and pipe swirls of frosting onto cupcakes. Garnish with an apple chip.

Chocolate Toffee Cookies

chocolatetoffeecookiesWhat exactly is toffee? It’s a cousin of caramel, cooked longer so it hardens and becomes brittle. Think Heath bar, but without the chocolate – that’s toffee.

This recipe came from the back of the Hershey’s Heath Bits O’Brickle Toffee Bits (just the plain toffee bits, not the milk-chocolate covered ones) and while it wasn’t exactly what I expected, it’s delicious. The cookies turned out really flat, likely because I didn’t chill my dough before I baked them – but regardless, they’re really good.

Ingredients

  • 1 cup flour
  • 1/4 cup cocoa powder
  • 1/2 teaspoon baking soda
  • 1/4 teaspoon salt
  • 8 tablespoons butter, at room temperature
  • 6 tablespoons sugar
  • 6 tablespoons brown sugar
  • 1/2 teaspoon vanilla extract
  • 1 egg
  • 8-ounce package Hershey’s toffee bits

Preparation

Preheat oven to 375 degrees. Line several baking sheets with parchment paper.

In a medium bowl, stir together flour, cocoa powder, baking soda, and salt; set aside. In a mixer, cream together butter, sugars, and vanilla extract. Add egg and beat to combine, then add flour mixture. Stir in toffee bits. If desired – and though I didn’t do this, I do recommend it now – chill your dough for about 30 minutes before baking.

Using a 1-inch cookie scoop, scoop generous portions of dough – about the size of a walnut –  and roll into balls. Place about 3 inches apart on your baking sheets; I baked 6 cookies per sheet. Bake for 8-11 minutes, until edges are set. Remove from oven and cool on baking sheets for a few minutes, then place on a wire rack to cool completely. Makes about 22.