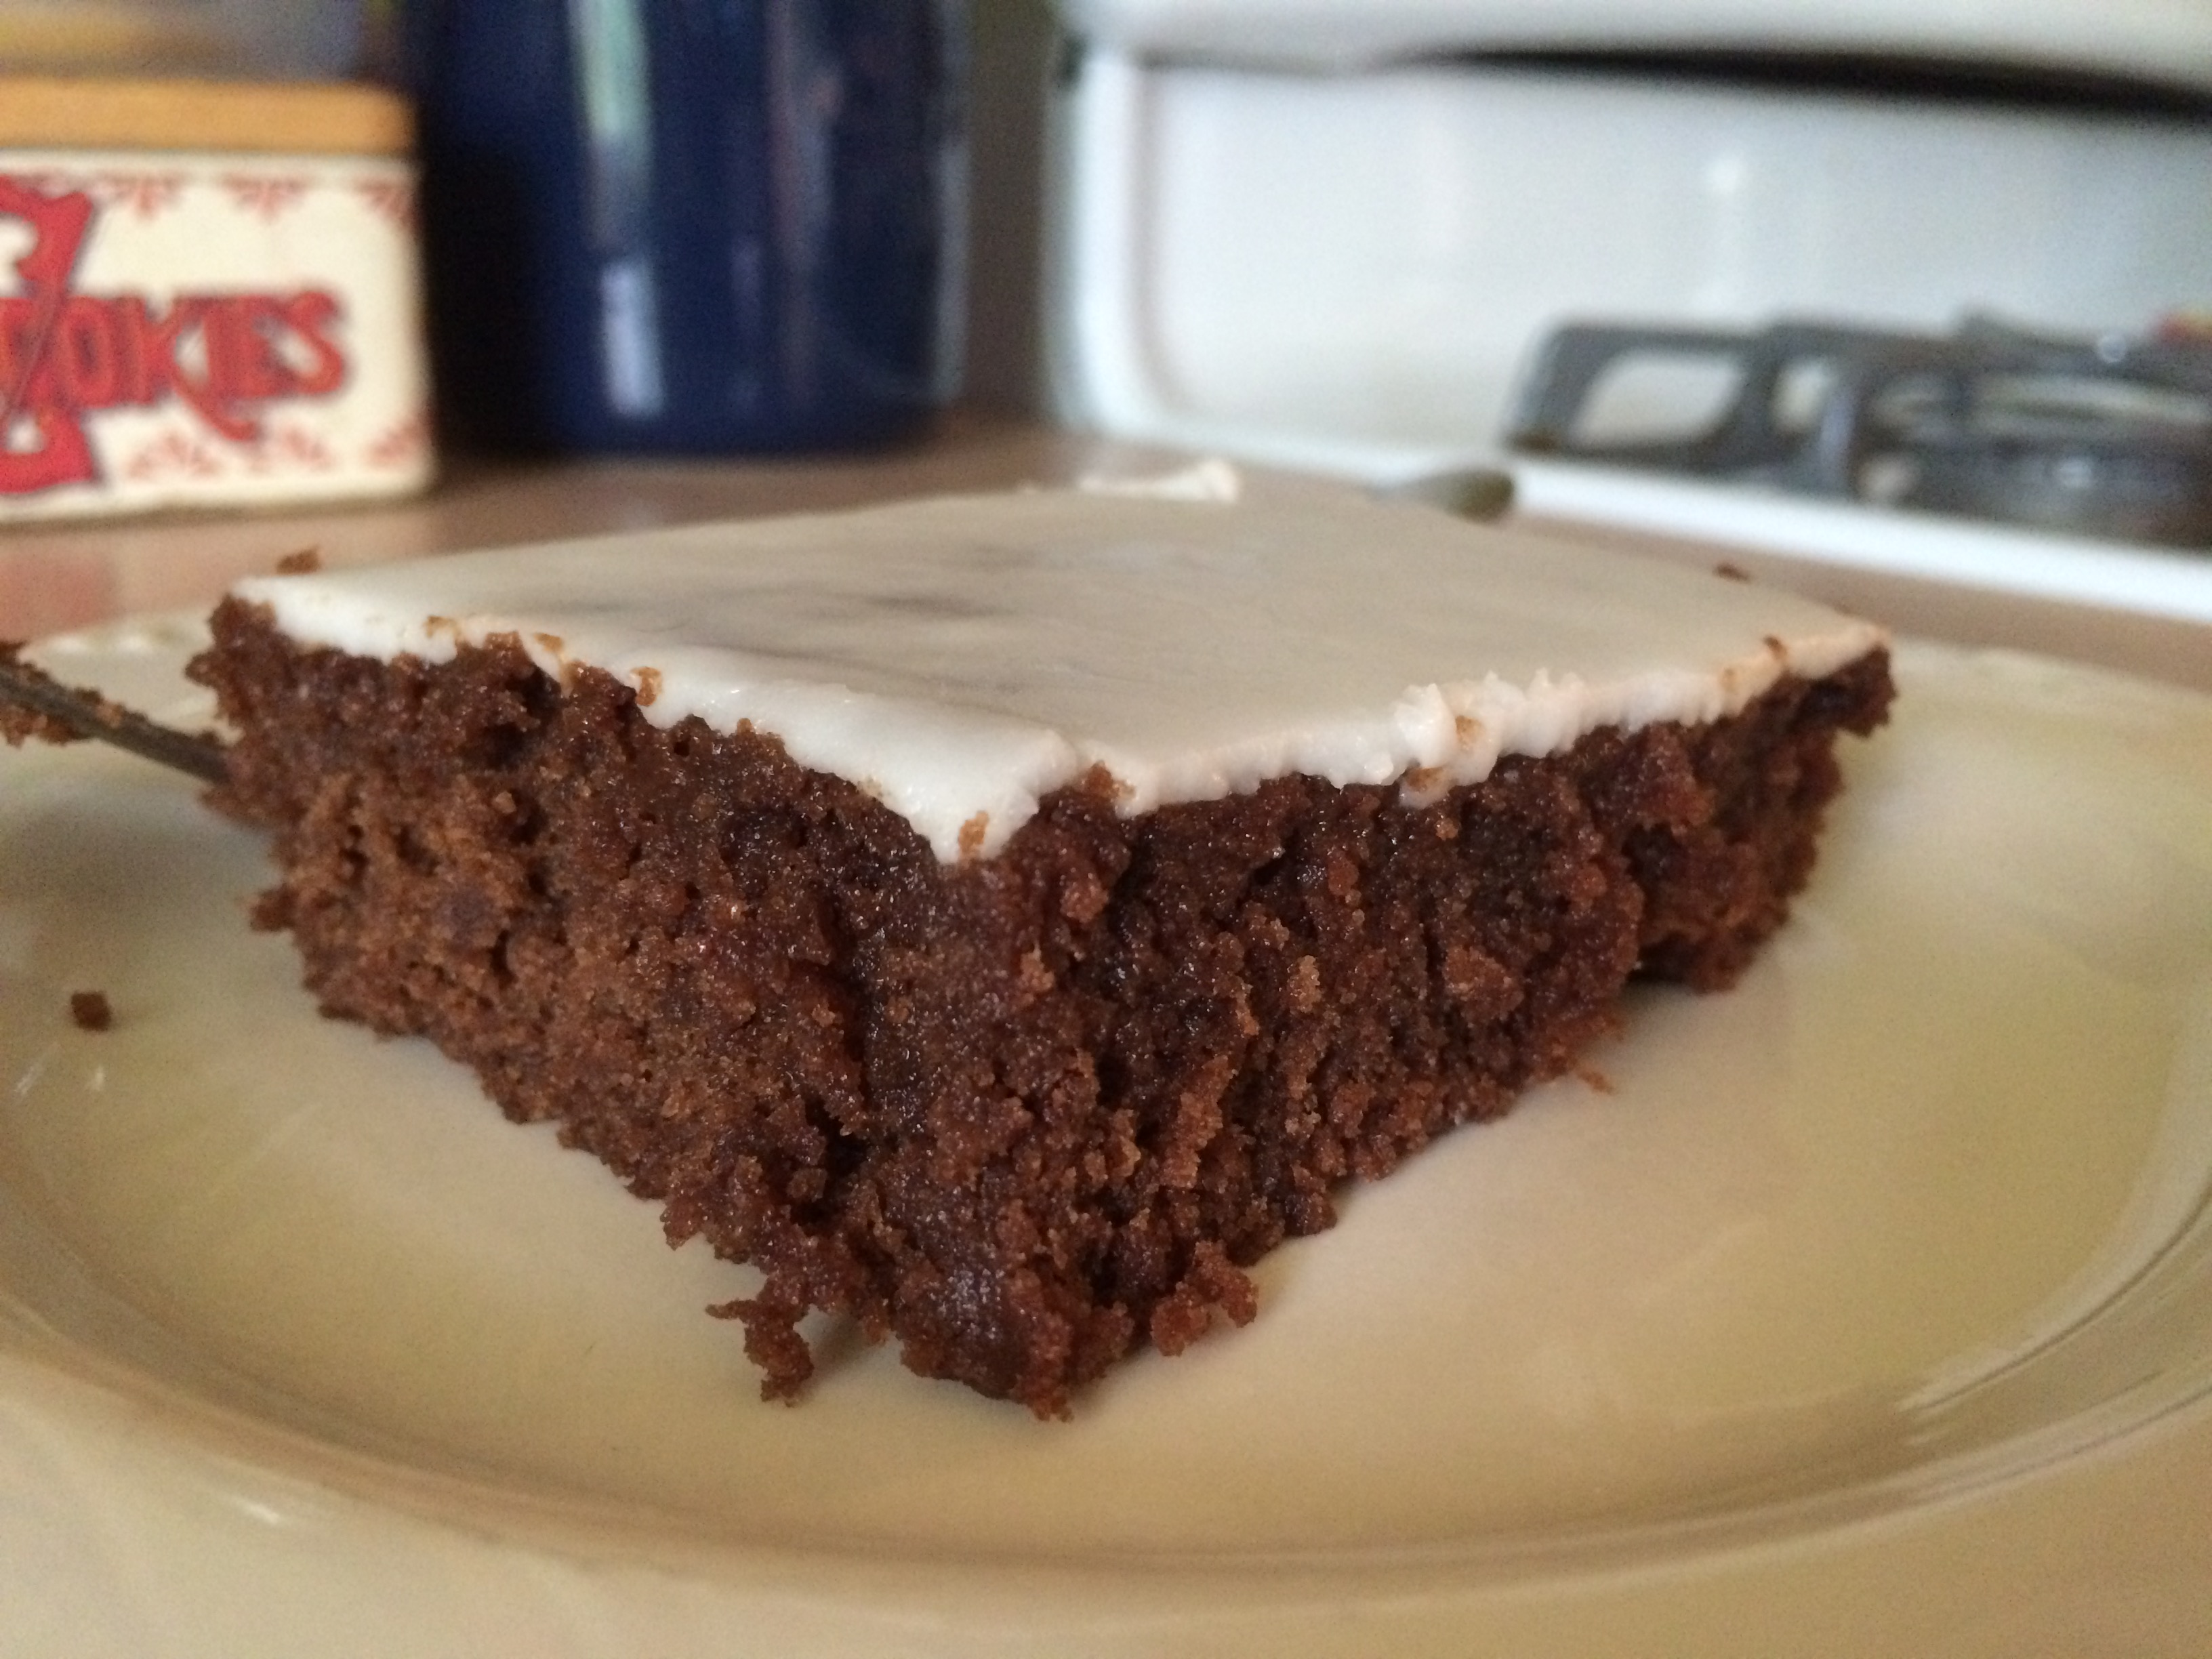
As I contemplated how to use up some leftover dulce de leche, brownies came to mind. My friends Scott and Diana helped me figure out several aspects of this treat last week, but what they’ll likely be surprised to discover at the office tomorrow is the layer of dulce de leche buttercream between the brownie and toasted coconut.
Yes, dulce de leche buttercream. Between a brownie and toasted coconut, topped with chocolate drizzle. They kind of remind me of the Girl Scout Samoa cookie, minus the shortbread…but that would be a great idea for next time. I wish I could try them, but Mike says they’re delicious. I’ll take his word for it!
Ingredients
For the brownie layer
- 1 1/3 cups flour
- 2 cups sugar
- 3/4 cup cocoa powder
- 1/2 teaspoon salt
- 2/3 cup vegetable oil
- 4 eggs
- 3 teaspoons vanilla extract
For the dulce de leche buttercream
- 8 tablespoons unsalted butter, softened
- 3/4 cup dulce de leche
- 2 cups powdered sugar
For the topping
- 1 1/2 cups shredded coconut
- 1/2 cup semisweet chocolate chips
- 1 tablespoon shortening
Preparation
Begin by toasting your coconut so it’s cool by the time you’re ready to use it. Preheat oven to 325 degrees and spread coconut on a rimmed baking sheet (you can line the sheet with parchment if you like, but mine toasted better without). Toast for about 8-10 minutes, checking and stirring every 2 minutes to prevent over-browning. Allow to cool completely before using.
Raise oven temperature to 350 degrees. Line a 9 x 13 baking pan with parchment paper, extending the paper over the sides; this will make it easier to lift the brownie out later.
In a large bowl, combine flour, sugar, cocoa powder, and salt.
In another bowl, combine vegetable oil, eggs, and vanilla; beat lightly to combine, then pour into the dry mixture. Stir well to combine, but be careful not to over-mix. You want all of your dry ingredients to be absorbed, but your batter doesn’t need to be completely smooth; it will thicken and become shiny when it’s ready.
Pour batter into prepared pan and bake for 25-28 minutes, until a cake tester inserted in the center comes out clean.
Allow to cool completely before frosting and topping.
To make frosting, in a mixing bowl fitted with the paddle attachment, beat butter on medium speed for about 2 minutes. Scrape down the bowl and add dulce de leche, then beat on medium speed for 3-4 minutes, until very smooth and well-combined. Add powdered sugar, 1 cup at a time, beating well between each.
Spread buttercream in an even layer over the brownies, then top with toasted coconut, pressing it gently into the surface of the frosting.
Lift brownies out of pan using parchment; peel parchment away from sides and cut into 24 squares. Place on a wire rack to drizzle with chocolate; it’ll be easier to manage the brownies if you follow this process, but you can certainly drizzle them in the pan then lift them out once the chocolate hardens.
Make drizzle: in a small saucepan, combine chocolate chips and shortening over low heat and stir until completely smooth and melted. Fill a zip-top bag with chocolate and snip off one corner, bearing in mind that the chocolate will be very liquid. Drizzle chocolate over brownies and allow to harden before serving.
Store in an airtight container at room temperature (if stacking, place waxed paper or parchment paper between layers) for up to 3 days.
Makes 24.
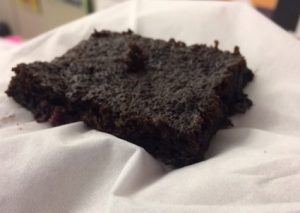 My friend Shannon finished her master’s degree last week, and such accomplishments must be marked with baked goods. Shannon is very fit and healthy, so she requested some paleo(ish) brownies, which were a huge hit at the office.