Chocolate Cookies with Peanut Butter Chips

Many years ago I baked this recipe, which I found on the back of the bag of Reese’s peanut butter chips, as cookie bars. They were a huge hit at one of my video shoots at work, where I shared with my colleagues that any time there’s a recipe on the back of something, it’s bound to work out well. Why? Because ingredient makers have test kitchens where bakers spend hours trying out recipes. The best ones end up on the backs of packages…and this is one of those recipes.

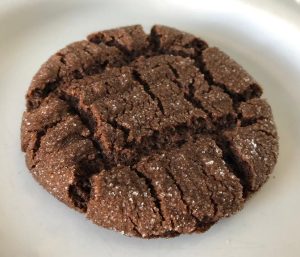
This time I chose to follow the recipe on the bag to bake as cookies (well, sort of, I made them much larger than I should have), but I think I liked the bar version better. These are delicious of course, but bars are so much easier in the grand scheme – mix the dough, press it into the pan, and bake it. Efficient and delicious. Maybe that should have been the name of this blog!

Ingredients

  • 2 cups flour
  • 3/4 cup cocoa powder
  • 1/2 teaspoon salt
  • 1/2 teaspoon baking soda
  • 1 1/4 cups (2 1/2 sticks) butter, softened
  • 2 cups sugar
  • 2 teaspoons vanilla extract
  • 2 eggs
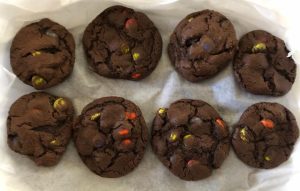
  • 10-ounce package Reese’s Peanut Butter baking chips

Preparation

Preheat oven to 350 degrees. Line several baking sheets with parchment paper.

In a large bowl, combine flour, cocoa powder, salt, and baking soda; set aside.

In a mixing bowl fitted with the paddle attachment, cream together butter and sugar until light and fluffy. Add eggs and vanilla and beat to combine.

Add flour mixture in two batches, beating well and scraping the sides of the bowl between each addition. Stir in peanut butter chips.

Using a 1 or 2-inch cookie scoop, drop scoops of dough onto the baking sheets, leaving a few inches between each; I baked 6 cookies per sheet using a 2-inch scoop. Bake for 8-10 minutes, until edges are set but centers are still puffy. Remove from oven and cool on the baking sheets for a few minutes, then place on a wire rack to cool completely. Makes about 24 2-inch cookies.

Chocolate Snickerdoodles

chocolatesnickerdoodlesDo you need to chill cookie dough? Sometimes yes, sometimes no – it depends on the ingredients, and what the end result of the cookie is meant to be. When you chill dough, it allows the butter (or other fat) to solidify, preventing the cookies from spreading too much as they bake.

I didn’t chill today’s chocolate snickerdoodle dough, but I wish I had – and I will next time. These cookies are delicious, but flat and thin, not exactly the texture I wanted. The chocolate/cinnamon combination is amazing, though; I made a small batch of just about 16, so you could easily double the quantities below for a regular amount. Also, the preparation directions below include what I’d recommend for chilling time.

Ingredients

  • 1 cup flour
  • 1/4 cup cocoa powder
  • 1/2 teaspoon baking soda
  • 1/2 teaspoon cream of tartar
  • 1/2 teaspoon cinnamon
  • 1/4 teaspoon salt
  • 8 tablespoons butter, at room temperature
  • 1/2 cup brown sugar, packed
  • 1 egg
  • 1/2 teaspoon vanilla extract
  • 2 tablespoons granulated sugar
  • 1/2 teaspoon cinnamon

Preparation

In a medium bowl, whisk together flour, cocoa powder, baking soda, cream of tartar, cinnamon, and salt; set aside. In a mixer, cream butter and brown sugar until light and fluffy; add egg and vanilla and beat to combine, Add flour mixture and beat to fully combine. Chill dough for about 30 minutes.

Preheat oven to 350 degrees. Line two baking sheets with parchment paper.

In a small bowl, combine granulated sugar and 1/2 teaspoon cinnamon. Using a 1-inch cookie scoop, scoop dough and roll into balls, then dip in cinnamon sugar to coat. Place on baking sheets about 2 inches apart; bake for 8-10 minutes, until edges are set but centers are still puffy. Remove from oven and allow to cool on the baking sheets or a few minutes, then remove to a wire rack to cool completely. Makes about 16 cookies.

Chocolate Crinkles

chocolatecrinkles

Chocolate crinkles are a classic…but typically coated in powdered sugar. And while this is totally fine with me at Christmas, I wondered what they’d be like coated in regular granulated sugar, like a peanut butter cookie. The result, I’m happy to report, is really delicious.

This recipe is based on the chocolate peppermint crinkles I made many years ago; I’d like to try a chocolate orange version as well, so stay tuned. If you prefer to coat these in powdered sugar, go for it, but bear in mind that powdered sugar-coated things don’t fare terribly well at the height of summer.

Ingredients

  • 3/4 cup flour
  • 1/4 cup unsweetened cocoa powder, sifted
  • 1 teaspoon baking powder
  • 2 ounces unsweetened baking chocolate, chopped
  • 2 tablespoons butter, cut into small pieces
  • 1/4 teaspoon salt
  • 1 cup sugar
  • 1 1/2 teaspoons vanilla bean paste (or extract)
  • 2 eggs
  • Granulated sugar for coating

Preparation

In a medium bowl, combine flour, cocoa powder, and baking powder; set aside.

Combine baking chocolate, butter, and salt in a small saucepan and melt over very low heat, stirring well to combine. Pour mixture into a medium bowl and add sugar, stirring well, then add vanilla bean paste and stir until smooth. Add flour mixture and stir until completely combined; mixture will thicken. Cover with plastic wrap and chill for at least 1 hour, until easier to handle.

Preheat oven to 350 degrees. Line two baking sheets with parchment paper.

Using a one-inch cookie scoop, scoop generous portions of dough and roll into balls, then dip in sugar and toss to coat very well. Place cookies about 2 inches apart on baking sheets and bake for 11 minutes; remove from oven and allow to cool on baking sheets for about 4-5 minutes before removing to wire racks to cool completely.

Store in an airtight container at room temperature. Makes 18.

Brownie Cookies

browniecookies
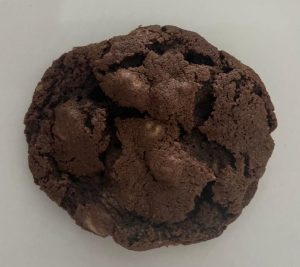
So, all the benefits of a brownie in cookie form? Yeah, sign me up. I don’t know who thought of this, but they’re a genius and deserve some type of Nobel Prize. Wouldn’t it be awesome if there were a Nobel Prize for baking? Anyway…

Not to be confused with the brookie, which is a combination of a brownie and a chocolate chip cookie, these brownie cookies are literally brownies in cookie form. They’re fudgy without being gooey – an important aspect of brownie-ness in my opinion – and just really, really delicious. The original recipe comes from Erren’s Kitchen, and I left out the optional sprinkle of sea salt because I didn’t have it – but I’m glad I didn’t, because I feel like these treats are perfect without it.

Ingredients

  • 1 1/4 cups flour
  • 1/4 cup cocoa powder
  • 1 teaspoon baking powder
  • 1/2 teaspoon salt
  • 1 cup semisweet chocolate chips
  • 8 tablespoons butter
  • 1 teaspoon instant coffee granules
  • 1 teaspoon vanilla extract
  • 2 eggs
  • 1 cup light brown sugar
  • 1/4 cup granulated sugar

Preparation

Sift together flour, cocoa powder, baking powder, and salt; set aside. In a medium saucepan over low heat, combine chocolate chips, butter, coffee granules, and vanilla and stir until melted and smooth; set aside to cool for a few minutes. In a mixer, beat eggs, brown sugar, and granulated sugar until light in color, about 3-4 minutes. Beat in the chocolate/butter mixture, then fold in the flour mixture. Cover your bowl with plastic wrap and let it sit at room temperature for about 30 minutes.

Preheat oven to 350 degrees. Line several baking sheets with parchment paper. Using a 2-inch cookie scoop, drop scoops of dough onto the baking sheets, leaving about 2 inches between each – I baked 6 cookies per sheet.

Bake for 10-12 minutes, until edges are set and tops are puffy. Remove from oven and cool on baking sheets for 5 minutes, then place on a wire rack to cool completely. Makes about 27.

Chocolate Orange Rounds

embossedchocolateMy dear friend Carrie gave me a lovely embossed rolling pin for my birthday this year. It has a folk art-type pattern of flowers, and I’ve been looking forward to using it for months now. As I’m on vacation this week, I’m baking up a storm, and decided to go with a chocolate orange roll-out cookie to test my embossed rolling skills.

While the cookies look absolutely delicious, they are too bitter for me. I used a King Arthur Baking recipe went with dark cocoa for my cocoa powder, but next time I’ll use regular unsweetened cocoa for a lighter chocolate taste. Mike proclaimed them as delicious and remarked that they’d be good with a pint of Guinness. Perhaps I’ll pick some up for him while running errands today.

Ingredients

  • 12 tablespoons butter, at room temperature
  • 1/2 cup powdered sugar
  • 1/2 teaspoon salt
  • 1 1/2 teaspoons vanilla extract
  • zest of 1/2 a large orange
  • 1 1/2 cups flour
  • 1/4 cup unsweetened cocoa powder

Preparation

In a mixer fitted with the paddle attachment, beat butter and powdered sugar. Add salt, vanilla extract, and orange zest and beat until fluffy. Add flour and cocoa powder and beat on low to combine, or stir in with a spoon. Wrap dough in plastic and chill for at least 30 minutes or until ready to use.

Preheat oven to 350 degrees. Line three baking sheets with parchment paper.

Using a regular rolling pin, roll out dough on a lightly floured surface to about 1/4 inch thickness. Using your embossed rolling pin, roll the dough again to imprint the pattern. Using a round cutter, cut out circles and place on the parchment-lined sheets. Bake for 12-14 minutes, until edges are set. Remove from oven and allow to cool on the baking sheets for 1-2 minutes, then place on a wire rack to cool completely. Store in an airtight container at room temperature for 3-4 days. Makes about two dozen cookies.

Old-Fashioned Chocolate Sugar Cookies

Choosing a favorite cookie is next to impossible…at least for me. But these old-fashioned chocolate sugar cookies, a recipe I found at Mel’s Kitchen Cafe, could be serious contenders for one of my favorite cookies ever. They’re soft, with a crunchy edge and soft, chewy middle. Flavor-wise, they remind me just a bit of a brownie, but not exactly. I decided to call mine “old-fashioned,” since I made them slightly smaller than the original and pressed them with a fork like you would a peanut butter cookie. They look very homey, like something your favorite aunt would have made.

The original author stressed the importance of using dark brown sugar in the recipe, and I completely agree with her. I don’t think the light brown version would yield the same kind of flavor or texture you get with dark brown sugar, but you can certainly substitute it and let me know what happens.

Ingredients

  •  1/3 cup sugar
  •  1 1/2 cups plus 2 tablespoons  flour
  •  3/4 cup  unsweetened cocoa powder
  •  1/2 teaspoon baking soda
  •  1/4 teaspoon baking powder
  •  14 tablespoons butter
  •  1 3/4 cups packed dark brown sugar
  •  1 tablespoon vanilla extract
  •  1/2 teaspoon salt
  •  1 egg, plus 1 egg yolk

Preparation

Preheat oven to 350 degrees. Line two baking sheets with parchment paper.

Place granulated sugar in a small bowl; set aside. In a medium bowl, stir together the flour, cocoa powder, baking soda, and baking powder and set aside.

Melt 10 tablespoons butter in a microwave-safe bowl, checking frequently – you want your butter to be just melted and not too hot. Stir in the remaining 4 tablespoons butter; this will bring the temperature down slightly. Let the butter sit until its about 90 degrees in temperature, then pour into a large bowl and whisk in dark brown sugar, vanilla, and salt until completely smooth. Whisk in egg and yolk, then stir in flour mixture until just combined.

Using a 2-inch cookie scoop, scoop out dough and roll into balls, then dip in granulated sugar to coat. Place on the baking sheet, leaving space between for spreading. Gently press the tops with a fork to make the crisscross pattern.

Bake for about 10-12 minutes, until edges are set but tops are still puffy – be careful not to overbake these, or they’ll be too hard. Cool on baking sheet for about 3 minutes, then transfer to a wire rack to cool completely.

Makes about 24 cookies.

Chocolate Charms

My nephew Roman is a big fan of store-bought chocolate cookies like Oreos. While he loves my chocolate cake, these chocolate charms – essentially like a chocolate shortbread, weren’t his favorite. I sent this shipment to North Carolina for his Valentine’s Day gift, and he apparently ate one and said, eh, I don’t like this. Fortunately my brother and sister-in-law both loved them, so it’s not a loss.

The original recipe for these treats comes from the Martha Stewart Living Cookie book and calls for a dusting of cocoa powder before serving. As I shipped these, I left them un-dusted, but I actually thought the next time I make them I’d like to dip them in a cocoa icing. We’ll see how that goes.

Ingredients

  • 2 cups flour
  • 1/4 cup cocoa powder
  • 1/4 teaspoon salt
  • 1 cup butter, at room temperature
  • 3/4 cup sugar
  • 1 teaspoon vanilla extract

Preparation

Sift together flour, cocoa powder, and salt in a medium bowl; set aside.

In a mixer fitted with the paddle attachment, beat butter on medium speed until fluffy, about 3-4 minutes. Add sugar and beat on medium for 3-4 minutes more, then add vanilla extract. Beat in flour/cocoa mixture until dough is just combined, scraping the sides of the bowl a few times. The dough may be just a bit crumbly, but should hold together when you squeeze it.

Turn dough out onto a piece of plastic wrap and flatten into a rough disc, then chill for about 1 hour.

Preheat oven to 325 degrees. Line two baking sheets with parchment. Break off 1-inch pieces of dough and roll into balls, then place on the parchment-lined baking sheet. Bake for 20 minutes, rotating the sheet about halfway through. Cool for a few minutes on the baking sheet, then remove to a wire rack to cool completely.

Store in an airtight container for about 1 week. If desired (and not shipping), dust with cocoa powder before serving. Makes about 2 1/2 dozen.

Halloween M&M Cookies

Finding Halloween cookies that ship well can be a challenge. Many adorable treats involve icing, frosting, or other decorations that aren’t quite suitable for a trip across the country. Sure, I’d love to bake adorable sandwich cookies with eyes and fangs that look like The Monster Book of Monsters from Harry Potter, or witch hat cookies made with Hershey’s kisses, or even just cute cut-outs frosted to look like ghosts and tombstones, with but such treats don’t hold up in shipping.

Fortunately I found these easy-to-bake, easy-to-ship Halloween M&M cookies at Cooking with Karli. I amended her recipe just a bit by adding two tablespoons of vanilla extract, rather than just one. I also meant to keep some M&Ms out to press into the tops of these cookies but totally forgot, so they definitely look more cookie-from-the-black-lagoon with the M&M lumps in them than I’d intended…but that actually works well for Halloween, right?

Ingredients

  • 1 1/2 cups flour
  • 1/2 cup cocoa powder
  • 1 teaspoon baking soda
  • 1/2 teaspoon salt
  • 12 tablespoons butter, softened
  • 1/2 cup sugar
  • 1/2 cup light brown sugar
  • 1 egg
  • 2 tablespoons vanilla extract
  • 1 tablespoon milk
  • 11.4 ounce package Ghoul’s Mix M&Ms

Preparation

Preheat oven to 350 degrees. Line several baking sheets with parchment paper.

In a medium bowl, combine flour, cocoa powder, baking soda, and salt; set aside.

In a mixer fitted with the paddle attachment, cream butter, sugar, and brown sugar until light and fluffy, about 3 minutes. Add egg and vanilla and beat until creamy.

Add flour mixture all at once and beat with the mixer running on low speed; when the flour mixture is about halfway incorporated into the butter/egg mixture, add milk. Beat to combine completely, then stir in M&Ms. Though the original recipe said the dough will be very soft, mine was pretty sturdy.

Using a 1-inch cookie scoop, scoop dough and roll into balls, then flatten the balls slightly and place on the parchment-lined baking sheets. If your dough is softer, you’ll be able to just drop the scoops onto the baking sheet. Bake for 8-10 minutes, until edges are set and tops no longer look shiny. Remove from oven and cool on the baking sheets for a few minutes, then remove to a wire rack to cool completely.

Store in an airtight container; if shipping, store between layers of waxed paper. Makes about 30 cookies.

Chocolate Hearts

chocolate-heart-cookieI inherited some vintage cookie cutters from my grandma Zella, among them a scallop-edged heart with a red wooden peg handle. With Valentine’s Day right around the corner, it seemed appropriate to make chocolate hearts to send to my nephew Roman, who now lives in North Carolina.

Cookie cutters come in nearly every shape and size, for every occasion and holiday. My cookie cutters, of which there are dozens, live in a wonderful set of stackable drawer containers in one of my kitchen cabinets. I have all the basics, plus cutters for nearly every holiday, with some animals, dinosaurs, and other fun shapes like an umbrella and a teapot mixed in. Zella’s vintage heart is among my favorites, though.

Ingredients

  • 1 1/2 cups flour
  • 3/4 cup cocoa powder
  • 1/8 teaspoon salt
  • 12 tablespoons butter, softened
  • 1 1/3 cup sugar
  • 1 egg
  • 1 teaspoon vanilla extract

Preparation 

In a medium bowl, combine flour, cocoa powder, and salt; set aside.

In a mixing bowl, cream together butter and sugar until fluffy. Add egg and vanilla extract, beating until well-combined.

Slowly add flour mixture, scraping the sides of the bowl often and beating until a very well-combined, soft dough forms.

Gently knead the dough a few times to make sure it comes together; roll dough into a ball and flatten into a disc. Wrap in plastic and chill for 1 hour.

Preheat oven to 375 degrees; line three baking sheets with parchment or foil.

On a lightly floured surface, roll dough to 1/8 inch thickness. Cut with a heart-shaped cookie cutter; if using different sizes of hearts, be sure to bake all of the same size on one cookie sheet. Baking different-sized or differently-shaped cookies on the same sheet can lead to uneven results; some of your cookies might be underdone while others will be overdone.

Bake for 8-10 minutes, until edges are set. Remove from oven and cool on cookie sheets for 1-2 minutes, then remove to wire racks to cool completely.

Makes about 3 dozen, depending on the size of your cookie cutter.

Chocolate Orange Cookies

chocolateorangecookiesSometimes I wonder who first looked at a piece of citrus fruit and thought, “hmm, I’m going to scrape off the outer layer of that skin and bake with it.” Regardless, it was a great idea.

Proper zesting of oranges, lemons, and limes can best be achieved by using a microplane grater, like this one. When zesting, wash your fruit, dry it with a paper towel, and stick to the colored outer layer of your rind, leaving the white pith alone. I usually zest my fruit first, then slice it and juice it; you can always reserve the juice for another time.

This recipe is adapted from Boys Ahoy.

Ingredients

  • 1 1/2 cups flour
  • 1/3 cup cocoa powder
  • 1/2 teaspoon salt
  • 1/2 teaspoon baking soda
  • 1/2 teaspoon baking powder
  • Zest of one large orange
  • 10 2/3 tablespoons butter, softened
  • 1 1/3 cup granulated sugar (reserve 1/3 cup for rolling)
  • 1 egg
  • 1 teaspoon vanilla
  • 1 1/2 tablespoons freshly squeezed orange juice

Preparation

Preheat oven to 350 degrees. Line several baking sheets with parchment paper.

In a medium bowl, combine flour, cocoa powder, salt, baking soda, and baking powder.

In a small bowl, combine 1/3 cup sugar with 1 teaspoon orange zest and mix together very well.

In a mixing bowl, beat butter, sugar, and remaining orange zest until light and fluffy, about 2-3 minutes.

Add egg, vanilla, and 1 tablespoon orange juice and beat until combined.

Add flour mixture in two batches, beating well and scraping the sides of the bowl a few times. Add remaining 1/2 tablespoon orange juice and beat until fully combined.

Using a 1-inch cookie scoop, scoop generous portions of dough and roll into balls. Dip in sugar/zest mixture, coating well.

Place on prepared baking sheets about 2 inches apart and flatten with the bottom of a glass to about 1/2 inch thickness.

Bake for 10-11 minutes, until edges are set but centers are still just slightly puffy.

Remove from oven and allow to cool on the baking sheet for about 5 minutes, then remove to wire racks to cool completely.