Cake for One

cake for oneFor the longest time, I’ve wanted to find a recipe for one 6-inch cake. Just a single 6-inch round, a cake for one, for those times you literally want a little cake.

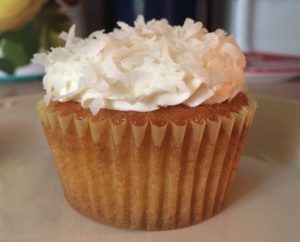
Most recipes can be cut down, but the single-layer cakes I’ve made before call for one egg – and I didn’t want to figure out how to halve an egg. Instead, I chose a recipe without eggs and cut it in half; this recipe for crazy vanilla cupcakes, which makes one dozen cupcakes or an 8-inch round, has no dairy at all. I’m delighted to report that it turned out very well,  just enough for four servings.

I cut my cake in half and turned it into a two-layer, but you could easily skip that step if you like. I also tinted my frosting a light pink and added some sprinkles for an extra bit of color.

Ingredients

For the cake 

  • 3/4 cup plus 1 1/2 tablespoons flour
  • 1/2 cup sugar
  • 1/2 teaspoon baking soda
  • 1/4 teaspoon salt
  • 1/2 teaspoon white vinegar
  • 3/4 teaspoon vanilla extract
  • 2 1/2 tablespoons vegetable oil
  • 1/2 cup water

For the frosting

  • 4 tablespoons unsalted butter, at room temperature
  • 1 3/4 cups powdered sugar
  • 1 teaspoon vanilla extract
  • 1/2 teaspoon almond extract
  • 3 teaspoons heavy cream
  • Food coloring, if desired
  • Sprinkles, if desired

Preparation

Preheat oven to 350 degrees. Lightly grease a 6-inch round cake pan; line with a parchment circle, then lightly grease the parchment and flour the pan.

In a medium bowl, combine flour, sugar, baking soda, and salt. Make three wells for the wet ingredients; add vinegar to one, vanilla to another, and vegetable oil to the third. Add water and stir until batter is very well-combined.

Pour batter into prepared pan and bake for 20-22 minutes, until a cake tester comes out clean.

Remove from oven and allow to cool in pan for a few minutes, then turn onto a wire rack to cool completely.

Make the frosting: In a mixing bowl, beat butter on medium speed for about 3 minutes, until light and fluffy. Add powdered sugar all at once, then beat on low speed until all of the sugar is incorporated into the butter; this will take a few minutes. Scraped down the bowl, then beat on medium speed for 2-3 minutes.

Add vanilla extract, almond extract, and heavy cream, then beat for another 1-2 minutes.

Add food coloring if desired; I used a few drops of red for a light pink shade.

Slice cake into two layers; place a dab of frosting on your cake plate to help the bottom layer stay in place during frosting. Place the bottom layer on the plate and top with a thin layer of frosting. Top with the second layer; frost the top and sides. If desired, add rainbow sprinkles.

Store in an airtight container at room temperature.

Butterscotch Cupcakes

butterscotch cupcakesSay hello to one of the best cupcakes I’ve ever made: the butterscotch cupcake. Last month, I tried and failed to make a butterscotch cake, and these treats are my redemption. They’re one of my favorite things I’ve ever made, and that’s really saying something.

Big thanks to Sally over at Sally’s Baking Addiction for the original recipe. I tweaked both the cupcake and frosting recipes just slightly, using sour cream instead of yogurt in the cupcakes and going with an adapted version of my own classic vanilla buttercream.

If you’re intimidated by the idea of making your own butterscotch sauce, don’t be. It’s incredibly easy, and the results are beyond delicious. I have about 1 cup of butterscotch left over, which will keep in the fridge for a week. Now we’ll just have to figure out how to use it up…maybe in another batch of these cupcakes?

Ingredients

For the butterscotch sauce

  • 4 tablespoons unsalted butter
  • 3/4 cup packed light brown sugar
  • 3/4 cup heavy cream
  • 2 teaspoons vanilla extract
  • 1/2 teaspoon salt

For the brown sugar cupcakes

  • 1 2/3 cups flour
  • 1/2 teaspoon baking powder
  • 1/4 teaspoon baking soda
  • 1/2 teaspoon salt
  • 8 tablespoons butter, melted
  • 1 cup light brown sugar
  • 1 egg, at room temperature*
  • 1/4 cup sour cream
  • 3/4 cup milk
  • 1 tablespoon vanilla extract

For the creamy vanilla frosting

  • 1 cup butter, at room temperature
  • 3 3/4 cups powdered sugar
  • 1 1/2 tablespoons vanilla extract
  • 1 tablespoon heavy cream

*To bring an egg to room temperature in a short amount of time, place it in a bowl and cover it with warm water. Allow it to sit for about 5 minutes. 

Preparation 

Make the butterscotch sauce: in a medium saucepan, melt butter over medium heat. Whisk in brown sugar, then heavy cream. Allow mixture to come to a gentle boil and cook without stirring for five minutes. Remove from heat and stir in vanilla and salt. Allow to cool completely before using; I stored my sauce in the refrigerator overnight before making the cupcakes, but it doesn’t have to be cold to use it.

Make the cupcakes: Preheat oven to 350 degrees. Line two cupcake tins with paper liners; this recipe made 21 cupcakes for me.

In a medium bowl, whisk together flour, baking powder, baking soda, and salt; set aside.

In a large bowl, combine brown sugar and melted butter, whisking until no lumps remain. Whisk in egg, sour cream, milk, and vanilla until smooth. Slowly whisk in flour mixture until batter is completely smooth; it will be fairly thick.

Using a two-inch cookie scoop, drop scoops of batter into prepared cupcake pans.

Bake for 15-20 minutes, until a cake tester comes out clean. Remove from oven and remove from pans immediately; cool completely before filling and frosting.

Make the frosting: In a mixing bowl, beat butter on medium speed for about 3 minutes, until light and fluffy. Add powdered sugar all at once, then beat on low speed until all of the sugar is incorporated into the butter; this will take a few minutes. Scraped down the bowl, then beat on medium speed for 2-3 minutes.

Add vanilla and heavy cream, then beat for another 1-2 minutes.

To fill and frost the cupcakes: Place butterscotch sauce in a squeeze bottle or pastry bag fitted with a small plain tip. Push the tip into the center of each cupcake and pipe in the sauce.

Fit a 14-inch piping bag with a Wilton M1 tip and fill with frosting; pipe frosting onto cupcakes. Drizzle tops with butterscotch sauce.

Store at room temperature for 2 days or in the refrigerator for up to 4 days; I’m keeping mine in the refrigerator until they go to the office with me tomorrow.

butterscotch cupcakes 2Here’s a cross-section of the cupcakes; check out the awesome fluffy cupcake texture and channel of butterscotch sauce down the center.

Fluffernutter Whoopie Pies

fluffernutter whoopies

If you’ve never had a fluffernutter, you haven’t really lived. Today, to my astonishment, I learned that some people don’t know what a fluffernutter is…and even if they knew, they’d never actually had one. How is this possible? This is America. Land of the marshmallow fluff, home of the peanut butter.

But seriously, if you’ve neither heard of nor eaten a fluffernutter, it’s a sandwich made with white bread, peanut butter, and marshmallow creme (or fluff, if you will)…and it is delicious. Invented in Massachusetts during World War I, this fluffy, peanut buttery treat was originally called a liberty sandwich, though I have no idea why. Last weekend I tried (unsuccessfully, but that’s another story for another time) to make fluffernutter cupcakes; they failed, but these flutternutter whoopie pies were a huge hit in my office today. The recipe below is adapted from Baking Bites, though I used a different type of filling instead of just marshmallow creme and peanut butter. This recipe makes 18 whoopie pies, and next time I think I’ll use a smaller cookie scoop to yield more.

Ingredients

For the peanut butter whoopie pies

  • 1 3/4 cups flour
  • 1/2 teaspoon baking powder
  • 1/2 teaspoon baking soda
  • 1/4 teaspoon salt
  • 8 tablespoons unsalted butter, at room temperature
  • 1/2 cup sugar
  • 1/2 cup light brown sugar
  • 2 eggs
  • 1/2 cup peanut butter
  • 1 cup sour milk* or buttermilk
  • 1 teaspoon vanilla extract

*To make sour milk, place 1 tablespoon vinegar in a glass measuring cup and add enough milk to equal 1 cup total. Stir; let stand for 5 minutes before using.

For the fluffy white filling

  • 8 tablespoons unsalted butter, at room temperature
  • 1 7-ounce jar marshmallow creme
  • 2 1/2 teaspoons vanilla extract
  • 2 3/4 cups powdered sugar

Preparation

Preheat oven to 350 degrees. Line three baking sheets with parchment paper.

In a medium bowl, combine flour, baking powder, baking soda, and salt; set aside.

In a mixing bowl, cream butter and sugars until light and fluffy. Add eggs, one at a time, scraping the sides of the bowl well. Add peanut butter and beat to combine, then add vanilla and beat well.

Add flour mixture and sour milk alternatively, beginning and ending with the flour, beating until no dry streaks remain and batter is well-combined. Your batter will look more like cake batter than cookie dough.

Using a 2-inch cookie scoop, drop scoops of batter onto prepared sheets; you should be able to fit 6 cookies on each sheet, as they will spread.

Bake for 12-14 minutes, until cookies are set and the tops spring back when lightly pressed. Remove from oven and cool on baking sheets for a few minutes, then remove to a wire rack to cool completely before filling.

To make the filling, place butter in a mixing bowl fitted with a paddle attachment and beat on medium speed for 1-2 minutes. Add marshmallow creme and vanilla and beat until very well-combined.

Add powdered sugar about 1 cup at a time, beating well between each addition and scraping the sides of your bowl frequently. You want a firm but spreadable consistency so that your filling doesn’t ooze out the sides.

Flip cookies over. Using a 1-inch cookie scoop, drop generous scoops of filling onto half of the cookies. Using a small offset spatula, spread filling slightly, then place another cookie on top.

Wrap each whoopie pie in plastic wrap for easy serving and storage. Since they are so large, it’s nice to be able to eat half of one and save the other half for later.


Peach Pie with Lattice Crust

peach pieSometimes I use canned pie filling. There, I admit it.

When you want to practice your latticework, it’s just a lot easier to make your crust from scratch, pop open a can of filling, and focus on your lattice strips than it is to worry about peeling your fruit and such. Someday, I’m sure I’ll make a peach pie from scratch, but in the meantime, my can of Lucky Leaf pie filling worked very well.

This is my third lattice-topped pie, and I think it’s the best appearance-wise. I had two crusts left over from yesterday’s lemon meringue pie adventure, and I still have a bit of crust left over from making my lattice, which I might turn into pie crust rolls later.

Ingredients

  • 2 pie crusts
  • 1 can peach pie filling
  • 1/4 teaspoon cinnamon

Preparation

Preheat oven to 425 degrees.

Mix cinnamon and pie filling; set aside.

Prepare pie crusts; line an 8-inch pie plate with one crust and reserve the second crust for the lattice top.

Roll out your second crust, then cut into 1 1/2 inch strips for the lattice. You’ll need 7 strips for this design.

Pour filling into pie dish; place four lattice strips on top. Fold back the first and third strips, then place another strip on your filling so it is perpendicular to the other strips. Fold back the strips so they cover the new strip, then repeat with remaining strips to form the lattice. If you’d like some video help, check out this tutorial from the folks at Southern Living magazine.

Fold the edges of your lattice strips over the edge of your bottom crust to seal. Gently press the tines of a fork into the crust vertically, then horizontally, all the way around your crust to create a crisscross design.

Place a pie guard or foil around the edge of your crust and bake for 25 minutes; remove pie guard and continue baking for 10 minutes.

Cool on a wire rack before serving.

Lemon Meringue Pie

lemon meringue pie

Lemon meringue pie reminds me of my grandpap, Andy Kozusko, Sr. It was his favorite, and a few times a year my grandma Zella made one for him, completely from scratch, of course.

My grandpap was a member of the Greatest Generation, born in Pittsburgh to Slovak immigrants in August 1921. He served in the Navy during World War II; he worked hard, knew how to fix everything, took great pride in his home and lawn, drove me to school, volunteered as a fireman, and served as a usher at church. He had more patience and gratitude than any person I’ve ever known.

This recipe comes from the Better Homes & Gardens Cookbook, and although the filling is kind of runny, it tastes delicious. I suspect that if my grandpap were here today, he’d thank me for making him a pie, tell me it was delicious, and ask for a second piece…because he was just that kind of man.

Ingredients

For the crust

For the filling

  • 3 egg yolks, beaten
  • 1 1/2 cups sugar
  • 3 tablespoons flour
  • 3 tablespoons cornstarch
  • dash of salt
  • 1 1/2 cups water
  • 2 tablespoons unsalted butter
  • zest of 1 medium lemon
  • 1/3 cup lemon juice

For the meringue

  • 3 egg whites, at room temperature
  • 1/2 teaspoon vanilla
  • 1/4 teaspoon cream of tartar
  • 6 tablespoons sugar

*My pie crust recipe yields 3 crusts, enough for this pie and either one or two more, depending on what you choose to make. Check out my pie ideas!

Preparation

Preheat oven to 350 degrees. Place beaten egg yolks in a large glass measuring cup next to your stove.

In a medium saucepan, combine sugar, flour, cornstarch, and salt; mix well. Slowly pour in water, stirring constantly to break up lumps. Cook and stir over medium-high heat until thickened and bubbly; once you see large bubbles break on the surface, it’s ready. Turn heat down to medium-low and continue cooking and stirring for 2 minutes more.

Gradually stir about 1 cup of hot filling into egg yolks, whisking constantly to temper. Pour the yolk/filling mixture back into the pan and bring to a gentle boil, then cook and stir for 2 minutes more.

Remove from heat and stir in lemon zest and butter, stirring until butter completely melts. Very carefully stir in lemon juice; keep filling warm while you make the meringue.

In a mixer fitted with the whisk attachment, whisk egg whites, vanilla, and cream of tartar on medium speed until soft peaks form (soft peaks will curl).  Gradually add sugar, 1 tablespoon at a time, and beat on high speed until stiff peaks form and meringue is glossy; this will take about 4 minutes.

Pour filling into pre-baked pie crust and gently top with meringue, spreading over filling and sealing to the edge of the crust to prevent it from shrinking.

Bake for 15 minutes; remove to a wire rack to cool for 1 hour, then cover and refrigerate for 3-6 hours before serving. Store in the refrigerator.


Vanilla Cupcakes with Raspberry Buttercream

vanilla cupcakes with raspberry buttercream

Some women go overboard in the shoe store, but I’m the kind of woman who goes overboard at her local nursery, falling in love with plants at first sight. This explains why our yard has an eclectic collection of flowers and shrubs; I see a plant, I love it, I buy it…then I figure out where I’ll put it later. Our most recent addition is a beautiful blue hydrangea, which lives next to a pink/peach rhododendron, a white azalea, and a yellow-flowering coreopsis plant.

Although we don’t have roses in our yard, I hope to add a few someday. These cupcakes were inspired by roses, easily frosted with the Wilton M1 tip.

Ingredients

  • 1 recipe Crazy Vanilla Cupcakes
  • 8 tablespoons butter, at room temperature
  • 1/3 cup seedless raspberry jam
  • 3 cups powdered sugar
  • 2 teaspoons vanilla extract

Preparation

Bake cupcakes and allow to cool completely before frosting.

In a mixing bowl, beat butter and raspberry jam on medium speed for about 2-3 minutes; mixture will look crumbly and curdled, but don’t worry – it will be fine when you add the powdered sugar.

Add powdered sugar and beat on low speed until the sugar is incorporated in the butter/jam mixture; this will take a few minutes. Scrape down the bowl, then add your vanilla extract and beat on medium speed for about 5 minutes, until frosting becomes somewhat fluffy. Note: this buttercream will not be as fluffy as regular buttercream, because the jam gives it a different texture.

Fit a 14-inch pastry bag with a Wilton M1 tip; beginning in the center of your cupcake, pipe a swirl and continue piping around the edge to make a rose design.

Store cupcakes in an airtight container at room temperature for up to three days.

Streamer Cake

streamer cakeMy mom, Genny, just turned 70. I intended to make a butterscotch cake for her party this weekend, but it turned out to be a disaster: burnt on the edges and gooey in the middle. I blame the recipe, of course, so I’ll go in search of another one. In the meantime, I baked this yellow cake and paired it with vanilla almond buttercream for a classic, birthday-cake type of cake.

Frosting-wise, I took inspiration from the Better Homes & Gardens Baking book, which featured a similar cake with different colors of icing as “streamers.” I’ve been practicing my piping skills for the past few months, though to make this cake you need very basic ones. A ribbon tip is helpful for the bottom piping, but you could use a plain one and make a bead design if you preferred. Color-wise, you can choose whatever you like to match your party theme; I went with colors that remind me of my mom and her love of the outdoors: yellow for sunshine, green for grass, and blue for the sky.

Yellow Cake

Ingredients

  • 2 1/2 cups flour
  • 2 1/2 teaspoons baking powder
  • 1/2 teaspoon salt
  • 10 2/3 tablespoons butter, slightly softened
  • 1 3/4 cups sugar
  • 1 1/2 teaspoons vanilla
  • 2 eggs
  • 1 1/4 cups milk

Preparation

Preheat oven to 375 degrees. Grease two 9-inch round cake pans, then line with parchment and grease the parchment. Lightly dust with flour.

In a medium bowl, combine flour, baking powder, and salt; set aside.

In a mixing bowl, beat butter on medium speed for one minute.

Add sugar and vanilla and beat until well combined.

Add eggs, one at a time, beating for one minute after each.

Add flour mixture and milk alternatively, beating until combined.

Divide batter evenly between pans and bake for 25-30 minutes, until a cake tester comes out clean. Cool in pans for about 5 minutes, then remove to wire racks to cool completely before frosting.

Vanilla Almond Buttercream

Ingredients

  • 1 1/2 cups unsalted butter, softened
  • 5 cups powdered sugar
  • 1 1/2 tablespoons vanilla extract
  • 1 1/2 tablespoons almond extract
  • Yellow, green, and blue food coloring

Preparation

In a mixing bowl, beat butter for about 1 minute.

Add powdered sugar and beat on low speed until all of the sugar is fully incorporated into the butter; this will take a few minutes.

Add vanilla extract and almond extract, beating well to combine. Taste; add more extract if desired.

Reserve about 3/4 cup of frosting for tinting; leave the remainder of the frosting white.

Place the bottom layer of cake on platter and frost the top, then place the second layer on top and frost the top and sides, creating as even a surface as you can.

Fit a piping bag with a ribbon tip and pipe a ribbon around the bottom edge of the cake.

Divide reserved frosting into three bowls and tint to your desired shade. Fit three piping bags with small plain tips and place one color in each bag.

Pipe colors, one at a time, to resemble birthday streamers.

Store cake at room temperature for up to three days.


Team Spirit Cupcakes

team spirit cupcakesThe Pittsburgh Penguins are playing in the Stanley Cup finals, and being a huge (and highly superstitious) hockey fan, I’m taking the series one game at a time. I actually baked these on Thursday night before game five, which we lost…but Mike’s coworkers still enjoyed them at the office the next day. We’re playing again tonight, and I’ll be in front of my television, hoping for victory.

These cupcakes are incredibly easy to make, and the recipe could be easily doubled (or tripled, even) to accommodate your sports-related celebrations (or hopes, for that matter). Just pick the frosting  color and embellishments of your choice. Next time, I’ll add some black sprinkles.

Crazy Almond Cupcakes

Ingredients

  • 1 1/2 cup plus 3 tablespoons flour
  • 1 cup sugar
  • 1 teaspoon baking soda
  • 1/2 teaspoon salt
  • 1 teaspoon white vinegar
  • 1 teaspoon almond extract
  • 1/2 teaspoon vanilla extract
  • 5 tablespoons vegetable oil
  • 1 cup water

Preparation

Preheat oven to 350 degrees. Line a 12-cup cupcake tin with paper liners; this recipe makes 12 cupcakes.

In a large bowl, mix flour, sugar, baking soda, and salt; make three wells for wet ingredients.

Add vinegar to the first well, vanilla to the second well, and vegetable oil to the third well. Add water and mix until smooth.

Using a 1/4 cup measuring cup, scoop batter into prepared cupcake wells.

Bake for 18-20 minutes, until a cake tester comes out clean. Remove from oven and remove cupcakes from pan immediately, cooling completely on a wire rack before frosting.

Gold Vanilla Almond Buttercream

Ingredients

  • 6 tablespoons unsalted butter, softened
  • 2 3/4 to 3 cups powdered sugar
  • 3/4 tablespoon vanilla extract
  • 3/4 tablespoon almond extract
  • Golden yellow food coloring

Preparation

In a mixing bowl, beat butter for about 1 minute.

Add powdered sugar and beat on low speed until all of the sugar is fully incorporated into the butter; this will take a few minutes.

Add vanilla extract and almond extract, beating well to combine. Taste; add more extract if desired.

Add golden yellow food coloring in small amounts, tinting to desired shade.

Frost cake or cupcakes and store at room temperature for up to three days.

Coconut Cupcakes

coconut cupcakesCoconut: people love it or hate it. I’ve never met anyone who said “yeah, coconut is okay.” I happen to love coconut, despite its somewhat odd texture, and look forward to pairing these cupcakes with different types of buttercream in the future. Lime, for example, is high up there on my list, as are lemon and mango.

My friend Jennie had her convalidation today, and I baked these cupcakes for her. Convalidation is a Catholic wedding ceremony for people who are already legally married, but weren’t initially married in the church. Jennie and her husband had a coconut cake at their civil wedding several years ago, and she requested coconut cupcakes as a nod to that. I’m happy to report that they were a big hit.

Coconut Cupcakes

  • 1 1/4 cups cake flour
  • 1 1/4 teaspoons baking powder
  • 1/2 teaspoon baking soda
  • 1/2 teaspoon salt
  • 2 eggs
  • 3/4 cup sugar
  • 1 tablespoon vanilla extract
  • 1 tablespoon coconut flavor
  • 1/2 cup canola oil
  • 1/2 cup buttermilk

Preparation

Preheat oven to 350 degrees. Line two regular-sized cupcake pans with paper liners; this recipe makes 21 cupcakes.

In a medium bowl, whisk together cake flour, baking powder, baking soda, and salt; set aside.

Place eggs in the bowl of a stand mixer fitted with the whisk attachment and beat on medium speed for 30 seconds. Add sugar and continue to beat for another 30 seconds.

Add vanilla and canola oil and beat on medium speed for 1 minute.

Add flour mixture and buttermilk alternatively in three batches, beginning and ending with the flour, scraping the sides of the bowl frequently. Batter will be very thin.

Using a quarter-cup measuring cup, scoop batter into prepared regular-sized cupcake liners, filling half full.

Bake for 11-13 minutes, until tops are light golden brown and a cake tester comes out clean. Remove from oven and remove cupcakes from pans; cool completely on a wire rack before frosting.

Coconut Buttercream

Ingredients

  • 1 cup butter, softened
  • 3 ¼ cups powdered sugar
  • 1 teaspoon vanilla extract
  • 2 3/4 teaspoons coconut flavor
  • About 1 cup shredded coconut, for topping

Preparation

Place butter in a mixing bowl and beat for a few minutes using the paddle attachment, then scrape down the bowl.

Add powdered sugar.  With your mixer on low, completely incorporate the powdered sugar into the butter.  (Hint: I find that placing a kitchen towel over the mixer during this stage prevents a powdered sugar blizzard.)

Increase speed and beat for 2-3 minutes.

Add vanilla extract and coconut flavor; beat for another 1-2 minutes, scraping the sides of the bowl well.

Fit a 14-inch piping bag with a large coupler and tip; I used the large shell tip from Wilton. Pipe frosting onto cupcakes.

Place shredded coconut in a shallow bowl and dip the top of each cupcake into the coconut.

Store at room temperature for up to three days.

Snickerdoodle Cupcakes

snickerdoodle cupcake 1What’s better than a snickerdoodle? A snickerdoodle cupcake.This recipe is adapted from Sally’s Baking Addiction, and it’s probably one of my favorites that I’ve ever made…which is really saying something.

It certainly helps that I’m a huge fan of cinnamon, and that I love snickerdoodles as well. I made just a few changes to Sally’s original recipe, adding cinnamon to the cupcake batter and using 1/3 cup of sour cream instead of 1/4 cup of yogurt. I also chose to go with a simple cinnamon vanilla buttercream frosting of my own creation, slathered on with a spatula, rather than piping it for a more homemade look. I have a feeling these will be a huge hit in the office tomorrow.

Ingredients

Snickerdoodle Cupcakes

  • 1 2/3 cups flour
  • 1/2 teaspoon baking powder
  • 1/4 teaspoon baking soda
  • 1/2 teaspoon salt
  • 2 1/2 teaspoons cinnamon, divided into 2 and 1/2 teaspoon portions
  • 8 tablespoons butter, melted
  • 1 1/2 cups sugar, divided into 1 cup and 1/2 cup portions
  • 1 egg
  • 1/3 cup sour cream
  • 3/4 cup milk
  • 1 tablespoon vanilla extract

Cinnamon Vanilla Buttercream

  • 8 tablespoons unsalted butter, at room temperature
  • 2 1/4 cups powdered sugar
  • 1 3/4 tablespoon vanilla extract
  • Heaping 1/2 teaspoon cinnamon

Preparation

Preheat oven to 350 degrees. Line cupcake tins with paper liners; my recipe yielded 17 cupcakes.

In a small bowl, combine 1/2 cup sugar and 2 teaspoons cinnamon; set aside.

In a medium bowl, combine flour, baking powder, baking soda, salt, and cinnamon; set aside.

In another medium bowl, whisk melted butter and sugar to combine. Add egg, sour cream, milk, and vanilla, stirring well to fully combine.

Add dry ingredients slowly, whisking to combine completely so no lumps remain.

Using a 1-inch cookie scoop, fill cupcake wells about 1/2 full, then top with 1 teaspoon cinnamon/sugar mix. Add one more scoop of batter to the top, so cupcake wells are filled about 3/4 full.

Bake for 19-21 minutes, until a cake tester comes out clean. Cool in pans for about 2 minutes, then remove to wire racks to cool completely before frosting.

To make the frosting, in a mixing bowl, beat butter on medium speed for about 1 minute. Add powdered sugar and mix on low speed until all of the sugar is incorporated into the butter; this will take a few minutes.

Add vanilla and cinnamon, mixing to completely combine, scraping the sides of the bowl often.

Using a 1-inch cookie scoop, drop scoops of frosting onto each cupcake. Frost with a small offset spatula.

Store in an airtight container at room temperature for up to 3 days.

Here’s a nice shot of the inside of the cupcake! snickerdoodle cupcake 2