Fall Spice Cupcakes

fall spice cupcakesDespite what retailers would have you believe, it’s still fall. And we have a lovely holiday – Thanksgiving – to celebrate this week. I get that Christmas can be a magical time of year for people, and most folks (even those who hate winter) get excited for the holidays, seeing family, spending time with friends, having special foods and whatnot. But when I heard Christmas music while out shopping this past weekend, I thought: not today, Santa. Not. Today.

Perhaps in response to the premature Christmasification of things, I baked these fall spice cupcakes, a warming combination of cinnamon, cloves, maple syrup, and applesauce. I found the recipe over at The Live-in Kitchen and cut it down to make a smaller batch, and I decided on a maple buttercream frosting instead of the original cream cheese one in the recipe. These treats are bound for my friend Diana, who is a fantastic baker herself and one of the few people who ever actually bakes for me.

Ingredients

For the cupcakes

  • 1/2 cup plus 6 tablespoons flour
  • 1 teaspoon baking powder
  • 1/2 teaspoon cinnamon
  • 1/4 teaspoon baking soda
  • 1/4 teaspoon cloves
  • 4 tablespoons butter, softened
  • 1/4 cup packed light brown sugar
  • 1/4 cup pure maple syrup, at room temperature
  • 1 egg, at room temperature
  • 1/2 cup unsweetened applesauce, at room temperature

For the frosting

  • 6 tablespoons butter, softened
  • 2 cups powdered sugar
  • 2-3 tablespoons pure maple syrup, to taste
  • 1 tablespoon milk

Preparation

Preheat oven to 350 degrees. Line a cupcake tin with paper liners; my recipe yielded 10 cupcakes.

In a medium bowl, combine flour, baking powder, cinnamon, baking soda, and cloves; set aside.

In a mixer fitted with the paddle attachment, cream together butter and brown sugar until light and fluffy. Add maple syrup and egg and beat to combine. Add flour mixture and applesauce alternatively in two batches, mixing to just combine.

Using a two-inch cookie scoop, scoop batter into cupcake wells, filling about 3/4 full. Bake for 15-18 minutes, until a cake tester inserted in the center comes out clean. Remove from oven and remove cupcakes from tin; cool on a wire rack completely before frosting.

To make frosting, beat butter on medium speed for about 1 minute; add powdered sugar and beat on low speed until the sugar is fully incorporated into the butter. Add maple syrup to taste, as well as 1 tablespoon milk to reach a spreadable consistency. Frost cupcakes using an offset spatula; store in an airtight container at room temperature for 1-2 days, or in the fridge for 2-3 days. The tops of these cupcakes get kind of sticky, so a cooler environment is best. Makes 10.

Kentucky Derby Pie

derbypieThe Kentucky Derby is in May…so why I did bake a derby pie in November? Well, Mike made shrimp and grits on Friday, and I wanted a dessert to complement it. But the recipe I tried failed, and once I fail at a recipe I must try again. I’ve spent literal years perfecting honey cake and buttercream, my friends. I could not let something that sounded as delicious as derby pie – essentially a pecan pie with chocolate and bourbon – go unperfected.

And so I took to the internet, searching for a recipe that seemed more feasible than the one I’d tried to make. I found this recipe at The Happier Homemaker, and it turned out great. I think I overbaked mine a bit, so next time I’ll pull it a few minutes earlier. And while I should probably call this Migraine Pie – because as it contains both chocolate and alcohol, I’m putting myself at migraine risk by eating it – it is absolutely delicious, almost like a chocolate chip blondie in pie crust, but not exactly. You’ll just have to make it and see what I mean.

Ingredients

For the pie crust

  • 1 1/4 cups flour
  • Dash of salt
  • 1/3 cup shortening
  • 4-5 tablespoons ice water

For the filling

  • 1 stick butter, melted
  • 1/2 cup dark brown sugar
  • 1/2 cup white sugar
  • 2 eggs
  • 1 teaspoon vanilla extract
  • 2 tablespoons Kentucky bourbon
  • 1/2 cup flour
  • 1/2 teaspoon salt
  • 1 cup pecan halves
  • 1 cup semisweet chocolate chips

Preparation

Preheat oven to 350 degrees. Place a pie dish on a baking sheet to catch any drips if your filling bubbles over the edges.

Make the crust: in a large bowl, combine flour, salt, and shortening. Cut the shortening in with a pastry cutter until the mixture looks like coarse crumbs. Drizzle two tablespoons water over the mixture and toss with a fork to combine; add enough water to bring your dough together, but be careful not to make the dough too wet. Gather dough into a ball and roll out to about a 12-inch circle; carefully lift into your pie pan, and trim and crimp the edges.

Make the filling: In a large bowl, combine melted butter and sugars, whisking to combine. Whisk in eggs, vanilla, and bourbon, then fold in flour and salt. Stir in pecans and chocolate chips.

Pour filling into the pie shell and bake for about 55-60 minutes. Remove from oven and allow to cool just slightly before serving, or chill and serve cold. Store in an airtight container in the refrigerator for 2-3 days; makes about 8 servings, depending on how generously you slice it. 


Fall Fun Chocolate Cupcakes

fallfuncupcakesI struggled to figure out what to call these cupcakes. They’re actually just chocolate cupcakes, frosted with vanilla buttercream to look like pumpkins. But chocolate pumpkin cupcakes – that’s a different thing altogether. And it actually sounds delicious, despite what some people might think about the pumpkin/chocolate combo. And so, I settled on “fall fun,” because they were fun to make.

As you can see in the photo below, Tucker was quite impressed with them – but as they’re chocolate, they are absolutely not dog friendly. Next time, I’ll go with more vibrant colors for my frosting – these shades are quite muted. I’ll also use a different piping tip for my pumpkin stems, because these ended up looking more like the Sorting Hat from Harry Potter than I’d like. Regardless of how they look, they’re quite tasty. I hope my brother Andy and nephew Roman, who were in town from North Carolina this weekend, will enjoy them.

Ingredients

For the cupcakes

  • 1 1/2 cups flour
  • 3 tablespoons cocoa powder
  • 1 cup sugar
  • 1 teaspoon baking soda
  • 1/2 teaspoon salt
  • 1 tablespoon vinegar
  • 1 teaspoon vanilla
  • 3 tablespoons vegetable oil
  • 1 cup water

For the frosting

  • 1 cup butter, at room temperature
  • 3 1/4 cups powdered sugar
  • 2 tablespoons vanilla extract
  • 1/2 teaspoon almond extract
  • Orange, green, and brown food coloring

Preparation

Preheat oven to 350 degrees. Line cupcake pans with paper liners; this recipe yields 14 cupcakes.

In a large mixing bowl, combine flour, cocoa powder, sugar, baking soda, and salt. Mix until well-blended, then make three wells for the wet ingredients.

Place vinegar, vanilla, and vegetable oil into the wells; add water and mix until the batter is smooth. The mixture will bubble up slightly when you add the water, so just keep mixing until you get a smooth consistency in the batter, which will be fairly thin.

Using a 1/4 cup measure, divide batter among your cupcake wells. Bake for 13-15 minutes, or until a cake tester inserted in the center comes out clean. Remove from the oven, then remove cupcakes from pan and cool completely on wire racks.

To make frosting, in a mixing bowl, beat butter for about 1 minute. Add powdered sugar and beat on low speed until all of the sugar is fully incorporated into the butter; this will take a few minutes. Add vanilla extract and almond extract, beating well to combine completely. Divide into three portions; two small portions of just a few tablespoons each for your stems and leaves, then the remainder for your pumpkins. Tint the largest portion orange, then the smaller portions green and brown. Fit a large piping bag with a Wilton M1 tip and pipe swirls of frosting onto each cupcake to create your pumpkin shape. Fit a small piping bag with a star or plain tip and pipe stems; fit another small piping bag with a leaf tip and pipe leaves. Store cupcakes in an airtight container at room temperature for 2-3 days. Makes 14.

tuckerwithcupcakesTucker was very interested in these, but remember – chocolate can be deadly for dogs. Never feed your pup chocolate! 

Bailey’s Chocolate Chip Cookies

baileyschocolatechipcookiesEarlier this month I got the flu, even though I got (and still firmly believe in) my vaccine. The Original Gangster Flu, the type that knocks you out of commission for a solid week. During my flu experience Mike found this recipe courtesy of Baker by Nature, and I promised him once the plague lifted I’d bake it. I’ve been symptom-free for about a week now, so today I gave it a try. I adapted my recipe to use milk chocolate chips instead of semisweet because that’s what I had on hand, so I think you can go with either one.

While I don’t really taste the Bailey’s in these cookies, they are delicious. Bailey’s is one of my favorite things to bake with, but to me these just taste like rich chocolate chip cookies with a hint of something I can’t quite identify. Mike loved them though, and that’s all that matters to me. My only recommendation for next time is that I bake them for less time; I think they turned out crisper than I’d prefer, so I’ll pull them around 8 minutes in the future and let them finish baking while they cool.

Ingredients

  • 2 1/2 cups flour
  • 3/4 teaspoon salt
  • 1 teaspoon baking soda
  • 1/2 teaspoon cinnamon
  • 1 1/2 teaspoons espresso powder
  • 1 cup butter, at room temperature
  • 1 cup packed dark brown sugar
  • 1/2 cup white sugar
  • 1 1/2 teaspoons vanilla extract
  • 3 tablespoons Baileys Irish Cream
  • 2 eggs, at room temperature
  • 12-ounce package milk or semisweet chocolate chips

Preparation

In a medium bowl, stir together flour, salt, baking soda, cinnamon, and espresso powder; set aside. In a mixer fitted with the paddle attachment, cream butter and sugars until light and fluffy. Add vanilla extract and Bailey’s and mix to combine; add eggs one at a time, mixing after each. Stir in flour mixture, then stir in chocolate chips; batter will be fairly thick, but be careful not to over mix it. Cover and chill for about 1 hour.

Preheat oven to 375 degrees; line four baking sheets with parchment paper and let your dough sit out at room temperature while the over preheats. Using a two-inch cookie scoop, scoop balls of dough and place on cookie sheets, spacing about 2 inches apart. Bake for 8-10 minutes, until edges are set but center still look puffy; remove from oven and cool on the baking sheets for a few minutes before transferring to a wire rack to cool completely. Store in an airtight container at room temperature; makes about 32 cookies, depending on how generous you are with your scoops.

Salted Caramel Chocolate Cookie Bars

saltedcaramelchocolatecookiebarsToday’s baking theme seems to be “looks good, tastes…just okay.” Granted, I have very high standards when it comes to flavor profiles, but I feel like there’s something missing from these salted caramel chocolate cookie bars, which I found over at Inside Bru Crew Life and adapted just slightly based on what I had on hand. The frosting is absolutely delicious, but the bars themselves need something more. The original recipe called for caramel-flavored coffee creamer in the dough and I just used milk, so perhaps that’s what’s missing?

In any case, this recipe makes a ton of frosting and you’ll have at least a cup or so left over. I suspect I’ll whip up some brownies and use the leftovers on them because I think that would be quite tasty. I’m also considering whether pecans or walnuts – toasted, of course, to really bring out their flavor – would make a nice addition. Stay tuned!

Ingredients

For the cookie base

  • 2 cups flour
  • 1/2 cup dark cocoa powder
  • 1 teaspoon baking powder
  • 1/2 teaspoon salt
  • 8 tablespoons butter, at room temperature
  • 1/2 cup brown sugar
  • 1/2 cup white sugar
  • 1 egg
  • 1 tablespoon vanilla extract
  • 2 tablespoons milk

For the frosting

  • 1 cup butter, at room temperature
  • 1/2 teaspoon vanilla extract
  • 1/2 cup caramel ice cream topping
  • 1 teaspoon kosher salt, plus more for sprinkling
  • 4 cups powdered sugar

Preparation

Preheat oven to 375 degrees. Line a 9 x 13 baking tin with foil and spray with baking spray. In a medium bowl, combine flour, cocoa powder, baking powder, and salt; set aside.

In a mixer fitted with the paddle attachment, cream butter and sugars until light and fluffy. Add egg, vanilla, and milk and beat to combine. Add flour mixture in two batches, beating well between each.

Press dough into the bottom of the baking tin to create an even layer; bake for 14 minutes. Remove from oven and let cool completely before frosting.

To make frosting, beat butter on medium speed for about 1 minute. Add vanilla, caramel sauce, and salt and continue to beat until combined. Add powdered sugar and beat on low, then medium speed, to fully incorporate the sugar into the butter mixture.

Spread frosting over bars and sprinkle lightly with additional kosher salt (if desired). Cut into 24 bars and store in an airtight container for 1-2 days.

Autumn Leaf Shortbread

leafshortbreadThis morning Tucker and I had a lovely walk at North Park, one of our favorite local places. North Park sits on more than 3,000 acres and includes a manmade lake for kayaking, paddling, and fishing, miles of hiking trails through beautiful woods, an ice rink, a swimming pool, various ballfields and tennis courts…pretty much everything you’d expect from a suburban park.

The trees at North Park are stunning at this time of year, and this year especially. Cooler weather has brought out vibrant reds and oranges, which are some of my favorite shades. These shortbread cookies, inspired by a recipe I found at Tastemade, are inspired by Mother Nature’s lovely fall showcase; while they look beautiful, they weren’t quite as flavorful as I would have liked. They have a lovely crumbly texture, but I think they need more vanilla extract – or even vanilla paste – to give them a richer flavor.

Ingredients

  • 8 tablespoons butter, at room temperature
  • 1/2 cup powdered sugar
  • 1 teaspoon vanilla extract
  • 2 cups flour
  • 3/4 teaspoon salt
  • Yellow, orange, and red gel food coloring

Preparation

Preheat oven to 325 degrees. Line a large baking sheet with parchment.

In a mixer fitted with the paddle attachment, cream butter, powdered sugar, and vanilla. Add flour and salt and mix to combine completely; this takes a few minutes. Divide dough into three portions and tint each portion a different color, then marble your dough together. If necessary, you can chill your dough, but I skipped this step because it was cool enough in my house today and the dough didn’t get that soft.

Roll your dough into a log, then roll out to about 1/4 inch thick. Cut cookies using a leaf-shaped cutter; press lines for leaf veins into each cookie using a sharp knife. Place on baking sheet and bake for 25-30 minutes, until bottoms are very light golden brown.

Remove from oven place on a wire rack to cool completely. Makes about a dozen, depending on the size of your cutter; I used a maple leaf shape that’s about 2 inches wide. Store in an airtight container at room temperature for 3-4 days.

Pumpkin Cheesecake Bars

pumpkincheesecakebarsSometimes you find a recipe online or in a cookbook that totally fails, even though you followed it to the letter. It happens to most bakers at some point or another, and we just chalk it up to a learning experience. But other times you hit the jackpot, as was my experience with these amazing treats. Billed as pumpkin streusel bars by Sally at Sally’s Baking Addiction, and incredibly reliable baker and blogger, I chose to call my version pumpkin cheesecake bars because they remind me so much of cheesecake. 

My version uses sour cream instead of Greek yogurt, and I added more nutmeg to the batter and also tossed some nutmeg into the streusel – but otherwise the recipe is the same, so Sally deserves the credit rather than me. I’ll definitely make these again and might mix some toasted pecans into the streusel next time. 

Ingredients

For the crust

  • 1 1/4 cups gingersnap cookies
  • 2 tablespoons sugar
  • 4 tablespoons butter, melted

For the filling

  • 8 ounces cream cheese, at room temperature
  • 1/2 cup sugar
  • 3 eggs
  • 2 teaspoons vanilla extract
  • 1 1/4 cups pumpkin puree
  • 1/3 cup sour cream
  • 1 1/2 teaspoons cinnamon
  • 1/4 teaspoon ginger
  • 1/4 teaspoon cloves
  • heaping 1/4 teaspoon nutmeg

For the streusel and icing

  • 1/2 cup old-fashioned oats
  • 1/3 cup packed light brown sugar
  • 1/4 cup flour 
  • 1/4 teaspoon cinnamon
  • Dash of nutmeg
  • 4 tablespoons butter, cut into small cubes
  • 1 1/2 cups powdered sugar
  • 2 – 3 teaspoons water

Preparation

Preheat oven to 325. Line an 8-inch square pan with foil, extending foil over the sides.

Make your streusel and keep in the fridge while you prepare the crust and filling: combine oats, brown sugar, flour, and spices in a small bowl. Rub (or cut) in butter until the mixture looks like coarse crumbs. Set aside in the fridge until ready to use. 

Mix the gingersnap cookie crumbs, sugar, and butter together and press into the bottom of the pan. Bake for 10 minutes; turn oven temperature up to 350 degrees. 

While crust is baking, prepare the filling. Beat cream cheese and sugar until fluffy, then add eggs, one at a time, beating after each. Beat in pumpkin, sour cream, and spices until mixture is creamy. Pour onto crust and top with streusel.

Bake for 40-45 minutes, covering the top with foil around 30-35 minutes to prevent over-browning. Bars are done when very lightly browned and the center is set; I used a cake tester to make sure they were done in the middle. Remove from oven and cool on a wire rack for about 1 hour, then chill for 3 hours in the fridge. Before serving, mix powdered sugar and water together to form a drizzly icing and drizzle over bars. 

Makes 12 or 16 bars, depending on how large you make them – mine made 16. Store in the fridge for 2-3 days – these bars become sticky after a day or so, but they are still absolutely delicious. 

Cinnamon Pumpkin Bites

cinnamonpumpkinbites
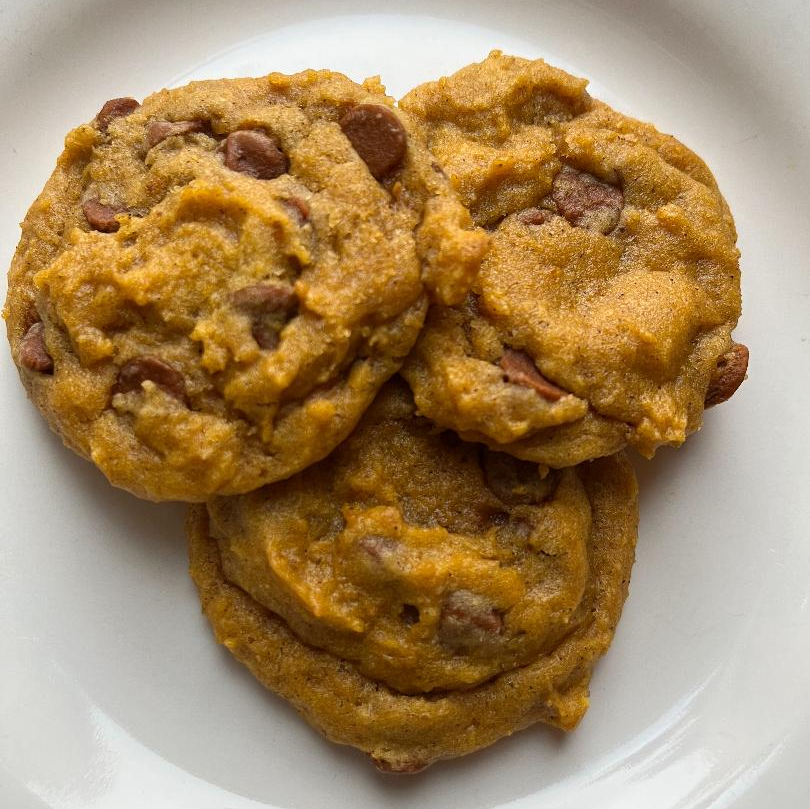
Ahh, fall baking. Time for some of my favorite  flavors, like pumpkin, maple, cinnamon, and ginger. Interesting ingredients like cinnamon chips, which I used in my maple cinnamon scones. But what does one do with leftover cinnamon chips? Whatever she wants…including stirring them into pumpkin cookies.

This recipe is one I’ve made before with butterscotch chips (which was absolutely delicious), and you could use semisweet or dark chocolate chips as well. The end result is a very tender, almost cake-like cookie with great flavor.

Ingredients

  • 2 cups flour
  • 1/4 teaspoon salt
  • 1 teaspoon baking soda
  • 1 teaspoon baking powder
  • 1/2 teaspoon cinnamon
  • 1/4 teaspoon ginger
  • 1/4 teaspoon allspice
  • 1/8 teaspoon nutmeg
  • 8 tablespoons butter, slightly softened
  • 1 cup sugar
  • 1 cup pumpkin puree
  • 1 teaspoon vanilla extract
  • 1 cup cinnamon chips

Preparation

Preheat oven to 350. Line several baking sheets with parchment paper.

In a medium bowl, sift together flour, salt, baking soda, baking powder, cinnamon, ginger, allspice, and nutmeg; set aside.

Cream butter and sugar until light and fluffy, about 3 minutes. Add pumpkin puree and vanilla extract and beat until combined. Batter will be clumpy, but this is normal.

Add flour mixture in two batches and beat until combined, scraping the sides of the bowl a few times. Stir in cinnamon chips.

Using a one-inch cookie scoop, drop scoops of dough onto prepared baking sheets.

Bake 8-10 minutes; cookies may look slightly underdone, but they will continue baking as they cool. Remove from oven and cool on baking sheets for 5 minutes before removing to a wire rack to cool completely.

Store in an airtight container at room temperature for 1-2 days; as these cookies are so cakey, they’ll start to get too soft after a few days. Makes about 3 dozen.

Maple Cinnamon Scones

maplecinnamonscones
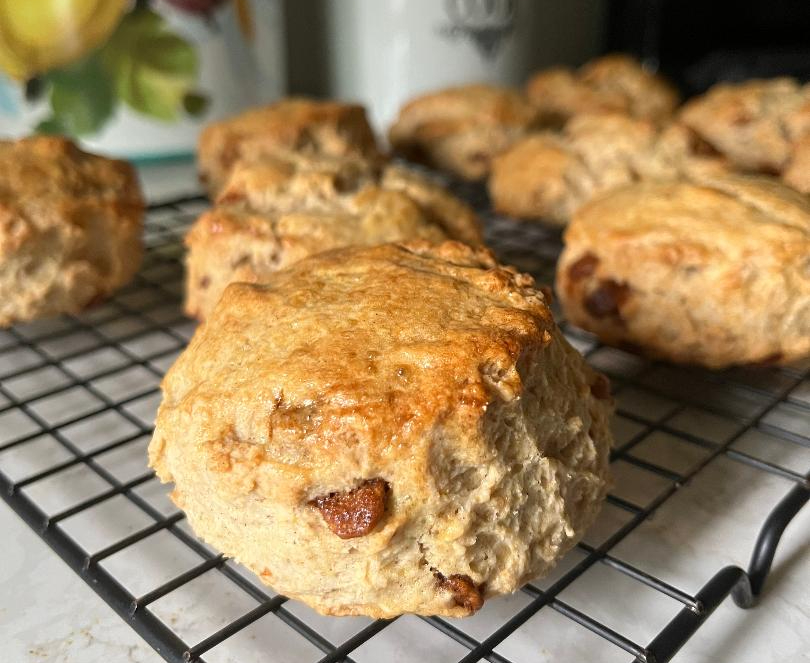
My obsession with England is profound. I love British baking, novels, weather, accents, movies, tea, television shows, royals (especially Camilla, but that’s a story for another day), universal health care…I could go on an on. When Mike and I traveled there in 2007, I wanted to stay. So in honor of Her Majesty Queen Elizabeth’s passing after an epic 70-year reign, I decided to bake a British treat with an American twist this weekend: maple cinnamon scones.

Here’s the thing about scones: it’s much easier to just cut them with a knife than a fluted cutter, lest they start out looking amazing and end up looking like some scruffy, down-on-its-luck cousin of an apple fritter. My first cuts turned out beautifully, like the front scone in the photo here. But as I gently pulled my scraps together and made my second and third cuts, things got ugly. Fortunately they all taste the same – a lovely blend of fall flavors made even more delicious by the addition of cinnamon chips. If you’re not sure where to find them, try your local Target and their seasonal section; that’s where I found these Hershey’s Cinnamon Chips.

Ingredients

Ingredients

  • 2 cups flour
  • 1/4 cup maple sugar
  • 1 1/4 teaspoons baking powder
  • 1/4 teaspoon baking soda
  • 1/4 teaspoon salt
  • 8 tablespoons butter, cold, cut into cubes
  • 1/2 cup cinnamon chips
  • 2/3 cup buttermilk
  • 1 tablespoons pure maple syrup

For egg wash

  • 1 egg
  • 1 tablespoon heavy cream

Preparation

Preheat oven to 400 degrees. Line a large baking sheet with parchment. Measure out buttermilk and add maple syrup; set aside.

In the bowl of your food processor, combine flour, maple sugar, baking powder, baking soda, and salt. Pulse to combine. Add butter and pulse until the mixture looks like coarse crumbs. If you don’t have a food processor, combine your dry ingredients in a large bowl, then cut in butter using a pastry cutter or two knives until the mixture looks like coarse crumbs.

Pour mixture into a large bowl; add cinnamon chips, then add buttermilk/syrup mixture and stir to combine, taking care not to over-mix.

Turn dough onto a lightly floured surface and knead 4-5 times. Pat into a circle about 7-8 inches wide and 1 1/2 inches thick. Cut using a fluted cutter; gently bring scraps together and re-cut. Alternatively, cut your circle into 8 wedges.

Place scones on your prepared baking sheet and make your egg wash; lightly beat your egg and add heavy cream. Brush the tops of each scone, then bake for 18-20 minutes, until tops are golden brown and a cake tester inserted in the center(s) comes out clean.

Cool on a wire rack; store in an airtight container at room temperature for up to 2 days. Makes 8-10, depending on whether you use cutters or just cut them with a knife.

Pumpkin Chocolate Chip Biscotti

pumpkinchochipbiscotti
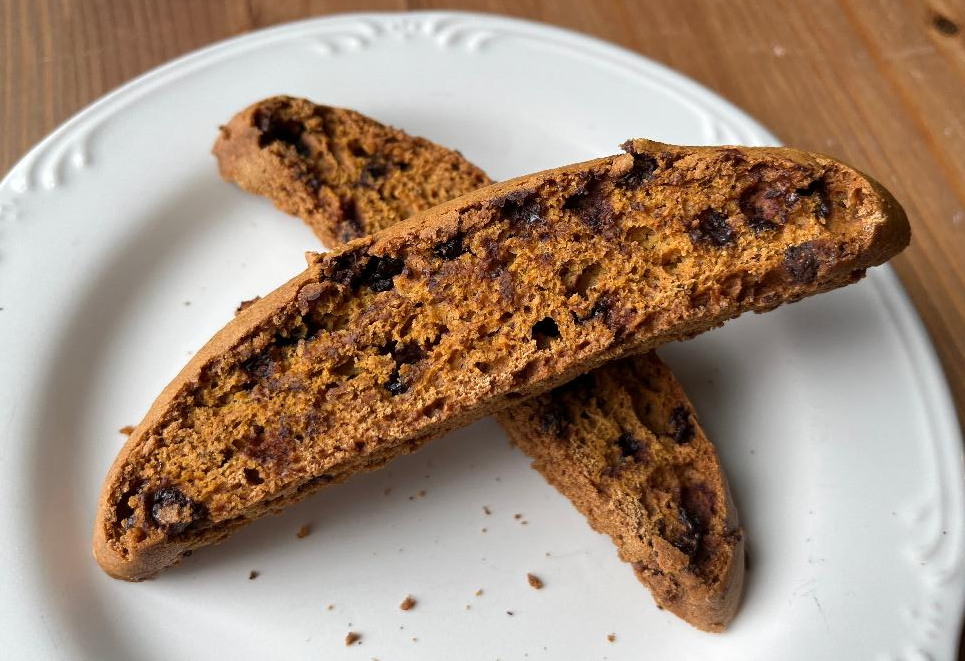
You know those people who love fall? Who put up autumn wreaths on September 1, buy orange mums and pumpkins for their porches even though it’s still 80 degrees outside, and cannot wait until it turns colder so they can put on an infinity scarf and drink hot apple cider? Hi there. I’m one of those people.

I enjoy all seasons, but fall and winter are my favorites. I welcome the cooler temperatures, the colorful leaves, the holidays, and the opportunity to beg my husband to make his absolutely delicious beef stew whenever the temperature drops below 60 degrees. I also welcome the chance to bake with fall flavors, like pumpkin, maple, and various warming spices – though truth be told I bake with those year-round anyway. These pumpkin chocolate chip biscotti are my offering to Mother Nature in the hope she ushers in some cooler temps quickly because I’m more than ready to put on that infinity scarf.

Ingredients

  • 2 eggs
  • 3/4 cup canned pumpkin puree (not pie filling)
  • 1 cup sugar
  • 2 1/3 cups flour
  • 1 teaspoon baking soda
  • 1/2 teaspoon cinnamon
  • 1/4 teaspoon ginger
  • 1/4 teaspoon nutmeg
  • 1/4 teaspoon cloves
  • 1/4 teaspoon salt
  • 1/2 cup miniature chocolate chips

Preparation

Preheat oven to 300 degrees. Line a baking sheet with parchment paper.

In a mixing bowl, combine eggs, pumpkin, and sugar; beat on low speed until well combined. Add dry ingredients and mix again to fully combine, then stir in chocolate chips.

Spoon dough onto the prepared baking sheet and, using a spatula, form it into a log of even thickness. Take care not to make your log too wide to start – this batter spreads a fair amount when baking, so a slimmer log is preferable (or so I found out the hard way).

Bake for 50 minutes; remove from oven and allow to rest for 10 minutes.

Transfer the log to a cutting board and slice into wedges about 1/2 inch thick; you may need a second baking sheet lined with parchment to accommodate all of the wedges.

Return wedges to the oven and bake for 25 minutes; flip each wedge over and bake another 25 minutes.

Cool on a wire rack; store in an airtight container at room temperature for several days. Biscotti are quite dry, so they’ll last a while. Makes about 20 pieces, depending on the length of your log.