Pumpkin Bars with Maple Drizzle

Pumpkin season is here, and there is a canned pumpkin shortage at my local grocery store. Of all the things I expected people to hoard during the pandemic, canned pumpkin wasn’t among them. Toilet paper? Sure. Cleaning supplies? Yep. But canned pumpkin? Quite a surprise.

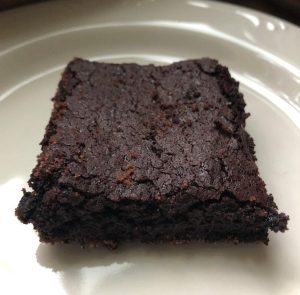
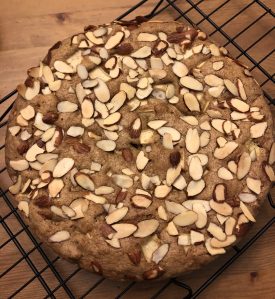
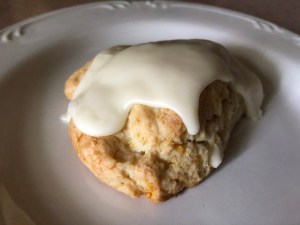
Fortunately, I keep a few cans of pumpkin on hand for my year-round pumpkin-themed baking efforts, like these deliciously spiced pumpkin bars. They are incredibly easy to make, and would be a nice addition to a Thanksgiving feast – though I think the next time I make these, I’ll cover the entire top with the maple drizzle for more of an icing. It’s quite tasty, and I would like more of it to enhance the delicious spices in the bars.

Ingredients

  • 2 cups flour
  • 1 1/2 cups sugar
  • 2 teaspoons baking powder
  • 2 teaspoons cinnamon
  • 1 teaspoon baking soda
  • 1/2 teaspoon salt
  • 1/4 teaspoon cloves
  • 4 eggs, lightly beaten
  • 15 ounces pumpkin puree
  • 1 cup vegetable oil
  • 1 1/2 cups powdered sugar
  • About 5 tablespoons maple syrup
  • 1 1/2 teaspoons vanilla extract

Preparation

Preheat oven to 350 degrees.

In a large bowl, whisk together flour, sugar, baking powder, cinnamon, baking soda, salt, and cloves until completely combined.

Add eggs, pumpkin puree, and vegetable oil, stirring well to completely combine, with no dry streaks or lumps remaining.

Pour batter into an ungreased 15 x 10 x 1 pan and spread evenly.

Bake for 25-30 minutes, until a cake tester comes out clean. Cool for 2 hours before drizzling.

To make drizzle, combine powdered sugar, 3 tablespoons maple syrup, and vanilla extract in a bowl and stir to combine. Add additional syrup to reach a smooth but slightly thicker drizzling consistency. Pour into a piping bag and snip off the end; drizzle over bars (or just drizzle from a spoon). Allow drizzle to set before cutting bars into squares. Store in an airtight container at room temperature. Makes 32.

Midnight Brownies

The brownie-baking extravaganza continued last week with these midnight brownies, which I’ve named as such because they are delightfully dark. These treats use Dutch process cocoa, which is made by washing cocoa beans in a potassium solution to neutralize its acidity before they’re processed into powder. 

The end result of this process (apparently pioneered by the Dutch) is a darker cocoa powder, which yields a different type of flavor in baked goods. Dutch process cocoa is also usually paired with baking powder, an acidic raising agent, rather than baking soda, which needs to react with an acid to create a rise in baking. Science was never my strong suit, but I think if I had learned it with baking-related examples, I would’ve understood it much better. 

Ingredients

  • 1 cup unsalted butter
  • 2 1/4 cups sugar
  • 1 1/4 cups Dutch process cocoa
  • 1 teaspoon salt
  • 1 teaspoon baking powder
  • 1 tablespoon vanilla extract
  • 4 eggs
  • 1 1/2 cups flour

Preparation

Preheat oven to 350 degrees. Lightly grease a 9 x 13 baking tin; sprinkle the bottom with sugar if desired for a crunchy bottom crust.

In a saucepan over low heat, melt butter, then stir in sugar and return to heat very briefly, until its hot – between 110 to 120 degrees – it will look shiny as you stir it (this helps the sugar dissolve better, which yields a crunchy top on the brownies). Transfer the mixture to a large bowl and stir in the cocoa, salt, baking powder, and vanilla. Stir in eggs, then flour, until batter is smooth. 

Pour into prepared baking tin and bake for 28 to 30 minutes, until brownies are set and a cake tester inserted in the center comes out clean. Cool completely before cutting into squares. Store in an airtight container at room temperature. Makes 24.

Easy Brownies

Brownies were my go-to treat throughout Baking in the Time of Coronavirus. Why? They’re incredibly easy to make, and this recipe is probably the easiest recipe I’ve ever found. I omitted the frosting from these treats, which I found at Tastes Better from Scratch, but I’ve frosted them with lots of different flavors over the years. Fudge frosting is my go-to for these, like from my retro fudge brownies.

The beauty of these brownies is that they are made in one bowl, with a spatula to mix everything together – no need to melt butter and chocolate or anything complicated. Simply stir up your ingredients and go – or add flavors like orange zest, almond extract, espresso powder, whatever you like. These keep well, for at least 3 days or so…if you can resist them that long.

Ingredients

  • 1 cup vegetable oil
  • 2 cups sugar
  • 4 eggs
  • 6 tablespoons cocoa powder
  • 1 teaspoon salt
  • 1 1/2 cups flour
  • 1 tablespoon vanilla extract

Preparation

Preheat oven to 350 degrees. Lightly grease a 9 x 13 baking tin; I always sprinkle the bottom of the tin with sugar when I’m baking brownies for a crunch bottom crust.

In a mixing bowl, stir together oil and sugar, then add eggs, one at a time, mixing well after each. Stir in cocoa powder, then salt, flour, and vanilla until the batter is smooth.

Pour into the baking tin and spread into an even layer. Bake for 30-34 minutes, until a toothpick inserted in the center comes out clean or with just a few moist crumbs. These brownies are fudgy, but shouldn’t be too gooey in the middle when they’re done; the center will look mostly set on top.

Remove from oven and allow to cool before cutting; store in an airtight container at room temperature. Makes 24.

Monster Brownies

Halloween is days away, and I’ve spent most of the afternoon baking for the kids in my life. My goddaughter Maureen, her little sister Margo, and our nephew Dylan are all receiving these monster brownies, a fun treat involving a very basic brownie recipe, some Halloween sprinkles, and candy eyes.

Note to other bakers: candy eyes will dissolve in the oven, so I strongly recommend placing the eyes immediately after you remove the brownies when they’ve finished baking.

Ingredients

  • 10 tablespoons unsalted butter, melted and cooled for about 1 minute
  • 2 eggs
  • 3/4 cup sugar
  • 1/4 cup light brown sugar, packed
  • 2 tablespoons brewed coffee (it’s fine to use leftover coffee from the morning)
  • 1 tablespoon vanilla extract
  • 3/4 cup plus 2 tablespoons unsweetened cocoa powder
  • 1 teaspoon espresso powder
  • 1/4 teaspoon salt
  • 1/2 cup flour
  • Halloween sprinkles
  • Candy eyeballs

Preparation

Preheat oven to 350 degrees. Line an 8 x 8 baking tin with foil and spray with baking spray.

In a large mixing bowl, combine melted butter, eggs, sugar, brown sugar, vanilla, and coffee and mix well to combine. Whisk in cocoa powder, espresso powder, and salt until well blended, then add flour and mix until just combined; you don’t want to over-mix your batter. Pour mixture into prepared tin and scatter sprinkles over the top.

Bake for about 30-32 minutes, being very careful not to over-bake. Brownies are done when a cake tester comes out with just a few moist crumbs stuck to it. Remove from oven and immediately press candy eyeballs into the top, giving a bit of thought to where your cut lines will be.

Cool brownies completely; cut into 16 squares. Store in an airtight container; if shipping, pack well between layers of waxed paper or parchment.

Mississippi Mud Brownies

Mississippi mud treats apparently come in many forms; cake, pie, and brownies. Wikipedia says the cake version is the original, resembling the banks of the Mississippi River. Having never been to the banks of the Mississippi, I’ll have to take Wikipedia’s word for it.

Though I usually avoid chocolate as a potential migraine trigger, I had a small bite of these brownies, and it was heavenly. It reminded me a bit of fudge, the homemade kind that a favorite aunt or beloved neighbor might make each Christmas. The original recipe comes from Grandbaby Cakes, and I adapted it just slightly to increase the amount of icing and fully cover the treats. Next time, I might mix some pecans into the brownie batter in addition to the topping.

Ingredients

For the brownies 

  • 4 ounces unsweetened chocolate, chopped
  • 12 tablespoons butter
  • 2 cups sugar
  • 4 eggs
  • 1 cup flour
  • 1 1/2 cups toasted chopped pecans
  • 3 cups miniature marshmallows

For the icing

  • 8 tablespoons butter
  • 1/3 cup milk
  • 6 tablespoons cocoa powder
  • 4 cups powdered sugar
  • 1 1/2 teaspoons vanilla extract

Preparation

Preheat oven to 350 degrees. Spray a 9 x 13 baking tin with baking spray.

In a large saucepan, heat chopped chocolate and butter on low until completely melted. Remove from heat and stir in sugar, then eggs, one at a time. Stir in flour in two batches until batter is smooth and pour into the prepared tin.

Bake for 25-27 minutes, until a cake tester inserted in the center comes out with a few moist crumbs. Top with toasted chopped pecans and miniature marshmallows.

For the icing, heat butter, milk, and cocoa over low heat and cook until the butter melts. Pour into the bowl of a stand mixer and add 2 cups powdered sugar, beating to combine. Add vanilla and remaining powdered sugar, beating until smooth.

Working quickly, pour icing over the pecans and marshmallows, coating completely. Allow to cool about 1 hour, until icing is set. Cut into squares; store in an airtight container at room temperature for 2-3 days. Makes 24.

Maple Sandwich Cookies

It’s maple season. Yes, I know – pumpkin spice is all the rage in October. I have absolutely nothing against it, but it’s not the only fall flavor, right? Maple is one of my favorite flavors regardless of the month, especially when paired with pecans. But for a while I’ve been meaning to make a maple sandwich cookie, so here we are.

Mike’s colleagues loved these, but truth be told, I think they’re just a bit too sweet. I know! Me, thinking something is too sweet…but on occasion, it does happen. The cookies themselves are absolutely delicious, as is the maple cream filling. I think you could leave the cookies plain, and perhaps pair the filling with a different, slightly saltier cookie. Ah well. As long as someone enjoyed them, that’s all that matters.

Ingredients

Maple Cookies

  • 8 tablespoons butter, softened
  • 1/2 cup shortening
  • 1 1/2 cups sugar
  • 1/4 cup packed light brown sugar
  • 1/4 cup pure maple syrup
  • 1 teaspoon baking soda
  • 1 teaspoon cream of tartar
  • 1/8 teaspoon salt
  • 3 egg yolks
  • 1/2 teaspoons vanilla
  • 1 3/4 cups flour

Maple Cream Filling

  • 8 tablespoons butter, softened
  • 2 tablespoons maple syrup
  • 2 1/2 tablespoons heavy cream
  • 2 cups powdered sugar
  • 1 teaspoon vanilla extract
  • 1/2 teaspoon maple extract

Preparation

Preheat oven to 300 degrees. Line several baking sheets with parchment paper.

In a mixing bowl, beat butter and sugar on high speed for 30 seconds. Add sugar, brown sugar, maple syrup, baking soda, cream of tartar, and salt. Beat until combined, scraping the sides of your bowl a few times. Beat in egg yolks and vanilla, then beat in flour.

Using a 1-inch cookie scoop, scoop dough into balls and drop about 2 inches apart on the baking sheet. Bake for 11-13 minutes, until edges are light brown. Remove from oven and cool on baking sheet for 2-3 minutes, then remove to a wire rack to cool completely.

To make maple cream filling, beat butter on medium speed for about 1 minute; add maple syrup, 1 tablespoon heavy cream, and 1 cup powdered sugar and beat to combine completely. Add remaining powdered sugar, heavy cream, vanilla extract, and maple extract and beat until smooth.

To assemble, flip cookies over and spread filling on half the cookies, then top with the remaining cookies to make sandwiches. Store in an airtight container at room temperature for 3-4 days. Makes 24 sandwiches.

Apple Cake

As a woman who doesn’t really like cooked fruit, my experience with fruit-based cakes is fairly limited. I see them all the time on the Great British Baking Show; impressive concoctions involving currants, cherries, and a range of other dried or fresh fruits mixed into spiced batter. Some people have theories about coating fruit in flour before mixing it in; others, like me, just toss it and hope for the best.

This cake is a gift for my friend Arvind and his wife, who just had identical twin girls (and they are beyond adorable). Because no one in my life can mark any major event without some type of baked good, I’ll be dropping this off at their house tomorrow, along with good wishes for the little ones. I hope it’s delicious; the original recipe came from Recipe Tin Eats, and was incredibly easy to make. I can see serving it with caramel sauce or perhaps some vanilla ice cream.

Ingredients

  • 2 cups flour
  • 3/4 teaspoon baking soda
  • 3/4 teaspoon salt
  • 3/4 teaspoon cinnamon
  • 3/4 teaspoon cloves
  • 1/2 teaspoon nutmeg
  • 1 1/4 cups sugar
  • 1 cup vegetable oil
  • 2 eggs, at room temperature
  • 1 1/2 teaspoons vanilla extract
  • 2 cups chopped Granny Smith apples (about 2 large apples)
  • 1/2 cup flaked almonds

Preparation

Preheat oven to 350 degrees. Line a 9-inch springform pan with parchment paper on the bottom and sides.

In a large bowl, whisk together flour, baking soda, salt, cinnamon, cloves, and nutmeg. In a separate bowl, stir together sugar and vegetable oil, then stir in eggs and vanilla extract. Pour into flour mixture and stir until just combined; be careful not to overmix. Stir in apples and pour batter into prepared pan; it will be very thick. Smooth the top and sprinkle on flaked almonds.

Bake for 40-50 minutes, or until a cake tester inserted in the center comes out clean (mine baked for 42 minutes, but the original recipe states that depending on your oven, it can take more than an hour). Remove from oven and place on a wire rack; let cool 10 minutes, then remove outer ring from the pan and allow to cool completely.

Store in an airtight container at room temperature for 2-3 days. Makes about 12 servings.

Orange Scones

Years ago Mike and I lived on Capitol Hill, and I took the red line metro from Union Station to work each morning. Amid the morning rush stood Au Bon Pain, bustling with commuters buying coffee and breakfast treats. The pastry display at ABP was a delight for the senses; baskets sat on metal utility shelves holding heaps of buttery croissants, Danish pastries filled with cheese and fruit, blueberry muffins the size of your head, and one of the most delicious treats ever: the orange scone.

While the recipe below is a cream scone variety, I’m positive the ABP orange scone was a butter variety because of its texture. Cream scones are tender and cakey, while butter scones have a crisper outside and a craggy interior. Does craggy seem like an odd adjective for a baked good? Perhaps, but if you’ve ever had a butter scone, you’ll know what I mean: it’s a drier texture, perfect for slathering with jam or lemon curd. Whether you go with the cream variety or the butter variety, orange makes a great scone flavor. I suspect mixing in some miniature chocolate chips in these would be a good idea…maybe next time.

Ingredients

  • 1 1/2 cup (180 grams) flour, measured by the scoop-and-sweep method or by weight (I measured by weight)
  • 3 tablespoons sugar
  • 1 1/2 teaspoons baking powder
  • 1/2 teaspoon salt
  • Zest of 1/2 small to medium orange
  • 3/4 cup plus 3 tablespoons heavy cream, divided
  • 1/2 teaspoon vanilla
  • 1/4 teaspoon orange extract
  • About 1 1/2 cups powdered sugar
  • 4-5 teaspoons fresh orange juice

Preparation

Preheat oven to 425 degrees. Line a baking sheet with parchment paper.

In a large bowl, whisk together flour, sugar, baking powder, salt, and orange zest. Combine vanilla, orange extract, and 3/4 cup plus 1 1/2 tablespoons heavy cream and drizzle over flour mixture, stirring gently to combine. You want a “shaggy” dough, with no loose flour at the bottom of the bowl, but the dough should not be sticky.

Gently shape the dough into a ball and turn out onto a lightly floured counter top. Press the dough into a circle about 5 1/2 inches wide.

Using a knife or bench scraper, cut the dough into 8 wedges. Transfer to a baking sheet, placing the wedges in a circle with about 1 inch between them. Brush the tops and sides with remaining heavy cream to help them brown.

Bake for 14-16 minutes, until light golden brown on top; I used a cake tester on one scone to make sure the center was baked through. Remove from oven and allow to cool, then combine powdered sugar and enough orange juice to make a medium-consistency drizzle. Pour over scones; allow to set before serving.

Store leftovers in an airtight container at room temperature for 1-2 days.

Nut Bars

Read any article about healthy eating habits and it’ll tell you to keep healthy snacks like almonds not just in your pantry, but with you when you’re on the go or at your desk at work. I aspire to be a healthy snacker, but truth be told most of the nuts I buy for snacks end up in baked goods.

These nut bars, adapted from a recipe I found at Taste of Home, are definitely not in the healthy snack category. I adapted mine to include pecans instead of pistachios, but I suspect any nutty combination would work for these treats. The bar base is far more crumbly than I expected it to be, so I think I need to mix my dough better next time. In any case, they’re delicious. Next time, I might sneak a bit of maple flavoring into the honey/sugar mixture.

Ingredients

For the crust

  • 12 tablespoons butter, cut into cubes
  • 2 1/3 cups flour
  • 1/2 cup sugar
  • 1/2 teaspoon baking powder
  • 1/2 teaspoon salt
  • 1 egg, at room temperature, lightly beaten

For the topping

  • 1 cup toasted hazelnuts, cooled and chopped
  • 1 cup lightly salted cashews
  • 1 cup lightly salted almonds
  • 1 cup pecans, chopped
  • 2/3 cup honey
  • 1/2 cup light brown sugar
  • 1/4 teaspoon salt
  • 6 tablespoons butter, cut into cubes
  • 2 tablespoons heavy cream

Preparation

Preheat oven to 375 degrees. Line a 9 x 13 baking tin with foil and grease it with butter.

In a large bowl, stir together flour, sugar, baking powder, and salt. Cut in the butter until the mixture resembles coarse crumbs, then stir in egg. Press into the bottom of the baking tin and bake for 18-20 minutes, until light golden brown. Cool crust completely.

In a medium saucepan, combine honey, brown sugar, and salt over medium heat, stirring to dissolve the sugar. Bring the mixture to a boil and boil without stirring for 2 minutes; remove from heat and stir in butter and heavy cream, then return to the heat for about 1 minute, stirring constantly, until the mixture becomes smooth. Stir in nuts.

Pour over cooled crust and bake for 15-18 minutes, until topping bubbles at the edges. Remove from oven and cool on a wire rack completely; lift out of pan and cut into squares; I made small, approximately 1 x 1 squares for more bite-sized treats, but you could cut larger squares if you like. My batch yielded 48 squares.

Chocolate Chip Shortbread Wedges

“Mom, do we have more of that little bread?” asked Alec Sutton, age five. His mom, my dear friend and colleague Anne, had no idea what he meant until she saw him reach for the bag of shortbread I’d given her for Christmas last year. I love this story for many reasons; first, Alec is one of the most adorable and observant kids you’ll ever meet, and second, I love how children’s minds process information. Shortbread and little bread make perfect sense as synonyms when you think about it. Since hearing this story, my shortbread has been referred to as little bread in our circle of friends.

Anne and Alec moved from Pittsburgh to Altoona to be closer to their family, and I sincerely miss working with her. During my visits to the Steel Tower, I’d always sit at the table behind Anne’s cube, and we had many great conversations and funny times. I’m hoping this chocolate chip “little bread” will make a nice housewarming gift for Anne and Alec in their new place. This batch makes 24 wedges, so I sent some to Anne and Alec and some to my nephew Roman as his back-to-school gift. Shortbread ships very well, so it’s easy to send wherever it needs to go.

Ingredients

  • 1 cup butter
  • 1 teaspoon salt
  • 3/4 cup sugar
  • 1 teaspoon vanilla extract
  • 2 1/3 cups flour
  • 1 cup miniature chocolate chips

Preparation

Preheat oven to 300 degrees. Lightly grease two 8-inch round cake pans. Reserve about 2 tablespoons chocolate chips to sprinkle over the top of your dough.

In a mixer fitted with the paddle attachment, cream together butter, sugar, salt, and vanilla. Add flour and beat to combine completely, then stir in chocolate chips.

Divide dough in half and press into the bottoms of the cake pans, using the palm of your hand to create an even surface. Prick all over with a fork, then sprinkle remaining chocolate chips on top. You can skip this step if you like – the chocolate chips do flatten out a bit when you turn the shortbread out of the pans later on.

Bake for 32-35 minutes, until the edges are golden brown. Remove from oven and gently loosen the sides, then allow to cool in the pans for 5 minutes. Gently flip onto a cutting board and slice each round into 12 wedges, then place wedges on a wire rack to cool completely. Store in an airtight container at room temperature for up to about 5 days; if shipping, pack between layers of waxed paper.