Peanut Butter Chocolate Chip Oatmeal Cookies

pb oatmeal
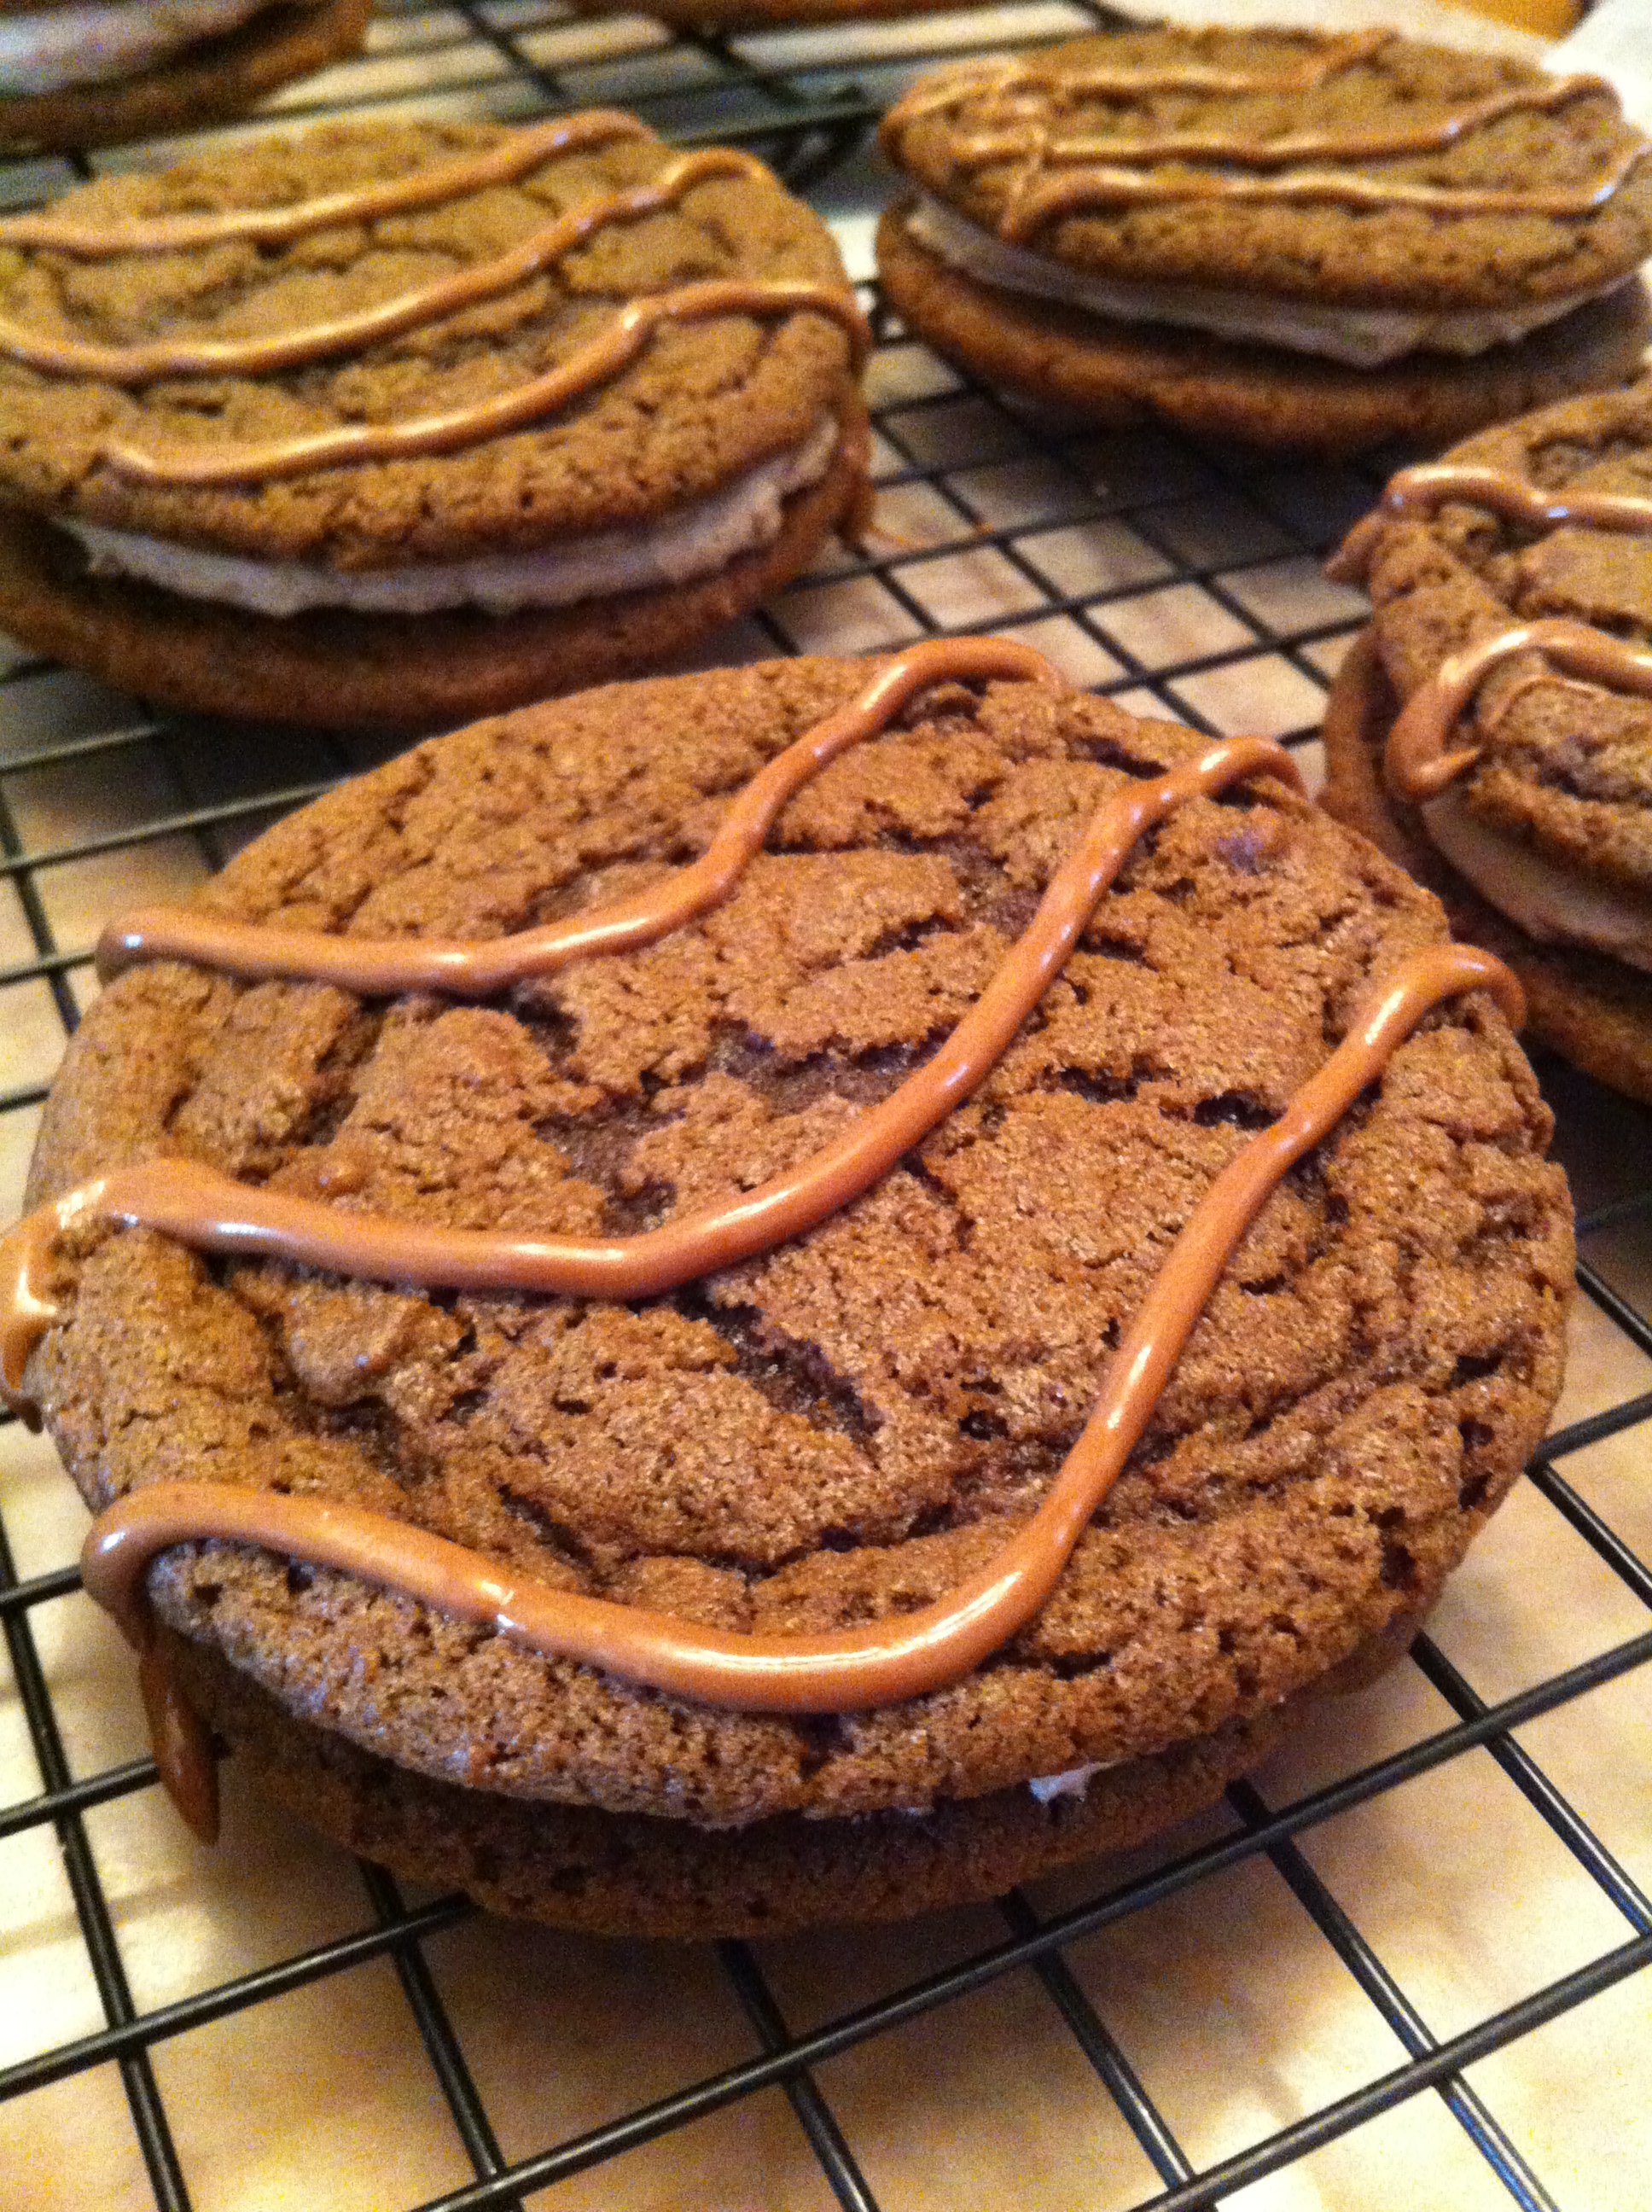
Peanut butter, chocolate chips, and oatmeal are all delicious on their own, but when combined in cookie form in this recipe they bring out the best in each other. These treats are among my favorites that I’ve made lately; they’re not too sweet, with interesting texture and a great combination of flavors.

If you’re not really a chocolate person (not that I could ever understand such a thing) you can omit the chocolate chips and just go with plain peanut butter oatmeal. You could also use peanut butter chips, or you could use crunchy peanut butter instead of smooth for some added texture. Either way, I’d recommend keeping these cookies small, because the oatmeal makes them pretty hearty.

This batch of cookies went to Southern Maryland with Mike this week; he’s visiting his parents, and our awesome cousins Barb and Robb and the incomparable Maureen, my goddaughter. I’m hoping that I’ll get a photo of Maureen eating one, but so far I’ve only seen a video of her with chocolate pudding all over her face. We’ll keep that one around for her wedding, of course.

Ingredients

  • 3/4 cup butter, slightly softened
  • 1/2 cup peanut butter
  • 1 cup sugar
  • 1/2 cup packed light brown sugar
  • 1 teaspoon baking powder
  • 1/2 teaspoon baking soda
  • 2 eggs
  • 1 teaspoon vanilla
  • 1 1/4 cups flour
  • 2 cups rolled oats
  • 1 cup semisweet chocolate chips

Preparation

Preheat oven to 375 degrees. Line three baking sheets with foil or parchment.

In a mixing bowl, combine butter and peanut butter and beat on medium speed for about 30 seconds. Add sugar, brown sugar, baking powder, and baking soda and mix until well-combined, scraping the sides of the bowl often.

Add eggs, one at a time, beating well after each addition, then add vanilla and beat until combined.

Beat in flour, about one half-cup at a time, until well-combined. Stir in oats and chocolate chips.

Using a one-inch cookie scoop, drop dough onto prepared cookie sheets; you should be able to fit 12 cookies on each sheet.

Bake for 8-10 minutes, until edges are just golden brown; cookie centers will still look slightly puffy. Remove from oven and allow to cool on cookie sheets for about 5 minutes, then place on wire racks to cool completely.

Note: this recipe yields 60 cookies. Because I only have three large-sized baking sheets, I let each of them cool between batches before I scoop on another round of dough.


Fudge Rounds

fudge roundsWhen I was in college, my grandma Zella would send me care packages. As a graduate of secretarial school in the 1940s, my little Hungarian-born gram never had the experience of microcosmic college life that I had at Frostburg State University. There, on a little campus on the side of a mountain in Western Maryland, my entire existence was wrapped up in papers about subjects I’d never remember today, in presentations for my communications degree, in quarters for laundry, and in the simple joy of grilled cheese day at the dining hall.

Another great joy in campus life was the care package from one’s grandma, and my packages always included some home-baked good, such as Zella’s almond cookies or butterscotch chip cookies, a few cans of Pringles, and some kind of Little Debbie Snack Cakes. The variety of snack cakes depended on the season; in autumn, Fall Party Cakes arrived, and in winter, Christmas Tree Cakes. Any time of year might bring Swiss Rolls, Zebra Cakes, Oatmeal Cream Pies, or Donut Sticks. Despite being one of the best bakers I’ve known, Z definitely believed in the convenience (and affordability) of Little Debbie’s offerings.

I’m not sure if she ever sent me Fudge Rounds, but I bet my gram would be proud of this recipe below; it captures the essence of the Fudge Round perfectly and, dare I say, with even more fudgy goodness than its packaged counterpart. The recipe below is adapted from a few others I found online, adjusting quantities for what I believe to be softer cookies and sturdier filling. You may notice the addition of 1 tablespoon of flour beyond the standard 2 cups in the cookie recipe; my first test batch seemed too soft, even after a few additional minutes of baking, so I added some more flour to stabilize the dough and it worked very well. It’s also important to note the need for salted butter here; if you’re using unsalted, you’ll want to add some salt with your dry ingredients to balance the flavor.

Fudge Cookies

Ingredients

  • 2 cups plus 1 tablespoon flour
  • 3/4 cups cocoa powder
  • 1 teaspoon baking soda
  • 1 1/4 cups salted butter, softened
  • 2 cups sugar
  • 2 eggs
  • 3 teaspoons vanilla extract

Preparation

Preheat oven to 350 degrees. Line three baking sheets with parchment paper.

In a medium bowl, stir together flour, cocoa powder, and baking soda; set aside.

In a mixing bowl, cream butter and sugar until light and fluffy. Add eggs, one at a time, beating well after each addition. Add vanilla and beat well.

Add flour mixture in three batches, scraping the sides of the bowl regularly; it will take several scrapings to fully incorporate all of the dry ingredients into the wet ingredients.

Using a two-inch cookie scoop, drop scoops of dough onto parchment-lined sheets; you should have 6 scoops on each sheet.

Bake for 8-10 minutes, until edges are set and centers are still puffy; remove from oven and allow cookies to cool on baking sheets for several minutes before removing to wire racks to cool completely. I left my batches on for about 8 minutes each.

Cool cookies completely before filling.

Chocolate Filling

Ingredients

  • 1/2 cup shortening
  • 1/2 cup salted butter, softened
  • 1 teaspoon vanilla extract
  • 1/4 cup cocoa powder
  • 3 1/2 to 3 3/4 cups powdered sugar
  • 4 tablespoons warm water

Preparation

In a mixing bowl, cream shortening and butter. Add vanilla and beat until well-combined.

Add cocoa powder and 1 cup powdered sugar; beat until well-combined, scraping the sides of the bowl often. Add 2 more cups powdered sugar, 1 cup at a time, mixing well and scraping the bowl between each addition. As with the batter for the cookies, it takes a while for the dry ingredients to fully incorporate with the wet ingredients in this recipe.

Add water and beat on low at first, then increase speed to medium and beat for 2 minutes, until filling is light and fluffy. Add remaining 1/2 to 3/4 cup powdered sugar, depending on the consistency of your filling; mine was quite thin, probably due to very soft butter in yesterday’s heat, so I added the full additional 3/4 cup to stabilize it.

Once the cookies have completely cooled, flip them all over; using a 1-inch cookie scoop, drop scoops of filling onto half of the cookies, spread with an offset spatula, and top with the remaining cookies.

Chocolate Drizzle

Ingredients

  • 1/2 cup milk chocolate chips
  • 1 teaspoon vegetable oil

Preparation

In a large glass measuring cup, melt chocolate chips and vegetable oil by microwaving in 15-second intervals, stirring between each. Pour drizzle into a pastry bag fitted with a small plain tip and pipe drizzle in wavy shapes. Allow chocolate to set before serving.

Store fudge rounds in single layers in airtight containers.

Brown Sugar Sandwich Cookies

brown sugar sandwichesFor some reason there’s a surplus of sour cream in our fridge. A few weeks ago I bought two containers intending to make something completely different–possibly a chocolate cake, although I can’t quite remember now–and then Mike brought home a third to use as a baked potato topping earlier this week. It was a happy accident to discover that this recipe called for sour cream, as clearly, I have plenty.

Scientifically speaking, sour cream alters the texture of baked goods because of its acidity, making cakes and cookies lighter and moister than those without. These cookies are soft, but also have a delightful just-shy-of-crispy edge. The original recipe called for them to be frosted with a caramel mixture, but I decided to fill them with a vanilla cream instead to balance the nearly-caramel flavor of the brown sugar. You could certainly eat them plain if you like; next time, I’ll use more filling for each cookie than I did today, so I’d actually recommend doubling the filling ingredients in the recipe below.

Brown Sugar Cookies

Ingredients

  • 2 3/4 cups flour
  • 1 teaspoon baking soda
  • Generous 1/4 teaspoon salt
  • 1 cup butter, slightly softened
  • 1 1/3 cups packed light brown sugar
  • 2 eggs
  • 1 1/2 teaspoons vanilla extract
  • 1/3 cup sour cream

Preparation

Preheat oven to 350 degrees. Line several baking sheets with parchment paper.

In a medium bowl, sift together flour, baking soda, and salt; set aside.

In a mixing bowl, beat butter and brown sugar until light and fluffy.

Add eggs and vanilla and mix until well-combined.

Add sour cream and mix until well-combined.

Add flour mixture in two separate batches, scraping the sides of the bowl in between.

Using a two-inch cookie scoop, drop scoops of dough onto prepared sheets, leaving a few inches between each as the cookies will spread. Spray your palm with baking spray and gently press each scoop of dough until the top is flattened.

Bake for 12 minutes; remove from oven and allow to cool on baking sheets for a few minutes before removing to wire racks to cool completely before filling.

Vanilla Cream Filling

Ingredients

  • 4 tablespoons butter, at room temperature
  • 4 tablespoons vegetable shortening
  • 2 cups powdered sugar
  • 1 1/2 teaspoons vanilla extract

Preparation

In a mixing bowl, beat butter and shortening until combined.

Add powdered sugar 1/2 cup at a time, mixing well between each addition.

Add vanilla extract and beat until well-combined.

To fill the cookies: flip half of the cookies over and spread filling on each; top with another cookie to create the sandwich.

Pecan Drops

pecan dropsBaking is both a science and an art, given that it requires both precision and creativity. Once you’ve baked your fair share of treats, you realize that just because the recipe in the book says to use a cup of this and a teaspoon of that, you sometimes need to improvise.

Why is this necessary? It all depends on the conditions under which a recipe has been tested, and the conditions under which you’re baking, which might be very different. Perhaps the test kitchen is in New York City, and you’re baking in New Orleans. Maybe the recipe was tested on a day in the middle of November, and you’re baking in the middle of July. Perhaps the test kitchen baker didn’t let her butter soften as much as yours, or she used a different kind of baking sheet.

Whatever the reason, you’ll usually know if you need to improvise as soon as you’ve finished mixing it according to the source’s instructions, and you’ll most definitely know after your first batch has baked. I suspected that I’d need to add more flour right after I finished mixing my dough, but I baked one test batch just to be sure, and I was proven right. This recipe includes more flour than Martha’s original, but I also fully acknowledge that it’s 88 degrees in Pittsburgh and very humid today, so the next time I make these, I might not need it.

Ingredients

  • 1 cup plus 2 tablespoons flour
  • 1/2 teaspoon kosher salt
  • 1 cup butter, softened
  • 3/4 cup dark brown sugar
  • 1 egg yolk
  • 2/3 cup pecan bits, toasted and cooled
  • 32 pecan halves

Preparation

Preheat oven to 325 degrees. Line four baking sheets with parchment.

In a small bowl, sift flour and kosher salt together; set aside.

In a mixing bowl, cream together butter and brown sugar, scraping the sides of the bowl as necessary.

Add egg yolk and mix well.

With the mixer running on low, slowly beat in flour mixture until just combined.

Stir in pecan bits.

Using a 1-inch cookie scoop, scoop dough onto prepared baking sheets, spacing about 2 inches apart (you should have 9 cookies per sheet for optimal baking). Press a pecan half into the top of each cookie.

Bake for 12-15 minutes, until edges are just golden. Cool on cookie sheets for 2-3 minutes, then place on a wire rack to cool completely.


Thumbprints

thumbprintRecipes are often handed down through the generations, and this is something that I really love about baking. Think of your favorite recipe, and think about where it may have come from – whether across the world or across the street – and how it connects you to the person who first shared it with you. That’s a pretty amazing thing, no?

I got this recipe from my dear friend Tara, who got it from her grandmother-in-law Midge. I can just imagine Midge in her kitchen, making these for her family, maybe tinting the icing a special color for a birthday or holiday. My own grandmother gave me hundreds of recipes over the years, some of which originated in her childhood home in Budapest, and others that she pioneered – or perfected – in the kitchen of the home where she raised my dad. I think about Midge and Zella and all the women like them, who took great pleasure in chopping up walnuts or whisking up drizzle icing, and I’m grateful to be a part of their legacy.

My only adjustment to Midge’s recipe is another 1/4 cup walnuts for the cookies, and 1/2 cup less powdered sugar for the icing. I coated my cookies very generously with walnuts and needed a bit more than her original 3/4 cup, and because my batch yielded 16 cookies, I realized that 1 full cup of powdered sugar would be too much.

Ingredients

For the cookies

  • 8 tablespoons margarine
  • 1/4 cup brown sugar
  • 1 egg, yolk separated from white (keep the white cold until ready to use)
  • 1/2 teaspoon vanilla
  • 1 cup sifted flour
  • 1/4 teaspoon salt
  • 1 cup finely chopped walnuts

For the icing

  • 1/2 cup sifted powdered sugar
  • 1/4 teaspoon vanilla
  • About 1 tablespoon milk

Preparation

In a mixing bowl, cream together margarine, brown sugar, egg yolk, and vanilla.

Blend salt into sifted flour and add to creamed mixture until well-combined.

Chill dough for about 1 hour, until firm and easy to handle. Dough will still be slightly sticky after 1 hour but that’s okay.

Preheat oven to 375 degrees.

Lightly beat the egg white.

Using a one-inch cookie scoop, scoop out dough and roll into balls. Dip each ball into egg white, then walnuts.

Place on a cookie sheet about 1 inch apart.

Bake for 5 minutes, then quickly press a thumbprint in the center of each using the back of a half teaspoon from your measuring spoons to create the thumbprint. I chose not to use my actual thumb because, naturally, the cookies are very hot! Continue baking another 8 minutes.

Remove from oven; press half teaspoon in each indentation again if necessary to reinforce your thumbprint.

Once cookies are cool, whisk together powdered sugar, vanilla, and about 1/2 teaspoon of milk. Add additional milk slowly to reach your desired consistency; you want it to be a thick drizzle so it will set easily.

Allow icing to set and store cookies in an airtight container.

Italian Easter Cookies

italian easter cookiesWhen I first saw these cookies, I thought they were called stracciatella. As it turns out, that’s the name of the blog they’re on; the word stacciatella actually refers to three different foods in Italy: an egg drop soup, a kind of gelato that’s similar to chocolate chip ice cream, and a kind of cheese, not these lovely little Easter cookies. Stracciatella means little shred, and is incredibly similar to the last name of one of my best friends ever, Kate.

Kate and I met in the back row of geometry class in the tenth grade, where neither of us had a clue what was going on. We’re both better with words than numbers, and how either one of us squeaked out of that class with a passing grade is one of life’s great mysteries. Our suffering created a bond though; since that fateful meeting in geometry, we’ve shared countless laughs, adventures, challenges, and desserts. We’re still friends to this day; in fact, Kate was among our guests at this past Monday’s Passover seder.

So, on this Easter Sunday, I give tribute to Kate, and her awesome Italian last name…even if these aren’t really called stracciatella, that’s probably what I’ll always call them. Buona Pasqua!

Ingredients

For the cookies

  • 8 tablespoons butter, at room temperature
  • 3/4 cup sugar
  • 3 eggs
  • 1 teaspoon almond extract
  • 1 teaspoon vanilla extract
  • 1/4 cup milk
  • 3/4 cup vegetable oil
  • 3 3/4 cup flour
  • 5 teaspoons baking powder

For the frosting

  • 4 tablespoons butter, at room temperature
  • 2 cups powdered sugar
  • 3 teaspoons almond extract
  • 1 teaspoon vanilla extract
  • 2-3 tablespoons milk
  • colored sprinkles

Preparation

Preheat oven to 350 degrees. Line several baking sheets with foil.

In a medium bowl, combine flour and baking powder; set aside.

In a mixing bowl, cream together butter and sugar until very light and fluffy.

Add eggs, one at a time, beating well after each addition and scraping the bowl frequently.

Add almond and vanilla extracts, milk, and vegetable oil and beat until well-combined.

Add flour mixture and beat until a soft dough forms.

Scoop 1-inch balls of dough and roll them into balls, then ropes, and form into rings. Place about 1 inch apart on the prepare baking sheets and bake for 8 minutes on the bottom rack of the oven, then 8 minutes on the top rack; the bottoms will be golden brown when they are done.

Cool cookies completely on a wire rack before dipping in frosting.

To make frosting, combine butter, powdered sugar, and almond and vanilla extracts and beat on low, then medium speed, to combine. Add milk 1 tablespoon at a time to reach a slightly drizzly consistency; you don’t want the frosting to be too thick or thin, just thin enough to dip the cookies.

Dip the top of each cookie into the frosting and set on a wire rack, then sprinkle with colored sprinkles if desired.

Store in an airtight container at room temperature.

Poppy Seed Rugelach

poppyseed rugelachYiddish is full of fun words like chutzpah, shlep, kvetch, maven, schmooze, nosh, and…rugelach. Rugelach translates to “little twists” or “rolled things” in Yiddish, and they can be filled with any number of tasty ingredients like nuts, fruit, chocolate, and of course, poppy seeds, which have been wildly popular in Central and Eastern European baking for a long time.

Rugelach begins with cream cheese dough, which is very simple to make. Because the dough employs both butter and cream cheese, it’s very soft when first prepared, so you’ll need to give it at least an hour or so to chill in your fridge before you use it. For the filling in these rugelach, I plan to use honey instead of sugar the next time I make this, and way more lemon zest to pump up the lemon-poppy seed flavor pairing.

Ingredients

For the dough

  • 8 ounces cream cheese, at room temperature
  • 1 cup butter, at room temperature
  • 1/4 cup sugar
  • zest of half a medium-sized lemon
  • 1 teaspoon vanilla
  • 1/4 teaspoon salt
  • 2 cups flour

For the filling

  • 10 ounces poppy seed filling
  • 2 tablespoons sugar
  • zest of half a medium-sized lemon

You will also need powdered sugar for sprinkling on cookies prior to baking.

Preparation

In a mixer fitted with the paddle attachment, cream together butter, cream cheese, and sugar until light and fluffy. Add lemon zest, vanilla, and salt and beat until combined, scraping the sides of the bowl a few times.

Add flour, one cup at a time, beating until combined. Divide dough into four equal portions, flatten into discs, and refrigerate at least one hour, until firm but easy to handle.

Preheat oven to 350 degrees. Line two baking sheets with parchment paper.

In a medium bowl combine poppy seeds, sugar, and lemon zest and mix well.

On a lightly floured surface, roll out one portion of dough at a time and spread with 1/4 of the poppy seed mixture. Cut into 12 wedges, then roll up each wedge starting from the outside edge.

Place rugelach on baking sheets and sprinkle generously with powdered sugar.

Bake for 18-20 minutes, until light golden brown. Cool completely before serving; the filling will be too hot to serve them right away.

Old-Fashioned Sugar Cookies

old-fashioned sugarsWhy do we leave out cookies and milk for Santa? Well, if you’re flying all around the world leaving gifts for all the good girls and boys, you’re probably in need of a bit of refreshment. Maybe one year, someone left Santa a note asking what he preferred, and he responded with a request for cookies and milk.

I bet Santa loves to visit the homes of bakers, where all manner of treats await. I also wonder what his favorite cookie is; there are so many to choose from, both store-bought and homemade. Does he like Oreos? Or Nutter Butters? Perhaps he prefers shortbread, or oatmeal raisin?

I like to think that Santa is an excellent judge of good cookies, and I bet he’d like this classic, old-fashioned sugar cookie. It is at once crunchy and soft, the kind of cookie that you’ll find in any bakery, the kind of cookie that needs no frosting to enhance its flavor…the kind of cookie that is perfect to leave on a plate next to your Christmas tree, in gratitude to Saint Nick and his kindness.

Ingredients

  • 1 cup butter, softenend
  • 1 1/2 cups sugar
  • 2 eggs
  • 1 teaspoon cream of tartar
  • 1 teaspoon baking soda
  • 1 teaspoon vanilla
  • 1/4 teaspoon salt
  • 2 3/4 cups flour
  • 1/2 cup sugar, for rolling

Preparation

In a mixing bowl, cream together butter and sugar until very well-combined.

Add eggs, cream of tartar, baking soda, vanilla, and salt; beat on medium speed until well-combined, scraping the sides of the bowl as necessary.

Gradually beat in flour, scraping the sides of the bowl to ensure that all flour is well-incorporated. Cover dough with plastic wrap and chill for about 1 1/2 hours, until dough is firm and easy to handle.

Preheat oven to 375 degrees. Line several baking sheets with parchment or foil.

Place 1/2 cup sugar in a small bowl.

Using a 1-inch cookie scoop, scoop out dough and roll into balls. Roll balls in sugar and place about 2 inches apart on prepared baking sheets.

Bake for 9-11 minutes, until tops are cracked and cookies are just golden. Cool on cookie sheets for about 5 minutes before placing on wire racks to cool completely.

Peppermint Meringues (Gluten-Free!)

peppermint meringuesMeringue cookies are a great option for using up leftover yolks; they’re easy to make, easy to adapt, and usually gluten-free, depending on what you combine with them.

The next time I make these cookies, I’ll do just a few things differently: first, I may bake them another 5 minutes or so, and second, I’ll remove them from the kitchen for cooling. The residual heat from my oven caused these meringues to get sticky within the first few minutes of cooling, which is something I haven’t experienced with meringues before. Despite their stickiness, they’re very nice peppermint treats, both with and without their chocolate enhancement!

Ingredients

  • 3 egg whites
  • 1/2 teaspoon cream of tartar
  • 1/2 teaspoon peppermint extract
  • pinch of salt
  • 3/4 cup sugar
  • red gel paste food coloring, for tinting

Chocolate Drizzle, for dipping cookie bottoms (optional)

  • 1/2 cup semisweet chocolate chips
  • 1 tablespoon shortening

Preparation

Preheat oven to 200 degrees. Line several baking sheets with parchment paper.

In a mixing bowl, combine egg whites, cream of tartar, peppermint extract, and salt; beat on medium speed until soft peaks form. Slowly add sugar and whip on high speed until stiff peaks form; when whites are approaching stiff peak stage, add red gel paste food coloring to tint.

Transfer meringue to a pastry bag fitted with a star tip and pipe 1-inch circles of meringue onto prepared baking sheets.

Bake for 1 hour and 15 minutes, until meringues are dry and firm when lightly touched. Transfer meringues to wire racks and cool completely in a cool room.

Optional: combine semisweet chocolate chips and shortening in a small saucepan and melt over low heat, stirring constantly. Dip bottoms of meringues in chocolate; place on parchment or waxed paper to harden.

Hot Cocoa Cookies

hot cocoa cookiesI joined Pinterest several months back, at the recommendation of my friend Kerry from work. At present, my “baking” board has 246 pins…and it gets bigger every day. I also have boards that celebrate lemons, gardens, eco-friendly housekeeping practices, good advice, and movie villains, but more often than not, I pin things that involve butter and sugar.

Kerry is also active on Pinterest, and she recently confessed that she pins recipes in the hope that I’ll see them and bake them. This is one of those examples, as she requested hot cocoa cookies for our holiday party at the office today. The recipe below is actually an adaptation of a recipe that I found on another food blog and combined with my own chocolate drizzle instead of the recipe’s original chocolate icing. The end result is a rich treat that tastes remarkably like a cup of hot cocoa. Next time, I might try a peppermint drizzle, or even a caramel one.

Ingredients

For the cookies

  • 8 tablespoons butter
  • 1 12-ounce package semisweet chocolate chips
  • 1 1/2 cups flour
  • 1/4 cup cocoa powder
  • 1 1/2 teaspoons baking powder
  • 1/4 teaspoon salt
  • 1 1/4 cups packed light brown sugar
  • 3 eggs
  • 2 teaspoons vanilla extract
  • 15 large marshmallows, cut in half crosswise

For the chocolate drizzle

  • 1/2 cup semisweet chocolate chips
  • 1 tablespoon shortening

Preparation

In a medium saucepan, melt butter and chocolate chips. Set aside and allow to cool slightly.

In a medium bowl, combine flour, cocoa, baking powder, and salt; set aside.

In a mixing bowl, combine brown sugar, eggs, and vanilla and beat until well-blended. Add cooled chocolate and beat until combined.

With the mixer running on low, slowly add flour/cocoa mixture until a smooth dough forms. Cover dough with plastic wrap and chill for 1 hour.

Preheat oven to 325 degrees. Line several baking sheets with parchment paper.

Using a 2-inch cookie scoop, scoop out dough (dough will be very stiff at this point) and roll into balls. Place about 2 inches apart on prepared baking sheets, and flatten slightly with the palm of your hand. My recipe above yielded 30 balls of dough, but if yours varies, simply adjust the quantity of marshmallows for topping.

Bake for 12 minutes, then remove from oven and quickly top each cookie with one half of a marshmallow. Return to the oven and bake 3 minutes more; remove from oven once again and gently press the marshmallow down to flatten it just slightly. Allow to cool for 5 minutes on baking sheets, then place on a wire rack to cool completely.

Once cookies are completely cool, place waxed paper beneath the cooling racks to catch any drip from the chocolate drizzle. To prepare the drizzle, combine 1/2 cup chocolate chips with 1 tablespoon shortening in a small saucepan and melt over low heat, stirring constantly until smooth. Drizzle over cookies and allow to harden before serving.