Walnut Torte

walnuttorteAre a torte and a cake the same? Sort of. Various sources on the internet report that tortes originated in central or eastern Europe; they are richer than a typical butter-and-flour-based cake, relying on ground nuts or breadcrumbs as a key ingredient. Some tortes are completely flourless, while others use just a small amount of flour.

This torte recipe comes from the Better Homes & Gardens Cookbook, that trusty volume tucked between a red and white plaid cover that my mom gave me more than 22 years ago. As with most BH&G recipes, this one turned out incredibly well – I delivered it to my dear friend Diana this morning and we had a slice together. The orange flavor really lifts the walnut, and the chocolate buttercream pairs beautifully with both. This is definitely a recipe I’ll make again.

Ingredients

For the torte

  • 2 tablespoons flour
  • 1 teaspoon baking powder
  • 1 teaspoon orange zest
  • 4 eggs
  • 3/4 cup sugar
  • 2 1/2 cups walnuts

For the buttercream

  • 8 tablespoons butter, at room temperature
  • About 3 1/4 cups powdered sugar
  • 1/4 cup plus 2 tablespoons cocoa powder
  • 2 teaspoons vanilla extract
  • 2 tablespoons milk

For the candied walnuts

  • 1 cup walnuts
  • 1/4 cup sugar
  • 1 tablespoon butter

Preparation

Preheat oven to 350 degrees. Lightly grease and flour two 8-inch baking tins. Combine flour, baking powder, and orange zest in a small bowl; set aside.

Place eggs and sugar in a food processor and process until smooth. Add walnuts and process for about 1 minute, until nearly smooth. Add dry mixture and pulse to just combine.

Divide batter evenly between cake tins and bake for 18-20 minutes, until lightly browned. Remove from oven and cool in tins about 10 minutes, then turn out on a wire rack to cool completely.

While the cake bakes, make your candied walnuts: combine walnuts, sugar, and butter in a medium skillet over medium heat and cook, stirring frequently, until the sugar and butter caramelize and coat the walnuts. Pour onto a sheet of parchment and separate the nuts using two spatulas; allow to cool completely.

For buttercream, beat butter on medium speed for about 1 minute; add powdered sugar and cocoa powder and beat on low speed until fully incorporated. Add vanilla extract and 1 tablespoon milk, beating on medium speed for about 2 minutes. Scrape down the bowl and add additional milk; you want a spreadable consistency, but the frosting shouldn’t be runny.

To frost, place one cake on your cake plate and cover with a layer of buttercream; top with the second cake and frost the top of that cake, leaving the sides bare. Place candied walnuts in the center. Store in an airtight container at room temperature for 1-2 days. Makes about 12 servings, depending on how big your slices are.

Sparkling Under the Sea Cookies

sparklingundertheseacookiesDo cookies ship well? I certainly hope so. I send them around the country to various friends and family members, and I sincerely hope they all arrive in one piece. Some cookies, like sugar cut-outs, are more conducive to shipping if you coat them in sugar instead of frosting them. Especially in summer, I wouldn’t trust frosted cookies to fare well through the mail.

These treats are for Mike’s friend Jackie, who lives in Maryland and has been perusing my blog with her little boys. Enjoy, Jackie and family!

Ingredients

  • ½ cup butter, softened
  • 1 cup sugar
  • 1 egg
  • 2 cups flour
  • 2 teaspoons baking powder
  • ½ teaspoon salt
  • 3 teaspoons vanilla
  • White, aqua, light blue, dark blue, and orange colored sugar
  • Miniature chocolate chips, for eyes

Preparation

Stir together flour, baking powder, and salt in a medium bowl; set aside.

Cream together butter and sugar until fluffy. Add egg and beat well. Add vanilla and about half the flour mixture, beating until combined; beat in remaining flour.

Note: if your dough is too crumbly, you can add just a bit of water or another ¼ teaspoon of vanilla.

Knead just slightly until dough sticks together, then flatten into a disc and wrap in plastic wrap.  Refrigerate until just barely firm, about 20-30 minutes.

Preheat oven to 375 degrees.

Roll dough to 1/8 inch thickness and cut into desired shapes – I used crabs, whales, sharks, octopuses, and starfish and chilled my dough a second time after I cut my shapes, because it’s quite humid here today and the dough was more fragile than usual.

Place colored sugar on a plate and carefully dip each cookie into the sugar, pressing so the sugar sticks (this provides better coverage than sprinkling the sugar on top, but you could do that too if you prefer). I used dark blue for the crabs, light blue and white for the whales, aqua for the sharks, and blended aqua and light blue for the octopuses. Carefully place cookies on parchment-lined baking sheets and add chocolate chip eyes.

Bake for 8-10 minutes, until edges are just golden brown. Remove from oven and cool on baking sheets for about 4-5 minutes, then place on a wire rack to cool completely.

Quantity varies based on the size of your cutter; this batch yielded about 24 cookies because the crab, whale, and shark cutters are fairy large. I also recommend baking similar-shaped cookies on each baking sheet – for example, crabs on one, whales and sharks on another, starfish on another – to keep them from browning at different rates.

Campfire Cupcakes

campfire cupcakesDespite absolutely loving the woods, I’ve never been camping. Shocking? Perhaps. But seriously, I think I’d be more of a glamper than a camper, retreating to a cozy cabin for my woodland excursions. In any case, I absolutely love a campfire, and have wanted to make these campfire cupcakes for some time.

A word about the frosting: I cannot imagine how many calories or grams of sugar there are in this combination of butter, marshmallow fluff, and powdered sugar – so make sure you include the kosher salt. It’s not quite as sweet as you might imagine, especially when paired with the dark chocolate of these cupcakes.

Ingredients

For the cupcakes

  • 1 1/2 cups flour
  • 3 tablespoons cocoa powder
  • 1 cup sugar
  • 1 teaspoon baking soda
  • 1/2 teaspoon salt
  • 1 tablespoon vinegar
  • 1 teaspoon vanilla
  • 3 tablespoons vegetable oil
  • 1 cup water

For the frosting

  • 1 cup butter
  • 4 cups powdered sugar
  • 7 ounces marshmallow fluff
  • 1 teaspoon vanilla extract
  • 1/4 teaspoon kosher salt
  • Red, orange, and golden yellow food coloring
  • Pepperidge Farm Pirouette cookies, cut into small “logs”

Preparation

Preheat oven to 350 degrees. Line cupcake pans with paper liners; this makes 13 cupcakes.

In a large mixing bowl, combine flour, cocoa powder, sugar, baking soda, and salt. Mix until well-blended, then make three wells for the wet ingredients.

Place vinegar, vanilla, and vegetable oil into the wells; add water and mix until the batter is smooth. The mixture will bubble up slightly when you add the water, so just keep mixing until you get a smooth consistency in the batter, which will be fairly thin.

Using a 1/4 cup dry measuring cup, scoop batter into cupcake wells, filling about 2/3 full. Bake for 15-17 minutes, until a cake tester comes out clean. Remove from oven and remove from cupcake pans; cool completely on a wire rack before frosting.

To make frosting, beat butter on medium speed for 1 minute, then add 1 cup powdered sugar. Beat until all of the sugar is incorporated, scrape down the bowl, and add the second cup powdered sugar. Beat again, then add marshmallow fluff and beat to combine. Add remaining powdered sugar, vanilla extract, and kosher salt and beat to completely combine.

Divide frosting into three portions and tint red, orange, and golden yellow. Place a piece of plastic wrap (about 20 inches long) on our counter; dollop yellow frosting in a straight line, then orange, then red so you have three parallel lines of frosting on your plastic wrap. Roll up and twist both ends, then snip off one end and insert it into an 18-inch piping bag fitted with a Wilton 1M large open star tip. Pipe a few trial blobs to make sure all three colors come out at once.

Pipe flame-shaped blobs of frosting onto each cupcake and add three cookie “logs.” If desired, pipe a few more blobs of frosting to cover the ends of the logs. Store in an airtight container in the fridge; bring to room temperature before serving. Makes 13.

Maple Cinnamon Pecan Sandies

maplecinnamonpecansandiesMost baking books include a recipe for pecan sandies, sometimes called sand tarts, a lovely shortbread-type cookie made with chopped pecans. Because I love to experiment with flavors, I wondered what would happen when a pecan sandie met a maple cinnamon shortbread. The end result is absolutely delicious, something I know I’ll make again.

I used maple sugar in this recipe, and you can likely buy at Whole Foods and from many retailers online. I typically buy mine from High Country Creamery & Market in Granstville, Maryland, just a short trip from Deep Creek. The market features local maple sugar and maple syrup, and I pick up a package whenever we visit. If you don’t have maple sugar, you can use regular and just add a bit more maple flavoring to make up for the taste. 

Ingredients

  • 1 cup butter, at room temperature
  • 1 teaspoon salt
  • 3/4 cup maple sugar
  • 1/2 teaspoon maple extract/flavoring
  • 2 1/3 cups flour
  • 1 cup pecans, toasted, cooled, and finely chopped

Preparation

Preheat oven to 300 degrees. Line two baking sheets with parchment paper.

In a mixer fitted with the paddle attachment, cream butter, salt, maple sugar, and maple extract until fluffy. Add flour and mix to combine, then stir in pecans.

Using a two-inch cookie scoop, scoop dough and roll into balls. Place about 2 inches apart on baking sheets; you should have 10 cookies per sheet. Flatten slightly with your hand. 

Bake for 15 minutes, then rotate the baking sheet and bake for another 15-17 minutes. Remove from oven and allow to cool for about 2-3 minutes on the baking sheets, then place on a wire rack to cool completely. Store in an airtight container at room temperature for several days. Makes 20.

Chocolate Walnut Cookies

chocolatewalnutcookieInterested in a cookie that tastes like a brownie? Look no further than these treats, which reminded me so much of a brownie I almost called them brownie cookies.

The original recipe from King Arthur Baking was called Mocha Walnuts, but to me, they’re far more chocolate than mocha – the espresso powder adds depth to the chocolate flavor without really making these taste of coffee. I adapted the original recipe to use mini chocolate chips, finely chopped walnuts, and just a one-inch cookie scoop for my treats, yielding a batch of about just about three dozen. The end result has a lovely brownie-like flavor and nice crunchy edge with a soft center, one of my favorite types of cookie textures.

Ingredients

  • 2 cups miniature semisweet chocolate chips
  • 8 tablespoons butter, softened
  • 1/4 cup granulated sugar
  • 1/2 cup light brown sugar
  • 3/4 teaspoon baking soda
  • 1/2 teaspoon salt
  • 1 egg
  • 2 teaspoons espresso powder
  • 1 1/4 cups flour
  • 1/2 cup walnuts, finely chopped

Preparation

Preheat oven to 350 degrees. Line four baking sheets with parchment.

Melt 1/2 cup of the miniature chocolate chips; set aside. In a mixer fitted with the paddle attachment, cream butter, sugars, baking soda, and salt until very light and fluffy. Add egg and beat to combine, then add melted chocolate and espresso powder. Stir in flour, walnuts, and remaining 1 1/2 cups chocolate chips.

Using a 1-inch cookie scoop, drop scoops of dough onto baking sheets. Bake for 10-12 minutes, until edges are just set and tops are still puffy. Remove from oven and cool on the baking sheets for a few minutes, then remove to a wire rack to cool completely. Makes about 36.

Woodland Creature Cupcakes

woodlandcupcakesI’m a year-round hiker, taking to the woods in all seasons. This past week Mike, Tucker, and I logged more than 10 miles on the trails at our local park. Today’s baking was inspired by the woodland creatures I love, but have never come upon while out on the trails. Granted, meeting a fox or hedgehog would be quite different than meeting a bear, but it’s still something I hope to experience someday.

Flavor-wise, these cupcakes are an orange-cinnamon combination based on my honey cupcake recipe, which originally calls for lemon zest instead of orange. I wanted a bright flavor profile for these treats, and that’s exactly what I got – a nice kick of citrus against the warmth of cinnamon, all in an adorable little cupcake.

Ingredients

For the cupcakes

  • 1 1/2 cups flour
  • 1 teaspoon baking powder
  • 1/4 teaspoon salt
  • 1 teaspoon cinnamon
  • 8 tablespoons butter, softened
  • 2/3 cup packed light brown sugar
  • 2 eggs
  • 1 teaspoon vanilla extract
  • zest of 1 medium orange
  • 1/3 cup honey
  • 1/3 cup milk

For the frosting and decoration

  • 1 cup butter, at room temperature
  • 3 cups powdered sugar
  • 2 teaspoons vanilla extract
  • 3/4 teaspoon cinnamon
  • Brown and orange food coloring
  • Mini and regular-sized chocolate chips
  • Candy eyes

Preparation

Preheat oven to 350 degrees. Line cupcake pans with paper liners; my batch yielded 16 cupcakes when cups were filled about half to three-quarters full.

In a small bowl, combine flour, baking powder, salt, and cinnamon; set aside.

In a mixing bowl, cream butter and brown sugar until light and fluffy. Add eggs, vanilla extract, orange zest, and beat until well combined, then add honey and beat until well combined.

With the mixer running on its lowest speed, gradually add flour until the mixture is just combined, then add milk and mix until just combined. Scrape sides of the bowl frequently to fully incorporate all ingredients.

Using a two-inch cookie scoop, scoop batter into cupcake pans, filling about half to three-quarters full. Bake for at least 17 minutes, then check cupcakes for doneness; if cupcakes are not done, continue baking for 1-2 minutes and checking after each interval to be sure they don’t burn. My cupcakes baked for about 20 minutes.

Remove from oven and cool for just a moment in the pans, then cool completely on wire racks.

When cupcakes are cool, prepare the frosting: beat butter in a mixer fitted with the paddle attachment for about 1 minute, then add all the powdered sugar and beat on low until the sugar is fully incorporated into the butter. Add vanilla extract and cinnamon and beat to combine.

Divide your frosting into three portions: leave one natural, then tint the other two brown and orange. To make my fox color, I combined some of the brown frosting with orange food coloring for an earthier tone.

Frost half of your cupcakes with a thin layer of the natural-colored frosting; these will be your hedgehogs and foxes.

To make hedgehogs, fit a piping bag with a Wilton 233 tip (the grass/fur tip) and pipe fur, leaving a heart-shaped area of the cupcake plain. Add two mini chocolate chips for eyes and one for the nose.

To make foxes, fit a piping bag with a small star tip (I used Wilton 13) and pipe fur, leaving two patches of the cupcake plain for the fox’s cheeks. Switch to a leaf tip (I used Wilton 352) and pipe on ears. Add two mini chocolate chips for eyes and one for the nose.

To make bears, take a small portion of the natural frosting and combine it with the brown frosting to make a lighter brown shade. Place it in a small piping bag and snip the end; reserve for the bear’s muzzles. Cover the entire cupcake with brown frosting, then pipe on the muzzle; add candy eyes, a chocolate chip for the nose, and chocolate chips for the bear’s ears. Use a sharp knife, pulling upward, to create the bear’s fur.

Frost the remaining cupcakes however you like, or just use the remaining natural frosting and leave them plain (which is what I did). Store in an airtight container at room temperature for 2-3 days. Makes 16.

Banana Chocolate Chip Cookies

bananachocolatechipcookie
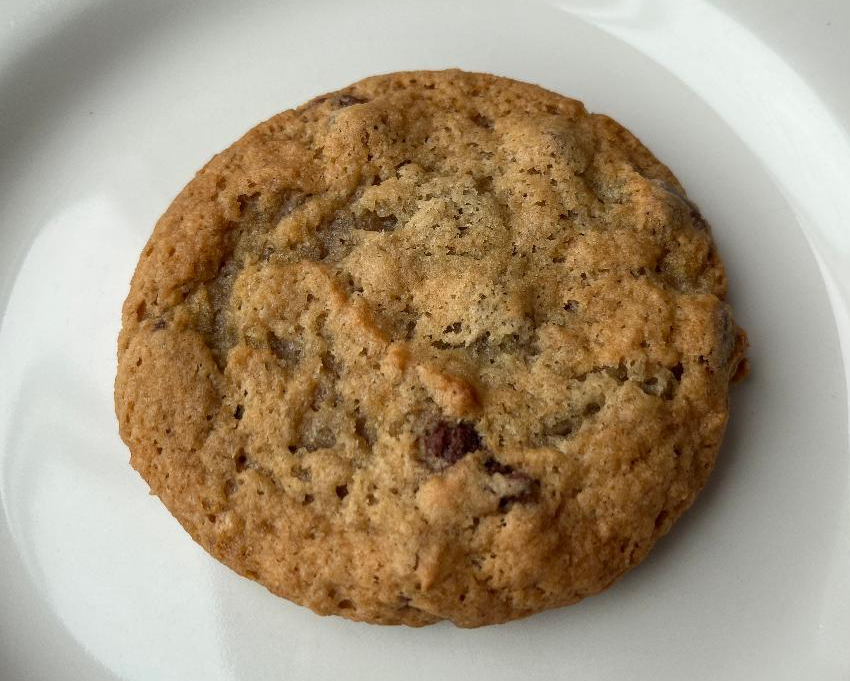
Mike and I had some sketchy-looking bananas on our countertop a few weeks ago, and I’m just getting around to blogging what I made with them. Behold, banana chocolate chip cookies! Yes, those leopard-like bananas can be made into much more than bread. Not that there’s anything wrong with banana bread, of course. It’s a classic, easily adapted to include walnuts, chocolate chips, or whatever else you may like. 

I found this recipe over at Mom in Time Out and adapted it to include just chocolate chips, rather than the original chocolate and peanut butter chip combination, at Mike’s request. He loved them, and now I have a new go-to recipe when our bananas go south. If you’re looking to add some crunch, I’d suggest stirring in a half-cup of chopped walnuts or pecans to your batter. 

Ingredients

  • 2 cups flour
  • 1 teaspoon baking soda
  • 1 tablespoon corn starch
  • 1/2 teaspoon salt
  • 8 tablespoons butter, softened
  • 2 medium ripe bananas
  • 1 cup brown sugar
  • 1/4 cup granulated sugar
  • 2 teaspoons vanilla extract
  • 1 1/2 cups milk chocolate chips 

Preparation

In a medium bowl, whisk together flour, baking soda, corn starch, and salt; set aside.

In a mixer fitted with the paddle attachment, cream the butter, bananas, and sugars until combined, then add vanilla extract and mix to combine. Stir in flour mixture, then chocolate chips. Cover and refrigerate the dough for about 15-20 minutes.

Preheat oven to 375 degrees. Line baking sheets with parchment paper.

Using a two-inch cookie scoop, drop scoops of dough on prepared baking sheets, about 2 inches apart.

Bake for 10-12 minutes, until very light golden brown. Remove from oven and cool on the baking sheet for about 5 minutes, then remove to a wire rack to cool completely. Store in an airtight container at room temperature for about 3 days. Makes about 2 dozen. 

Lemon Poppy Seed Bars

lemon poppy bars
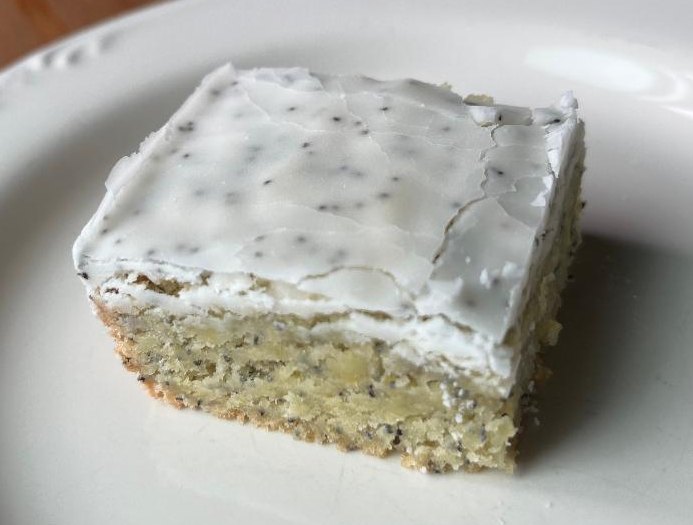
A while back I found a great recipe called Scandinavian blondies in my King Arthur Baking cookie companion, a great combination of lemon and almond flavors (or just almond, if you prefer). I’ve adapted that recipe multiple times to adjust the flavors, most recently using a classic lemon poppy seed combination. They turned out really well, and I’ll definitely make them again.

My first attempt at these used just one tablespoon of poppy seeds in the bars, which wasn’t enough. While it might sound like a lot, you definitely need two tablespoons to get a good poppy flavor against the lemon.

Ingredients

For the bars

  • 2 eggs
  • 1 cup sugar
  • 1/2 teaspoon salt
  • 1 teaspoon vanilla extract
  • zest of 1 medium lemon
  • 8 tablespoons butter, melted
  • 1 cup flour
  • 2 tablespoons poppy seeds

For the glaze

  • 1 3/4 cups powdered sugar
  • 1 tablespoon poppy seeds
  • 3 – 4 teaspoons water

Preparation

Preheat oven to 325 degrees. Lightly grease an 8 x 8 square baking pan.

In a mixer fitted with the paddle attachment, beat eggs until light colored and thick. Add sugar and salt, continuing to beat until shiny and pale yellow.

Add extract, zest, melted butter, and 1/2 cup of the flour, folding in gently. Fold in remaining 1/2 cup of flour and poppy seeds.

Pour batter into prepared pan and bake for 30-35 minutes, until the edges begin to pull away from the sides of the pan and are a very light golden color.

Remove from oven and cool completely before icing. To make icing, combine powdered sugar and poppy seeds; add water, 1 teaspoon at a time, to make a pourable glaze. Pour over bars and spread evenly with an offset spatula; allow to set before cutting. Makes 16.

Fudgy Coffee Brownies

fudgy coffee browniesChocolate and coffee are great flavor friends, and I’ve made many a mocha treat on this blog. A few weeks ago I wanted to bake something simple and easy, so I went with a classic coffee brownie using espresso powder and a simple espresso glaze icing. The end result was a fudgy (yet not too gooey) creation that proved to be very popular in Mike’s office.

If you don’t have espresso powder, I’d recommend using a coffee extract or even just coffee itself in your glaze. You can also add a tablespoon of coffee to your brownie batter as an alternative if you like. Espresso powder is usually available in the baking aisle at grocery stores near the chocolate. 

Ingredients

For the brownies

  • 1 cup butter
  • 2 1/4 cups sugar
  • 1 1/4 cups Dutch process cocoa
  • 1 teaspoon salt
  • 1 teaspoon baking powder
  • 1 tablespoon espresso powder
  • 1/2 tablespoon vanilla extract
  • 4 eggs
  • 1 1/2 cups flour

For the icing

  • 2 cups powdered sugar
  • 2 tablespoons espresso powder 
  • 2 tablespoons hot water
  • 1 teaspoon vanilla extract
  • 1 – 2 teaspoons additional water 

Preparation

Preheat oven to 350 degrees. Lightly grease a 9 x 13 baking tin and sprinkle the bottom with sugar; this is my tip for a slightly crunchy bottom crust that adds a nice texture to otherwise soft treats like brownies.

In a large pot, melt butter over low heat. Stir in sugar and continue heating for another minute while stirring, until the mixture is just hot. Remove from heat and stir in cocoa powder, salt, baking powder, and espresso powder, then whisk in eggs and vanilla extract. Stir in flour, then spread evenly in prepared pan.

Bake for 28-30 minutes, until a cake tester inserted in the center comes out clean. Cool completely before icing.

To make icing, place powdered sugar in a medium bowl; set aside. Mix espresso powder and hot water in a small bowl, then add to powdered sugar and stir. Add vanilla extract and additional water, 1/2 teaspoon at a time, to make a thick pourable glaze. Glaze brownies and use an offset spatula to smooth; allow to set before cutting into squares. Makes 24.

Rustic Apple Tart

rusticappletartMy mom Genny, an occasional subject on this blog, is coming from dinner this evening. She requested something simple – “just hamburgers, or whatever” – and instructed me not to go to any trouble. Well, I can’t have my mom over for Mother’s Day dinner without preparing some kind of dessert.

This rustic apple tart, originally found in my Better Homes & Gardens Baking book as a peach tart, was my first foray into free-form pastry baking and I think it turned out fairly well. The apples in the center look a bit dry to me, so I’m stocked with vanilla ice cream (both of the dairy and non-dairy variety, as Genny lives a low-dairy life) just in case. I actually suspect that I should have glazed the apples with apple or apricot jam after the tart baked to make them shiny. Eh, maybe next time.

Ingredients

For the crust

  • 1 1/2 cups flour
  • 1/2 teaspoon salt
  • 1/2 cup vegetable shortening
  • About 5 tablespoons cold water
  • Milk, for glazing
  • Sugar, for sprinkling

For the filling

  • 1/4 cup sugar
  • 4 teaspoons flour
  • 1 teaspoon apple pie spice
  • 3 cups peeled, sliced apples (I used Granny Smith and McIntosh)

Preparation

Preheat oven to 375 degrees. To make the crust, in a medium bowl, stir together flour and salt. Cut in shortening using a pastry blender or fork, then sprinkle in 1 tablespoon cold water at a time, tossing it in the dough to combine so it sticks together. You’ll still have some dry bits of flour in the bowl – that’s okay.

Place a large sheet of parchment on your countertop and pour the crust mixture onto it. Use the parchment to bring the dough together, pressing it into a rough rectangle. For an amazing look at how to do this, check out this video from King Arthur Baking. Set the dough aside in the fridge while you make your filling.

To make the filling, stir together sugar, flour, and apple pie spice. Add apples and toss to coat.

Remove crust from the fridge; place a second sheet of parchment on top of it and roll it out to about a 13-inch circle. I flipped my crust over at this point so my original piece of parchment could get discarded.

Place the crust on a rimmed baking sheet and add apples into the center, leaving about a 2-inch border around the sides. Fold the sides in to create the pleating; brush crust with milk and sprinkle with sugar.

Bake for 50-55 minutes, until crust is golden brown. Around 30 minutes, cover the exposed filling with a circle of foil to prevent burning.

Cool on a wire rack; store in an airtight container at room temperature for 1 day or in the fridge for 2 days. Makes 8 servings.