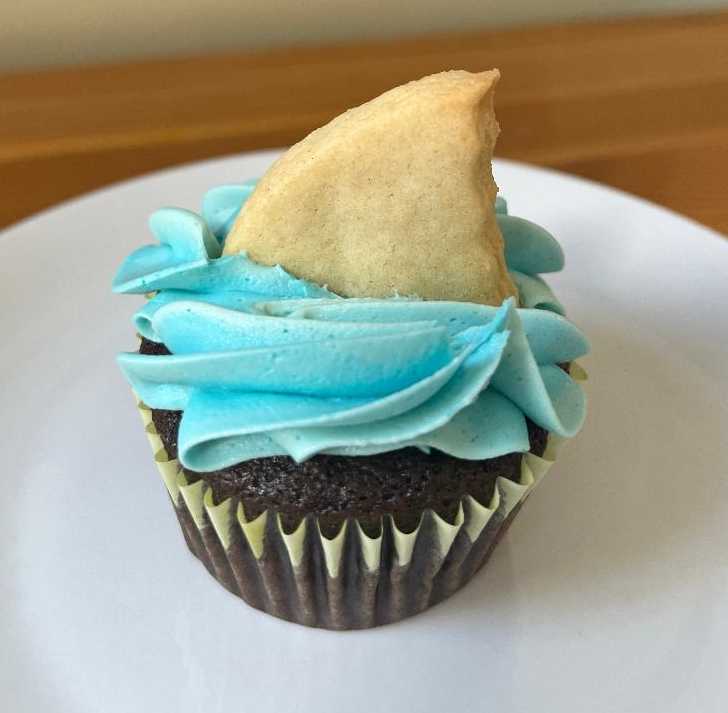
Cinnamon Swirl Bread II

cinnamonswirlbreadCinnamon swirl bread recipes are a dime a dozen, especially on the internet. I’ve made it before and blogged it many years ago in this post – and it was certainly delicious. But this recipe from Sally’s Baking Addiction is better, in both taste and texture. I think the sour cream – which makes the bread really tender and almost fluffy – is the key ingredient.

This bread made its way to my dear friend Carrie in State College for her birthday a few weeks ago; I made two batches at once so I was able to try it and took the rest of the second loaf to the office, where it was a very big hit.

Ingredients

For the cinnamon swirl

  • 1/2 cup sugar
  • 1 tablespoon cinnamon

For the bread

  • 2 cups flour
  • 1 teaspoon baking soda
  • 1/2 teaspoon salt
  • 1 egg, at room temperature
  • 3/4 cup sugar
  • 1/3 cup vegetable oil
  • 1/3 cup sour cream, at room temperature
  • 2/3 cup whole milk, at room temperature
  • 1 1/2 teaspoons vanilla extract

Preparation

Preheat oven to 350 degrees. Spray a 9 x 5 loaf tin with baking spray.

To make the swirl, combine sugar and cinnamon in a small bowl; set aside.

In a large bowl, whisk together flour, baking soda, and salt. In a large glass measuring cup or medium bowl, whisk together egg, sugar, vegetable oil, sour cream, milk, and vanilla extract. Add wet ingredients to dry ingredients and stir to combine – don’t over-mix. You just want all the dry ingredients to be absorbed into the wet ingredients.

Pour about half the batter into the loaf tin; reserve two tablespoons from the swirl mixture and sprinkle the rest over the batter. Carefully top with the remaining batter, and sprinkle the remaining swirl mixture on the top. Using a knife, make a large swirl down the loaf – you don’t need to swirl too much.

Bake for 50 – 65 minutes, until a cake tester inserted in the center comes out clean. Check your bread around 40 minutes and cover with foil to prevent over-browning. Remove from oven and cool in the tin for about one hour, then remove from the tin and let cool completely on a wire rack. Store tightly wrapped at room temperature for 3-4 days.

Creamsicle Pound Cake

creamsiclepoundcakeThe Good Humor Creamsicle is one of the best ice cream desserts around, an awesome combination of vanilla ice cream and orange sherbet. Now that summer is here (well, technically not until a few weeks from now, but it’s June so let’s go with it), I wanted to bake something inspired by this classic summer treat. Enter the creamsicle pound cake.

Full disclosure: I baked two versions, one with a different recipe and one with the recipe below. The recipe below turned out better – it’s yet another riff on my poppy seed cake, this time with orange zest and fiori di sicilia, a very potent citrus/vanilla extract (of which a little goes a very, very long way) in the batter. If you don’t have fiori di sicilia, you can use 1/2 teaspoon of orange extract instead; the flavor won’t match exactly, but it’ll be close enough.

Ingredients

For the cake

  • 3 cups flour
  • 2 1/2 cups sugar
  • 1 1/2 teaspoons baking powder
  • 1/2 teaspoon salt
  • 3 eggs, at room temperature
  • 1 1/2 cups whole milk
  • 1 cup vegetable oil
  • 2 teaspoons vanilla extract
  • 1/2 teaspoon butter extract
  • 1/4 teaspoon fiori di sicilia
  • zest of 1 medium orange 

For the icing

  • 2 cups powdered sugar
  • 1 teaspoon vanilla extract
  • scant 1/8 teaspoon fiori di sicilia
  • 3-4 tablespoons orange juice

Preparation

Preheat oven to 350 degrees. Grease and flour a 10-inch Bundt tin.

In a large bowl, combine flour, sugar, baking powder, and salt; set aside. In a large, 4-cup glass measuring cup, whisk together eggs, milk, vegetable oil, vanilla extract, fiori di sicilia, and orange zest. Stir wet ingredients into dry ingredients to completely combine.

Pour batter into prepared tin and bake for 50-60 minutes or until a cake tester comes out clean. Cool in tin for about 15 minutes, then turn out onto a wire rack to cool completely.

To make the icing, combine powdered sugar, vanilla extract, fiori di sicilia, and 2 tablespoons orange juice; add enough additional juice to make a thick but pourable icing. Pour over cake and allow to drip down the sides. Allow icing to set before serving.

Store in an airtight container at room temperature for several days; this cake stays moist for a very long time.

White Almond Cake

almondcake
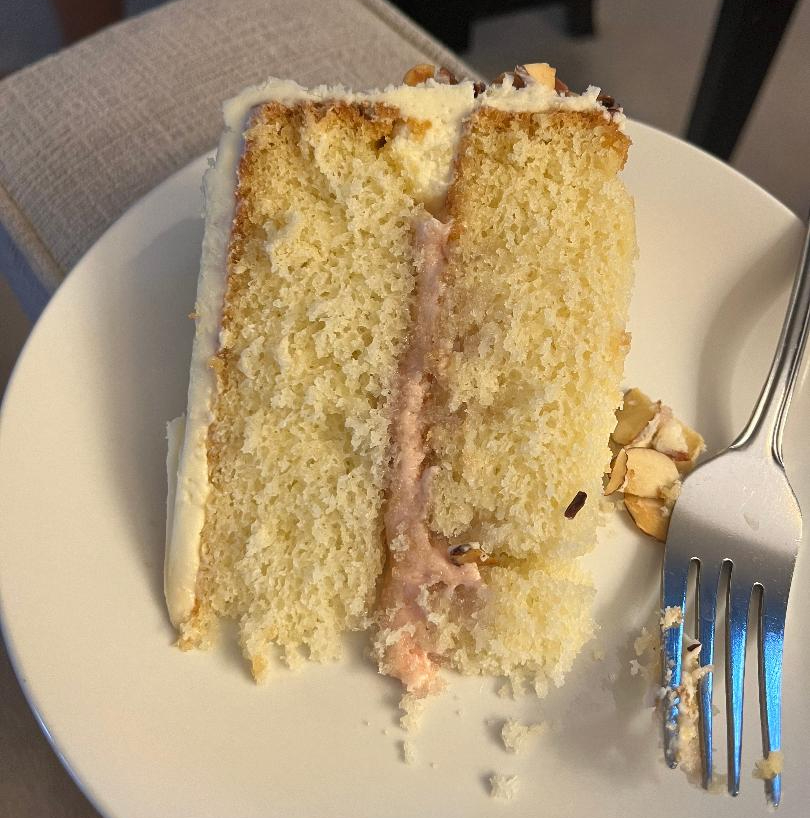
White almond cake is a classic, but many of the recipes I found online were the three-layer variety. As a person who doesn’t have three round cake tins (why exactly, I don’t know), I wanted a simple two-layer option and found this recipe at Sally’s Baking Addiction. It’s a basic white cake, but I made it into an almond version for my mom’s (early, because my brother and nephew were in town) birthday celebration this past weekend.

I added strawberry buttercream between my two layers, but wish I’d gone with a much thicker layer of it – it tasted delicious, but there just wasn’t enough. The cake itself is delicious and really tender, so I’ll absolutely make it again. It seems like a great base cake for other flavor ideas, so stay tuned.

Ingredients

For the cake

  • 2 1/2 cups cake flour, spooned and leveled
  • 2 teaspoons baking powder
  • 1/2 teaspoon baking soda
  • 1 teaspoon salt
  • 12 tablespoons butter, at room temperature
  • 1 3/4 cups sugar
  • 5 egg whites, at room temperature
  • 1/2 cup sour cream, at room temperature
  • 2 teaspoons vanilla extract
  • 1 tablespoon almond extract
  • 1 cup whole milk, at room temperature

For the strawberry buttercream

  • 4 tablespoons butter, at room temperature
  • 1 to 1 and 1/4 cups powdered sugar
  • About 2 tablespoons fresh strawberry puree, to taste*

For the almond buttercream and decoration

  • 1 1/4 cups butter, at room temperature
  • 3 1/2 cups powdered sugar
  • 1/2 tablespoon vanilla extract
  • 1 1/4 tablespoons almond extract
  • 2/3 cup flaked almonds, toasted and cooled

*The more puree you add, the thinner your buttercream will become, so add sparingly along with additional powdered sugar to make a soft, but sturdy buttercream. 

Preparation

Preheat oven to 350 degrees. Spray two 9-inch round baking tins with baking spray, line with parchment circles, and spray the parchment.

In a medium bowl, whisk cake flour, baking powder, baking soda, and salt; set aside. In a mixer fitted with the paddle attachment, beat butter for 1-2 minutes. Add sugar and beat on high speed for 2 minutes, until fluffy; scrape down the bowl a few times. Add egg whites and beat on high to combine, then beat in sour cream, vanilla extract, and almond extract. With the mixer running on low, slowly add dry mixture until just incorporated, then add milk. Don’t over-mix; once you’ve added the milk, turn off your mixer and finish incorporating everything by hand.

Divide batter evenly between the cake tins; bake for 25-30 minutes, until a cake tester comes out clean. Remove from oven and cool completely in the baking tins.

Once cakes are cool, make the buttercreams. For the strawberry, beat butter on medium speed for 1-2 minutes, then add powdered sugar and beat on low speed until the sugar is fully incorporated into the butter. Add strawberry puree and beat to completely combine; set aside until you’re ready to assemble the cake.

To make the almond buttercream, beat butter on medium speed for 1-2 minutes, then add powdered sugar and beat on low speed until the sugar is fully incorporated into the butter. Add vanilla and almond extracts and beat to combine completely.

To assemble, place one cake layer on your serving plate; pipe a circle of almond buttercream at the edge of the cake and fill with strawberry buttercream; this will keep the strawberry from leaking out when you cover the cake in the almond buttercream. Top with the second cake layer, then frost the top and sides with the remaining almond buttercream. Press toasted flaked almonds up the sides of the cake.

almondcakesideA view from the side, with toasted flaked almonds on display. 

Homemade Nutter Butters

homemadenutterbuttersNutter Butter cookies are my second favorite store-bought cookie, right behind the Double Stuf Oreo. For some reason I always have them on road trips, and honestly don’t know why. A homemade, copycat version came across my Pinterest feed from The Soccer Mom Blog recently and I thought, why not? As always, I added more vanilla to my filling than the original recipe called for, because I never think recipes have enough.

Anyway, here’s the thing…these cookies are massive. I mean, massive. They claim to have 230 calories each, and I believe it. The next time I make them (likely tomorrow) I’m going to make them smaller, and probably try a chocolate filling instead of peanut butter just because. While they’re not crunchy like the store-bought version, they’re absolutely delicious. 

Ingredients

For the cookies

  • 1 1/2 cups flour
  • 1 teaspoon baking soda
  • 1/4 teaspoon kosher salt
  • 8 tablespoons unsalted butter, at room temperature
  • 1 cup light brown sugar
  • 1 cup smooth peanut butter
  • 1 egg
  • 1/2 teaspoon vanilla extract
  • 1/2 cup granulated sugar, for rolling

For the filling

  • 4 tablespoons butter, at room temperature 
  • 1/2 cup smooth peanut butter
  • 1 1/2 cups powdered sugar
  • 2 tablespoons whole milk
  • 1 teaspoon vanilla extract 

Preparation

Preheat oven to 350 degrees. Line several baking sheets with parchment paper. In a small bowl, combine flour, baking soda, and salt; set aside. Place granulated sugar in another small bowl to roll your dough in, and set that aside as well.

In a mixer fitted with the paddle attachment, cream butter, peanut butter, and brown sugar together. Add egg and vanilla and beat to combine, then add in flour mixture and beat until just combined.

Using a 1-inch cookie scoop, scoop out portions of dough. Roll into balls, roll in granulated sugar, then form into log shapes and place about two inches apart on the baking sheets. To create the peanut shape, pinch the middle of each log, then use a fork to make the crisscross pattern like you would on a regular peanut butter cookie. Bake for about 10 minutes, until edges are just starting to turn golden brown – you don’t want to over bake these (or any treats, really). Remove from oven and cool cookies on the baking sheets for 3-4 minutes, then remove to a wire rack to cool completely.

Once cookies are cool, make the filling. Cream together butter and peanut butter, then add in powdered sugar, milk, and vanilla. Beat until smooth, then place in a piping bag and pipe about one tablespoon of filling onto half of the cookies. Top with the remaining cookies to create sandwiches. My batch yielded 15 sandwiches, and I had plenty of filling left over – about a half-cup, at least. I’m holding onto that for another treat.

Almond Croissant Blondies (aka Frangipane Blondies)

almondcroissantblondiesCroissants aren’t really my thing, to bake or to eat. If I do eat one, I want an almond one filled with frangipane. So what is frangipane, you ask? It’s an almond paste commonly found in pastries and tarts, like the Bakewell tart from England. In this case, an almond blondie base gets a layer of frangipane on top of it, then a layer of sliced almonds on top of that, not unlike the almond croissants you can find at bakeries and your local Starbucks.

What I know is this: these treats are absolutely delicious. They remind me very much of the croissant version, and I definitely want to make them again. I found this recipe at Lifestyle of a Foodie, and it absolutely did not disappoint.

Ingredients

For the blondie layer

  • 8 tablespoons butter, at room temperature
  • 1 cup light brown sugar, packed
  • 1 egg, at room temperature
  • 1/4 teaspoon almond extract
  • 1/4 teaspoon vanilla extract
  • 1/4 teaspoon salt
  • 1 1/3 cups flour
  • 1/4 teaspoon baking powder
  • 1/3 cup almond flour

For the frangipane layer

  • 4 tablespoons butter, at room temperature
  • 1/2 cup sugar
  • 1 egg yolk, at room temperature
  • 1/4 teaspoon vanilla extract
  • 1/4 teaspoon almond extract
  • 1/4 teaspoon orange zest, optional
  • 2/3 cup almond flour
  • pinch of salt
  • 1/2 cup sliced almonds, for topping

Preparation

Preheat oven to 350 degrees. Line an 8 x 8 baking tin with parchment paper.

Make the blondie layer: In a mixer fitted with the paddle attachment, cream butter and brown sugar until light and fluffy. Add egg and beat well, then add in almond and vanilla extracts and beat to combine. Add salt, flour, baking powder, and almond flour and beat to completely combine. Spread batter into the prepared tin.

Make the frangipane layer: In a mixer fitted with the paddle attachment, cream butter and sugar until light and fluffy. Add egg yolk and beat to combine, then add vanilla extract, almond extract, and orange zest and beat well. Beat in almond flour and salt to make a smooth paste.

Spread frangipane over the blondie layer, then top with sliced almonds. Bake for 30-34 minutes, until edges are golden and center is just set. Allow to cool in the pan for about 25 minutes, then remove from the pan by lifting the parchment and cool completely on a wire rack. Cut into squares; makes 16.

Italian Orange Cookies

italianorangecookiesI don’t know what makes these cookies Italian, but according to Marisa’s Italian Kitchen, they are. They’re also delicious, very soft and tender with a nice crunchy sugar coating. The original recipe called for rolling them in both granulated sugar and powdered sugar, but I just went with granulated.

I think I should have chilled my dough for longer, because while Marisa’s cookies were more sturdy-looking, mine spread a bit when they baked. I suspect they would be good as sandwich cookies, maybe with some chocolate ganache between the layers. I might still do that, add a dark chocolate ganache – because chocolate and orange are really good flavor friends. You could also fill them with a vanilla buttercream for more of a creamcicle vibe…so maybe next time. Stay tuned.

Ingredients

  • 8 tablespoons butter, at room temperature
  • 1/2 cup sugar
  • 1 egg yolk, at room temperature
  • zest from 1 medium orange
  • 2 tablespoons orange juice
  • 1 teaspoon vanilla extract
  • 1 1/2 cups flour 
  • 1 teaspoon baking powder
  • 1/8 teaspoon salt
  • Additional granulated sugar, for rolling

Preparation

In a mixer fitted with the paddle attachment, cream butter and sugar until fluffy. Add egg yolk, and beat to combine, then add orange zest, orange juice, and vanilla and beat well. Add flour, baking powder, and salt and beat to combine completely. Cover and chill for about 1 hour.

Preheat oven to 350 degrees. Line two baking sheets with parchment paper. Place sugar in a small bowl for rolling; set aside.

Using a small cookie scoop, scoop scant balls of dough – you want them to be about the size of a gumball. Roll into balls, then coat in sugar. Place on the baking sheets and bake for 13-15 minutes, then edges are just golden. Remove from oven and cool on baking sheets for a few minutes, then place on a wire rack to cool completely. Makes about 22.

Kentucky Butter Cake

kentuckybuttercakeDid this cake originate in Kentucky? I assume so, but really have no idea. The internet was little help – just a ton of recipes for this delicious treat. It’s basically pound cake, drenched in butter rum syrup. You can’t go wrong when drenching things in butter rum syrup.

A word about the drenching, though: I never seem to do it properly. I always poke holes in the cake with a skewer, yet my syrup doesn’t distribute as evenly as I’d like. Regardless, this cake is delicious. There are lots of recipes out there, but mine came from Ask Chef Dennis; I, like Chef Dennis, used dark rum in my syrup, but you can use light rum or rum extract if you don’t have the dark kind. I also doubled the amount of vanilla extract in this recipe, because I do that for most vanilla quantities – I feel like you can never have enough.

Ingredients

For the cake

  • 1 cup buttermilk, at room temperature
  • 5  eggs, at room temperature
  • 4 teaspoons vanilla extract
  • 3 cups all-purpose flour, spooned and leveled*
  • 1 teaspoon baking powder
  • 1/2 teaspoon baking soda
  • 1/2 teaspoon salt
  • 2 cups sugar
  • 1 cup unsalted butter, at room temperature

*Spoon your flour into the measuring cup, then level it off with a knife. Alternatively, bake by weight, not by volume; three cups of flour is 360 grams. 

For the syrup

  • 8 tablespoons unsalted butter
  • 1 cup sugar
  • 1/3 cup water
  • 1 tablespoon dark rum

Preparation

Preheat oven to 325 degrees. Grease and flour a 10-cup Bundt pan.

In a large glass measuring cup, combine buttermilk, eggs, and vanilla extract; beat to combine.

In a mixer fitted with the paddle attachment, place flour, baking powder, baking soda, salt, and sugar; beat on low to combine for just a few seconds. Add butter and half the buttermilk mixture and beat to combine for just one minute; scrape the bowl a few times. With the mixer running on low, add remaining buttermilk mixture, then increase speed to medium and beat for three minutes. Batter will be light in color.

Pour into the Bundt pan and bake for 55-65 minutes, until a cake tester comes out clean. Remove from oven and allow to cool in the pan for 10 minutes while you make the syrup.

To make the syrup, combine butter, sugar, water, and rum in a medium saucepan. Bring to a very gentle boil, then reduce to a simmer and cook for about two to three minutes, until the sugar dissolves. Using a skewer, poke holes in the cake, about 3/4 of the way down. Reserve 1/3 cup syrup and pour the remainder over the cake; if it pools on the cake, poke a few more holes. Let cool in the pan for 30 minutes, then turn out onto a wire rack or serving plate; place parchment or a rimmed baking sheet underneath if you’re using a wire rack. Pour remaining syrup over the cake and brush it with a pastry brush to distribute. Let cool completely; store in an airtight container. Makes about 16 slices.

Vanilla Caramel Cupcakes

vanillacaramelcupcakesLast week’s chocolate caramel cupcakes were delicious, so a vanilla version seemed like a good idea too. Naturally, it was. The cupcake recipe is one I’ve used before, modified from the original marble cupcake recipe I found at Sally’s Baking Addiction to omit the chocolate batter and just go with vanilla.

I wasn’t sure what to top them with; I thought about Kraft caramel squares, but that seemed too vanilla. Then I considered Rolos for the chocolate element, but then mini Heath bars came to mind and that seemed like the best idea. Toffee is actually a cousin of caramel, cooked longer so it’s a hard, brittle treat, so it sort of made sense to me for these cupcakes. In any case, the end result is very tasty.

Ingredients

For the cupcakes

  • 1 2/3 cups flour (spooned and leveled)
  • 1/2 teaspoon baking powder
  • 1/4 teaspoon baking soda
  • 1/2 teaspoon salt
  • 1/2 cup unsalted butter, melted
  • 1 cup sugar
  • 1 egg, at room temperature
  • 1/4 cup vanilla yogurt
  • 3/4 cup milk
  • 1 1/2 tablespoons vanilla extract

For the frosting and decoration

  • 12 tablespoons butter, at room temperature
  • 3 cups powdered sugar
  • About 1/3 cup caramel sauce*
  • 1 teaspoon vanilla
  • 18 Heath bar miniatures  (I found mine at Target)

*I used Smucker’s Salted Caramel Ice Cream topping to save time but you can also make your own caramel sauce. Homemade caramel sauce is absolutely delicious.

Preparation

Preheat oven to 350 degrees. Line two cupcake tins with paper liners; my batch made 18 cupcakes. Fun fact: if you place the cupcake liners in the wells on the outside of each tin, your cupcakes can rise higher. Science, man.

In a large bowl, combine flour, baking powder, baking soda, and salt; set aside. In a microwave-safe bowl, melt butter, then add sugar and stir to combine; mixture will be grainy. Refrigerate for 1 minute, then remove and add egg, yogurt, milk, and vanilla. Stir into the flour mixture until no lumps remain.

Using a 2-inch cookie scoop, scoop batter into tins and fill about 2/3 to 3/4 full. Bake for 20-24 minutes, until a cake tester comes out clean. Remove from oven and place cupcakes on wire racks to cool completely.

To make frosting, beat butter and powdered sugar on low speed until the sugar is fully incorporated into the butter. Add caramel sauce and vanilla and beat to combine completely. Fit a large piping bag with a large closed star tip (I use the Wilton 1M) and pipe swirls of frosting onto each cupcake. Top with a mini Heath bar; store in an airtight container at room temperature for 2-3 days.

Chocolate Caramel Cupcakes

chocolatecaramelcupcakesThis weekend I’m off to State College to see one of my oldest (meaning I have known her for 21 years, not that she herself is old) and dearest friends, Carrie. We met back in 2003 at the National Building Museum in DC and bonded over being from Pennsylvania; she is an Erie native now living in Happy Valley, despite not being a football fan. These treats are for her and her family; she too is a baker, as are her boys.

Rain is expected in State College this weekend, so our plans are TBD. But one thing I’d like to do is visit the Penn State Creamery, as I’ve never had their ice cream before. I’ve never made my own ice cream either, but you never know when that might enter the repertoire.  For now, I’ll stick to my oven.

Ingredients

For the cupcakes

  • 1 1/2 cups flour
  • 3 tablespoons cocoa powder
  • 1 cup sugar
  • 1 teaspoon baking soda
  • 1/2 teaspoon salt
  • 1 tablespoon vinegar
  • 1 teaspoon vanilla
  • 3 tablespoons vegetable oil
  • 1 cup water

For the frosting and decoration

  • 12 tablespoons butter, at room temperature
  • 3 cups powdered sugar
  • About 1/3 cup caramel sauce*
  • 1 teaspoon vanilla
  • 14 Dove Milk Chocolate Promises candies

*I used Smucker’s Salted Caramel Ice Cream topping to save time but you can also make your own caramel sauce. Homemade caramel sauce is absolutely delicious. 

Preparation

Preheat oven to 350 degrees. Line cupcake pans with paper liners; this recipe makes 14 cupcakes.

In a large mixing bowl, combine flour, cocoa powder, sugar, baking soda, and salt. Mix until well-blended, then make three wells for the wet ingredients.

Place vinegar, vanilla, and vegetable oil into the wells; add water and mix until the batter is smooth. The mixture will bubble up slightly when you add the water, so just keep mixing until you get a smooth consistency in the batter, which will be fairly thin.

Using a 1/4 cup measure, fill cupcake wells about half full. Bake for 15-19 minutes, until a cake tester comes out clean. Cool in pan for a few minutes, then remove from pan and cool completely on wire racks. Cool completely before frosting.

To make frosting, beat butter and powdered sugar on low speed until the sugar is fully incorporated into the butter. Add caramel sauce and vanilla and beat to combine completely. Fit a large piping bag with a large closed star tip (I use the Wilton 1M) and pipe swirls of frosting onto each cupcake. Top with a Dove chocolate; store in an airtight container at room temperature for 2-3 days.

Chocolate Chip Loaf Cake

chocolatechiploafcakeSometimes simple treats are the best. This chocolate chip loaf cake from Sally’s Baking Addiction is very simple, and also absolutely delicious. I think it could be for breakfast or a snack, whatever you prefer.

I don’t bake a ton of loaf cakes, but they’re really easy and I feel like I’m going to adapt this recipe to incorporate a few different flavors moving forward; I would love to include some orange zest for a chocolate orange flavor, so we’ll see how that turns out next time. I can also see removing the chocolate chips and turning this into a lemon cake, or even just a vanilla version. Time will tell.

Ingredients

  • 1 3/4 cups flour
  • 1 1/2 teaspoons baking powder
  • 1/4 teaspoon salt
  • 12 tablespoons unsalted butter, at room temperature
  • 3/4 cup sugar
  • 2 eggs, at room temperature
  • 1/4 cup sour cream, at room temperature
  • 1 1/2 teaspoons vanilla extract
  • 1/2 cup whole milk, at room temperature
  • 1 cup miniature chocolate chips

Preparation

Preheat oven to 350 degrees. Generously grease a 9 x 5 loaf tin or spray with baking spray. Technical note: my loaf tin is 9.25 x 5.25, so I cut down on my baking time by just a bit.

In a medium bowl, whisk together flour, baking powder, and salt; set aside. In a mixer, cream butter and sugar on medium speed until fluffy, about two minutes. Scrape down the bowl and add eggs, beating for one minute. Add sour cream and vanilla and beat to combine; the mix will look curdled, but that’s okay. Add flour mixture and beat on low speed, adding milk with the mixer running, until just combined. Finish mixing with a spatula to make sure there are no pockets of flour remaining, then fold in chocolate chips.

Pour batter into loaf tin and bake for 50-70 minutes, until a cake tester inserted in the center comes out clean. My cake was done around the 55 minute mark. Remove from oven and cool in the tin for about 15 minutes, then turn onto a wire rack and cool completely before serving.