Mega Chocolate Caramel Cookies

These cookies are massive. Four-inches-wide massive. They’re also made with Hershey’s Special Dark cocoa powder and stuffed with Milky Way Simply Caramel candy bars. Yep, that’s right: dark chocolate cookies stuffed with caramel candy. Genius, right?

I found the recipe at Life, Love, and Sugar while scrolling through Pinterest for Halloween cookie ideas. While I omitted the sprinkle of sea salt on the top because I didn’t have any sea salt, if I make these again I’ll definitely add it. They smelled amazing in the oven, and they’re now packed safely in a box on their way to my nephew Roman in North Carolina. Next time, I think I’ll cut the candy bars into quarters, rather than just halves, and make smaller versions. I actually made two batches, as the ingredients below yielded 10 cookies for me. I also chilled my Milk Way bars prior to stuffing them inside the cookies, but I’m not sure this was necessary. When I cut one of the cookies in half, the caramel definitely didn’t ooze out the way it appeared to in the original baker’s blog post, but I’m sure they’ll taste great anyway.

Ingredients

  • 1 1/4 cups all purpose flour
  • 1/2 cup Hershey’s Special Dark cocoa powder
  • 1 tsp baking soda
  • 12 tablespoons butter, softened*
  • 1/2 cup brown sugar, lightly packed
  • 1/2 cup sugar
  • 1 egg
  • 1 tsp vanilla extract
  • 5 Milky Way Simply Caramel fun-sized candy bars, cut in half

*The original recipe recommended salted butter for this, but I just used regular unsalted. I suspect this may alter the flavor of the cookies, so fingers crossed that mine turned out okay. 

Preparation

Preheat oven to 350 degrees. In a medium bowl, combine flour, cocoa powder, and baking soda; set aside.

In a mixer fitted with the paddle attachment, cream the butter and sugar until very light and fluffy, about 3-4 minutes. Add egg and vanilla extract and beat well, then add the flour mixture all at once. Beat on low, then medium speed, until combined.

Scoop generous, 2-tablespoon-sized scoops of dough and roll into a ball. Break the ball in half and stuff with half a Milky Way; press back together and roll again to seal the candy bar inside. Place on baking sheets several inches apart; cookies will spread as they bake.

Bake for 10-12 minutes; the centers will look puffy, but the edges will be just set. Remove from oven and cool on baking sheet for about 5 minutes, then remove to a wire rack to cool completely. Store in an airtight container at room temperature.

Makes 10 four-inch cookies.

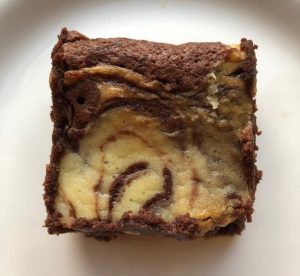
Here we have a cookie sliced in half. 

Skeleton and Mummy Cookies

Halloween is just a few days away, and I’ve spent this weekend baking, fulfilling my role of Great Pumpkin. My favorite girls in Maryland – Mo and Margo – will receive these skeleton and mummy cut-outs just in time for the holiday. Will the royal icing stand up to shipping? It’s a fairly dry confection, so I’d hope so. And I suppose if any of the eyes or bandages flake off in shipping, it’ll just add to the Halloween creep factor. Hopefully I’m not going to traumatize the children.

I’m not that experienced with royal icing, and I’ve used the meringue powder version for these treats, rather than the version with a fresh egg white. Royal icing consistency can vary from much more liquid, appropriate for “flooding” sugar cookies, to a sturdier variety more commonly found on gingerbread houses. It’s not exactly tasty, but these cookies have a delicious chocolate flavor that will more than make up for it.

Ingredients

For the cookies

  • 1 1/2 cups flour
  • 3/4 cup cocoa powder
  • 1/8 teaspoon salt
  • 12 tablespoons butter, softened
  • 1 1/3 cup sugar
  • 1 egg
  • 1 teaspoon vanilla extract

For the royal icing & decoration

  • 1 tablespoons meringue powder
  • 1 1/3 cups powdered sugar
  • About 2-3 tablespoons water
  • Small-sized candy eyeballs

Preparation 

In a medium bowl, combine flour, cocoa powder, and salt; set aside.

In a mixing bowl, cream together butter and sugar until fluffy. Add egg and vanilla extract, beating until well-combined.

Slowly add flour mixture, scraping the sides of the bowl often and beating until a very well-combined, soft dough forms.

Gently knead the dough a few times to make sure it comes together; roll dough into a ball and flatten into a disc. Wrap in plastic and chill for 1 hour.

Preheat oven to 375 degrees; line three baking sheets with parchment or foil.

On a lightly floured surface, roll dough to 1/8 inch thickness. Cut with a gingerbread man-shaped cookie cutter and place on prepared sheets about 1 inch apart.

Bake for 8-10 minutes, until edges are set. Remove from oven and cool on cookie sheets for 1-2 minutes, then remove to wire racks to cool completely.

To make the royal icing, combine the meringue powder, powdered sugar, and 1 tablespoon water in a mixer and beat on medium speed using the whisk attachment; your mixture will probably clump together at first, so just dribble in enough additional water to make a smooth consistency. Continue to beat on medium-high speed for a few minutes, until peaks form.

Fit a piping bag with a plain tip and fill with royal icing. For skeletons, pipe eyes, mouths, ribs, and arm and leg bones. For mummies, place a small dot of icing on the back of each eyeball and press it onto the cookie; swap out your piping tip for a flat-style tip (I used a Wilton 47 basket weave tip, because that was as close as I could get; a rose petal tip like a Wilton 104 would also likely work) and pipe bandages across the cookies. Allow icing to harden completely before storing; store between layers of waxed paper in an airtight container at room temperature.

Yield will vary depending on the size of your cutters; my batch yielded about 18 cookies.

Lemon Almond Biscotti

Lemon and almond make a great pair, not unlike my California-based best friend Amanda and me. Yes, I also have a Pittsburgh-based best friend, Kate; and yes, I get that you’re not supposed to have more than one best friend because best is a superlative but I’ve always marched to my own drummer so there you have it. Anyway…Amanda and I have known each other since we were 14 and despite a distance of about three thousand miles, still text each other nearly every day.

Amanda is  big fan of lemon, and I baked this biscotti for her. Biscotti travels very well, so it’s suitable for a trip across the country. It’s packaged up with the Halloween M&M cookies I made for her kids, tucked into a recycled box from my latest Amazon delivery because I know she won’t judge me for using a recycled box, and will instead applaud my attempt to save the planet one recycled box at a time. Enjoy, my dear friend!

Ingredients

  • 3 1/4 cups flour
  • 1 tablespoon baking powder
  • 1 cup sugar
  • 1/2 cup vegetable oil
  • 3 eggs, at room temperature
  • zest of 1 lemon
  • 1 teaspoon almond extract
  • 1/2 teaspoon lemon extract

Preparation

Preheat oven to 375 degrees. Line a baking sheet with parchment paper.

In a medium bowl, combine flour and baking powder; set aside.

In a mixing bowl, combine sugar, vegetable oil, sugar, eggs, lemon zest, almond extract, and lemon extract and beat on medium speed until combined.

Add flour all at once; beat until combined. Dough will be very thick and somewhat sticky.

Turn dough onto a lightly floured surface and knead for just a moment to bring the dough together; divide the dough in half and roll into logs about 14 inches long; place on your baking sheet and press dough down to about 1-inch thickness.

Bake for 25-30 minutes, then remove from the oven and allow to cool for about 10 minutes.

Slice each log into 1 1/2-inch slices, then place slices on baking sheets and return to the oven and bake for another 6 minutes on each side. Remove from oven and cool on a wire rack.

Store in an airtight container at room temperature; makes about 20 slices.

Halloween M&M Cookies

Finding Halloween cookies that ship well can be a challenge. Many adorable treats involve icing, frosting, or other decorations that aren’t quite suitable for a trip across the country. Sure, I’d love to bake adorable sandwich cookies with eyes and fangs that look like The Monster Book of Monsters from Harry Potter, or witch hat cookies made with Hershey’s kisses, or even just cute cut-outs frosted to look like ghosts and tombstones, with but such treats don’t hold up in shipping.

Fortunately I found these easy-to-bake, easy-to-ship Halloween M&M cookies at Cooking with Karli. I amended her recipe just a bit by adding two tablespoons of vanilla extract, rather than just one. I also meant to keep some M&Ms out to press into the tops of these cookies but totally forgot, so they definitely look more cookie-from-the-black-lagoon with the M&M lumps in them than I’d intended…but that actually works well for Halloween, right?

Ingredients

  • 1 1/2 cups flour
  • 1/2 cup cocoa powder
  • 1 teaspoon baking soda
  • 1/2 teaspoon salt
  • 12 tablespoons butter, softened
  • 1/2 cup sugar
  • 1/2 cup light brown sugar
  • 1 egg
  • 2 tablespoons vanilla extract
  • 1 tablespoon milk
  • 11.4 ounce package Ghoul’s Mix M&Ms

Preparation

Preheat oven to 350 degrees. Line several baking sheets with parchment paper.

In a medium bowl, combine flour, cocoa powder, baking soda, and salt; set aside.

In a mixer fitted with the paddle attachment, cream butter, sugar, and brown sugar until light and fluffy, about 3 minutes. Add egg and vanilla and beat until creamy.

Add flour mixture all at once and beat with the mixer running on low speed; when the flour mixture is about halfway incorporated into the butter/egg mixture, add milk. Beat to combine completely, then stir in M&Ms. Though the original recipe said the dough will be very soft, mine was pretty sturdy.

Using a 1-inch cookie scoop, scoop dough and roll into balls, then flatten the balls slightly and place on the parchment-lined baking sheets. If your dough is softer, you’ll be able to just drop the scoops onto the baking sheet. Bake for 8-10 minutes, until edges are set and tops no longer look shiny. Remove from oven and cool on the baking sheets for a few minutes, then remove to a wire rack to cool completely.

Store in an airtight container; if shipping, store between layers of waxed paper. Makes about 30 cookies.

Coffee & Walnut Cupcakes

I’ve never been a coffee person. Tea is my warm beverage of choice, especially now in caffeine-free migraine life.  But even before I went caffeine-free, I’d really only liked coffee in baked goods, like my favorite dessert, tiramisu.

While coffee and walnut seems like a more American combination to me, this recipe actually comes from Baking with Mary Berry, which Mike gave me for my birthday this year. I’ve seen several coffee and walnut combinations on British food sites, right up there with the Victoria sponge, the Battenburg cake, and various fruitcakes. My batch turned out okay, just a bit on the dry side. The original recipe called for extra large eggs, but I only had large on hand – I suspect the extra large eggs give a bit more volume and moisture to the cupcakes, so next time I’ll definitely use them. That’s the beauty of baking; even “mistakes” can turn out delicious.

Ingredients

For the cupcakes

  • 1 tablespoon instant coffee granules
  • 1 tablespoon boiling water
  • 8 tablespoons butter, at room temperature
  • 1 1/4 cups self-rising flour
  • 2/3 cup sugar
  • 2 tablespoons milk
  • 2 eggs
  • 1/4 cup walnuts, chopped

For the frosting

  • 2 teaspoons instant coffee granules
  • 2 teaspoons boiling water
  • 7 tablespoons butter, at room temperature
  • 1 3/4 cups powdered sugar, sifted
  • 12 walnut halves, toasted*

*Mary’s original recipe doesn’t include toasted walnuts, but I prefer toasted nuts to raw ones for flavor and texture.

Preparation

Preheat oven to 350 degrees. Line a cupcake tin with paper liners; my batch yielded 13 cupcakes, so I used two tins.

In a mixing bowl, combine coffee granules and boiling water, stirring to combine. Add butter, flour, sugar, milk, and eggs and beat until combined. Stir in walnuts.

Using a 2-inch cookie scoop, scoop batter into cupcake tins. Bake for 20-22 minutes, until a cake tester comes out clean. Remove from oven and cool completely before frosting.

For frosting, in a mixing bowl, combine coffee granules and boiling water, stirring to combine. Add butter and powdered sugar, beating on low speed for a few minutes, then on medium speed for a few more minutes, to combine completely. Scrape your bowl a few times to avoid streaks of dissolved coffee.

Using a 1-inch cookie scoop, scoop frosting onto cupcakes and spread with an offset spatula. Top with a toasted walnut half.

Store in an airtight container at room temperature for 2-3 days. The original recipe yields 12, but mine yielded 13.

Orange Honey Sweet Rolls

Well, these are absolutely delicious. Not that I’m surprised; the recipe comes from my Better Homes & Gardens Baking book. And BH&G recipes have never – I repeat, never – let me down. Other sources are not so reliable, but I suspect that BH&G has the best test kitchen in the entire world. Which would make sense, when you think about it. They’ve been in business quite a long time.

My orange and honey sweet rolls are adapted just slightly from the original version, which included golden raisins in the filling and slightly less orange icing for the top. The dough is very easy to work with, which is good for amateur bread bakers like me. Next time, I might add a bit of cinnamon or nutmeg to the filling for a more aromatic treat, but these are wonderful with just the flavors of the orange and honey.

Ingredients

For the dough

  • 2 packages active dry yeast
  • 1 1/4 cup warm water (about 105-110 degrees)
  • 1/2 cup nonfat dry milk powder*
  • 1/3 cup butter, softened
  • 1/3 cup honey
  • 2 eggs, lightly beaten, at room temperature
  • 2 tablespoons toasted wheat germ
  • 1 teaspoon salt
  • 3 cups plain flour
  • 2 cups bread flour

*I bought mine at King Arthur Flour

For the filling

  • 1/4 cup butter, softened
  • 1/4 cup honey
  • zest of 1/2 medium orange

For the icing

  • 1 1/2 cups powdered sugar
  • zest of 1/2 medium orange
  • 2 tablespoons fresh orange juice

Preparation

Place yeast and warm water in a mixing bowl and let stand for five minutes. Add dry milk powder, butter, honey, eggs, wheat germ, and salt and mix on low speed for 30 seconds. Scrape down the bowl, add 2 cups plain flour, and beat on low for 30 seconds, then on high for 3 minutes. Scrape the bowl a few times during mixing.

Stir in remaining 1 cup plain flour with a wooden spoon, then stir in 1 cup bread flour. Turn dough onto a lightly floured surface and knead in as much as the remaining bread flour as you can to make a moderately soft dough that is smooth and elastic, about 6 minutes total. Shape into a ball and place in a lightly greased bowl, turning once to coat. Let rise in a warm place for about 1 hour.

Turn dough out onto a lightly floured surface and gently deflate; cover and let rest for 10 minutes. While the dough is resting, make the filling; stir together butter, honey, and orange zest until smooth; set aside. Lightly grease a 9 x 13 baking tin and set aside.

Roll dough into an 18 x 15 rectangle and spread with filling, leaving a gap of about 1/2 inch around all four sides. Starting from a long side, roll the rectangle into a log and pinch the seam to seal. Cut into 15 slices and place cut-side down in the prepared baking tin. Cover and allow to rise for about 30 minutes.

Preheat oven to 350 degrees. Bake rolls for 25-30 minutes, until lightly browned. Remove from oven and cool in tin for 1 minute, then carefully invert on a cooling rack. Allow to cool for about 5 minutes, then flip onto your serving platter (or a rectangular cake caddy, which is what I used) and drizzle with orange icing. Serve warm or cool.

Store in an airtight container at room temperature for 2-3 days. Makes 15 (though mine only made 13 because I’m terrible at math).

Citrus “Traybake” Cake

“Traybake” isn’t really part of the American baker’s vocabulary…unless she watches the Great British Baking Show, of course. Visitors to this blog know very well of my GBBS obsession, which lives on in full force

A traybake can be a cake, brownie, or other dessert baked in a rectangular pan. Ranging from the simple to the complex, traybakes are apparently a staple of family baking in Britain. This recipe is adapted from Mary Berry’s Fast Cakes: Easy Bakes in Minutes; I subbed oranges for limes because that’s what I had on hand. I suspect that I slightly over-baked my cake, but Mike’s coworkers registered no complaints. I also made the mistake of zesting my lemon and orange in advance, then trying to sprinkle the chilled zest over my icing; next time, I’ll zest the fruit straight onto the icing so it falls more evenly, rather than in clumps.

Ingredients

For the cake

  • 1 cup margarine* straight out of the fridge
  • 1 cup superfine sugar
  • 2 1/2 cups self-rising flour
  • 4 eggs
  • 1 teaspoon baking powder
  • 2 teaspoons lemon curd
  • zest of 1/2 lemon
  • zest of 1/2 orange

For the icing

  • 2 1/2 cups powdered sugar, sifted
  • 3-4 tablespoons lemon and orange juice
  • zest from 1/2 lemon
  • zest from 1/2 orange

Preparation

Preheat oven to 350 degrees. Lightly grease a 9 x 13 (or 9 x 12, if that’s what you have) baking tin and line it with parchment.

Place all cake ingredients in a mixer and beat well to combine, until batter is light and fluffy. Pour into prepared tin and bake for 30-35 minutes, until well risen and the top springs back slightly when gently pressed.

Remove from oven and cool completely before icing.

To make icing, place powdered sugar in a bowl and add 1 tablespoon lemon and orange juice at a time to make a smooth, thick drizzle icing. Pour over cake; spread with an offset spatula to cover completely. Top with lemon and orange zest.

Allow icing to set, then cut into 16 pieces. Store in an airtight container at room temperature for 2-3 days.

Cream Puffs

I can now make choux pastry. Say it with me: shoo, or shoe, if you like. Choux is French for cabbage, so named for the resemblance these pastries have to small cabbages. This patisserie staple was surprisingly easier to make than I’d imagined.

As always, I approached this recipe with my standard “no fear” motto. What was the worst that would happen, I wondered? I suspected that perhaps my choux buns wouldn’t rise, having seen more than one baker fall victim to flat choux on The Great British Baking Show. But rise they did! And once they cooled, I filled them with pastry cream, and I’m here to tell you that I’m never going to be the same again. This recipe is adapted from the King Arthur Flour recipe, just cut in half to yield a smaller batch.

Ingredients

  • 1/2 cup water
  • 4 tablespoons butter
  • 1/8 teaspoon salt
  • 1/2 cup plus 2 tablespoons flour
  • 2 eggs
  • Pastry cream, for filling

Preparation

Preheat oven to 425 degrees. Line a baking sheet with parchment paper.

Place water, butter, and salt in a medium saucepan and bring to a rolling boil. Remove from heat and add flour all at once, stirring vigorously. Return to heat and cook over medium heat, stirring constantly, until the mixture forms a ball. This will only take a minute or so.

Remove from heat and allow the mixture to cool for about 10 minutes, until it reaches about 140 degrees. Transfer to a mixer fitted with the paddle attachment and beat in one egg; the mixture will look curdled, but keep beating for about 30 seconds, then add the second egg and beat for 2 minutes more. The mixture will even out and turn into a smooth batter.

Transfer batter to a piping bag and pipe into 1- to 1 1/2-inch rounds. Wet the tip of your finger and lightly press any sharp peaks down.

Bake for 15 minutes, then lower the oven temperature to 375 degrees and bake 15 minutes more. Turn off your oven, open the door a crack (I used a bamboo spoon to hold the door open just a bit) and allow the choux to cool inside the oven for 30 minutes. Remove from oven and cool completely.

To fill, you can either pipe pastry cream into each choux bun from the bottom, or split the pastries and fill them from the middle. Store in an airtight container in the refrigerator for 2-3 days.

Makes about 12, depending on how large you pipe your rounds.

Filled cream puffs – yay!

Marble Brownies

Until yesterday, I’d never made those classic cream cheese marbled brownies. How this treat escaped me for so many years I don’t know, but there you have it. While I’m still not eating chocolate, I really considered it yesterday, wondering if it would send me into migraine land. As they baked, a heavenly aroma of chocolate filled my kitchen. And who doesn’t like cream cheese, especially when it’s swirled in chocolate? Well, some people probably don’t, but seriously, I don’t need that kind of negativity in my life.

These brownies went to work with me today, as a special thank you to our design team. My buddies in design are incredibly talented, have great senses of humor, and always make things work for us even with very short notice. Surely worthy of these treats.

Ingredients

For the cream cheese swirl

  • 3 ounces cream cheese, at room temperature
  • 2 tablespoons butter, at room temperature
  • 1/4 cup sugar
  • 1 egg
  • 1 tablespoon flour

For the brownies

  • 1 1/4 cups flour
  • 3/4 teaspoon baking powder
  • 1/2 teaspoon salt
  • 6 ounces unsweetened chocolate, chopped
  • 12 tablespoons butter
  • 2 1/4 cups sugar
  • 4 eggs
  • 1/4 cup milk
  • 1 tablespoon vanilla extract
  • 1 teaspoon almond extract

Preparation

Preheat oven to 325 degrees. Line a 9 x 13 pan with foil, extending over the sides, and spray with baking spray.

Make the cream cheese topping: in a mixing bowl, cream together cream cheese and butter until smooth. Gradually add sugar, beating until light and fluffy. Add egg and 1 tablespoon flour and beat to combine. Set aside.

In a medium bowl, stir together flour, baking powder, and salt; set aside. Melt chocolate and butter in a saucepan over low to medium heat; remove from heat and transfer to a clean mixing bowl, then slowly beat in sugar, a little bit at a time. Add eggs, one at a time, beating on low speed after each until just combined. Beat in milk, vanilla extract, and almond extract. Beat in flour mixture in three batches, beating until just combined after each.

Pour chocolate batter into prepared pan, spreading evenly. Spoon cream cheese topping in blobs over the top. Using a dull knife or spatula, gently swirl the cream cheese into the chocolate batter.

Bake for 40-45 minutes, until a cake tester comes out clean or with a few moist crumbs. Cool in pan on a wire rack; once brownies are completely cool, lift out of the pan by the foil. Cut into bars.

Makes 24 (or you can cut them smaller if you like).

Mini Snickerdoodle Loaves

My friend Kanika and I met at Catholic Charities Foundation many years ago in DC. Our team had two back-to-back unsuccessful hires for the events assistant position, so we asked our priest to bless the desk and exorcise the bad luck. A few weeks later Kanika joined us (thanks, Father Mario!), bringing amazing professional skills, a great sense of humor, and a picky appetite to our crew. As a fellow picky eater, I fully supported this. We had some very funny times on that team, many thanks to her.

Kanika sends me recipe ideas sometimes, and when these mini snickerdoodle loaves came across Facebook Messenger, I knew I needed to bake them. The end result is absolutely delicious, with a tender crumb and great cinnamon flavor. I can see this recipe as a base for other flavor combinations; the original came from Health Printable Recipes, and I tweaked it just slightly based on only having 6 ounces miniature cinnamon chips in my pantry. My recipe yielded five loaves, rather than four; two of those loaves are on their way to Kanika right now. Thanks for the recipe, Marbles!

Ingredients

  • 2 1/2 cups of flour
  • 2 teaspoons baking powder
  • 1/2 teaspoon salt
  • 2 teaspoons cinnamon
  • 1  cup butter, softened
  • 2 cups sugar
  • 3 eggs, at room temperature
  • 1 teaspoon vanilla
  • 3/4 cup sour cream
  • 6 ounces miniature cinnamon chips
  • About 2 tablespoons sugar, for topping
  • About 2 teaspoons cinnamon, for topping

Preparation

Preheat oven to 350 degrees. Lightly grease five miniature loaf tins (about 5 x 3 size).

In a medium bowl, combine flour and baking powder; set aside.

In a mixer fitted with the paddle attachment, cream butter, sugar, salt, and cinnamon until fluffy, about 3 minutes. Add eggs, one at a time, beating between each addition. Stir in vanilla and sour cream, then stir in flour mixture until no dry streaks remain. Stir in cinnamon chips and incorporate evenly, being careful not to over-mix your batter, which will be fairly thick.

Divide batter between loaf tins, filling about 2/3 full; mine had about 10 ounces of batter in each. Combine 2 tablespoons sugar and 2 teaspoons cinnamon, then sprinkle on top of each loaf.

Bake for 35 – 40 minutes, until a cake tester comes out clean. Remove from oven and serve warm, or cool completely and store, tightly wrapped, at room temperature.

Make 5 miniature loaves.