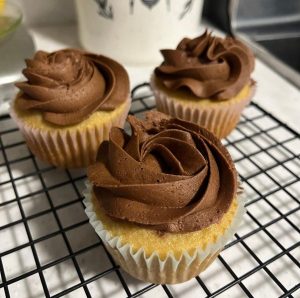
 This cupcake recipe is actually one of my favorites, and I think I need to start making it more often and experimenting with different flavors of frosting. It’s an easy combo requiring basic ingredients, two bowls, and a whisk, so it takes very little time to prepare – another thing I really like.
I originally made these as butterscotch cupcakes, and they were delicious, but they pair well with chocolate buttercream too. I feel like you could embellish them with a Rolo or other caramel-filled chocolate candy if you wanted to, but they’re great just as they are. These were a huge hit in my office last week.
Ingredients
Caramel Cupcakes
- 1 2/3 cups flour
- 1/2 teaspoon baking powder
- 1/4 teaspoon baking soda
- 1/2 teaspoon salt
- 8 tablespoons butter, melted
- 1 cup light brown sugar
- 1 egg, at room temperature
- 1/4 cup sour cream
- 3/4 cup milk
- 1 tablespoon vanilla extract
Chocolate Buttercream
- 12 tablespoons butter, at room temperature
- 3 cups powdered sugar
- 1/4 cup plus 2 tablespoons cocoa powder
- 2 teaspoons vanilla extract
- 1-2 tablespoons milk
Preparation
Preheat oven to 350 degrees. Line two cupcake tins with paper liners; this recipe made 21 cupcakes for me.
In a medium bowl, whisk together flour, baking powder, baking soda, and salt; set aside.
In a large bowl, combine brown sugar and melted butter, whisking until no lumps remain. Whisk in egg, sour cream, milk, and vanilla until smooth. Slowly whisk in flour mixture until batter is completely smooth; it will be fairly thick.
Using a two-inch cookie scoop, drop scoops of batter into prepared cupcake pans. Bake for 15-20 minutes, until a cake tester comes out clean. Remove from oven and remove from pans immediately; cool completely before frosting.
To make chocolate buttercream, place butter in a mixing bowl and beat for a few minutes using the paddle attachment. Add powdered sugar and cocoa powder and beat on low speed until the sugar and cocoa are fully incorporated into the butter. Add vanilla extract and beat; add milk 1 tablespoon at a time; you may not need both tablespoons.
Fit a large piping bag with a large open star tip (I use the Wilton 1M) pipe swirls of frosting onto cupcakes; you’ll have some frosting left over that you can use for other treats.


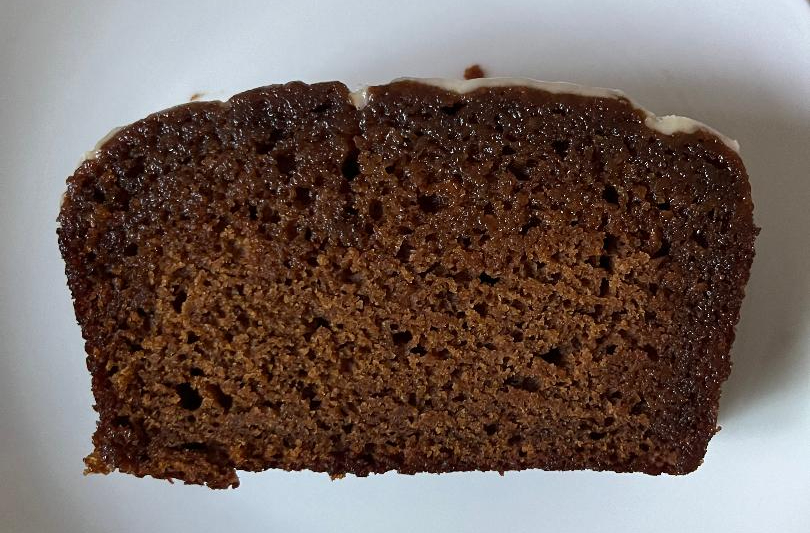 Pumpkin bread and gingerbread are two of my favorite fall and holiday treats…so a combination? Sign me up. I found this recipe on Pinterest from
  Are dark and light brown sugar interchangeable? It probably depends on who you ask, but I’d say yes, for the most part. Dark brown sugar contains more molasses, giving it a richer color and flavor than the light variety. And in my kitchen, dark brown sugar turns to a rock in a matter of days after it’s opened, so I try to use up the whole bag quickly when I do bake with it.
 My niece, Margaret, was born on Halloween. Margaret is technically my cousin, as her mom is my cousin Barb, but to her I’m Aunt Amy given the age gap. Anyway, I think having a Halloween birthday would be really cool – you get to dress up, there’s always going to be some kind of party, and spooky season is fun in a lot of ways. I like to call Margaret “Count Margula” around her birthday in a nod to Dracula, a starring figure in this season.
 So, it’s fall. Cue pumpkin spice madness! Almost three weeks into this season, I haven’t baked anything pumpkin yet, but it’s on the horizon. Today, though, I made these amazing applesauce cupcakes. I found the recipe over at
  A cupcake without sugar? Well, you don’t need sugar when you’ve got maple syrup. This recipe comes from