Peanut Butter Muffins

pb muffinsHappy Canada Day! Today, I’d like to celebrate Canadian Marcellus Gilmore Edson, pioneer of modern peanut butter, as I consider him to be a genius on par with Albert Einstein and John Nash.

Whatever possessed Mr. Edson to mill roasted peanuts between sheets of heated metal is beyond me, but I’m certainly glad he did. Without him, we wouldn’t have peanut butter cookies, cakes, candies, muffins, pies…the list goes on.

This muffin recipe is very simple, yielding a subtle peanut butter flavor and smooth, moist texture. You could serve them with peanut butter (as I did in the photo above), but jelly, honey, or regular butter would also work well. The original recipe for these muffins called for brushing their tops with melted butter, then sprinkling them with cinnamon and sugar.

Ingredients

  • 2 cups flour
  • 1/2 cup sugar
  • 1 tablespoon baking powder
  • 1/2 teaspoon salt
  • 1/2 cup peanut butter
  • 2 tablespoons butter, cold, cut into pieces
  • 1 cup milk
  • 2 eggs

Preparation

Preheat oven to 400 degrees.

Line two muffin tins with paper liners; you will need 16.

In a large bowl, combine flour, sugar, baking powder, and salt.

Cut in peanut butter and butter until the mixture resembles coarse crumbs.

In a large measuring cup, combine milk and eggs and whisk together; add to crumb mixture and stir until just moistened; batter will be very lumpy.

Fill muffin cups about 3/4 full.

Bake for 15-17 minutes, until tops are just golden and a cake tester comes out clean.


Strawberry Lemonade Cupcakes

strawberry lemonade cupcakesToday, Soergel Orchards is having their annual Strawberry Festival. Beyond picking your own berries in their fields, you can get your face painted, go on a hay ride, jump in a bouncy castle, or in my case, enter a strawberry recipe contest.

How does the self-taught baker set out to win her first competition? She thinks about what she’d want to eat, and goes from there. This recipe is a confectionery interpretation of an iconic summer drink, and I’m proud to say that it won first place.


Strawberry Cupcakes with Lemon Curd Filling

Ingredients

  • 1 1/2 cups flour
  • 1 teaspoon baking powder
  • 1/4 teaspoon salt
  • 1 heaping cup strawberry puree
  • 1/4 cup whole milk, at room temperature
  • 1 teaspoon vanilla extract
  • Zest of 1 medium lemon
  • 8 tablespoons butter, at room temperature
  • 1 cup sugar
  • 1 large egg, at room temperature
  • 2 large egg whites, at room temperature
  • About 1/2 to 3/4 cup lemon curd, at room temperature

Preparation

Position a rack in the lower third of the oven and preheat oven to 350 degrees.

Line cupcake tins with 16 paper liners.

In a medium bowl, sift together flour, baking powder, and salt; set aside.

In a large glass measuring cup, whisk together strawberry puree, milk, vanilla, and lemon zest; set aside.

In a stand mixer fitted with the paddle attachment, beat butter on medium speed until light in color. Gradually add sugar and beat until fully incorporated; scrape down the sides of the bowl frequently. Add egg and egg whites, one at a time, and beat until well incorporated.

Add the flour mixture in thirds, alternating with the strawberry mixture, beginning and ending with the flour. Scrape down the sides of the bowl frequently and beat for 1-2 minutes after the last addition of flour to make sure all ingredients are well incorporated.

Scoop batter into prepared cupcake tins, filling about 2/3 full. Bake for 20-25 minutes, until a cake tester inserted into the center of a cupcake comes out clean; cool on a wire rack.

Using the small end of a melon baller, scoop out a small amount of cake from the center of each cupcake; fill with lemon curd (a half-teaspoon measuring spoon works well for filling if you don’t want to use a piping bag). Frost with fresh strawberry buttercream; store cupcakes in the refrigerator for up to 3 days.

Bring cupcakes to room temperature before serving.

Fresh Strawberry Buttercream

Ingredients

  • 8 tablespoons butter, at room temperature
  • 1 teaspoon fresh lemon juice
  • 2 cups powdered sugar, sifted
  • Scant ¼ cup strawberry puree

Preparation

In a stand mixer fitted with the paddle attachment, beat butter and lemon juice on low speed until smooth and creamy, about 2 minutes.

Gradually add powdered sugar, in half-cup increments, beating until fully incorporated.

Add strawberry puree, mixing until completely incorporated, about 1-2 minutes.

Using a small cookie scoop, scoop frosting onto tops of cupcakes and spread with an offset spatula. Frosting can be stored in an airtight container at room temperature for up to 2 days; refrigerate cupcakes after they are filled and frosted for up to 3 days.

Note: you can adjust the sweetness or tartness of this frosting very easily by adding more lemon juice or puree; you’ll just need to add more sifted powdered sugar so the frosting isn’t too runny.

Victory! Yep, that’s me with the star of today’s festival, The Strawberry.

strawberry festival


Oatmeal Craisin Chocolate Chip Cookies

oatmeal craisin dark chocAs far as chocolate goes, people tend to have strong opinions; many are milk chocolate loyalists, while others embrace the antioxidant properties of dark. I will eat any kind of chocolate except white, which I maintain is not really chocolate, given that its cocoa solids are removed during production. And, white chocolate just tastes strange to me. But anyway…

While I tend to prefer milk chocolate chips in classic chocolate chip cookies, there are many recipes in which semisweet, dark, or bittersweet chips are more appropriate in order to balance their accompanying flavors. To complement the tart dried cranberries in this recipe, I sought bittersweet chips, which are 60 percent cacao. Fortunately my local grocery store had Ghirardelli bittersweet chips, but both Hershey and Nestle make dark chocolate chips containing 53 percent cacao that could have worked just as well. A fun aspect of dark and bittersweet chocolate chips is that they’re larger than both milk and semisweet chips, which adds to their visual appeal.

Side note: as I’m not a dried fruit fan, Mike tasted these cookies and proclaimed them excellent, proving my theory about bittersweet chocolate chips balancing tart dried cranberries to be correct.

Ingredients

  • 8 tablespoons butter, softened
  • 2/3 cup packed light brown sugar
  • 1 egg
  • 1/2 teaspoon vanilla extract
  • 1/2 cup white flour
  • 1/4 cup whole wheat flour
  • 1/2 teaspoon baking soda
  • 1/2 teaspoon cinnamon
  • 1/4 teaspoon salt
  • 1 1/2 cup old-fashioned rolled oats
  • 3/4 cup dried cranberries
  • 3/4 cup bittersweet chocolate chips

Preparation

Preheat oven to 350 degrees.

Line three baking sheets with parchment paper.

In a small bowl, combine white flour, wheat flour, baking soda, cinnamon, and salt; mix and set aside.

In a mixing bowl, cream together butter, brown sugar, egg, and vanilla.

Stir in flour mixture until well combined.

Stir in oats; at this point, you may need to reach in and use your hands to thoroughly incorporate them.

Stir in dried cranberries and chocolate chips; again, you will likely need to use your hands.

Using a two-inch cookie scoop, generously scoop out dough and roll into balls, then flatten slightly. Place at least 2 inches apart on the prepared baking sheets.

Bake 11-12 minutes, until edges are golden but centers appear slightly under-baked. You do not want these cookies to appear totally baked when you pull them from the oven, as they will continue to bake for several minutes on the hot baking sheet once they’re out.

Let stand on cookie sheets for 5 minutes, then cool completely on a wire rack.


Planet Cupcakes

planet cupcakes
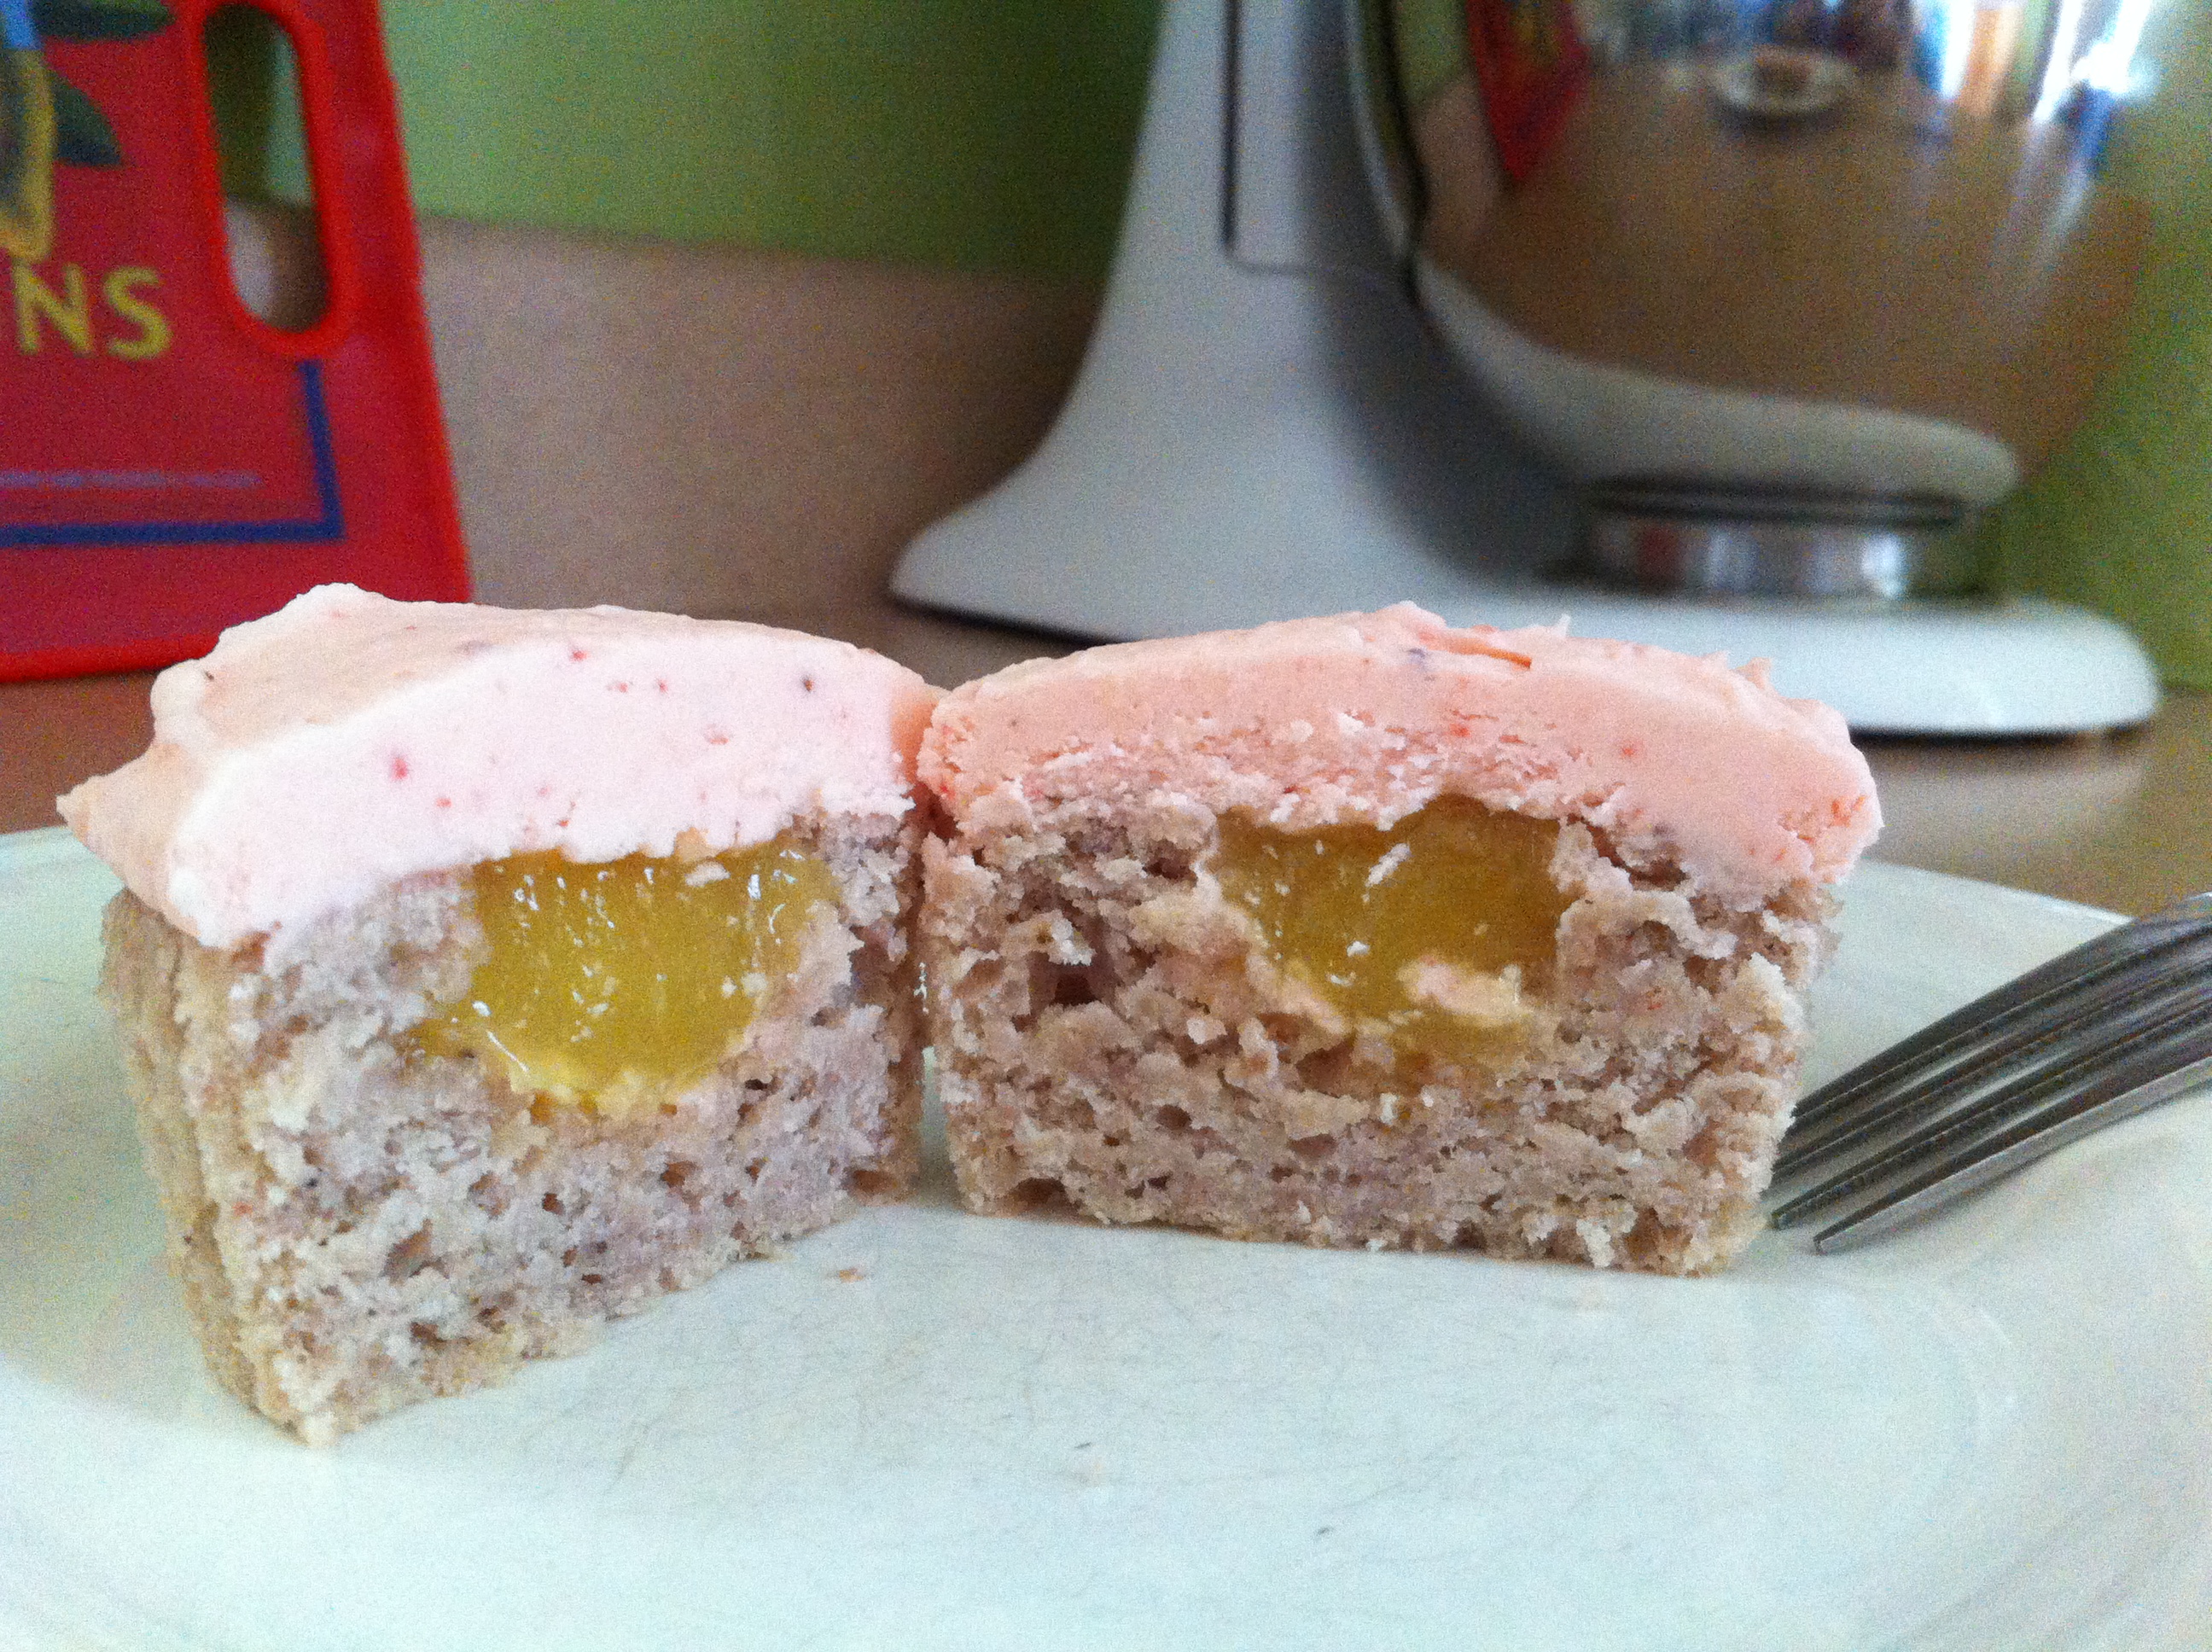
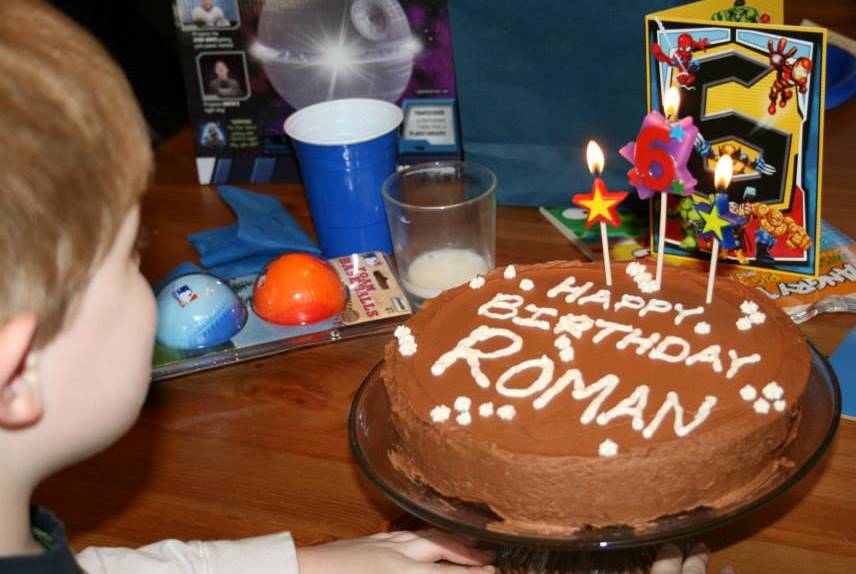
Not everyone can eat chocolate, and my mom is one of those folks. And because our nephew Roman requested a chocolate cake with chocolate icing for his birthday party this past weekend, I needed an alternative for Grandma Genny, who was also in attendance. The result: planet-themed vanilla cupcakes.

The most time-consuming aspect of these cupcakes was, quite obviously, the decoration.You need a decent quantity of vanilla buttercream, lots of food coloring, and plenty of time. It was a lot of fun to interpret the planets in frosting, though; I used a few colors mixed together for Venus, Earth, and Jupiter and got out the pastry bag for the rings on Saturn and Uranus, and of course the Sun, which was my favorite (and, incidentally, was the cupcake that I ate).

For the Vanilla Cupcakes

Ingredients

  • 1 1/2 cups flour
  • 1 teaspoon baking powder
  • 1/2 teaspoon salt
  • 8 tablespoons butter, softened
  • 1 cup sugar
  • 3 eggs
  • 1 1/2 teaspoons vanilla extract
  • 3/4 cup milk

Preparation

Preheat the oven to 350 degrees.

Line a cupcake pan with paper liners; set aside.

In a medium bowl, sift together flour, baking powder, and salt.

In a mixing bowl, cream butter and sugar until light and fluffy.

Add eggs, one at a time; scrape down bowl, and beat in vanilla.

Add flour mixture and milk alternatively, beginning and ending with flour mixture.

Divide batter evenly among liners, about three-quarters full each.

Bake until golden and tops spring back to touch, 20-22 minutes.

Transfer pans to wire rack; cool completely before frosting.

For the Vanilla Buttercream Frosting

Ingredients

  • 1 cup butter, softened
  • 3 to 3 1/4 cups powdered sugar, sifted
  • 1/4 teaspoon salt
  • 1 to 2 tablespoons vanilla extract
  • 2 tablespoons milk
  • Both liquid and gel food coloring; I used yellow and blue liquid coloring and golden yellow, orange, red, royal blue, and violet gel coloring

Preparation

Place butter in a mixing bowl and beat for a few minutes using the paddle attachment.

Add 3 cups powdered sugar.  With your mixer on low, incorporate the powdered sugar into the butter.  (Hint: I find that placing a kitchen towel over the mixer during this stage prevents a powdered sugar blizzard.)

Increase speed and add 1 tablespoon vanilla, salt, and milk.

Beat for 3 minutes, then taste.  If you’d like a stronger vanilla flavor, add the second tablespoon of vanilla, along with the additional ¼ cup of powdered sugar.  Beat until combined and very smooth; you want an easily-spreadable consistency.

To Decorate

You’ll need just a few tablespoons of frosting for each cupcake, but I started out by tinting larger quantities in the colors I knew I’d need more of, like yellow and blue, then darkened them as I went along. Reserve as much un-tinted buttercream as you can so that you can lighten colors if you need to; I also used un-tinted frosting to pipe “Happy Birthday Roman” and some stars on Roman’s chocolate cake.

The Sun

Tint about four tablespoons of frosting using golden yellow gel food coloring. Fit an 8-inch pastry bag with a star tip and pipe lines radiating out from the center of the cupcake to cover the top, then pipe additional “rays” so that they stand up vertically from the surface of the cupcake.

Mercury

Tint about a half-cup of frosting using yellow liquid food coloring; you’ll just need a few drops to create the very pale yellow of Mercury. Frost the cupcake and create a smooth surface.

Venus

Tint a few tablespoons of frosting using orange gel food coloring; apply a thin layer of frosting, then add both yellow and un-tinted buttercream to create swirls.

Earth

Tint about a half-cup of frosting using blue liquid food coloring; you’ll just need a few drops to create a pale blue that you can use for Neptune. Remove a small portion of the light blue and tint it darker, using royal blue gel food coloring. Frost the cupcake using swirls of both blues and some white; add piped white “clouds” if you like.

Mars

Tint a few tablespoons of frosting using red gel food coloring. Frost the cupcake and create a smooth surface.

Jupiter

Using un-tinted, yellow, and orange frosting, frost the cupcake and create band-like effects with your spatula (or knife, whatever you’re using). Using a toothpick, dab some red frosting on to create the dust storm and drag the toothpick through the other color bands to create hints of red.

Saturn

Darken the orange frosting you used for Venus and frost the cupcake to create a smooth surface. Tint a very small amount of frosting violet using violet gel food coloring; fit an 8-inch pastry bag with a leaf tip and pipe very loose rings.

Uranus

Reserve some of the pale blue frosting for Neptune; darken the blue that you used for Earth and frost the cupcake to create a smooth surface. Pipe un-tinted rings using a star tip or plain tip.

Neptune

Using the pale blue frosting you created before you frosted Earth and Uranus, frost the cupcake and create a smooth surface.

What about Pluto?

Yes, I also frosted Pluto using the violet frosting I had for Saturn’s rings, but there was no room for Pluto on my cake plate. And since Pluto was downgraded from planet status a few years ago anyway, I thought that was okay 🙂
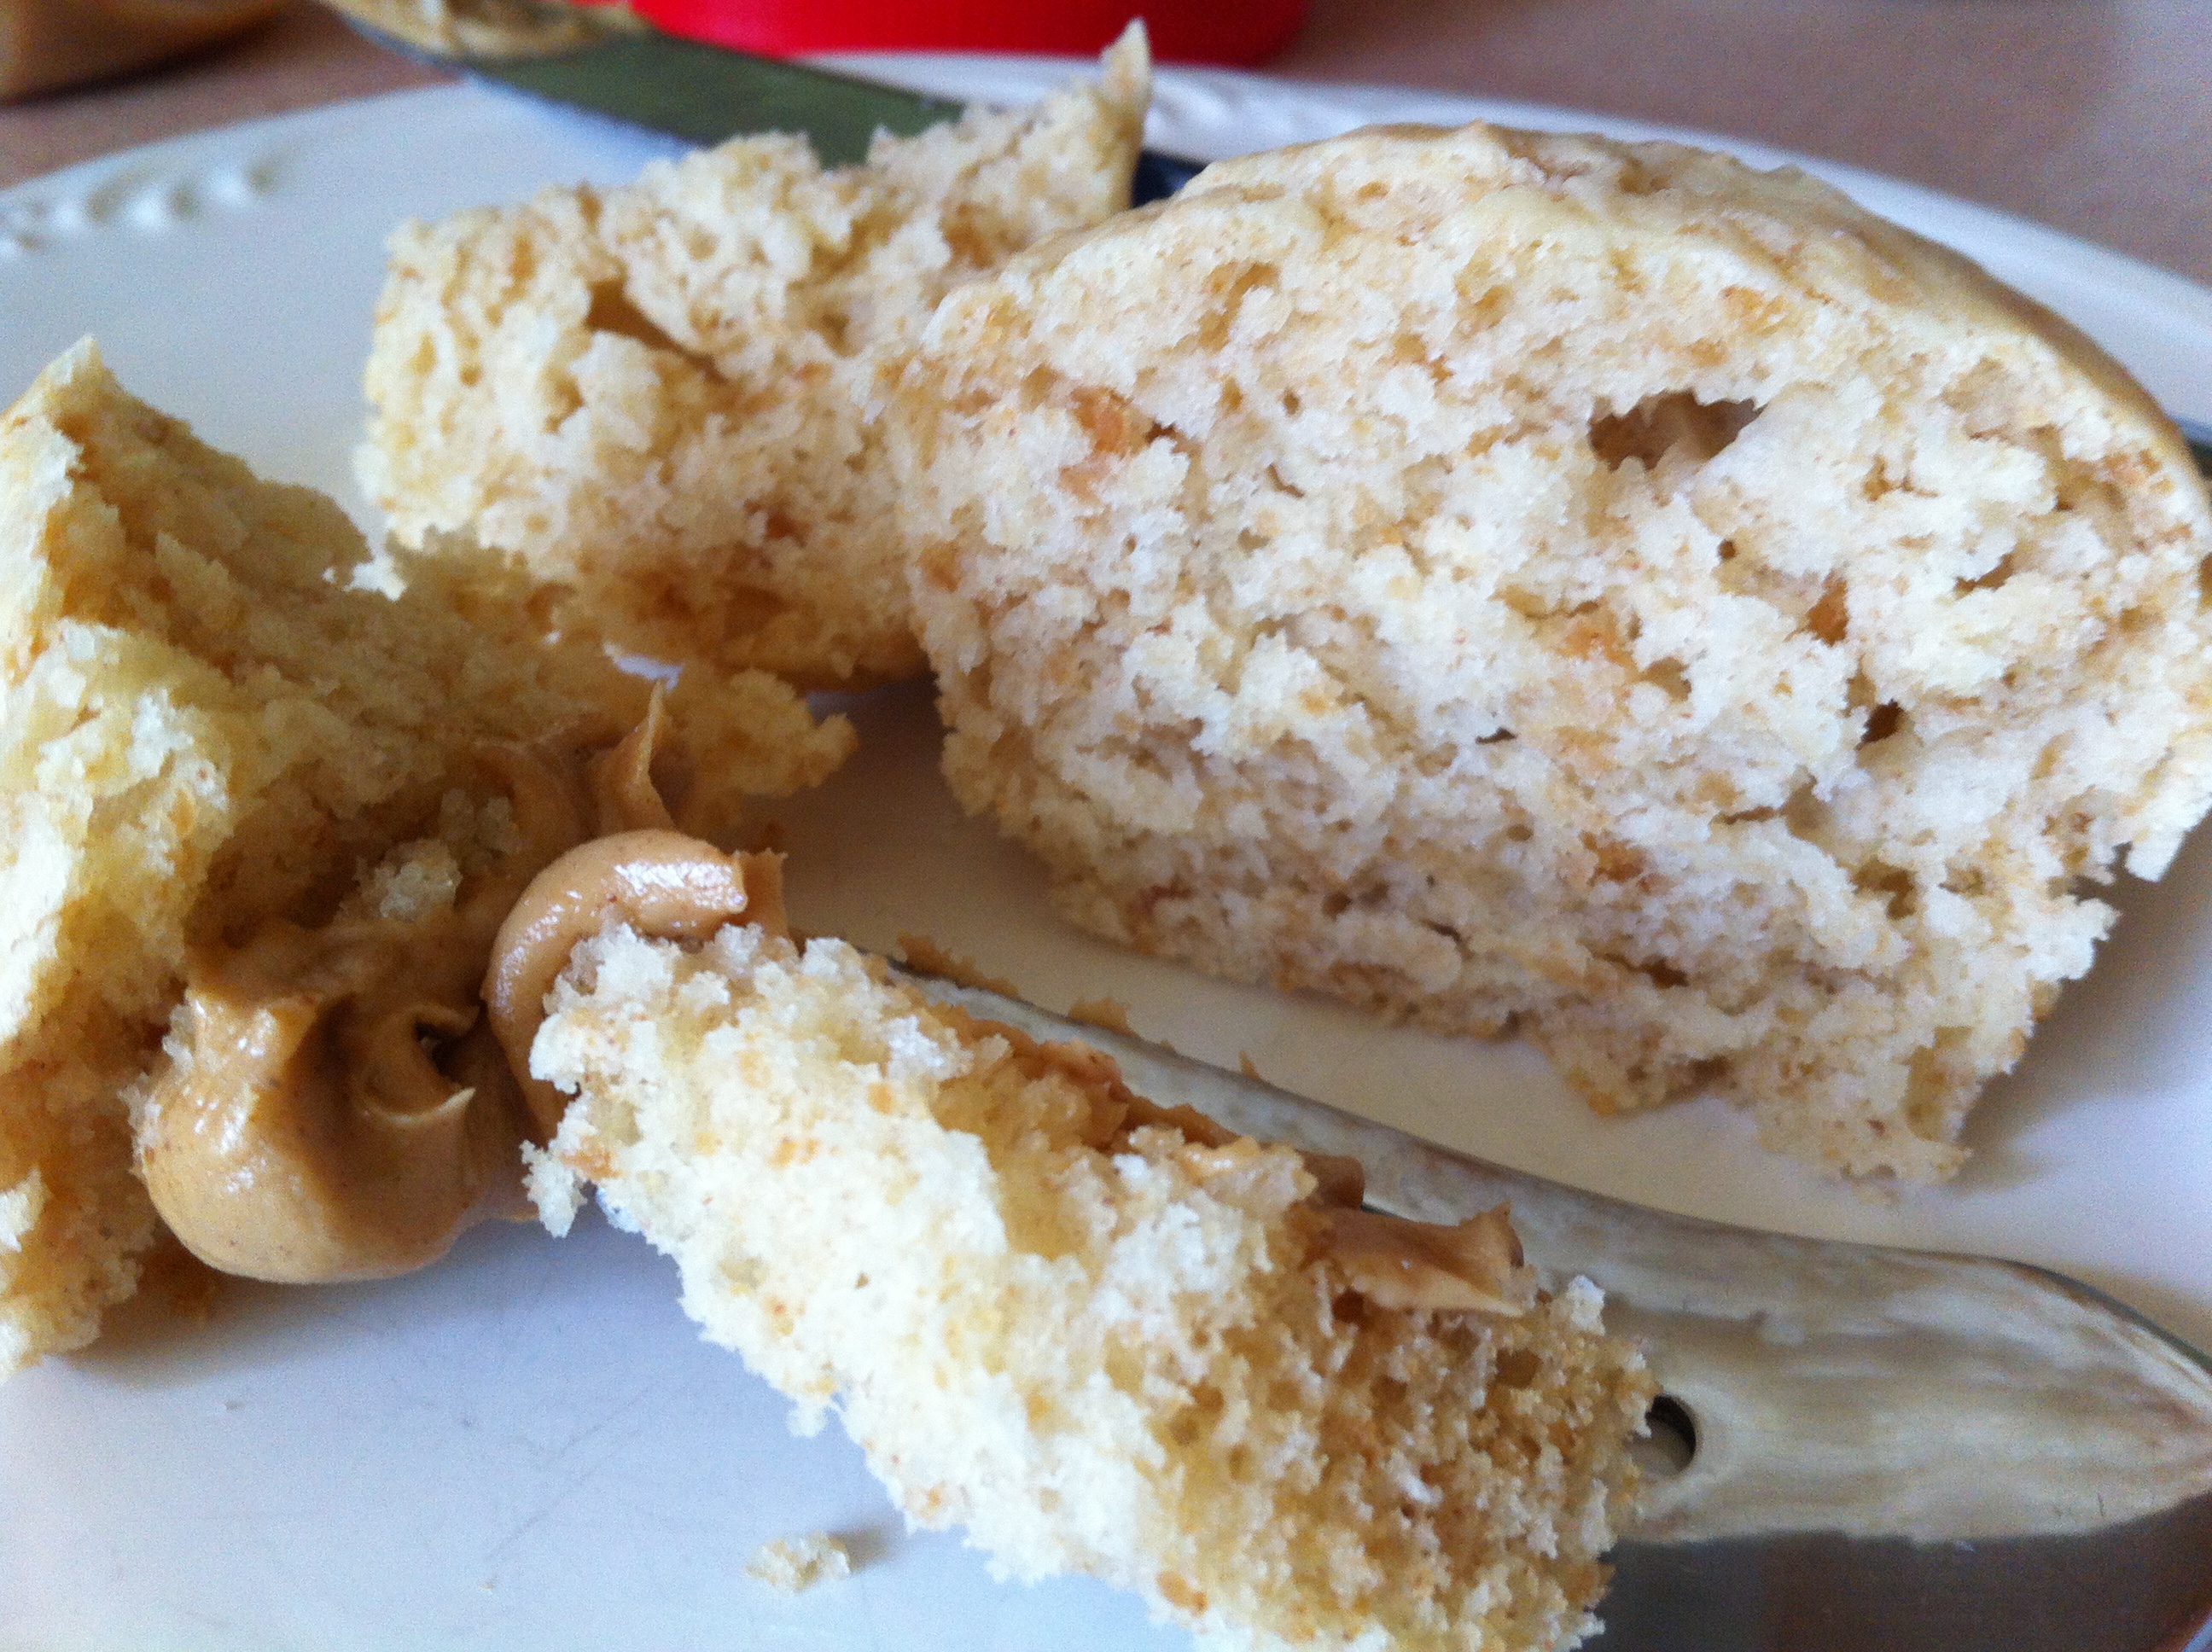


Roman’s Birthday Cake

Roman's Birthday Cake 2Our nephew Roman turned six yesterday. Mike and I moved back to Pittsburgh right after he was born, so we’ve had front-row seats to watch him grow up. It seems like just last week he was swaddled and drinking from a bottle. Now, he plays Angry Birds on my brother’s iPad and runs around the house with a light sabre telling me that “Jedi knights only need to sleep once a year, Auntie,” when I attempt to put him to bed.

Roman is a funny, intelligent lad who requested a chocolate cake with chocolate icing for his birthday. It’s an easy recipe, yielding a single layer cake that is good for smaller parties (we hosted Roman’s family party, with seven people in attendance, at it worked out very well). To complement our outer space theme, I also baked Planet Cupcakes with Vanilla Buttercream Frosting and used some of the vanilla buttercream to decorate this cake.

For the Chocolate Cake (originally posted on 12/29/12)

Ingredients

  • 1 cup flour
  • 1 cup sugar
  • 1/4 cup unsweetened cocoa powder
  • 1 teaspoon baking powder
  • 1/4 teaspoon salt
  • 3/4 cup milk
  • 1/4 cup shortening
  • 1/2 teaspoon vanilla
  • 1 egg

Preparation

Preheat oven to 350 degrees.

Prepare the pan one of two ways: grease the bottom, line it with a circle of waxed paper, then grease the paper and the sides of the pan and flour well, or use Wilton Bake Easy! Nonstick spray. This time, I used the Wilton spray and it worked very well.

In a mixing bowl, combine flour, sugar, baking powder, and salt.

Add milk, shortening, and vanilla, beating on medium speed for two minutes.

Add egg and beat on medium speed for another two minutes.

Pour batter into prepared pan; it will be a light brown color and very fluffy in texture.

Bake for 30 minutes, or until a cake tester inserted in the center comes out clean.

Cool cake on a wire rack in the pan for 10 minutes, then remove from the pan (if you desire) to cool completely.

For the Chocolate Almond Buttercream Frosting

Ingredients

  • 8 tablespoons butter, softened to a texture like ice cream (not too soft)
  • 1 1/2 cups powdered sugar, sifted
  • 1/4 cup cocoa powder, sifted
  • 1/8 teaspoon salt
  • 1 tablespoon vanilla extract
  • 1 tablespoon almond extract
  • 1 tablespoon milk

Preparation

In a mixing bowl, beat butter for about 30 seconds.

Scrape down the sides of the bowl and add powdered sugar and cocoa powder. Cover your mixer with a kitchen towel to prevent a powdered sugar/cocoa storm and set your mixer on low, beating until all the sugar and powder is incorporated into the butter; this takes a few minutes.

Add vanilla and beat for one to two minutes, then add the almond and beat for a few minutes, and finally the milk, beating for a few minutes. You want a very smooth, easily-spreadable texture.

Frost the cake according to your preferred frosting thickness; decorate as you like.


Pecan Scones

IMG_0452One of the most important things about baking is following your instincts. When you do, amazing things can happen. When you don’t, you end up burning the daylights out of your scones.

Fresh from the oven, these treats looked like the kind of scone you’d pay three bucks for with your morning coffee; they were golden brown and fragrant, smelling of pecans and chocolate and espresso.

I should have left them alone.

But the recipe instructed me to generously dust the tops with powdered sugar, then place the scones back in the oven, under my broiler, to caramelize. Enticed by the notion of a crunchy sugar shell on the top of each scone, I gave it a try. And even though I’m quite adept at broiling, I was no match for the melting point of powdered sugar. Half of the scones were in the direct path of the heat, and those caramelized, then burned within seconds. The others, which weren’t in the direct path of the heat, didn’t even begin to melt. Some careful moving of the baking sheet ensued, and I was able to properly caramelize just a few. And fortunately, the properly caramelized scones are delicious…but next time, my instincts will win out.

Ingredients

  • 2 cups flour
  • 1/4 cup sugar
  • 1 1/4 teaspoons baking powder
  • 1/4 teaspoon baking soda
  • 1/4 teaspoon salt
  • 1 tablespoon espresso powder (optional)
  • 8 tablespoons butter, cold, cut into cubes
  • 1/2 cup chopped pecans, toasted and cooled
  • 1/2 cup semisweet chocolate chips
  • 2/3 cup buttermilk
  • 1 tablespoons pure maple syrup
  • 1 lightly beaten egg
  • 1 tablespoon heavy cream

Preparation

Preheat oven to 400 degrees.

Stack two cookie sheets together and line the top one with foil or parchment.

In a large mixing bowl, combine flour, sugar, baking powder, baking soda, salt, and espresso powder (if using).

Add butter and cut in with a pastry blender until the mixture resembles coarse crumbs; you’ll need to use your hands in addition to the pastry blender.

Add pecans and chocolate chips, stirring to combine.

Add maple syrup to buttermilk and all the wet ingredients to the dry ingredients all at once, mixing until dough is just combined.

Turn dough onto a lightly floured surface and knead 4-5 times. Pat into a circle about 7-8 inches wide and 1 1/2 inches thick. Cut into eight wedges and place on the cookie sheet.

Make egg wash; combine lightly beaten egg with heavy cream and brush the tops of each scone.

Bake 18-20 minutes, until tops are golden brown and a cake tester inserted in the center(s) comes out clean.

Cool on a wire rack.

Chocolate Pie

chocolate pie

I waited four months for this pie.

Why, you ask, would someone like me go four months without a cookie, slice of cake, scoop of ice cream, sip of soda (Western Pennsylvanias read: pop), or bite of pie? Let’s just say that sugar and I had one of those unhealthy, borderline addictive-type relationships, and something had to be done about it…not to mention that my scale came very close to being hurled out the window after Christmas. But, now that I can look upon sweets as a normal part of a regular diet rather than the focus of my daily caloric intake, I really wanted a chocolate pie.

This is not a chocolate cream pie, but rather an interesting, almost brownie-like creation. It could definitely benefit from some whipped cream and raspberries (or raspberry sauce), fresh strawberries, or even a drizzle of melted peanut butter. It is also quite good just plain, and well worth a four-month wait.

Ingredients

  • 1 unbaked pie crust
  • 1 1/2 cups sugar
  • 3 tablespoons cocoa powder
  • 1/4 teaspoon salt
  • 2 eggs
  • 3/4 cup evaporated milk
  • 1 tablespoon vanilla
  • 4 tablespoons butter, melted

Preparation

Preheat oven to 350 degrees.

Line a 9-inch pie plate with crust, trim the edges, and prick the bottom and sides with a fork. Line the crust with two layers of foil, fill with dried beans or pie weights, and blind bake crust for 15 minutes. Remove from oven and cool 10 minutes before filling. If using beans, pour them into a bowl and allow them to cool, then store for re-use.

In a mixing bowl, combine sugar, cocoa powder, eggs, evaporated milk, vanilla, and salt. Carefully add melted butter, taking care not to scramble the eggs.

Cover the edge of the pie with a guard or foil; bake for 30 minutes, then remove guard and bake another 20 minutes, until the pie is set. Remove from oven and cool completely; refrigerate once pie reaches room temperature.

Pecan Pie…for my Mom

Pecan pieEveryone loves my mother. No, really, they do. Many times in my life, when I’ve introduced myself to someone, they’ve said “oh, are you related to Genny Kozusko?” And when I confirmed that she’s my mom, they inevitably proclaimed, in wide-eyed fascination, “Genny’s your mom?!? I love her! What’s it like to have a mom like her?”

What is it like to have a mom like Genny? She was strict with my brother Andy and me when we were kids, tolerating no back-talk, tantrums, or nonsense. Weekly mass attendance was compulsory, good grades were expected, and junk food was rationed like it was World War II. But every summer, she packed us into the car for a week-long trip to Maryland, where she and my Aunt Liz would take us to Gettysburg, or DC, or Baltimore and teach us about everything they knew; during the school year, Genny came to all of our games, school plays, and concerts when her own busy teaching and coaching schedule permitted. When I lived away from Pittsburgh, I called her every week to check in, and I still call her when I travel to let her know that I’ve arrived safely. She helped Mike and me paint our house, landscape our yard, and renovate our bathroom. She’s our go-to dog-sitter and always happy to take Millie for a walk when she stops by.

What it’s like to have a mom like Genny is to know that I must leave this world a little better off than I found it; to know that family, faith, honesty, hard work, and humor are the most important things that exist. I’m incredibly lucky to have her as my mom. And because it’s Mother’s Day, I’ve baked this pecan pie for her.

Ingredients

  • 1 unbaked pie crust
  • 3 slightly beaten eggs
  • 1 cup light corn syrup
  • 2/3 cup sugar
  • 1 teaspoon vanilla
  • 1/3 cup butter, melted
  • 1 1/2 cups pecan halves

Preparation

Preheat oven to 350 degrees.

Line a 9-inch pie plate with crust; trim edges and shape as desired.

In a medium bowl, combine eggs, corn syrup, sugar, and vanilla and mix well. Add melted butter, taking care not to cook your eggs, stirring to combine. Stir in pecans, then pour filling into crust.

Cover the edge of the pie with a guard or foil to prevent over-browning; bake for 25 minutes, then remove guard and bake another 20-25 minutes, until a knife inserted in the center of the pie comes out clean.

Cool on a wire rack for at least two hours before refrigerating.

Meet Genny

Genny O’Donnell Kozusko is the second-youngest of six children. Born in Howard County, Maryland on June 9, 1946, she is fifty minutes older than her twin sister, my Aunt Liz. She’s the director of athletics at The Ellis School in Pittsburgh, though she is retiring this year to spend more time volunteering at her church, hanging out with our nephew Roman, and hopefully walking Millie.

Below, Genny leans over to touch the Green Monster at Fenway Park in Boston.

Genny and the Monster

Butter Cookies with Chocolate Drizzle

butter cookies with chocolate


My grandmother used to buy tins of Royal Dansk Danish butter cookies, and their signature blue tin meant one thing to me as a child: the pretzel-shaped cookie sprinkled with enormous granules of sugar. It was my favorite, followed closely by the one with the tiny chocolate chips in it. This recipe reminds me a bit of the Royal Dansk cookies; it is simple, with few ingredients, and easily adapted into various shapes. Before today, I’ve baked these as twists and pretzels, both dipped in chocolate. Because chocolate makes everything better, especially sturdy butter cookies like these.

The chocolate drizzle is incredibly easy to make and convenient for both drizzling or dipping, depending on what you prefer. Next time, I might coat each cookie entirely in chocolate.

Ingredients

For the cookies

  • 8 tablespoons butter, at room temperature
  • 1/2 cup sugar
  • 1 teaspoon vanilla
  • 1 egg white
  • 1/2 teaspoon coarse salt
  • 1 1/2 cups plus 2 tablespoons flour

For the chocolate drizzle

  • 1/2 cup milk chocolate chips
  • 1 tablespoon shortening

Preparation

Preheat oven to 350 degrees.

Line two baking sheets with parchment paper.

In a mixing bowl, combine butter and sugar and cream together until combined.

Add vanilla and egg white and mix until combined.

Add salt and one-half cup flour; mix until incorporated. Add remaining flour slowly, mixing until well incorporated.

Using a one-inch cookie scoop, scoop out dough and roll into balls. Place a few inches apart on prepared cookie sheets and flatted into discs using the bottom of a glass.

Bake for 14-16 minutes, until cookies are light golden brown.

Allow to cool completely before drizzling or dipping.

Once cookies are cool, combine chocolate chips and shortening in a small saucepan. Melt on low heat, stirring frequently.

Drizzle chocolate over cookies, or dip half of each cookie into chocolate and allow to set on waxed paper.


Caramel Popcorn

caramel corn


Caramel is tricky. Chemically speaking, caramelization is the removal of water from sugar, a breakdown of molecules and re-formation of compounds that yield a distinct flavor. Making caramel can be a complicated business, because it’s a sensitive substance. Rainy days aren’t good for candy making in general, and you’ve got to be careful about stirring or not stirring according to a recipe’s specifications.

When Mike and I lived in Maryland and DC, my caramel popcorn turned out very differently, with a smooth caramel coating that I am yet to achieve in Pittsburgh. In LaPlata, Mike’s coworkers took up collections, giving me the proceeds to buy ingredients and keep them in caramel popcorn on a weekly basis. But here in my sunny Pittsburgh kitchen, the atmosphere, or moisture in the air, or humidity yields a crystalline caramel akin to rock candy, rather than a smooth caramel like it should. I’ve amend my recipe below to feature an additional half-teaspoon of vanilla from what I used today.

Ingredients

  • 3/4 cup unpopped popcorn kernels
  • 12 tablespoons butter
  • 1 1/2 cups packed light brown sugar
  • 6 tablespoons light corn syrup
  • 1/2 teaspoon baking soda
  • 1 teaspoon vanilla

Preparation

Preheat oven to 300 degrees.

Using an air popper, pop the popcorn and place it in a large roasting pan; remove any unpopped kernels.

In a medium saucepan, combine butter, brown sugar, and corn syrup. Cook and stir over medium heat until the mixture comes to a boil, then continue boiling, without stirring, for 5 minutes.

Remove from heat and add baking soda and vanilla, then stir vigorously to combine; the mixture will puff up a bit and it is very important to do this off of the heat.

Pour immediately over the popcorn and bake for 15 minutes; stir, then bake 5 minutes more.

While the popcorn is baking, spread two large pieces of aluminum foil on a table; tape down at the edges and butter well.

When popcorn is finished baking, spread immediately on the buttered foil to cool.