Witch Brew Cookies

witchbrewcookies

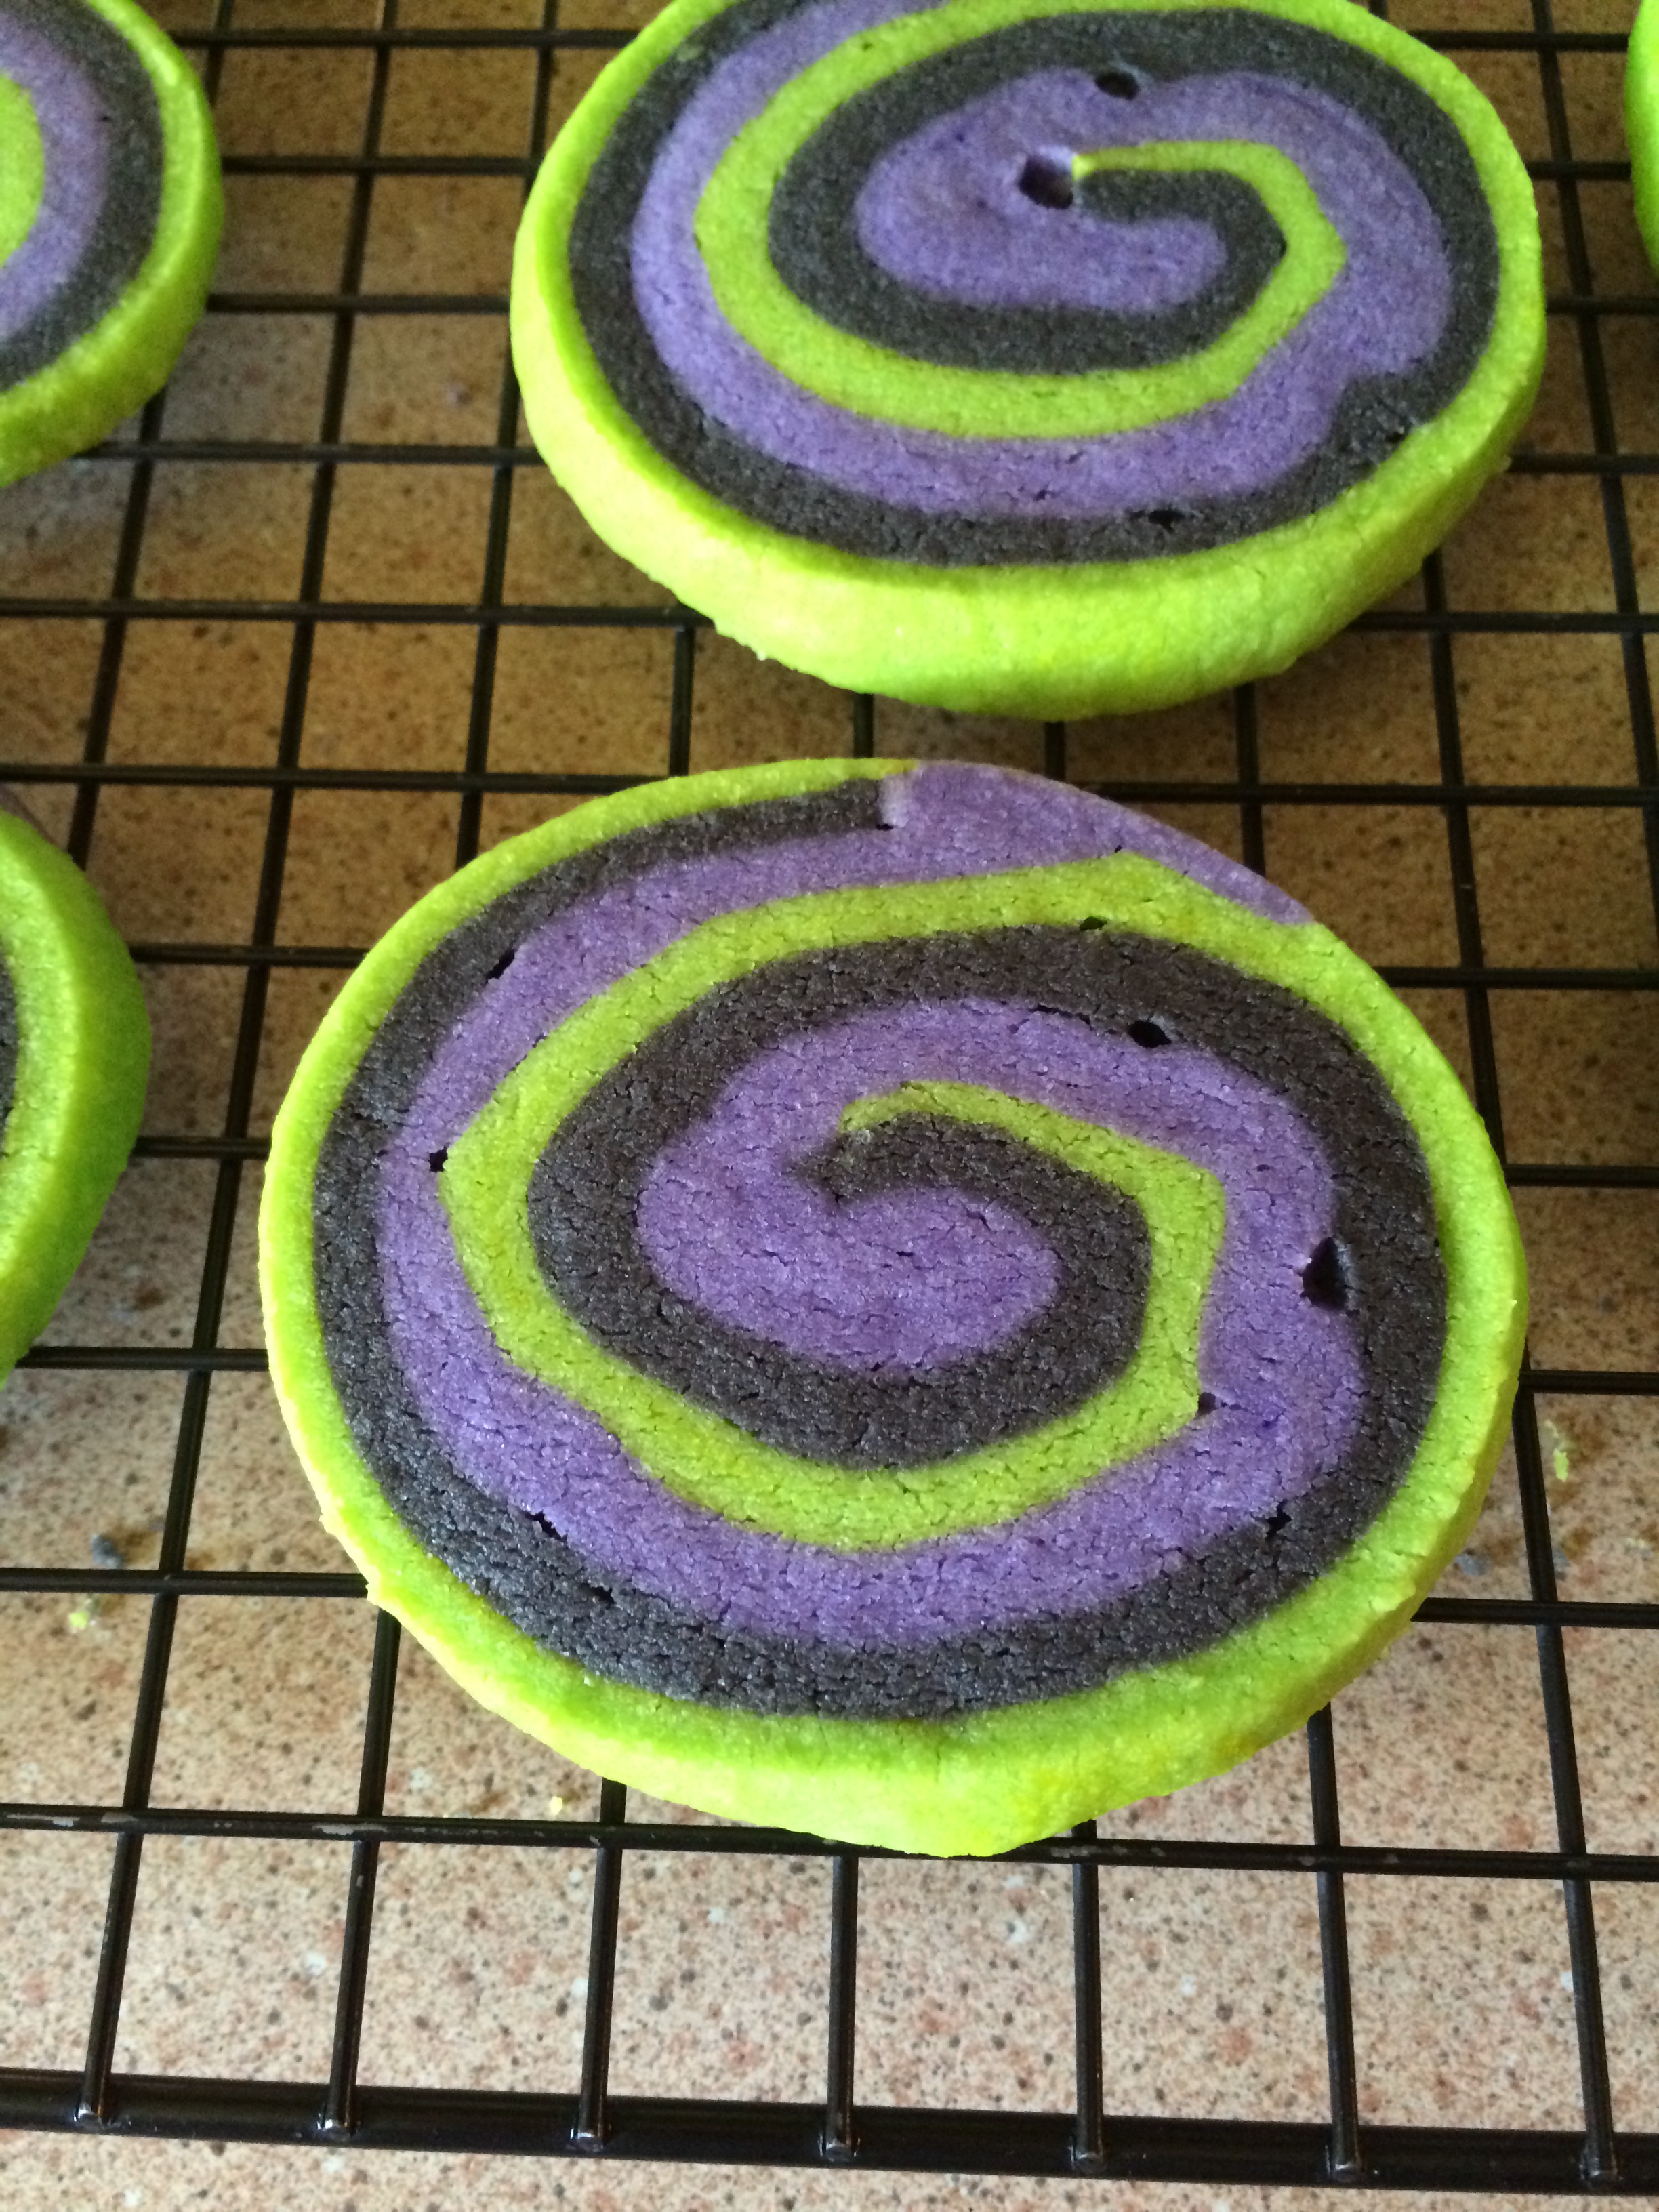
With just a few weeks to go until Halloween, these fun witch brew cookies are on their way to my goddaughter Mo and her little sister Margo, whose birthday also happens to fall on Halloween. Does this cookie look like something from a witch’s cauldron? I certainly hope so.

A word about spiral cookies: it’s very important to press your layers together firmly as you roll your dough log to avoid the small gaps you can see in the cookie here. This dough is very soft when rolled out, so waxed paper helps in handling a great deal. I found the original recipe for these over at Lady Behind the Curtain and chose not to roll the dough log in sprinkles before I sliced them, but that would definitely add an extra spooky kick (and some nice crunch) to these treats.

Ingredients

  • 2 cups plus 6 tablespoons all purpose flour, divided
  • 1/2 teaspoon baking powder
  • 1/4 teaspoon salt
  • 2/3 cup powdered sugar
  • 1/4 cup sugar
  • 1 1/4 cups butter, cut into cubes and softened
  • 1 1/2 teaspoons vanilla extract
  • Leaf green, lemon yellow, violet, and black gel food coloring

Preparation

In a mixing bowl, combine 2 cups flour with the baking powder, salt, powdered sugar, and sugar. Mix to combine.

Add butter a few cubes at a time, mixing until the texture has the consistency of sand.

Add the vanilla and mix just until a ball forms.

Divide dough into thirds; dough will be very soft.

Add food coloring and 2 tablespoons of flour to each ball, kneading with your hands to combine until you have even coloring. For the electric green color, use leaf green and lemon yellow.

Begin with the green ball; tape a sheet of waxed paper to your counter top and roll the dough ball between it and another sheet of waxed paper. Set aside; repeat this process with the black and violet layers.

Place the green layer, still on its waxed paper, on your counter top and remove the top sheet of waxed paper. Carefully remove the black and violet layers from their waxed paper and place them on top of the green layer.

Roll your layers into a log, pressing firmly as you go and using the bottom layer of waxed paper to help with rolling.

Wrap the log tightly and refrigerate for 2 hours.

Preheat oven to 325 degrees. Line 2 baking sheets with foil or parchment.

Remove dough log from the refrigerator and slice into 1/4 inch cookies.

Bake for 15-17 minutes, until cookies are no longer shiny on top.

Remove from oven and allow to cool for a few minutes on cookie sheets, then remove to a wire rack to cool completely.

Milk Dud Brownies

milk dud browniesDespite my overwhelming appreciation for chocolate and caramel, I rarely eat Milk Duds. This year, one of our Halloween candy mixes included miniature boxes of them, and because it rained on Halloween we had plenty left over. What’s one to do with leftover Milk Duds? Turn them into brownies, of course.

This recipe comes from Bakeaholic Mama and reminds me of a flourless chocolate cake – the finished product is very dense, very chewy, and quite delicious. My only challenge was cutting them – once they were cool, I was able to score them well, but actually removing them from the pan without having them crumble was next to impossible. Next time, I might add one additional teaspoon of flour to stabilize them a bit.

Ingredients

  • 5 1/2 teaspoons butter, melted
  • 3/4 cup sugar
  • 1/8 teaspoon salt
  • 1/2 teaspoon vanilla extract
  • 1 egg
  • 3 tablespoons flour
  • 1/2 cup cocoa powder
  • 1/2 cup Milk Duds, chopped

Preparation

Preheat oven to 350 degrees. Spray the bottom of an 8 x 8 pan with baking spray.

In a medium bowl, mix butter, sugar, salt, vanilla, and egg until well-combined.

Add flour and cocoa powder and stir to combine; fold in Milk Duds.

Spread batter in pan and bake for 15-20 minutes, until a cake tester comes out clean.

Cool in pan before cutting.

Chocolate Bats

chocolate batsIt’s Halloween Eve, also known as Devil’s Night. As a big fan of the city of Detroit, I was disheartened to learn that this term is primarily associated with major vandalism and arson in the Motor City. I’m hoping that Detroit is peaceful tonight, for many reasons.

Anyway…it’s also National Bat Week, and I dig bats. I’ve been wanting to make bat-themed sugar cookies for a while, and I found this very easy recipe on Betty Crocker’s website. As usual, Betty knows her stuff.

This dough is incredibly easy to work with, not too soft and not too firm, just the right texture for rolling and cutting. I usually don’t enjoy making sugar cookies because they’re quite labor-intensive, but this recipe was really simple. I used two different bat cutters and intended to pipe on some icing eyes and fangs, but once these treats were done I decided I liked them better just as they were. Happy Halloween!

Ingredients

  • 1 1/2 cups flour
  • 3/4 cup cocoa powder
  • 1/8 teaspoon salt
  • 12 tablespoons butter, softened
  • 1 1/3 cup sugar
  • 1 egg
  • 1 teaspoon vanilla extract

Preparation 

In a medium bowl, combine flour, cocoa powder, and salt; set aside.

In a mixing bowl, cream together butter and sugar until fluffy. Add egg and vanilla extract, beating until well-combined.

Slowly add flour mixture, scraping the sides of the bowl often and beating until a very well-combined, soft dough forms.

Gently knead the dough a few times to make sure it comes together; roll dough into a ball and flatten into a disc. Wrap in plastic and chill for 1 hour.

Preheat oven to 375 degrees; line three baking sheets with parchment or foil.

On a lightly floured surface, roll dough to 1/8 inch thickness. Cut with a bat-shaped cookie cutter; if using different shapes, be sure to bake the same shape on one cookie sheet. Baking different-sized or differently-shaped cookies on the same sheet can lead to uneven results; some of your cookies might be underdone while others will be overdone.

Bake for 8-10 minutes, until edges are set. Remove from oven and cool on cookie sheets for 1-2 minutes, then remove to wire racks to cool completely.


Rice Krispie Pumpkins

rice krispie pumpkinWith just a few weeks to go until Halloween, I’ve prepared a little care package for my favorite preschooler, my goddaughter Maureen. She’s mildly allergic to cinnamon, so the pumpkin chocolate chip bread I’m sending will really be for her parents, and while I would’ve liked to have sent her some pumpkin-shaped sugar cookies, they’re not quite as sturdy for shipping.

These Rice Krispie pumpkins are a good alternative, as they can be packed in an airtight container with little risk of breakage between Pittsburgh and southern Maryland. My Rice Krispie treats use a high marshmallow-to-Krispie ratio, as I like a softer treat, but you can use an additional cup of Krispies if you’re after something a bit sturdier. I’m hoping that they’ll stay fresh during the few days they’ll be in transit!

If you’re not shipping your treats, you might consider adding some frosting or melted chocolate embellishments to make the pumpkins look like Jack-o-Lanterns. You could also gently press in some candy corn or other Halloween-related candy into the tops of the treats and simply cut them into bars if you like.

Ingredients

  • 3 tablespoons margarine
  • 4 cups miniature marshmallows
  • yellow liquid food coloring
  • red liquid food coloring
  • 5 cups Rice Krispies

Preparation

Spray a 9 x 13 pan with nonstick spray; set aside.

In a large pot, melt margarine over medium heat. Add marshmallows and stir until completely melted; add about 15 drops of yellow food coloring and two drops of red to achieve your desired orange color.

Add Rice Krispies and stir until completely coated with marshmallow mixture; immediately pour into your prepared pan and smooth out using a spatula.

Allow to cool completely, then turn out onto a sheet of parchment. Spray a pumpkin cookie cutter with nonstick spray and cut; reshape scraps and cut again, or hand-form into pumpkins.