Peanut Butter Bacon Dog Treats

pbbacontreatsDog treats, while available in many varieties in convenient boxes at your local store, are very easy to make at home. These treats have only five ingredients, many of which we have on hand in any given week (yes, that includes the bacon grease).

There are healthier versions, for sure, but these make a nice occasional treats. I found this recipe at Hardly Housewives, and next time, I might add just a bit of crumbled bacon to make them extra-special.

Ingredients

  • 1 3/4 cup flour
  • 1/4 cup peanut butter
  • 1/4 cup bacon grease, in liquid form so it’s easy to mix
  • 1 egg
  • 1/2 cup water

Preparation

In a large mixing bowl, combine all ingredients. Mix with a wooden spoon, then knead together with your hands to form a soft dough.

Wrap in plastic wrap and chill for about 1 hour, until dough is firmer and easier to handle.

Preheat oven to 375 degrees. Line two baking sheets with foil.

On a lightly floured surface, roll out the dough to about 1/4 inch thickness. Cut into desired shapes; I used a medium bone-shaped cutter.

Place bones on prepared baking sheets and bake for 20-22 minutes, until treats are golden brown and firm. Allow to cool, then serve to your favorite canine friend.

Cream Cheese Cookies

creamcheesecookiesI’m on a mission to find a recipe, with one very basic challenge: I have no idea what the cookie I seek might be called.

When I was a kid, my grandma occasionally brought home cookies from a bakery several miles north up the Allegheny River, in New Kensington or Natrona Heights, I can’t recall exactly. Whenever she went, she returned home with a specific kind of cookie; scalloped at its edges, flavored with vanilla, not as sweet as a regular sugar cookie, decorated with one teardrop-shaped dollop of icing.

A few weeks ago, someone from another department at work brought in cookies from a local bakery. I know neither the name of the person who brought the cookies, nor the bakery from whence they came. Square, edged with walnuts, with a dollop of icing; they tasted so similar to the mystery bakery cookies of my youth, I could hardly believe it. But what, on earth, are they called? I have no idea.

I’ve scoured the internet with no luck yet, but suspect that they might be cream cheese-based. My friend Carrie sent me a cream cheese cookie recipe long ago, which I decided to bake today. Although they’re not the mystery cookies of my youth, they are absolutely delicious. According to Carrie’s recipe, you can tint them different colors for holidays, or just leave them plain. Many thanks for this recipe, Carrie – they are amazing.

Ingredients

  • 2 1/2 cups flour
  • 1/2 teaspoon salt
  • 3 ounces cream cheese, softened
  • 1 cup shortening
  • 1 cup sugar
  • 1 egg yolk
  • 1 teaspoon vanilla extract

Preparation

Preheat oven to 350 degrees. Line baking sheets with parchment paper.

In a medium bowl, combine flour and salt; set aside.

In a mixing bowl, cream together the cream cheese and shortening. Scrape down the sides of your bowl, then add the sugar and cream until well-combined.

Add egg yolk and vanilla and mix until combined. Add flour, mixing until a soft dough forms; I waited until mine pulled away from the sides of the bowl to stop mixing.

Using a small (one-inch) cookie scoop, scoop dough and roll into balls. Place on prepared baking sheets about 1 inch apart.

Bake for 12-15 minutes; cookies will crack just slightly, and that’s okay. Remove from oven and cool on baking sheets for a few minutes, then remove to a wire rack to cool completely.


Crazy Vanilla Cupcakes with Cocoa Frosting

crazyvanillacupcakes

Can you bake a cupcake without breaking eggs? Of course you can. People in the Great Depression did it all the time.

An egg shortage in the U.S. has commercial bakers scrambling (I couldn’t resist) for solutions in the wake of a massive outbreak of avian flu. I read about this earlier today, and it made me think of crazy cake, a Depression-era recipe that required absolutely no dairy because of rationing.

I’ve made crazy chocolate cupcakes before, and found a recipe for a vanilla version at Sweet Little Bluebird. Because I didn’t know how the cupcakes would turn out flavor-wise, I chose to pair them with a rich cocoa frosting in case they needed a bit of a flavor boost. I’m glad I did so; the cupcake flavor leaves a bit to be desired for me, but I didn’t want to stray too far from the original recipe since this was my first crack (yes, another egg pun!) at it. Next time, I’ll add more vanilla and hope that it doesn’t affect the stability of the batter.

Crazy Vanilla Cupcakes

Ingredients

  • 1 1/2 cup plus 3 tablespoons flour
  • 1 cup sugar
  • 1 teaspoon baking soda
  • 1/2 teaspoon salt
  • 1 teaspoon white vinegar
  • 1 1/2 teaspoons vanilla extract
  • 5 tablespoons vegetable oil
  • 1 cup water

Preparation

Preheat oven to 350 degrees. Line a 12-cup cupcake tin with paper liners.

In a large bowl, mix flour, sugar, baking soda, and salt; make three wells for wet ingredients.

Add vinegar to the first well, vanilla to the second well, and vegetable oil to the third well. Add water and mix until smooth.

Using a 1/4 cup measuring cup, scoop batter into prepared cupcake wells.

Bake for 18-2o minutes, until a cake tester comes out clean. Remove from oven and remove cupcakes from pan immediately, cooling completely on a wire rack before frosting.

Cocoa Frosting (adapted from my previous recipe to yield a fluffier texture)

Ingredients

  • 4 tablespoons butter, melted
  • 1/3 cup cocoa powder, sifted
  • 1 3/4 cup powdered sugar, sifted
  • 3 tablespoons milk
  • 1 tablespoon vanilla extract

Preparation

In a small bowl, combine melted butter and cocoa powder, whisking until smooth. Place mixture in the bowl of a stand mixer fitted with the paddle attachment; beat on low speed for 1 minute, then on medium speed for 2 minutes.

Add 1 cup powdered sugar and 1 tablespoon milk and beat until very well-combined, scraping the sides of the bowl well a few times. Add remaining powdered sugar and 1 more tablespoon milk and beat for about 1 minute; add vanilla and beat 1 minute more, then add final tablespoon of milk and beat for 2 minutes, until lighter in color and fluffy.

Fit a piping bag with a large star tip; pipe frosting onto cupcakes.


Chocolate Whoopie Pies

chocolatewhoopiesThe whoopie pie: cake, cookie, or pie? To me, certainly not a pie; more of a cross between a cake and a cookie.

Whatever you call them, they come in many varieties. I’ve tried several, and have personally made chocolate peanut butter whoopie pies, lemon raspberry whoopie pies, and vanilla whoopie pies with chocolate filling. Despite this, nothing quite compares to the classic chocolate-cookie-with-fluffy-white-filling whoopie pie. This is my first attempt at the classic version, and I have to say: they are delicious. And enormous. And definitely not heart-healthy. But it’s not like you’ll eat them every day, right?

The recipe below is adapted from Cinnamon-Spice & Everything Nice, incorporating more powdered sugar into the filling to mellow out the sweetness of the marshmallow creme. That probably sounds impossible, but it’s true; a bit more powdered sugar cuts the sticky sweetness of the creme very well, and also stabilizes the filling a bit. Don’t skip the step where you let your filling chill in the refrigerator for just a few minutes; it sets up very nicely and yields a fluffy texture that complements the tender cookies very well.

Ingredients

For the chocolate cookies

  • 2 cups all-purpose flour
  • 1/2 cup unsweetened cocoa powder
  • 1 1/4 teaspoons baking soda
  • 1 teaspoon salt
  • 1 cup buttermilk
  • 1 teaspoon vanilla extract
  • 8 tablespoons butter, softened
  • 1 cup firmly packed brown sugar
  • 1 egg, at room temperature

For the fluffy white filling

  • 8 tablespoons butter, softened
  • 2 1/4 cups powdered sugar
  • 1 7-ounce jar marshmallow creme
  • 2 teaspoons vanilla extract

Preparation

Preheat oven to 350 degrees. Line three baking sheets with parchment paper; my recipe yielded 20 individual cookies for 10 complete whoopie pies.

In a medium bowl, combine flour, cocoa powder, baking soda, and salt; set aside.

In a medium glass measuring cup, combine buttermilk and vanilla; mix and set aside.

In a mixing bowl, beat butter on medium speed for 1 minute. Add brown sugar and cream until light and fluffy, about 2-3 minutes.

Scrape down your bowl very well and add the egg, then beat until well-combined.

Add flour mixture and buttermilk mixture alternatively, beginning and ending with the flour, mixing until combined after each.

Using a 2-inch cookie scoop, scoop very generous, heaping scoops of batter onto prepared sheets; you should have 6 cookies per sheet and need to leave a few inches of space between them, as they’ll spread as the bake.

Bake for 10-12 minutes, until tops are set and spring back lightly when touched. Remove from oven and cool on baking sheets for a few minutes before removing to a wire rack to cool completely before filling.

To make the fluffy white filling, beat butter on medium speed for 2 minutes, until light and fluffy. Add vanilla and marshmallow creme, beating for about 2 minutes to combine. Add powdered sugar 1 cup at a time, beating well to combine.

Chill filling for about 5 minutes in your refrigerator; this will allow it to set up slightly and provides a sturdier texture.

Flip cookies over and divide filling evenly among half of them; using a small offset spatula, spread filling slightly, then place another cookie on top.

Wrap each whoopie pie in plastic wrap for easy serving and storage. Since they are so large, it’s nice to be able to eat half of one and save the other half for later.


Cinnamon Muffins

cinnamonmuffinsMost of the world’s cinnamon comes from Sri Lanka, but other countries – like Madagascar, China, Vietnam, and Indonesia – also grow and process this popular spice. My favorite cinnamon is Vietnamese, which has a slightly more spicy flavor than your average, from-the-grocery-store cinnamon. I purchase it at Penzey’s in Pittsburgh’s Strip district, along with Mexican vanilla extract and Tahitian vanilla beans for the baker’s version of a splurge.

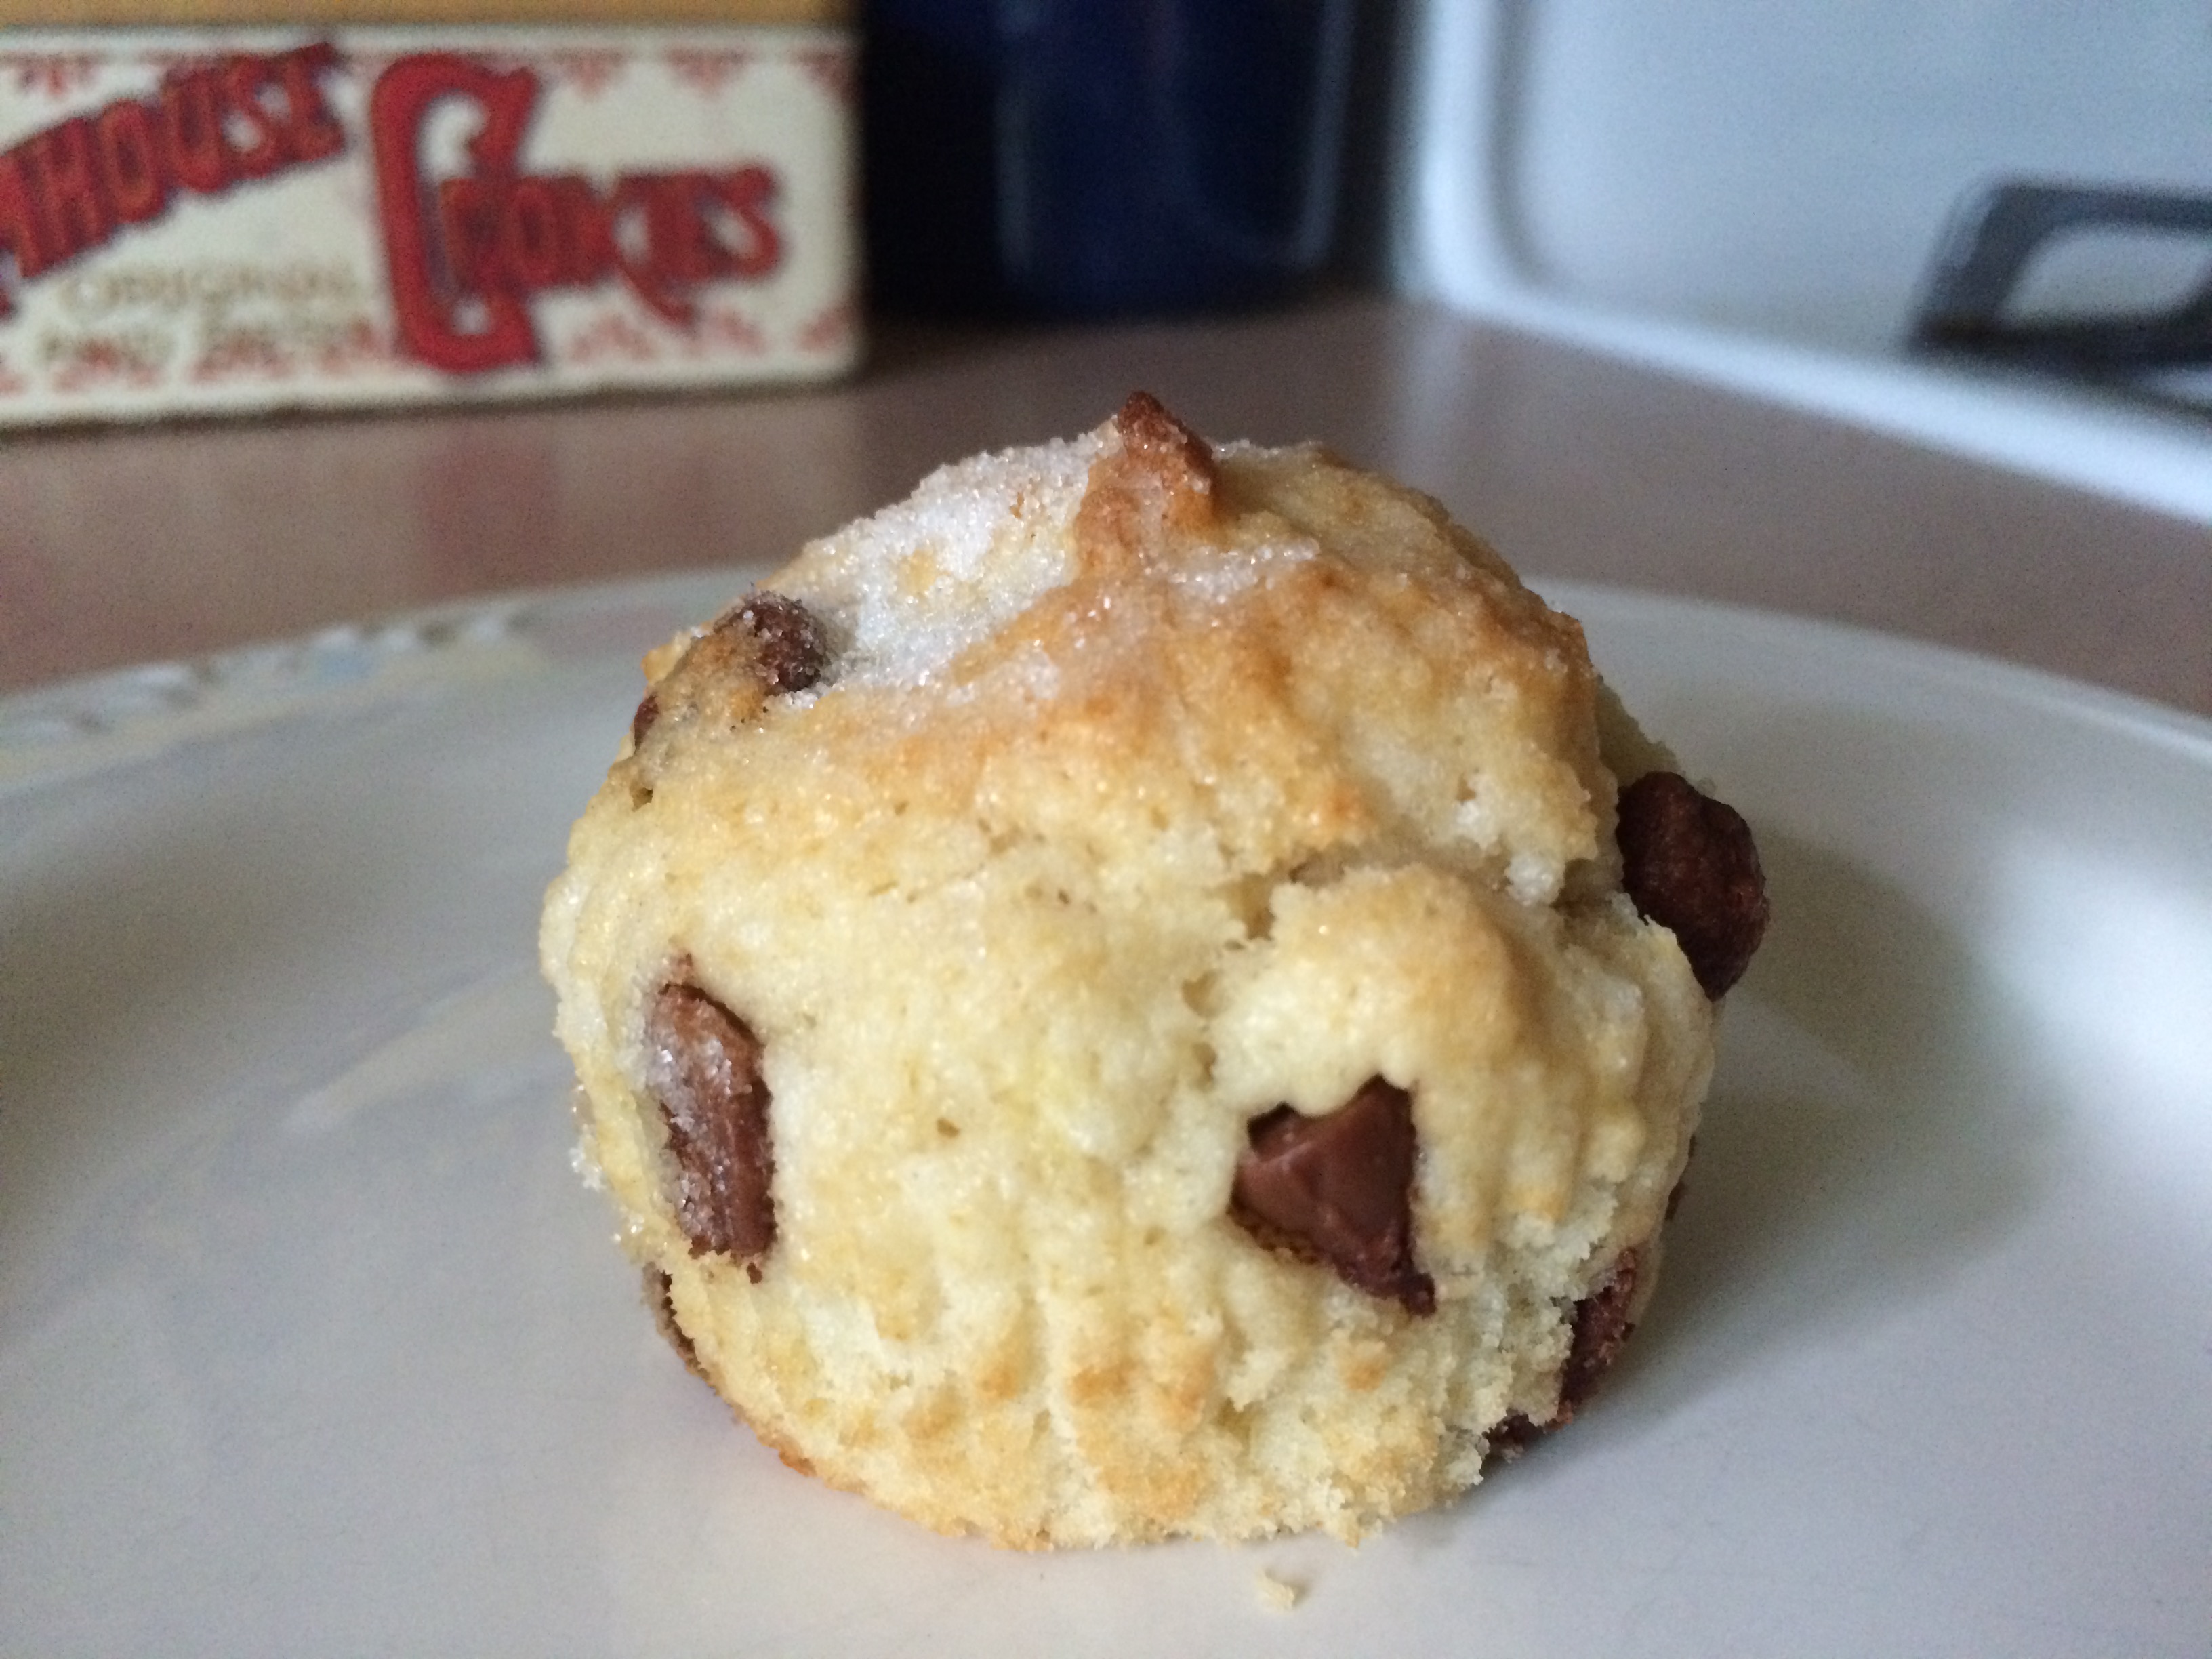
These muffins include Vietnamese cinnamon of the “extra fancy” variety – and yes, I keep both this and regular, from-the-grocery-store cinnamon in my pantry. I’m a generous measurer of cinnamon as well, so if you’re looking for a more mellow flavor, you can always cut back a bit.

These muffins are prepared two ways; first with what the original recipe called a streusel topping, which I expected to be more crumb-like but turned out to be more of a crunchy coating, and second with a cinnamon vanilla drizzle. Whatever you choose, you won’t go wrong – or if you’re feeling really adventurous, do both! I chose to put the streusel crunch on the first batch, and went with the glaze on the second batch because some of my streusel crunch-coated muffins burned at the edges a bit. When dropping your streusel crunch pieces onto your muffins, be careful to keep them as close to the center as possible, as they can spread and burn. Note: this recipe yielded 20 muffins.

Ingredients

Cinnamon Muffins

  • 2 cups all-purpose flour
  • 1/2 cup sugar
  • 1/4 cup firmly packed brown sugar
  • 1 tablespoon baking powder
  • 1 teaspoon cinnamon
  • 1/2 teaspoon salt
  • 3/4 cup milk
  • 1/2 cup butter, melted
  • 1 teaspoon vanilla
  • 1 egg, beaten

Streusel Crunch (makes enough for all of the muffins)

  • 1/4 cup all-purpose flour
  • 1/4 cup firmly packed brown sugar
  • 1 teaspoon cinnamon
  • 3 tablespoons cold butter, cut into small pieces

Cinnamon Vanilla Glaze (makes enough for 8 muffins)

  • 3/4 cup powdered sugar
  • 1/8 teaspoon cinnamon
  • 1/2 teaspoon vanilla extract
  • About 1 teaspoon water

Preparation

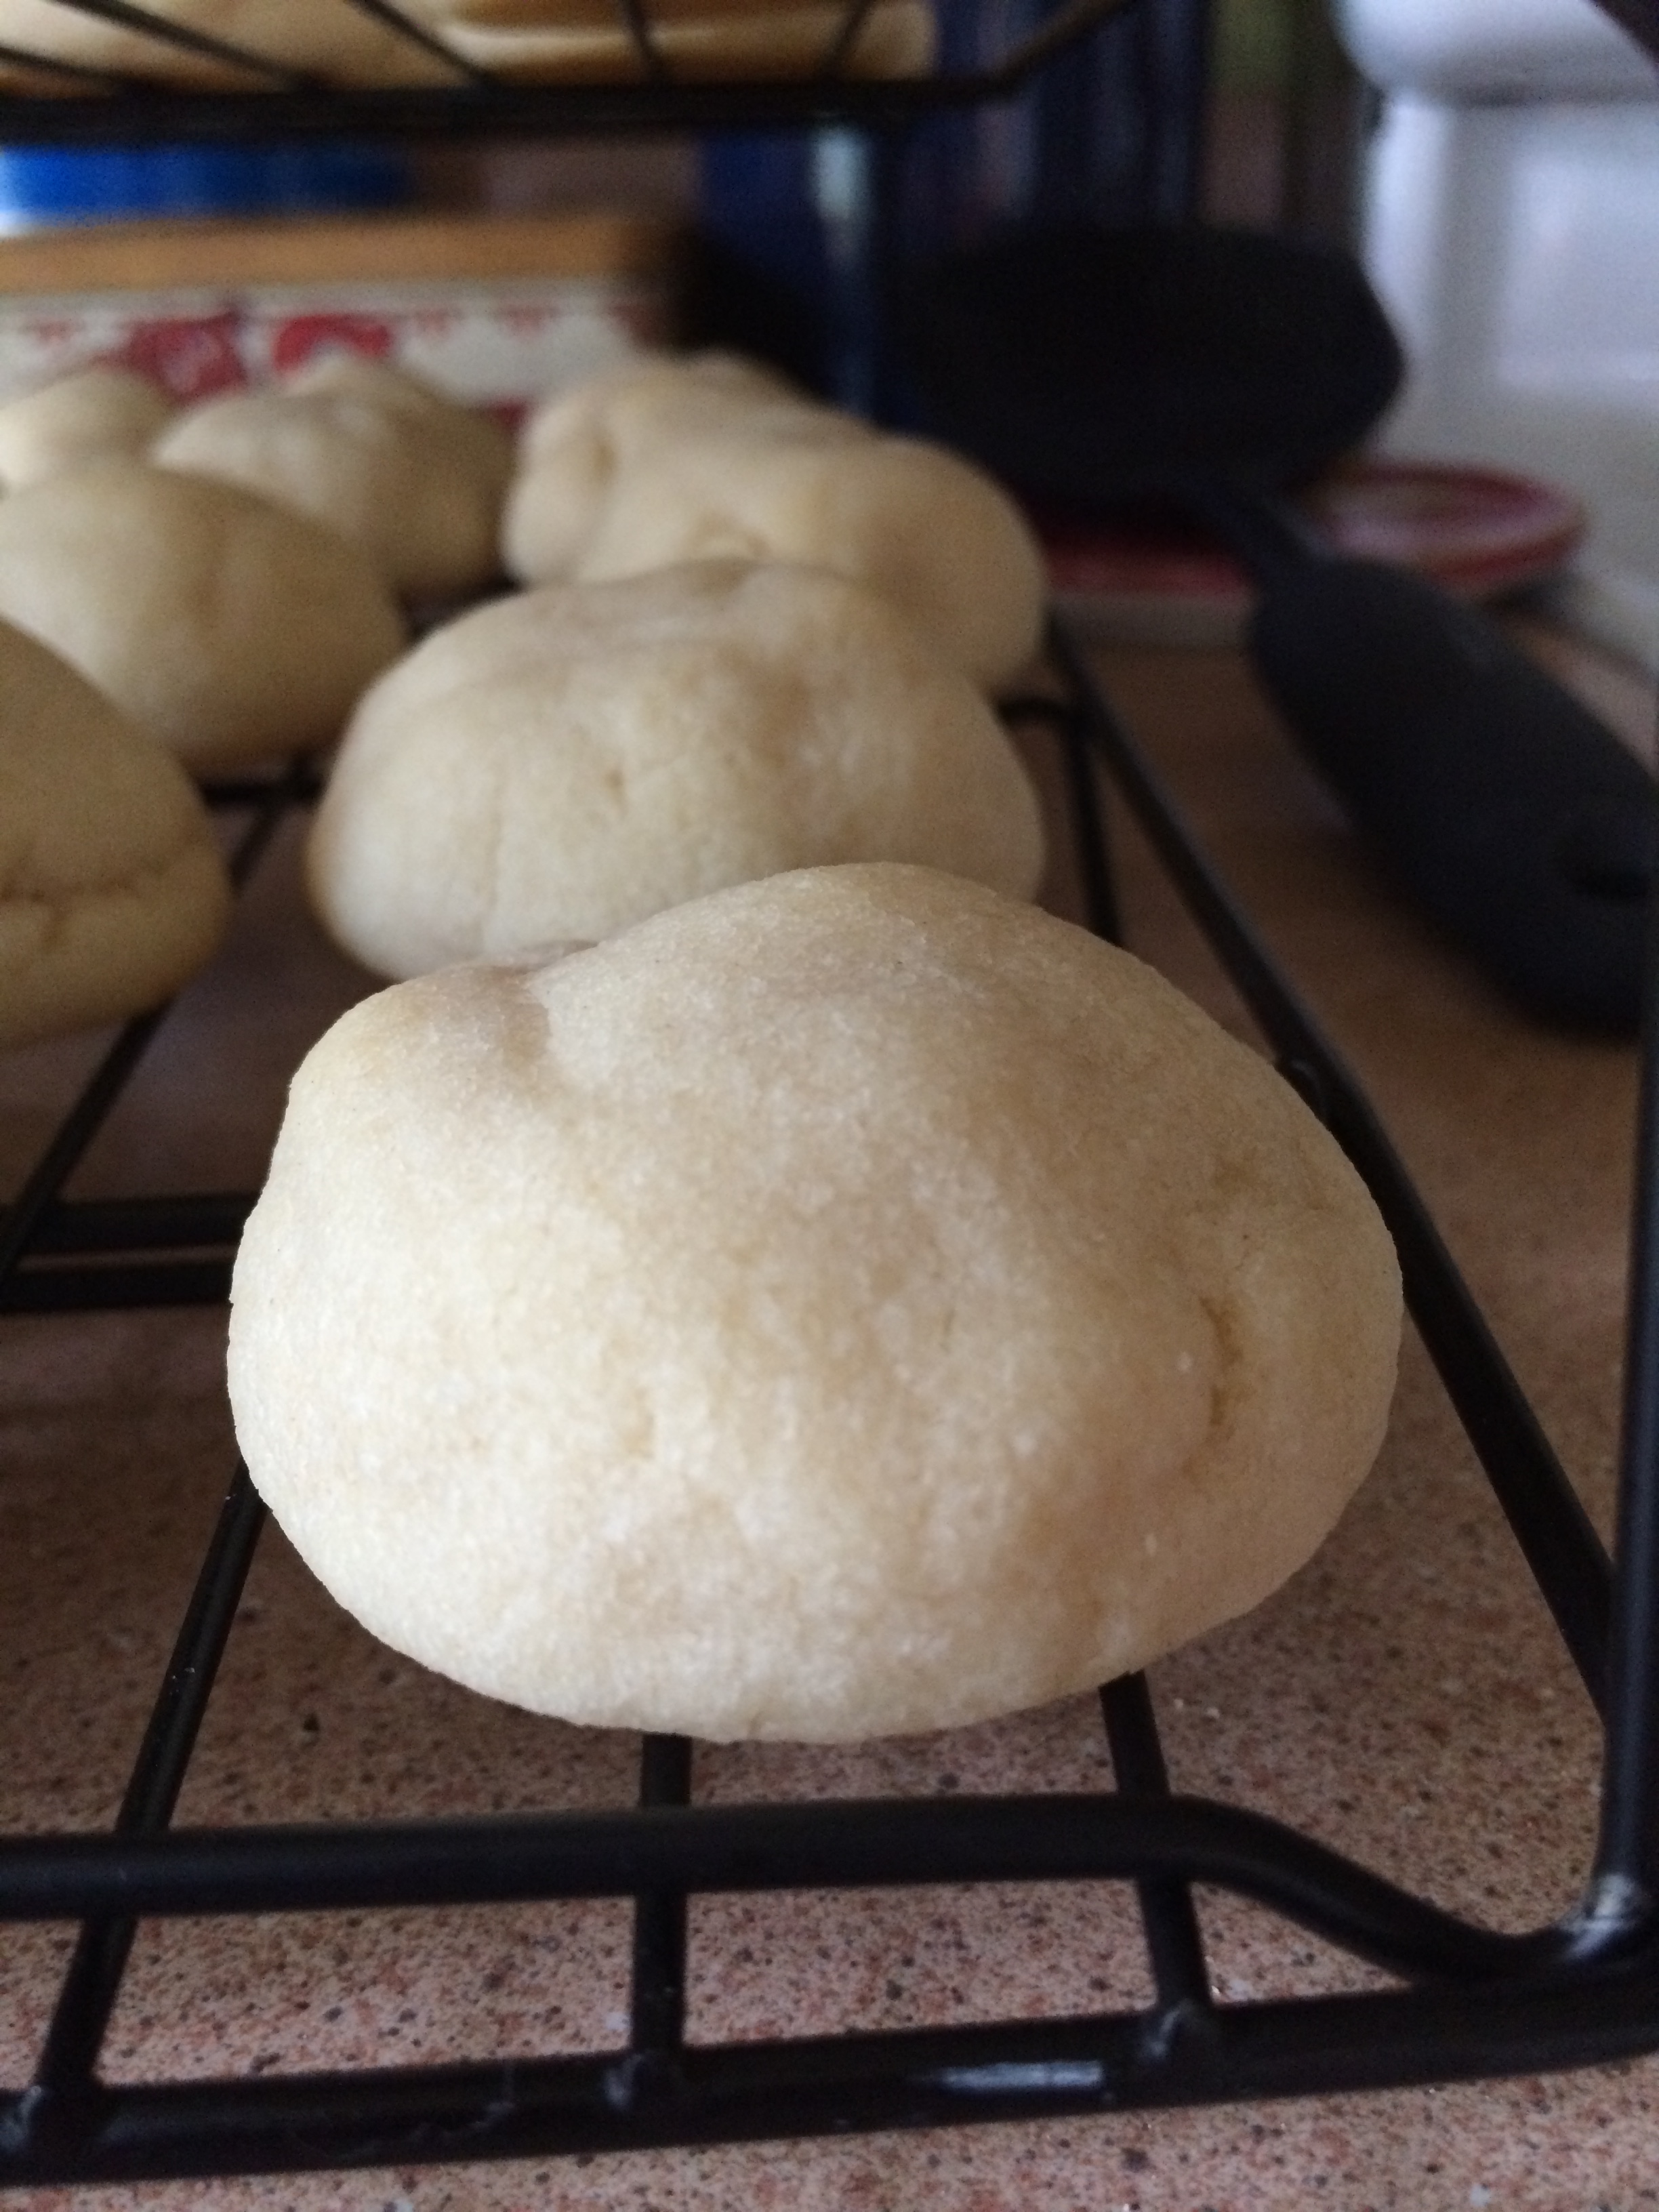
Preheat oven to 400 degrees. Line muffin tins with paper liners; my recipe yielded 20 muffins.

Make the streusel crunch: in a small bowl, combine flour, brown sugar, and cinnamon. Cut in butter, or rub in with your hands, until the mixture comes together; the original recipe said this would go crumb-like, but that didn’t happen to mine. I had to pull it apart and place drops of it on the muffins, rather than sprinkling it.

Make the muffins: in a large bowl, combine flour, sugar, brown sugar, baking powder, cinnamon, and salt. Make a well in the center.

In a large glass measuring cup, combine milk, melted butter, vanilla, and egg and whisk to combine. Pour into the well in the dry mixture and mix until just combined and no dry streaks remain.

Using a 2-inch cookie scoop, drop scoops of dough into prepared muffin tins. If using, place drops of streusel crunch on tops of muffins.

Bake for 18-2o minutes, until a cake tester comes out clean. Remove from oven and immediately remove muffins to a wire rack to cool completely if glazing.

Make the glaze: in a small bowl, combine powdered sugar and cinnamon, stirring to combine. Add vanilla extract, then add water about 1/4 teaspoon at a time to reach a drizzly consistency.

Drizzle over cooled muffins; I placed my drizzle in a small zip-top bag and piped it on, but ypu could just drizzle it with a spoon.


Chocolate Chip Muffins

chochipmuffinI know you’ve had this experience: you select a chocolate chip muffin from the bakery or coffee shop, expecting to tuck in to some chocolate chippy goodness. You break it open and, despite the presence of a few well-placed chips on top, one of two things happens. One: the inside of the muffin contains exactly three chocolate chips and no more, despite being the size of a softball. Two: the inside of the muffin has vaguely chocolate-colored streaks, as if the chips up and left during baking.

For these reasons, I’ve never made chocolate chip muffins until now, suspecting that most recipes would lack in both technique and ingredients. Fortunately, I found a great recipe on Taste of Home and adapted it to add some vanilla extract and to use full-sized milk chocolate chips instead of mini semi-sweet ones.

The results are delicious, if I do say so myself. Next time, I might add a chocolate drizzle on top instead of the sugar, or add some toasted pecans into the batter. Stay tuned!

Ingredients

  • 2 cups flour
  • 1/2 cup sugar
  • 1 tablespoon baking powder
  • 1/2 teaspoon salt
  • 1 egg
  • 3/4 cup milk
  • 1/3 cup vegetable oil
  • 1 1/2 teaspoons vanilla extract
  • 1/2 cup regular-sized milk chocolate chips
  • Sugar for sprinkling on muffin tops

Preparation

Preheat oven to 400 degrees. Line muffin tins with paper liners; my batch yielded 18 muffins.

In a large bowl, combine flour, sugar, baking powder, and salt. Make a well in the center.

In a large glass measuring cup, combine egg, milk, vegetable oil, and vanilla; beat to combine, then pour all at once into the well in the dry mixture. Mix until just combined and no dry streaks remain; stir in chocolate chips.

Using a 2-inch cookie scoop, drop scoops of dough into prepared muffin tins. Sprinkle with sugar if desired.

Bake 16-20 minutes, until tops are just golden brown and a cake tester comes out clean.

Immediately remove from muffin tins to cool completely on a wire rack.

Vanilla Whoopie Pies

vanilla whoopieThe whoopie pie comes in many varieties. I wanted to make classic chocolate cake/vanilla filling whoopies today, but I lacked buttermilk and didn’t think a sour milk substitution would do the trick. And so, I opted for a reverse on the classic: vanilla cake/chocolate filling whoopies.  (And how fun is it to say whoopie pie, by the way? A lot of fun.)

The vanilla cake part of this recipe is an adaptation from King Arthur Flour’s Double-Vanilla Whoopie Pie, and the chocolate filling is slightly adapted from a version I used in my homemade fudge rounds. I’ll admit: the flavors need a bit of tweaking, and next time I’ll probably add some more vanilla to both, and I’ll likely add more cocoa powder for the filling to ramp up the chocolateyness.

Ingredients

Vanilla Cakes

  • 1 cup sugar
  • 11 tablespoons butter, at room temperature
  • 2 teaspoons baking powder
  • 1 teaspoon salt
  • 1 tablespoon vanilla extract
  • 1/2 teaspoon almond extract
  • 2 eggs
  • 3 cups flour
  • 2/3 cup milk

Chocolate filling

  • 1/2 cup shortening
  • 1/2 cup salted butter, softened
  • 1 1/2 teaspoons vanilla extract
  • 1/2 teaspoon almond extract
  • 1/4 cup cocoa powder
  • 3 to 3 1/2 cups powdered sugar

Preparation

Preheat oven to 400 degrees. Line three baking sheets with parchment paper.

In a mixing bowl, cream together sugar and butter for about 2-3 minutes, until very light and fluffy.

Add baking powder, salt, vanilla extract, and almond extract, and beat well.

Add eggs, one at a time, beating well and scraping the bowl between each.

Add flour and milk alternatively, beginning and ending with the flour and mixing until batter is just combined. Batter will be thick and fluffy.

Using a 2-inch cookie scoop, scoop dough onto prepared sheets, placing about 2 inches apart; you should have 6 scoops on each sheet.

Bake for 8-9 minutes, until edges are set and tops are just slightly springy. Remove from oven and cool on baking sheets for a few minutes before removing to a wire rack to cool completely.

To make the filling, beat shortening and butter on medium speed for about 2 minutes. Add vanilla and almond extracts and beat until combined.

Add cocoa powder and 1 cup powdered sugar and beat until combined. Slowly add 2 additional cups powdered sugar, about 1/2 cup at a time, beating well between each addition. Beat on medium speed for about 2 minutes; if your filling is thin, add another 1/2 cup powdered sugar and beat again until the consistency is fluffy.

To fill, flip cakes over and, using a 1-inch cookie scoop, drop scoops of filling onto half of the cakes. Spread with an offset spatula and top with another cake.

Wrap whoopie pies in plastic wrap and store in an airtight container at room temperature. You could probably refrigerate these, but they might dry out a bit.

Baseball Sugar Cut-Outs

baseballsOnce upon a time, I loathed making sugar cookies. I had a sketchy recipe that never seemed to come together and make for easy rolling, frosting them could take a while depending on the shape, and in the end, they just never seemed to be worth the trouble.

One autumn in DC, I discovered a new recipe, then added a few extra teaspoons of vanilla. From that dough, I created a platter of fall-themed treats – turkeys (complete with sprinkled-on plumage), acorns, pumpkins, and colorful leaves – and took it to my Aunt Liz’s house for Thanksgiving dinner. It was a huge hit, to say the least.

Since then, I’ve used that same recipe to make treats for many seasons and reasons, including a fun batch of steamed crab cut-outs that my cousin-in-law Robb absolutely loved. Now, sugar cut-outs are among my favorite cookies to make.

These baseballs are for my nephew Roman, who turns 8 this week. Happy birthday, kiddo.

You will need:

Preparation

Bake cookies and allow them to cool completely before frosting.

Prepare frosting, reserving about 1/4 for red stitch details. I use flavorless red gel food coloring and added about 1/4 teaspoon to achieve a dark red.

Frost cookies with the white frosting, smoothing out each as much as you can.

Fit a pastry bag with a small plain tip. Pipe curved lines first, then add stitch details. Allow frosting to set before storing; store cookies between layers of waxed paper in an airtight container for up to three days.


Chocolate Nutmeg Donuts

chocolatenutmegdonutsA donut for dessert? Why not?

I wonder who decided which treats went with, or after, which meals. What makes a donut, croissant, or coffee cake more appropriate for breakfast than dessert, and a cupcake, or a slice of pie, more appropriate for dessert than breakfast? Not that I’m advocating eating cupcakes for breakfast…although if the truth be told, I did have more than one breakfast of Little Debbie’s Swiss Cake Rolls in college.

Tonight, I wanted a chocolate donut for dessert, and not the kind you get at a chain. I wanted a cakey, tender, lightly glazed creation of chocolate and the slightest hint of spice. Nutmeg is a key ingredient in achieving that bakery donut flavor; without nutmeg, these donuts would taste more like chocolate cake than chocolate donuts.

The serving of Cool Whip in the photo here is optional, of course…but this was my dessert tonight. And it was delicious.

Ingredients

For the donuts:

  • 1 cup flour
  • 1/4 cup cocoa powder
  • 1/2 teaspoon baking soda
  • 1/4 teaspoon salt
  • 1/4 teaspoon nutmeg
  • 1/2 cup packed light brown sugar
  • 1/2 cup sour milk (see note below)
  • 1 egg
  • 4 tablespoons unsalted butter, melted
  • 1 teaspoon vanilla

For the glaze:

  • 1 cup powdered sugar
  • 3 teaspoons milk
  • 1 teaspoon vanilla

Preparation 

Preheat oven to 325 degrees. Spray a 6-well donut pan with baking spray.

Make sour milk; place 1/2 tablespoon white vinegar in a glass measuring cup. Add enough milk to equal 1/2 cup, then stir and let stand for 5 minutes.

In a large bowl, combine flour, cocoa powder, baking soda, salt, and nutmeg.

In a medium bowl, combine brown sugar, sour milk, egg, melted butter, and vanilla; stir until smooth, then add all at once to flour mixture. Stir until just combined and no dry streaks or large lumps remain.

Fill a piping bag or large zip-top bag with batter; pipe into wells, filling about 3/4 full.

Bake for 13-15 minutes; remove from oven and immediately remove donuts from wells. Cool on a wire rack before glazing.

To make the glaze, combine powdered sugar and milk, 1 teaspoon at a time, mixing until completely smooth. Add vanilla and stir well; you want a very thin glaze. Dip tops of donuts in glaze and allow to set before serving.

If you like, top donuts with a spoonful of whipped cream or other whipped topping just before serving.


Sundae Donuts

sundaedonutVanilla, chocolate, and sprinkles make me think of ice cream sundaes, so I’ve decided to call these sundae donuts. Their original recipe comes from Sally’s Baking Addiction, but I’ve included some extra vanilla in the donut batter.

And, now, for a bit of food history…several American towns claim to have invented the sundae, and each story centers around a local pharmacy with a soda fountain. Blue laws, which prohibited the sale of soda on Sundays (and people think Pennsylvania’s liquor laws are strange), apparently gave way to the serving of ice cream with syrup and other toppings like fruit and whipped cream. I’m not sure where sprinkles came on the scene, but they add a fun, crunchy texture to an otherwise smooth dish.

These donuts remind me a bit of a hot fudge sundae, and you could leave them sprinkle-free if you like, or add sprinkles of other shapes and colors for holidays. Whatever you do, don’t skip the nutmeg in the donut batter – while it might seem like a strong spice, it’s necessary to achieve that classic, donut-from-the-bakery taste. Just a few notes about some of the ingredients: I used whole milk, but skim, 1%, 2%, or almond milk would be fine; I used vanilla Greek yogurt, but any plain or vanilla yogurt – regular or Greek – that you have on hand would work. Also, my sprinkles are the Betty Crocker Parlor Perfect ice cream topping variety, which can be found with the ice cream toppings at your local store.

Ingredients

For the donuts

  • 1 cup flour
  • 1 teaspoon baking powder
  • 1/4 teaspoon baking soda
  • 1/4 teaspoon nutmeg
  • 1/3 cup light brown sugar
  • 1 egg
  • 1/4 cup milk
  • 1/4 cup vanilla Greek yogurt
  • 2 tablespoons melted butter
  • 2 teaspoons vanilla

For the glaze

  • 1/2 cup semi-sweet chocolate chips
  • 2 tablespoons light corn syrup
  • 2 tablespoons butter
  • 2 teaspoons water
  • rainbow sprinkles

Preparation

Preheat oven to 350 degrees. Spray two 6-count donut pans with cooking spray; this recipe yielded 8 donuts for me.

In a large bowl, whisk together flour, baking powder, baking soda, and nutmeg; set asite.

In a medium bowl or large glass measuring cup, whisk together brown sugar, egg, milk, and yogurt until smooth. Add melted butter and vanilla and whisk to combine. Pour wet ingredients into dry mixture and mix until just combined; you don’t want to over-mix your batter.

Spoon the batter into a large zip-top bag or pastry bag and pipe into wells, filling about 2/3 full.

Bake for 9-10 minutes, until edges are golden brown. Remove from oven and let cool in the pans for about 1 minute, then gently lift each donut out (I use a small offset spatula) and transfer to a wire rack to cool before glazing.

For the glaze, place chocolate chips, corn syrup, butter, and water in a medium-sized, microwave-safe bowl. Microwave at 20-second intervals until chocolate and butter melt, stirring between each, until the mixture is completely smooth. My glaze took about 1 minute to reach the right consistency.

Place your rainbow sprinkles in a small bowl; dip tops of donuts into the chocolate glaze, then into the sprinkles, coating completely.

Donuts are best eaten the day they’re made. If you can resist, store them in an airtight container at room temperature for up to two days.