“Healthy” Peanut Butter Swirl Brownies

pb swirl browniesCan a “healthy” version of a dessert actually taste as good as the regular, full-sugar, full-fat version? This is a question I’ve pondered for some time, fascinated by the employment of applesauce and stevia and wheat flour in a variety of treats in lieu of higher sugar/fat/carbohydrate ingredients. For the most part, I envisioned healthy versions of desserts to be unfulfilling, tasting vaguely like their regular counterparts, but not quite as good.

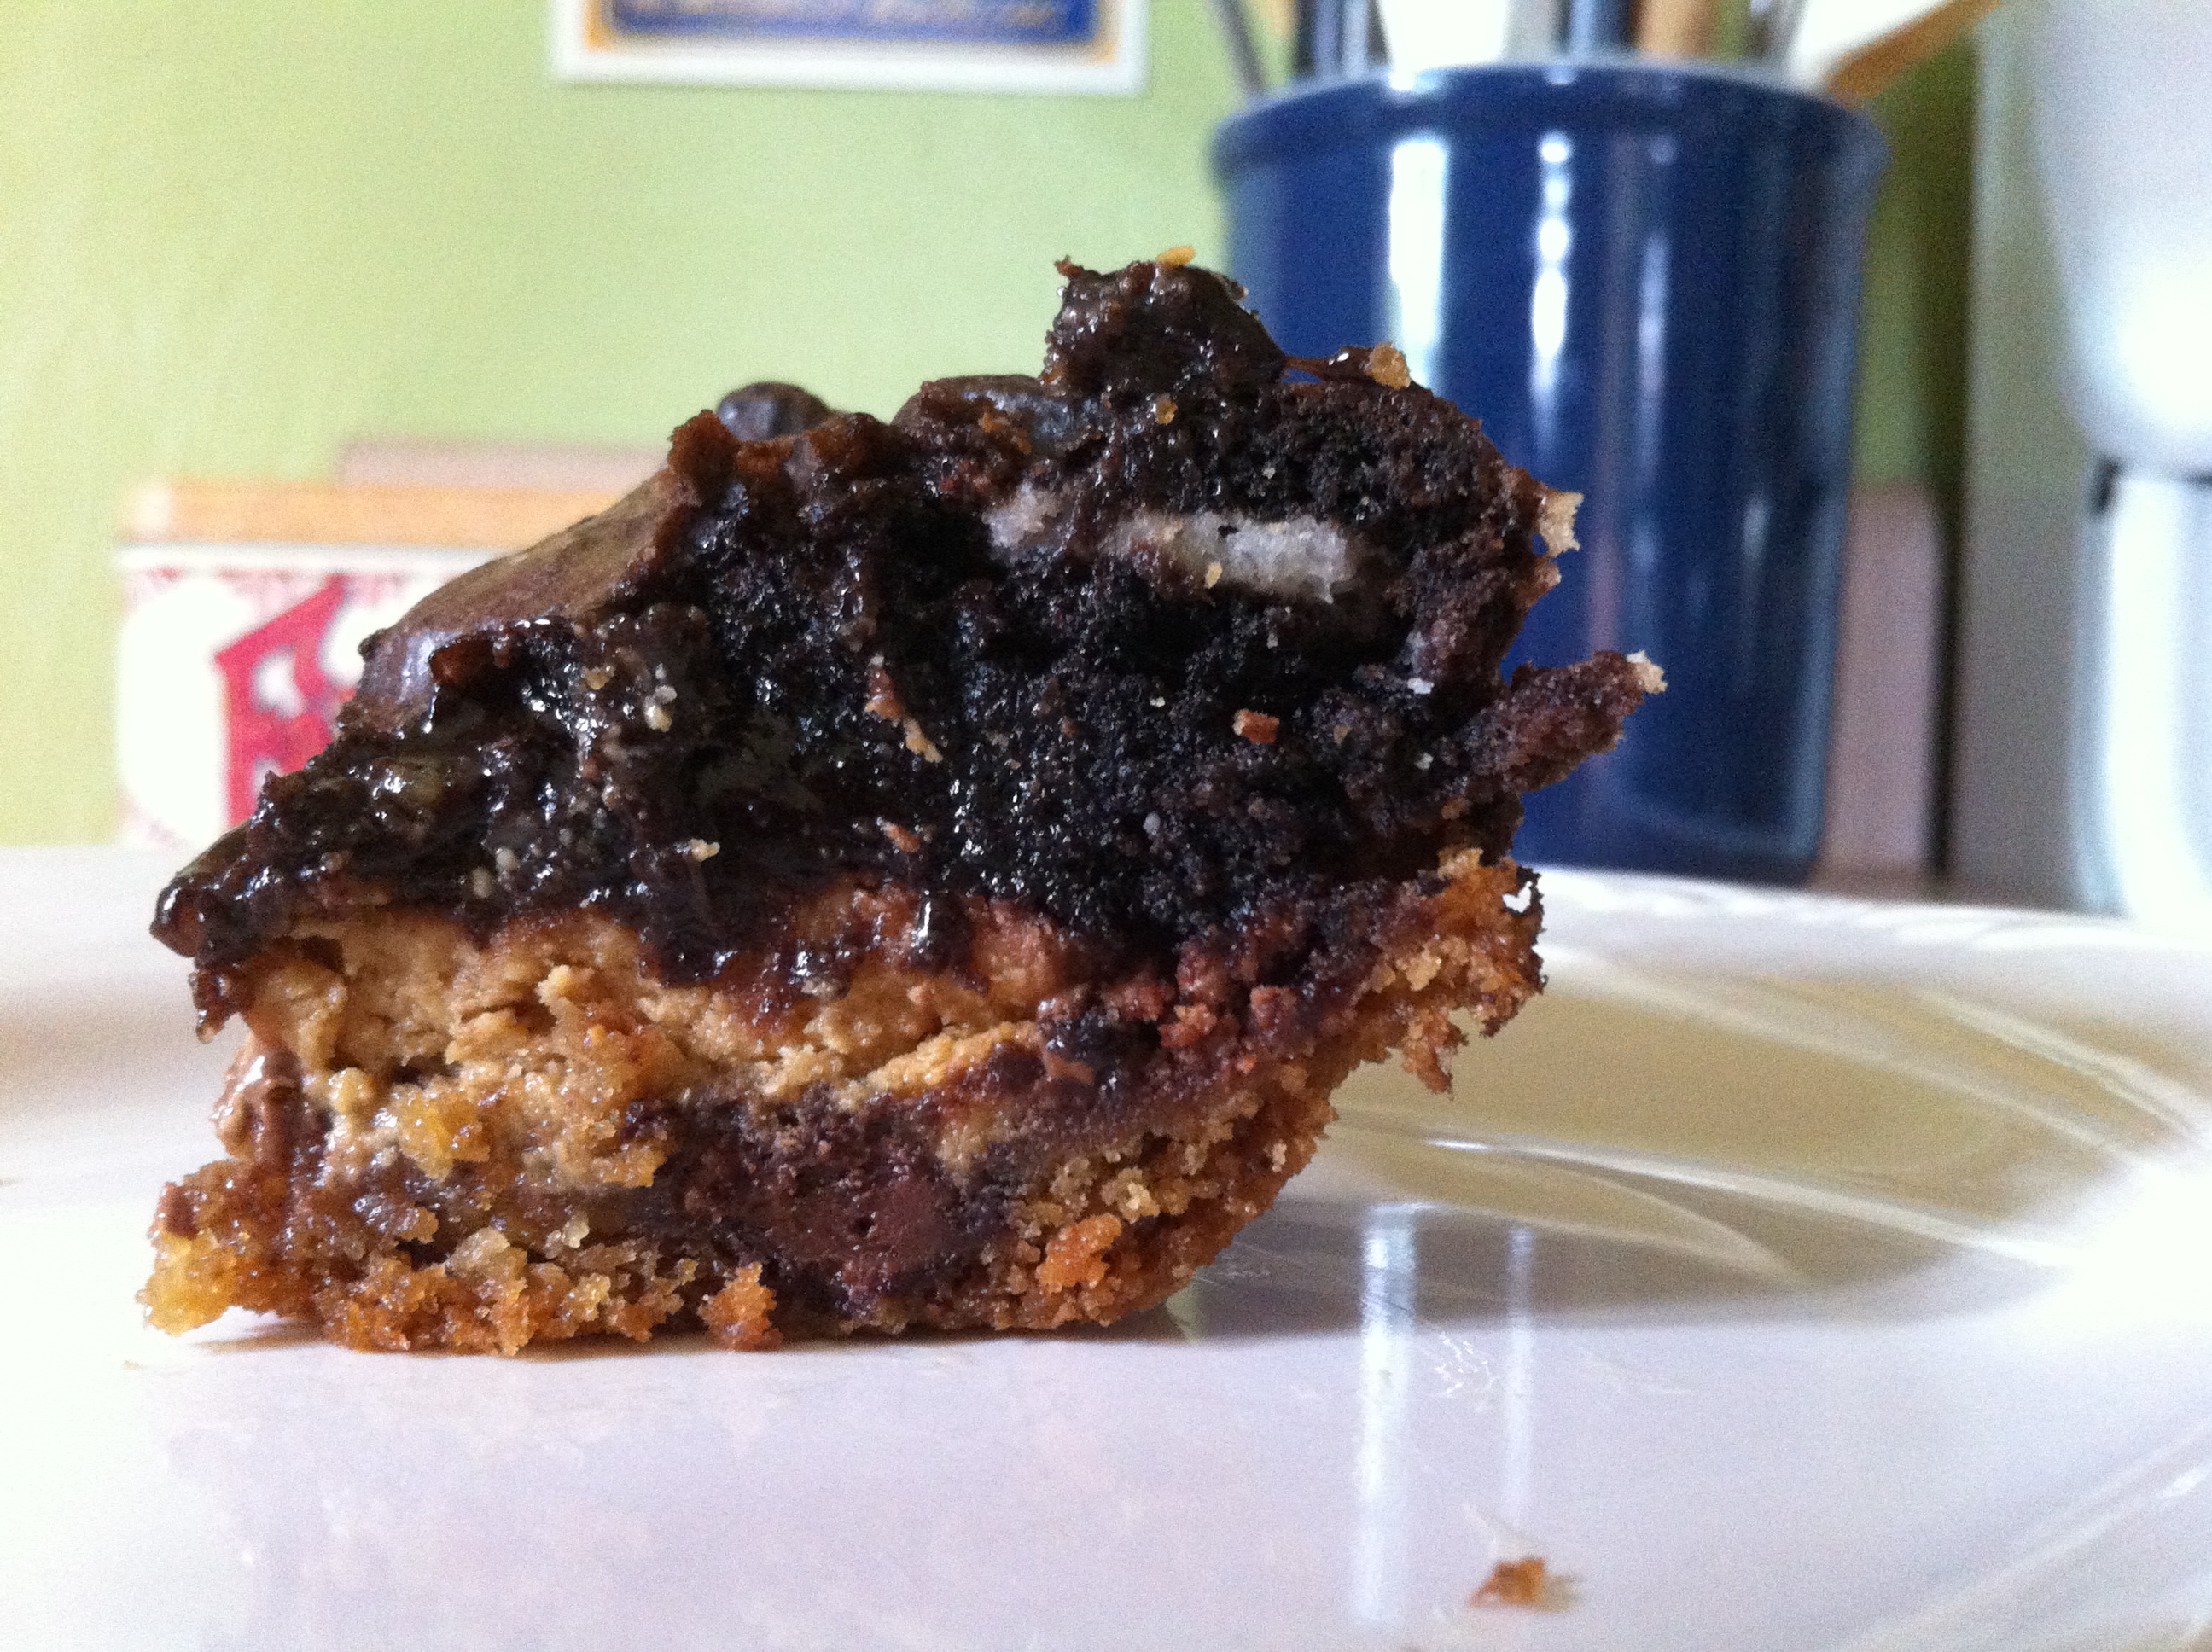
My boss asked if I’d be interested in baking this Weight Watchers peanut butter swirl brownie, as many of us in the office have recently recommitted ourselves to healthier habits. I was more than happy to test this out, to see if a lower sugar, reduced-fat brownie could live up to my advanced sweet tooth’s expectations.

This recipe is very easy to make and put together, so don’t be intimidated by ingredients like apple butter and egg substitute. You’ll find other uses for them (stay tuned, as I’ll be searching for ways to use up apple butter in the coming days) and they behave pretty much exactly like the full fat, full sugar ingredients they’re replacing. The brownies were a big hit at the office today, and I have to admit, they actually taste like real brownies.

Peanut Butter Swirl

Ingredients

  • 6 ounces Neufchatel cheese
  • 3/4 cup reduced fat peanut butter
  • 1/4 cup fat-free egg substitute
  • 3 tablespoons half and half

Preparation

Combine Neufchatel and peanut butter in a mixing bowl and beat until well-combined.

Add egg substitute and beat until well-combined.

Add half and half and beat until well-combined and fluffy. You want a easily-spreadable texture.

Set aside while you prepare the brownie mix.

Brownies

Ingredients

  • 1 box dark chocolate brownie mix (or regular mix if you prefer)
  • 1/4 cup vegetable oil
  • 1/4 cup apple butter
  • 1/4 cup water
  • 1/3 cup fat-free egg substitute

Preparation

Preheat oven to 350 degrees.

Spray a 13 x 9 pan with cooking spray.

Spread half of the brownie mix in the bottom of the pan.

Top with dollops of about half of the peanut butter swirl mixture; using a spatula or knife, swirl to spread peanut butter mixture over the brownie mix.

Spread the remaining half of the brownie mix over the top, then follow with additional peanut butter swirl mix in dollops. Swirl peanut butter over the brownie mix.

Bake for 30-32 minutes, until a cake tester comes out clean. My brownies were slightly more fudgy in the middle than I would have liked, and I baked for 30 minutes, but I’d recommend adding a few extra minutes for a firmer center.

Cool completely; cut into 32 squares. One square is equal to 4 Weight Watchers points, for those participating in the program.

Chocolate Peanut Butter Whoopie Pies

choc pb whoopies If ever there was a treat worth fighting over, it would be the whoopie pie. Pennsylvania, Maine, and New Hampshire all claim that whoopie pies were invented in their states, though some food historians believe that it was in fact the Amish in Pennsylvania, who migrated to other places, who pioneered these amazing cookies.

Pittsburghers call these treats gobs, but I think that whoopie pie is an infinitely happier term. Traditional whoopie pies are tender, cakey chocolate cookies with a thick layer of fluffy white frosting in between, but they’ve been adapted to incorporate an array of flavors, like pumpkin or lemon or vanilla. This recipe is adapted from the Martha Stewart Cookie Book recipe; I am pleased to say that it is delicious, among my favorite things that I’ve made lately.

Just a note: the peanut butter filling is really the key to this cookie. If it’s too sweet, the entire cookie will be overwhelming, so it’s important to have the right balance of peanut butter flavor, and this is why I suggest adding additional peanut butter to taste as you go along. I added about two additional tablespoons to the 3/4 cup of peanut butter to achieve the flavor I wanted.

Chocolate Cookies

Ingredients

  • 1 3/4 cups flour
  • 3/4 cup unsweetened cocoa powder
  • 1/2 tablespoon baking soda
  • 1/2 teaspoon baking powder
  • 1/2 teaspoon salt
  • 8 tablespoons butter, softened
  • 1 cup sugar
  • 1 egg
  • 1 cup buttermilk
  • 1 teaspoon vanilla

Preparation

Preheat oven to 400 degrees.

Line several baking sheets with parchment paper.

In a medium bowl, sift together flour, cocoa powder, baking soda, baking powder, and salt; set aside.

In a mixing bowl, cream together butter and sugar until very light and fluffy.

Add egg, buttermilk, and vanilla and mix well.

With the mixer on low, slowly add the flour mixture and beat until combined.

Using a one-inch cookie scoop, drop scoops of dough onto prepared sheets at least 2 inches apart.

Bake for 8 minutes, rotating baking sheets halfway through to ensure even baking.

Cool on wire racks completely before filling.

Peanut Butter Filling

Ingredients

  • 8 tablespoons butter, softened
  • 3/4 cup peanut butter, plus additional tablespoons to taste
  • 1 cup powdered sugar

Preparation

In a mixing bowl, beat together butter and 3/4 cup peanut butter.

Add powdered sugar, 1/4 cup at a time, beating until smooth.

Taste the filling and add additional peanut butter if desired.

To assemble cookies: using a one-inch cookie scoop, drop scoops of filling onto the flat sides of half of the cookies, smooth with a knife, then top with another cookie.

Store in the refrigerator for up to 3 days.


Lemon Raspberry Whoopie Pies

lemon raspberry whoopiesSome of my fondest memories from our time in DC involve my dear friend Kelly. If I had a nickel for every time she and I went to Starbucks together, neither one of us would have to work anymore.

When we met, Kelly and I were 20-somethings working our fingers to the bone to establish ourselves professionally. During one lunchtime excursion, as a wedge of lemon sat on one of our plates, we discussed the challenges of working for a newly-merged nonprofit where the processes, procedures, lines of communication, and chains of command were still in development. We decided that it was sort of like being told to take care of a lemon, making that lemon into lemonade, then being told by a different supervisor that we should have made lemon pie, while another person wanted us to make lemon cookies. While this story is likely not funny to anyone but Kelly and me, we continue to reference it to this day.

Kelly has worked overseas for the past few years, and I’ve certainly missed her. Yesterday, during her visit to Pittsburgh, she and I made these lemon raspberry whoopie pies, which are admittedly more like lemon raspberry sandwich cookies. Either way, they involve lemons…in the best of senses.

Lemon Cookies

Ingredients

  • 1 1/2 cups flour
  • 1/2 teaspoon baking powder
  • 1/4 teaspoon baking soda
  • 1/4 teaspoon salt
  • 6 tablespoons butter, softened
  • 1 cup sugar
  • 1 tablespoon lemon zest
  • 1 egg
  • 1 tablespoon lemon juice
  • 1 teaspoon vanilla extract
  • 1/2 cup buttermilk

Preparation

Preheat oven to 350 degrees.

Line three baking sheets with parchment paper.

In a medium bowl, sift together flour, baking powder, baking soda, and salt; set aside.

In a mixing bowl, cream together butter, sugar, and lemon zest until very light and fluffy.

Add egg, lemon juice, and vanilla and beat for 1 minute.

Add half the flour mix, then buttermilk, then remaining flour mix, beating until just combined after each addition.

Using a two-inch cookie scoop, drop scoops of dough at least 2 inches apart on the cookie sheets – they will spread when baking.

Bake for 11-13 minutes, until cookies are set.

Allow to cool completely before filling and assembling.

Raspberry Filling

Ingredients

  • 8 tablespoons butter, softened
  • 1 7-ounce jar marshmallow fluff
  • 1/4 cup raspberry jam
  • 1/2 teaspoon vanilla extract
  • 1/2 teaspoon raspberry extract
  • 1 to 1 1/3 cups powdered sugar

Preparation

Combine butter, marshmallow fluff, jam, vanilla extract, raspberry extract, and 1 cup powdered sugar in a mixing bowl and beat well. Add another 1/3 cup powdered sugar if your mixture is too thin; you want an easily-spreadable consistency but not one that is too runny.

To assemble cookies: using a one-inch cookie scoop, scoop filling onto one half of each cookie and spread with a knife, leaving about 1/4 inch around the edges. Top with another cookie; filling will spread slightly. Store in the refrigerator.


Fab Four Bars

fab 4 barsChocolate chip cookies,  Reese’s Peanut Butter Cups, Double Stuf Oreos, and dark chocolate brownies are among my favorites. But all four, in the same treat? Now that is fabulous.

One of the gals in my office made these recently and proclaimed them to be amazing, so I thought I’d give them a try. You could certainly make the cookie dough and brownie batter from scratch, but for convenience’s sake I chose to experiment with the store-bought versions.

A few suggestions: you certainly need your cookie dough to be pliable, so let it sit out on the counter top for about 10 minutes, then dust your hands with flour before you press it into the pan. While I baked my Fab Fours for about 40 minutes and the brownies were done on the pan’s edges, about one inch in from the edges they were gooey as could be. If you like gooey brownies, that’s probably fine, but you need to be careful about proper cooking times since brownie batter contains raw egg and raw egg can be dangerous. I might let mine bake another 5 minutes or so next time.

Trust me: you want to cut these into small squares, not huge slabs. They’re incredibly rich so you really only need a small piece to get the full effect. Enjoy!

Ingredients

  • Two 16-ounce tubes refrigerated chocolate chip cookie dough
  • 16 regular-sized Reese’s Peanut Butter Cups
  • 16 Double Stuf Oreos, chopped into large chunks
  • 1 box dark chocolate brownie mix

Preparation

Preheat oven to 350 degrees.

Line a 9 x 13 glass baking dish with parchment paper, allowing the paper to extend over on all four sides.

Allow cookie dough to stand at room temperature for about 10 minutes, then press it into the bottom of the parchment-lined pan.

Place peanut butter cups top-side down on the cookie dough, spacing evenly.

Sprinkle Oreo chunks over/around the peanut butter cups.

Pour brownie batter over the top and smooth with a spatula as much as possible.

Bake for at least 40 minutes; cool in pan on a wire rack.

Peach Crisp

peach pecan crispI suspect that crisps, like cobblers, were born of necessity. Some time ago, a thrifty and creative baker probably had some fruit that had gotten soft and rather than toss it out to the birds in her backyard, she decided to whip it up into a tasty dessert. I admire such resourcefulness, being a thrifty gal myself.

Crisps are easy to make and quick to bake, requiring basic pantry staples and whatever fruit is in season.This crisp is made from farm-fresh white peaches that were just beginning to get mushy in the heat of my kitchen, but you could substitute (or add) apples, apricots, or pears. You could also use frozen, rather than fresh fruit, if you let it thaw first and bake it for 40 minutes rather than 30.

This recipe bakes in an 8×8 glass dish, but you could increase the quantities to bake it in a larger dish if you need to serve a crowd. A classic accompaniment would be vanilla ice cream, but I might serve it with a berry ice cream for an interesting twist.

Ingredients

  • About 2 1/2 cups sliced peaches
  • 2 tablespoons sugar
  • 1/4 cup rolled oats
  • 1/4 cup packed brown sugar
  • 2 tablespoons flour
  • 1/4 teaspoon cinnamon
  • 1/4 teaspoon nutmeg
  • 2 tablespoons butter, cut into cubes
  • 1/4 cup chopped pecans

Preparation

Preheat oven to 375 degrees.

Place peaches in the bottom of an 8×8 baking dish; add sugar and stir to combine.

In a medium bowl, combine oats, brown sugar, flour, cinnamon, sugar, and nutmeg.

Add butter and rub it into the flour mixture until the mixture resembles coarse crumbs.

Add pecans and toss to combine, then sprinkle the topping over the peaches.

Bake for 30 minutes, until top is just golden brown.

Cool completely, or serve warm.

Pound Cake

pound cakeThe Christmas before Mike and I got married, to help me prepare for married lady-ness, my mom gave me the Better Homes & Gardens New Cookbook. Its red and white plaid cover shelters a binder of classic BH&G recipes—70 years worth, in fact. It is the most useful book that I possess, or have ever read.

A treasure chest of middle-class American cuisine, this cookbook features information about weight and measure conversions, emergency substitutions, the different types of pasta, the merits of butter over margarine in baked goods, a glossary of common cooking terms, and diagrams of the different cuts of meat. Unlike some of the other cookbooks I’ve used, the BH&G has never failed me. Every single recipe I’ve made from it—and believe me, I’ve nearly exhausted the cookie and cake chapters—turns out exactly as expected. This speaks volumes for BH&G’s test kitchens, and makes things so much easier for self-taught cooks and bakers.

This pound cake recipe is a slight adaptation from the one in the BH&G (I tripled the quantity of vanilla) and yields a sturdy but tender texture that would be an ideal base for a trifle. It could be accessorized by any number of glazes, though I highly recommend pairing this cake with whipped cream (or whipped topping, as is pictured above) and the summer fruit of your choice or a handful of chocolate chips.

Ingredients

  • 8 tablespoons butter
  • 3 eggs
  • 1/2 cup sour cream
  • 1 1/2 cups flour
  • 1/4 teaspoon baking powder
  • 1/8 teaspoon baking soda
  • 1 cup sugar
  • 1 1/2 teaspoons vanilla extract

Preparation

Let butter, eggs, and sour cream stand at room temperature for 30 minutes.

Preheat oven to 325 degrees.

Grease and lightly flour an 8x4x2 loaf pan.

In a small bowl, combine flour, baking soda, and baking powder; set aside.

In a mixing bowl, beat butter on medium speed for about 30 seconds. Gradually add sugar and continue beating on medium or medium-high speed until very light and fluffy, about 7 minutes.

Beat in vanilla.

Add eggs, one at a time, and beat for 1 minute after each; scrape the bowl well before adding your next egg.

Add flour mixture and sour cream alternatively, beginning and ending with the flour mixture, beating after each until ingredients are just combined.

Pour batter into loaf pan and bake for 60-65 minutes, until a cake tester comes out clean.

Cool completely before serving.


Peanut Butter Muffins

pb muffinsHappy Canada Day! Today, I’d like to celebrate Canadian Marcellus Gilmore Edson, pioneer of modern peanut butter, as I consider him to be a genius on par with Albert Einstein and John Nash.

Whatever possessed Mr. Edson to mill roasted peanuts between sheets of heated metal is beyond me, but I’m certainly glad he did. Without him, we wouldn’t have peanut butter cookies, cakes, candies, muffins, pies…the list goes on.

This muffin recipe is very simple, yielding a subtle peanut butter flavor and smooth, moist texture. You could serve them with peanut butter (as I did in the photo above), but jelly, honey, or regular butter would also work well. The original recipe for these muffins called for brushing their tops with melted butter, then sprinkling them with cinnamon and sugar.

Ingredients

  • 2 cups flour
  • 1/2 cup sugar
  • 1 tablespoon baking powder
  • 1/2 teaspoon salt
  • 1/2 cup peanut butter
  • 2 tablespoons butter, cold, cut into pieces
  • 1 cup milk
  • 2 eggs

Preparation

Preheat oven to 400 degrees.

Line two muffin tins with paper liners; you will need 16.

In a large bowl, combine flour, sugar, baking powder, and salt.

Cut in peanut butter and butter until the mixture resembles coarse crumbs.

In a large measuring cup, combine milk and eggs and whisk together; add to crumb mixture and stir until just moistened; batter will be very lumpy.

Fill muffin cups about 3/4 full.

Bake for 15-17 minutes, until tops are just golden and a cake tester comes out clean.


Strawberry Lemonade Cupcakes

strawberry lemonade cupcakesToday, Soergel Orchards is having their annual Strawberry Festival. Beyond picking your own berries in their fields, you can get your face painted, go on a hay ride, jump in a bouncy castle, or in my case, enter a strawberry recipe contest.

How does the self-taught baker set out to win her first competition? She thinks about what she’d want to eat, and goes from there. This recipe is a confectionery interpretation of an iconic summer drink, and I’m proud to say that it won first place.


Strawberry Cupcakes with Lemon Curd Filling

Ingredients

  • 1 1/2 cups flour
  • 1 teaspoon baking powder
  • 1/4 teaspoon salt
  • 1 heaping cup strawberry puree
  • 1/4 cup whole milk, at room temperature
  • 1 teaspoon vanilla extract
  • Zest of 1 medium lemon
  • 8 tablespoons butter, at room temperature
  • 1 cup sugar
  • 1 large egg, at room temperature
  • 2 large egg whites, at room temperature
  • About 1/2 to 3/4 cup lemon curd, at room temperature

Preparation

Position a rack in the lower third of the oven and preheat oven to 350 degrees.

Line cupcake tins with 16 paper liners.

In a medium bowl, sift together flour, baking powder, and salt; set aside.

In a large glass measuring cup, whisk together strawberry puree, milk, vanilla, and lemon zest; set aside.

In a stand mixer fitted with the paddle attachment, beat butter on medium speed until light in color. Gradually add sugar and beat until fully incorporated; scrape down the sides of the bowl frequently. Add egg and egg whites, one at a time, and beat until well incorporated.

Add the flour mixture in thirds, alternating with the strawberry mixture, beginning and ending with the flour. Scrape down the sides of the bowl frequently and beat for 1-2 minutes after the last addition of flour to make sure all ingredients are well incorporated.

Scoop batter into prepared cupcake tins, filling about 2/3 full. Bake for 20-25 minutes, until a cake tester inserted into the center of a cupcake comes out clean; cool on a wire rack.

Using the small end of a melon baller, scoop out a small amount of cake from the center of each cupcake; fill with lemon curd (a half-teaspoon measuring spoon works well for filling if you don’t want to use a piping bag). Frost with fresh strawberry buttercream; store cupcakes in the refrigerator for up to 3 days.

Bring cupcakes to room temperature before serving.

Fresh Strawberry Buttercream

Ingredients

  • 8 tablespoons butter, at room temperature
  • 1 teaspoon fresh lemon juice
  • 2 cups powdered sugar, sifted
  • Scant ¼ cup strawberry puree

Preparation

In a stand mixer fitted with the paddle attachment, beat butter and lemon juice on low speed until smooth and creamy, about 2 minutes.

Gradually add powdered sugar, in half-cup increments, beating until fully incorporated.

Add strawberry puree, mixing until completely incorporated, about 1-2 minutes.

Using a small cookie scoop, scoop frosting onto tops of cupcakes and spread with an offset spatula. Frosting can be stored in an airtight container at room temperature for up to 2 days; refrigerate cupcakes after they are filled and frosted for up to 3 days.

Note: you can adjust the sweetness or tartness of this frosting very easily by adding more lemon juice or puree; you’ll just need to add more sifted powdered sugar so the frosting isn’t too runny.

Victory! Yep, that’s me with the star of today’s festival, The Strawberry.

strawberry festival


Oatmeal Craisin Chocolate Chip Cookies

oatmeal craisin dark chocAs far as chocolate goes, people tend to have strong opinions; many are milk chocolate loyalists, while others embrace the antioxidant properties of dark. I will eat any kind of chocolate except white, which I maintain is not really chocolate, given that its cocoa solids are removed during production. And, white chocolate just tastes strange to me. But anyway…

While I tend to prefer milk chocolate chips in classic chocolate chip cookies, there are many recipes in which semisweet, dark, or bittersweet chips are more appropriate in order to balance their accompanying flavors. To complement the tart dried cranberries in this recipe, I sought bittersweet chips, which are 60 percent cacao. Fortunately my local grocery store had Ghirardelli bittersweet chips, but both Hershey and Nestle make dark chocolate chips containing 53 percent cacao that could have worked just as well. A fun aspect of dark and bittersweet chocolate chips is that they’re larger than both milk and semisweet chips, which adds to their visual appeal.

Side note: as I’m not a dried fruit fan, Mike tasted these cookies and proclaimed them excellent, proving my theory about bittersweet chocolate chips balancing tart dried cranberries to be correct.

Ingredients

  • 8 tablespoons butter, softened
  • 2/3 cup packed light brown sugar
  • 1 egg
  • 1/2 teaspoon vanilla extract
  • 1/2 cup white flour
  • 1/4 cup whole wheat flour
  • 1/2 teaspoon baking soda
  • 1/2 teaspoon cinnamon
  • 1/4 teaspoon salt
  • 1 1/2 cup old-fashioned rolled oats
  • 3/4 cup dried cranberries
  • 3/4 cup bittersweet chocolate chips

Preparation

Preheat oven to 350 degrees.

Line three baking sheets with parchment paper.

In a small bowl, combine white flour, wheat flour, baking soda, cinnamon, and salt; mix and set aside.

In a mixing bowl, cream together butter, brown sugar, egg, and vanilla.

Stir in flour mixture until well combined.

Stir in oats; at this point, you may need to reach in and use your hands to thoroughly incorporate them.

Stir in dried cranberries and chocolate chips; again, you will likely need to use your hands.

Using a two-inch cookie scoop, generously scoop out dough and roll into balls, then flatten slightly. Place at least 2 inches apart on the prepared baking sheets.

Bake 11-12 minutes, until edges are golden but centers appear slightly under-baked. You do not want these cookies to appear totally baked when you pull them from the oven, as they will continue to bake for several minutes on the hot baking sheet once they’re out.

Let stand on cookie sheets for 5 minutes, then cool completely on a wire rack.


Planet Cupcakes

planet cupcakesNot everyone can eat chocolate, and my mom is one of those folks. And because our nephew Roman requested a chocolate cake with chocolate icing for his birthday party this past weekend, I needed an alternative for Grandma Genny, who was also in attendance. The result: planet-themed vanilla cupcakes.

The most time-consuming aspect of these cupcakes was, quite obviously, the decoration.You need a decent quantity of vanilla buttercream, lots of food coloring, and plenty of time. It was a lot of fun to interpret the planets in frosting, though; I used a few colors mixed together for Venus, Earth, and Jupiter and got out the pastry bag for the rings on Saturn and Uranus, and of course the Sun, which was my favorite (and, incidentally, was the cupcake that I ate).

For the Vanilla Cupcakes

Ingredients

  • 1 1/2 cups flour
  • 1 teaspoon baking powder
  • 1/2 teaspoon salt
  • 8 tablespoons butter, softened
  • 1 cup sugar
  • 3 eggs
  • 1 1/2 teaspoons vanilla extract
  • 3/4 cup milk

Preparation

Preheat the oven to 350 degrees.

Line a cupcake pan with paper liners; set aside.

In a medium bowl, sift together flour, baking powder, and salt.

In a mixing bowl, cream butter and sugar until light and fluffy.

Add eggs, one at a time; scrape down bowl, and beat in vanilla.

Add flour mixture and milk alternatively, beginning and ending with flour mixture.

Divide batter evenly among liners, about three-quarters full each.

Bake until golden and tops spring back to touch, 20-22 minutes.

Transfer pans to wire rack; cool completely before frosting.

For the Vanilla Buttercream Frosting

Ingredients

  • 1 cup butter, softened
  • 3 to 3 1/4 cups powdered sugar, sifted
  • 1/4 teaspoon salt
  • 1 to 2 tablespoons vanilla extract
  • 2 tablespoons milk
  • Both liquid and gel food coloring; I used yellow and blue liquid coloring and golden yellow, orange, red, royal blue, and violet gel coloring

Preparation

Place butter in a mixing bowl and beat for a few minutes using the paddle attachment.

Add 3 cups powdered sugar.  With your mixer on low, incorporate the powdered sugar into the butter.  (Hint: I find that placing a kitchen towel over the mixer during this stage prevents a powdered sugar blizzard.)

Increase speed and add 1 tablespoon vanilla, salt, and milk.

Beat for 3 minutes, then taste.  If you’d like a stronger vanilla flavor, add the second tablespoon of vanilla, along with the additional ¼ cup of powdered sugar.  Beat until combined and very smooth; you want an easily-spreadable consistency.

To Decorate

You’ll need just a few tablespoons of frosting for each cupcake, but I started out by tinting larger quantities in the colors I knew I’d need more of, like yellow and blue, then darkened them as I went along. Reserve as much un-tinted buttercream as you can so that you can lighten colors if you need to; I also used un-tinted frosting to pipe “Happy Birthday Roman” and some stars on Roman’s chocolate cake.

The Sun

Tint about four tablespoons of frosting using golden yellow gel food coloring. Fit an 8-inch pastry bag with a star tip and pipe lines radiating out from the center of the cupcake to cover the top, then pipe additional “rays” so that they stand up vertically from the surface of the cupcake.

Mercury

Tint about a half-cup of frosting using yellow liquid food coloring; you’ll just need a few drops to create the very pale yellow of Mercury. Frost the cupcake and create a smooth surface.

Venus

Tint a few tablespoons of frosting using orange gel food coloring; apply a thin layer of frosting, then add both yellow and un-tinted buttercream to create swirls.

Earth

Tint about a half-cup of frosting using blue liquid food coloring; you’ll just need a few drops to create a pale blue that you can use for Neptune. Remove a small portion of the light blue and tint it darker, using royal blue gel food coloring. Frost the cupcake using swirls of both blues and some white; add piped white “clouds” if you like.

Mars

Tint a few tablespoons of frosting using red gel food coloring. Frost the cupcake and create a smooth surface.

Jupiter

Using un-tinted, yellow, and orange frosting, frost the cupcake and create band-like effects with your spatula (or knife, whatever you’re using). Using a toothpick, dab some red frosting on to create the dust storm and drag the toothpick through the other color bands to create hints of red.

Saturn

Darken the orange frosting you used for Venus and frost the cupcake to create a smooth surface. Tint a very small amount of frosting violet using violet gel food coloring; fit an 8-inch pastry bag with a leaf tip and pipe very loose rings.

Uranus

Reserve some of the pale blue frosting for Neptune; darken the blue that you used for Earth and frost the cupcake to create a smooth surface. Pipe un-tinted rings using a star tip or plain tip.

Neptune

Using the pale blue frosting you created before you frosted Earth and Uranus, frost the cupcake and create a smooth surface.

What about Pluto?

Yes, I also frosted Pluto using the violet frosting I had for Saturn’s rings, but there was no room for Pluto on my cake plate. And since Pluto was downgraded from planet status a few years ago anyway, I thought that was okay 🙂