Raspberry Crumb Bars

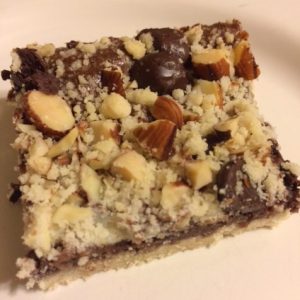
A while back I made these amazing chocolate raspberry walnut bars, and ever since I’ve wanted to make a non-chocolate version. These bars, which I found at Cooking Classy, are a delicious treat for those of us who live chocolate-free lives.

What I really like about these bars is that you use raspberry jam, rather than fresh raspberries, for the filling, making these a year-round possibility. I suspect they’d be delicious with blackberry or apricot jam as well; I’ll have to give those a try sometime. I might also incorporate some chopped walnuts into the crumb mixture next time.

Ingredients

  • 1 cup flour
  • 1/4 teaspoon baking soda
  • 1/4 teaspoon salt
  • 1 cup rolled oats
  • 1/2 cup packed light brown sugar
  • 8 tablespoons butter, cut into cubes and softened
  • 3/4 cup seedless raspberry jam

Preparation

Preheat oven to 350 degrees. Line an 8 x 8 baking pan with foil, extending foil over the sides. Lightly grease foil or spray with baking spray.

In a medium bowl, combine flour, baking soda, salt, oats, and light brown sugar. Mix with a fork until completely combined.

Add butter and toss to coat the cubes, which will make it easier to rub into the dry ingredients. Rub the butter into the dry mixture with your hands to incorporate it very well; you’ll have a crumby texture, but it should stick together if you press it between your hands when it’s ready.

Place 2 cups of the crumb mixture into the bottom of the prepared pan, pressing into an even layer. Spread jam on top, leaving about 1/4 inch border around the edges. Top with remaining crumb mixture and press it into the jam layer just slightly.

Bake for 34 minutes, until top is light golden brown. Remove from oven and cool completely in the pan; lift bars out of the pan by the foil, then cut into squares.

Store in an airtight container at room temperature for 2-3 days. Makes 16.


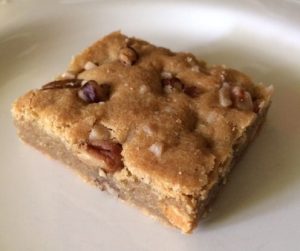
Butter Pecan Blondies

Blondies are easy to make and easy to customize. Start with a basic batter and pick flavors that you like for your add-ins, then stir it all up, pour it into a pan, and bake. Simple, low-maintenance, and delicious – three of my favorite things! Just remember to keep your stir-in portions under control; you don’t want to crowd your dough too much, and you can always sprinkle more of the add-ins on top for extra flavor and texture; that’s what I always do.

Blondies are also a wonderful option for those living chocolate-free lives like me. I’ve always been a huge fan of butterscotch, so I’ve been thinking about a butterscotch blondie for a while now. Then I remembered the amazing combination of butterscotch chips, toffee bits, and pecans from these butter pecan cookies I made a while back, and it seemed like a great idea for blondies, too. I’m pleased to say that they turned out very well, with excellent texture and flavor.

Ingredients

  • 2 1/2 cups flour
  • 1/2 teaspoon salt
  • 1/2 teaspoon baking soda
  • 1 1/2 cups packed light brown sugar
  • 12 tablespoons butter, melted
  • 2 eggs
  • 1 1/2 tablespoons vanilla extract
  • 1/4 cup plus 2 tablespoons butterscotch chips, divided
  • 1/4 cup plus 2 tablespoons toffee bits, divided
  • 1/4 cup plus 2 tablespoons chopped pecans, divided

Preparation

Preheat oven to 350 degrees. Line a 9 x 13 pan completely with foil and lightly spray with baking spray.

Reserve 2 tablespoons each of the butterscotch chips, toffee bits, and chopped pecans for sprinkling on top of your batter; set aside.

In a large bowl, combine flour, salt, baking soda, and brown sugar; mix well to combine.

Add melted butter and stir to incorporate slightly; add eggs and vanilla extract and stir well to fully combine. The dough will be fairly dry, so you’ll want to use your hands to fully incorporate your ingredients.

Add 1/4 cups each of the butterscotch chips, toffee bits, and chopped pecans; stir very well, using your hands if necessary to fully incorporate the ingredients.

Press dough into the prepared pan, then sprinkle the top with the remaining chips/bits/nuts and press them into the dough.

Bake for 23-25 minutes, until a cake tester inserted in the center comes out clean.

Cool in pan for about 15 minutes, then lift out by the foil and place on a wire rack; peel foil back slightly and allow to cool completely.

Once cool, remove foil entirely and cut into bars. Store in an airtight container.

Makes 24.

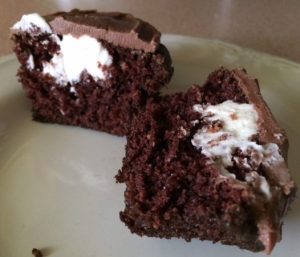
Chocolate Cupcakes with Vanilla Cream Filling

Today’s snickerdoodle sandwich cookies left me with about a cup and a half of vanilla cream filling, and I could think of nothing better to do with it than to pipe it into some dark chocolate cupcakes, Hostess-style. You remember the Hostess cupcake…dark chocolate cake, fluffy filling, waxy (in a good way) chocolate icing and that signature white loopy swirl. I actually preferred the orange version to the chocolate version, but both were quite a treat.

These cupcakes are a take on the classic store-bought version, minus the white loopy swirl (though I really want to do that next time). Mike proclaimed them better than the Hostess version, without intending any offense to the fine folks of Hostess, of course.

Ingredients

Preparation

Bake cupcakes and allow to cool completely before filling and frosting. Make filling; reserve leftover portion for another use.

Fill a pastry bag fitted with a 1/4 inch plain tip with about 1 1/2 cups filling. Insert the tip into each cupcake, piping in filling until the top of the cupcake starts to puff up.

Prepare icing; using a teaspoon from your flatware, scoop about 1 teaspoon of filling onto each cupcake and quickly frost with a small offset spatula.

Store cupcakes in an airtight container at room temperature for up to 3 days. Makes 15.


Glossy Chocolate Icing

If I could still eat chocolate, I’d make a batch of this and eat it with a spoon. Made with cocoa powder, this glossy chocolate icing is easy to prepare and makes a wonderful companion for a variety of treats. Today’s batch went onto these chocolate cupcakes with vanilla cream filling, pictured at left.

I’ve made this icing once before and it turned out a bit more drizzly then than it did today, but today’s consistency was much better for my cupcakes. Just be careful to work quickly, as it sets pretty fast. If you’re not able to spread it, add just a bit more milk to thin it slightly, about a half-teaspoon at a time. You can always add more if you need to, but remember that you can never take the liquid back out of an icing once it’s there.

Ingredients

  • 3 tablespoons butter
  • 2 tablespoons unsweetened cocoa powder, sifted
  • 1 1/2 cups powdered sugar
  • 1 teaspoon vanilla
  • 2 tablespoons milk

Preparation

In a medium saucepan, melt butter over low heat. Stir in cocoa powder, then remove from heat.

Add powdered sugar, vanilla, and milk and stir well until you reach a very smooth consistency; it will become glossy once it’s done. Use immediately, as it sets very fast! Makes enough for about 16 cupcakes.

Vanilla Cream Filling

What can you do with vanilla cream filling? A ton of stuff, actually. This filling is great for various types of sandwich cookies and filled cupcakes…even as its own frosting, if you like.

This recipe makes about 2 1/2 to 3 cups, I’d guess – honestly, I didn’t measure the end result. I need to figure out smaller batches, because I always end up making two different treats with it; today’s batch went into both snickerdoodle sandwich cookies and chocolate cupcakes with vanilla cream filling. It’s not as fluffy as the filling you’d get in a Hostess cupcake, but not as dry or dense as the filling in an Oreo cookie – a wonderful balance of both, I’d say!

Ingredients

  • 8 tablespoons butter, softened
  • 1/2 cup shortening
  • 3 1/2 cups powdered sugar
  • 1 tablespoon vanilla extract

Preparation

In a mixing bowl, beat together butter and shortening.

Add powdered sugar in small batches, beating until combined.  Once all sugar is incorporated, beat on medium speed for two minutes

Add vanilla and beat to combine.

If you need to store it before using, do so in an airtight container at room temperature. Makes about 2 1/2 to 3 cups, plenty for two dozen filled cupcakes or about 48 sandwich cookies.


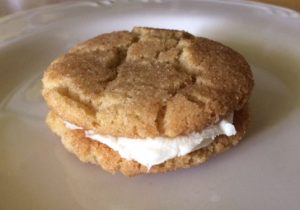
Snickerdoodle Sandwich Cookies

Some time ago I started thinking about a snickerdoodle sandwich cookie, based on the vanilla bean sandwich cookies that my dear friend Diana absolutely loves. I’m proud to say that I adapted that recipe with great success and created a wonderful treat with the perfect balance of cinnamon and vanilla, two of my favorite flavors.

The cookies themselves would be fine on their own, but sandwiching them with vanilla cream filling takes this recipe up a delicious notch. You’ll have plenty of filling left over (I’m making chocolate cupcakes and filling them with the remaining portion), so you can be generous with your portions. Someday I’ll need to figure out how to cut the filling recipe down!

Vanilla Snickerdoodle Cookies

Ingredients

  • 1 3/4 cups flour
  • 1 teaspoon baking soda
  • 1/2 teaspoon kosher salt
  • 1 teaspoon cinnamon, divided
  • 10 tablespoons butter, at room temperature
  • 2 cups sugar, divided
  • 1 egg
  • 2 teaspoons vanilla extract

Preparation

Preheat oven to 350 degrees. Line three baking sheets with parchment paper.

In a small bowl, stir together 1/2 teaspoon cinnamon with 1/2 cup sugar; set aside.

In a medium bowl, whisk together flour, baking soda, kosher salt, and remaining 1/2 teaspoon cinnamon; set aside.

In a mixer fitted with the paddle attachment, cream butter and remaining 1 1/2 cup sugar until light and fluffy, about 2 minutes.

Add egg and vanilla extract and beat on medium speed until smooth.

With the mixer running on low, gradually add flour mixture.

Shape dough into 1/2 teaspoon-sized balls, about the size of a gumball, and roll in cinnamon sugar.

Place on baking sheets about 2 inches apart and bake for 10-11 minutes, until tops are very light golden and just set.

Cool on baking sheets for 2-3 minutes, then transfer on the parchment to wire racks to cool completely before filling.

Vanilla Cream Filling

Ingredients

  • 8 tablespoons butter, softened
  • 1/2 cup shortening
  • 3 1/2 cups powdered sugar
  • 1 tablespoon vanilla extract

Preparation

In a mixing bowl, beat together butter and shortening.

Add powdered sugar in small batches, beating until combined.  Once all sugar is incorporated, beat on medium speed for two minutes

Add vanilla and beat to combine.

Place about 1 teaspoon of filling onto half of the cookies, spreading to the edges. Top with another cookie; store at room temperature for up to 3 days. Makes 28 sandwiches.

Shannon’s Paleo(ish) Brownies

My friend Shannon finished her master’s degree last week, and such accomplishments must be marked with baked goods. Shannon is very fit and healthy, so she requested some paleo(ish) brownies, which were a huge hit at the office.

This recipe is adapted from Civilized Caveman Cooking’s blueberry espresso brownies; I didn’t use organic products or drizzle the melted coconut cream concentrate over the top like he did, but apparently they were delicious nonetheless. As they bake, they filled my kitchen with a delicious coffee/chocolate aroma, so I’m glad everyone liked them so much! Congratulations, Shannon!

Ingredients

  • 1 cup coconut cream concentrate, melted
  • 3 eggs
  • 1/2 cup honey
  • 1/4 cup cocoa powder
  • 1 tablespoon cinnamon
  • 1 tablespoon ground coffee
  • 2 teaspoons vanilla extract
  • 1/2 teaspoon baking soda
  • 1/4 teaspoon salt
  • 1 cup blueberries

Preparation

Preheat oven to 325 degrees. Lightly grease a 9 x 13 baking pan.

In a mixing bowl fitted with the paddle attachment, combine melted coconut cream concentrate, eggs, honey, cocoa powder, cinnamon, ground coffee, vanilla, baking soda, and salt. Beat on medium speed for 2-3 minutes, scraping the sides of the bowl well, until the mixture is very well-combined. Stir in blueberries.

Pour batter into the baking pan, spreading gently in an even layer.

Bake for 25-30 minutes, until a cake tester inserted in the center comes out clean.

Cool brownies in the pan; cut into 24 squares. Store in an airtight container at room temperature for up to 3 days.

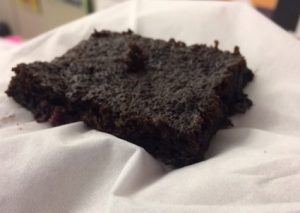
Super Fudgy Brownies

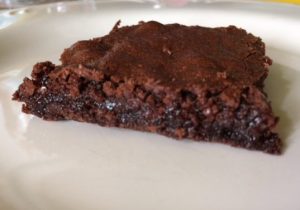
There are those who like fudgy brownies, and those who like cakey brownies. For me, brownies mean fudgy…the cakey ones may as well be chocolate cake. Not that I wouldn’t have eaten them back in my chocolate-eating days, but the fudgy ones were always my preference.

These brownies are super fudgy and adapted from a King Arthur Flour recipe; I left them completely plain so as to not take away from their amazing fudgy-ness. They got excellent reviews from both Mike’s coworkers and mine (I had a video shoot today and took them to my dear friends at our media studio).

Ingredients

  • 12 tablespoons butter
  • 2 cups sugar
  • 3/4 cup Dutch process cocoa powder
  • 1 teaspoon salt
  • 1/2 teaspoon baking powder
  • 1 tablespoon vanilla extract
  • 3 large eggs, very lightly beaten
  • 1 cup flour

Preparation

Preheat oven to 325 degrees. Lightly grease a 9 x 13 baking pan.

In a medium saucepan, melt butter over low heat. Stir in sugar, then continue to cook for just a few minutes until the mixture is hot, but not bubbly.

Pour butter mixture into a large bowl and add cocoa powder, salt, baking powder, and vanilla, stirring well to fully combine. Add eggs, stirring to completely combine, then stir in flour until smooth.

Pour batter into prepared pan and bake for 29-32 minutes, until a cake tester inserted in the center comes out clean.

Cool completely in pan; cut into 24 squares. Using a small offset spatula, gently lift bars out of pan; remember, they are super fudgy, so you’ll want to be gentle so they don’t break. Store in an airtight container at room temperature for up to 3 days.

Peanut Butter Cookie Bars

Peanut butter cookies are among my favorites. But what if you don’t want to go through the process of making the dough, rolling it into balls, dipping them in sugar, then making that crisscross pattern in the tops? You make peanut butter cookie bars.

The original recipe for these bars came from the Nestle Very Best Baking blog and included chocolate chunks, but I substituted peanut butter chips instead for an extra kick of peanut butter flavor. Next time, I might also add some melted peanut butter chips in a drizzle on the top. You could very easily substitute my peanut butter chips for chocolate chips or chunks if you like; I’m sure it would be delicious!

Ingredients

  • 1 1/2 cups flour
  • 1/2 teaspoon baking soda
  • 3/4 cup packed light brown sugar
  • 1/2 cup sugar
  • 8 tablespoons butter, softened
  • 3/4 cup peanut butter
  • 1 egg
  • 1 teaspoon vanilla extract
  • 10-ounce package peanut butter chips

Preparation

Preheat oven to 350 degrees.

In a small bowl, combine flour and baking soda; set aside.

In a mixing bowl, combine light brown sugar, sugar, butter, and peanut butter; cream together on medium speed until smooth. Add egg and vanilla, beating again until smooth.

Add flour mixture and beat to combine, then stir in peanut butter chips.

Press dough into the bottom of an ungreased 9 x 13 baking pan and bake for 18-22 minutes, until edges are light brown and a cake tester comes out with just a few moist crumbs when inserted in the center.

Cool completely in pan; cut into 24 bars. Store in an airtight container at room temperature for up to 4 days.

Coconut Dulce de Leche Brownies

As I contemplated how to use up some leftover dulce de leche, brownies came to mind. My friends Scott and Diana helped me figure out several aspects of this treat last week, but what they’ll likely be surprised to discover at the office tomorrow is the layer of dulce de leche buttercream between the brownie and toasted coconut.

Yes, dulce de leche buttercream. Between a brownie and toasted coconut, topped with chocolate drizzle. They kind of remind me of the Girl Scout Samoa cookie, minus the shortbread…but that would be a great idea for next time. I wish I could try them, but Mike says they’re delicious. I’ll take his word for it!

Ingredients

For the brownie layer

  • 1 1/3 cups flour
  • 2 cups sugar
  • 3/4 cup cocoa powder
  • 1/2 teaspoon salt
  • 2/3 cup vegetable oil
  • 4 eggs
  • 3 teaspoons vanilla extract

For the dulce de leche buttercream

  • 8 tablespoons unsalted butter, softened
  • 3/4 cup dulce de leche 
  • 2 cups powdered sugar

For the topping

  • 1 1/2 cups shredded coconut
  • 1/2 cup semisweet chocolate chips
  • 1 tablespoon shortening

Preparation

Begin by toasting your coconut so it’s cool by the time you’re ready to use it. Preheat oven to 325 degrees and spread coconut on a rimmed baking sheet (you can line the sheet with parchment if you like, but mine toasted better without). Toast for about 8-10 minutes, checking and stirring every 2 minutes to prevent over-browning. Allow to cool completely before using.

Raise oven temperature to 350 degrees. Line a 9 x 13 baking pan with parchment paper, extending the paper over the sides; this will make it easier to lift the brownie out later.

In a large bowl, combine flour, sugar, cocoa powder, and salt.

In another bowl, combine vegetable oil, eggs, and vanilla; beat lightly to combine, then pour into the dry mixture. Stir well to combine, but be careful not to over-mix. You want all of your dry ingredients to be absorbed, but your batter doesn’t need to be completely smooth; it will thicken and become shiny when it’s ready.

Pour batter into prepared pan and bake for 25-28 minutes, until a cake tester inserted in the center comes out clean.

Allow to cool completely before frosting and topping.

To make frosting, in a mixing bowl fitted with the paddle attachment, beat butter on medium speed for about 2 minutes. Scrape down the bowl and add dulce de leche, then beat on medium speed for 3-4 minutes, until very smooth and well-combined. Add powdered sugar, 1 cup at a time, beating well between each.

Spread buttercream in an even layer over the brownies, then top with toasted coconut, pressing it gently into the surface of the frosting.

Lift brownies out of pan using parchment; peel parchment away from sides and cut into 24 squares. Place on a wire rack to drizzle with chocolate; it’ll be easier to manage the brownies if you follow this process, but you can certainly drizzle them in the pan then lift them out once the chocolate hardens.

Make drizzle: in a small saucepan, combine chocolate chips and shortening over low heat and stir until completely smooth and melted. Fill a zip-top bag with chocolate and snip off one corner, bearing in mind that the chocolate will be very liquid. Drizzle chocolate over brownies and allow to harden before serving.

Store in an airtight container at room temperature (if stacking, place waxed paper or parchment paper between layers) for up to 3 days.

Makes 24.