Vampire Bite Sandwich Cookies

vampiresandwiches
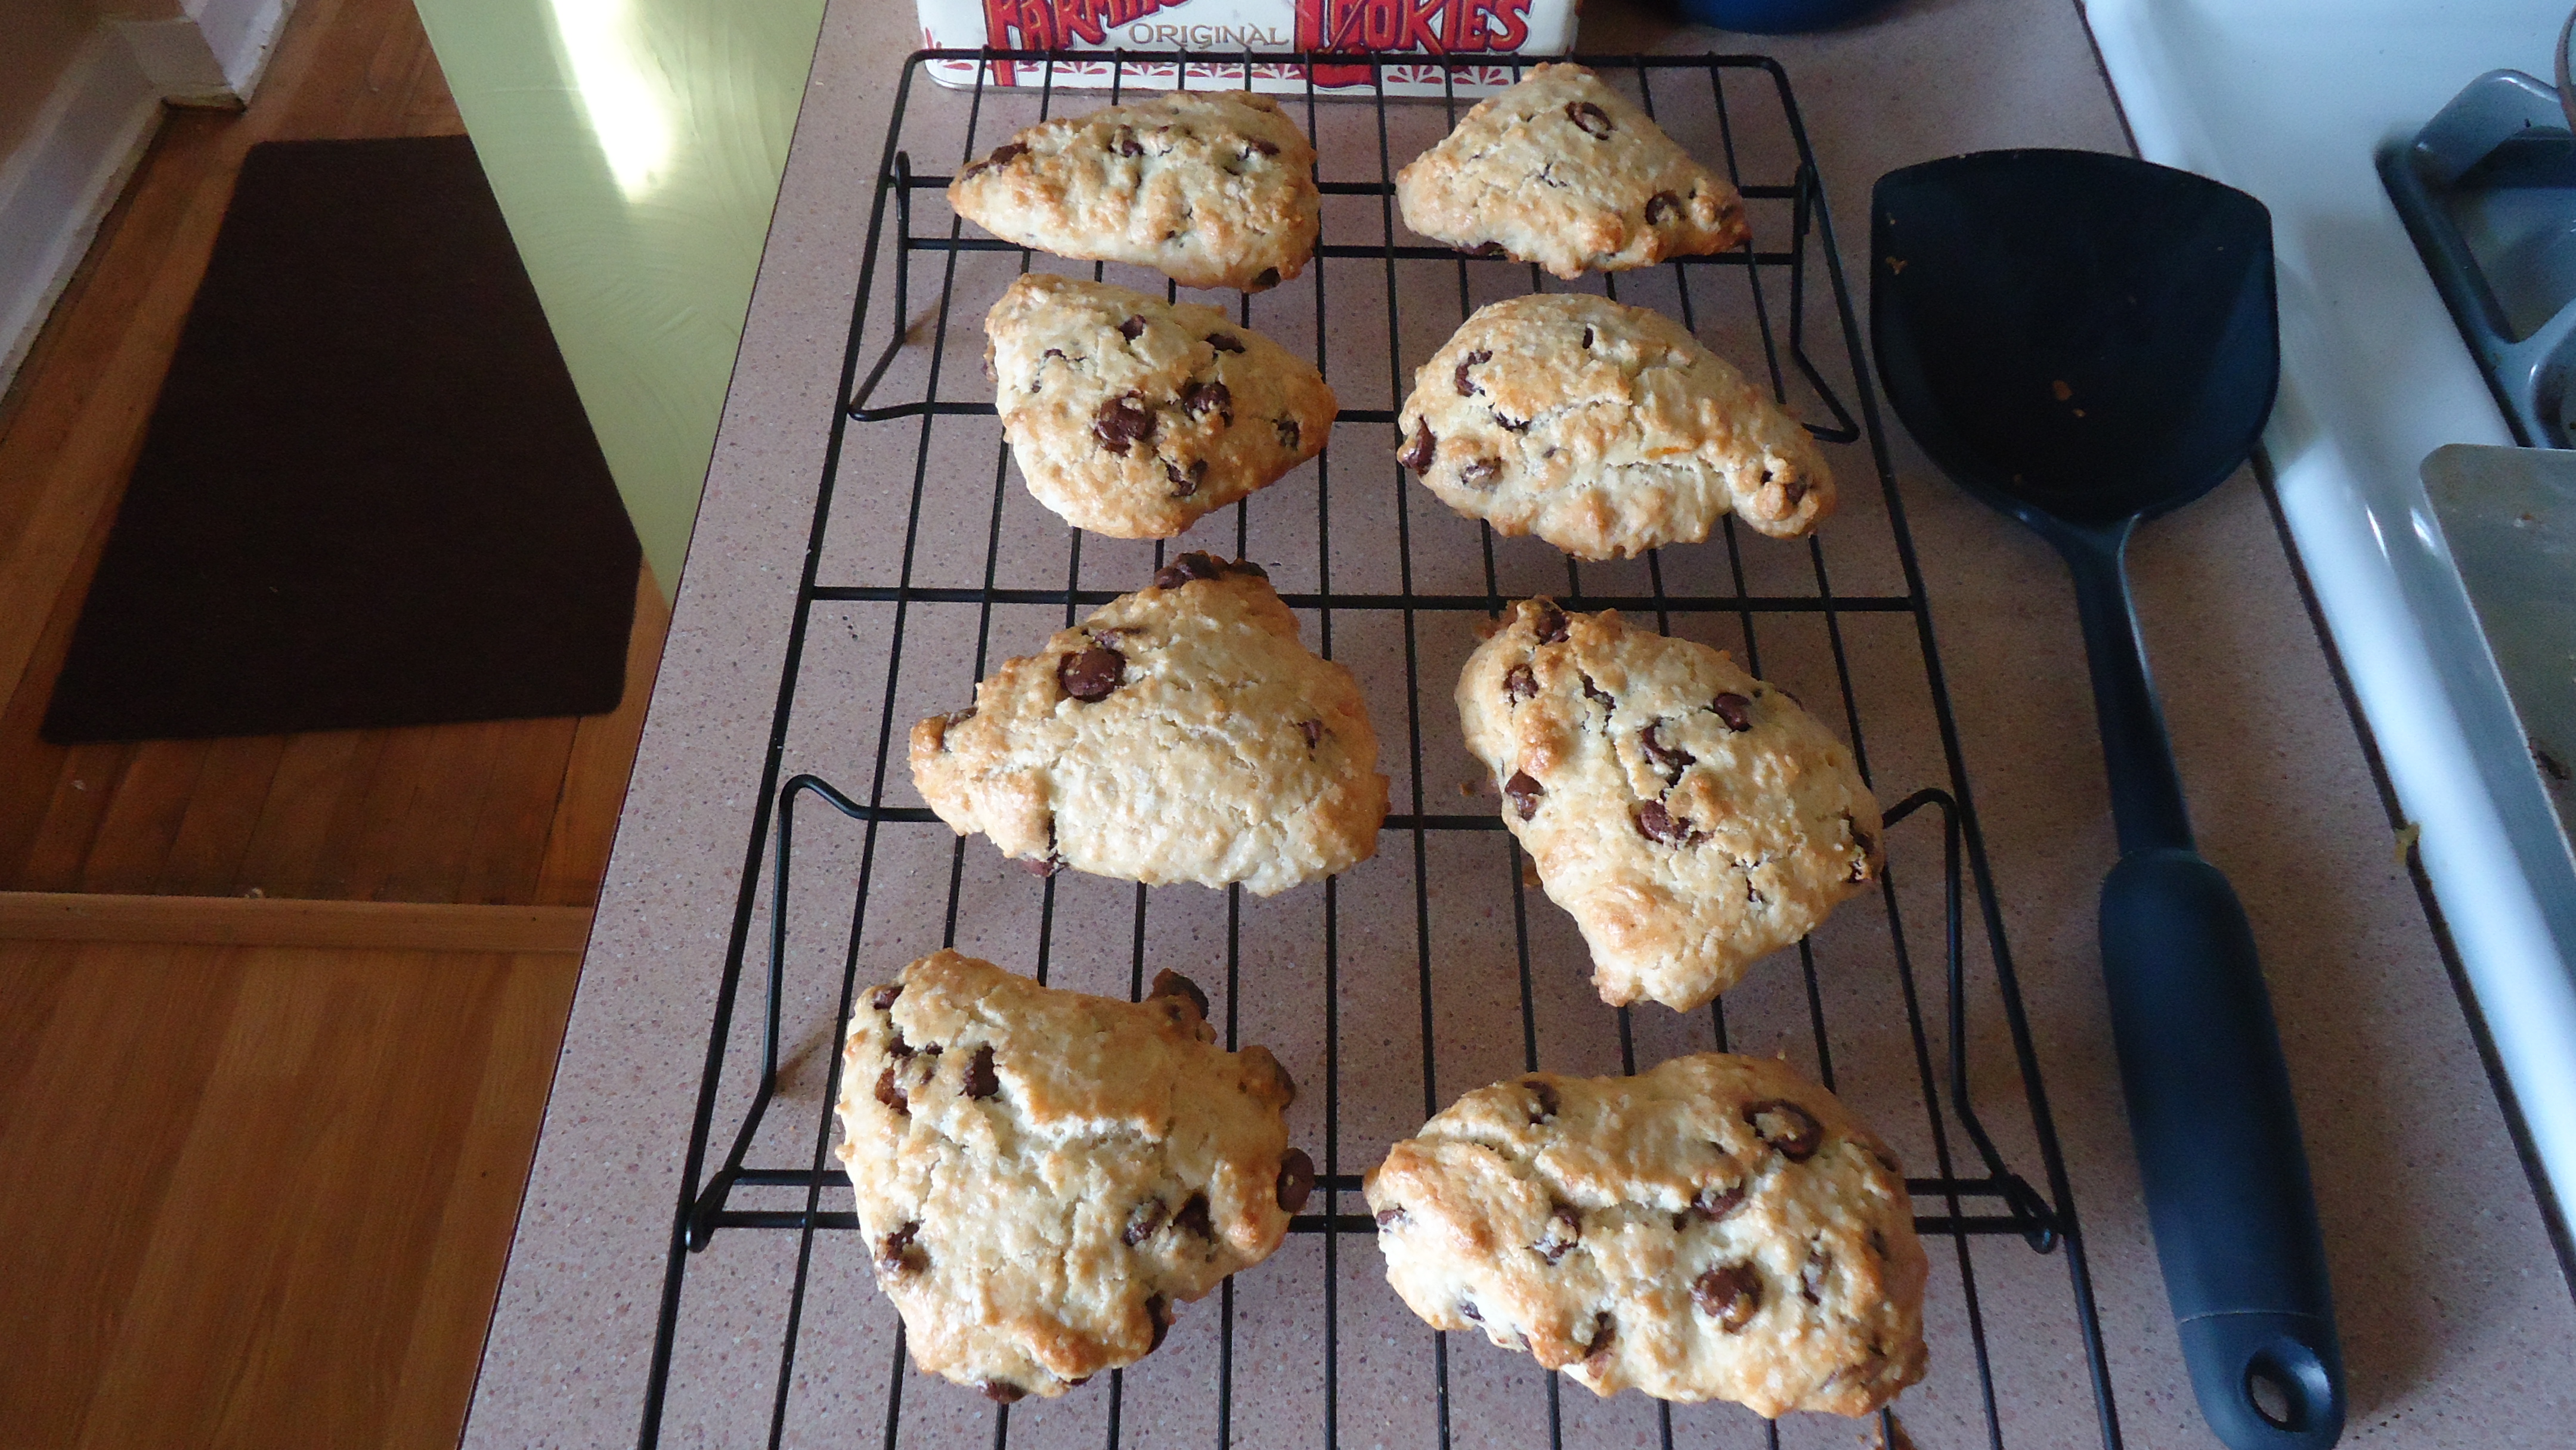
Sometimes you find a recipe that goes totally awry. Such was my experience today with a recipe for vampire bite cookies, a sugar cookie stuffed with raspberry jam. Let’s just say we’ll be going back to the drawing board on those, but in the meantime, I turned what could have been a disaster into something quite tasty.

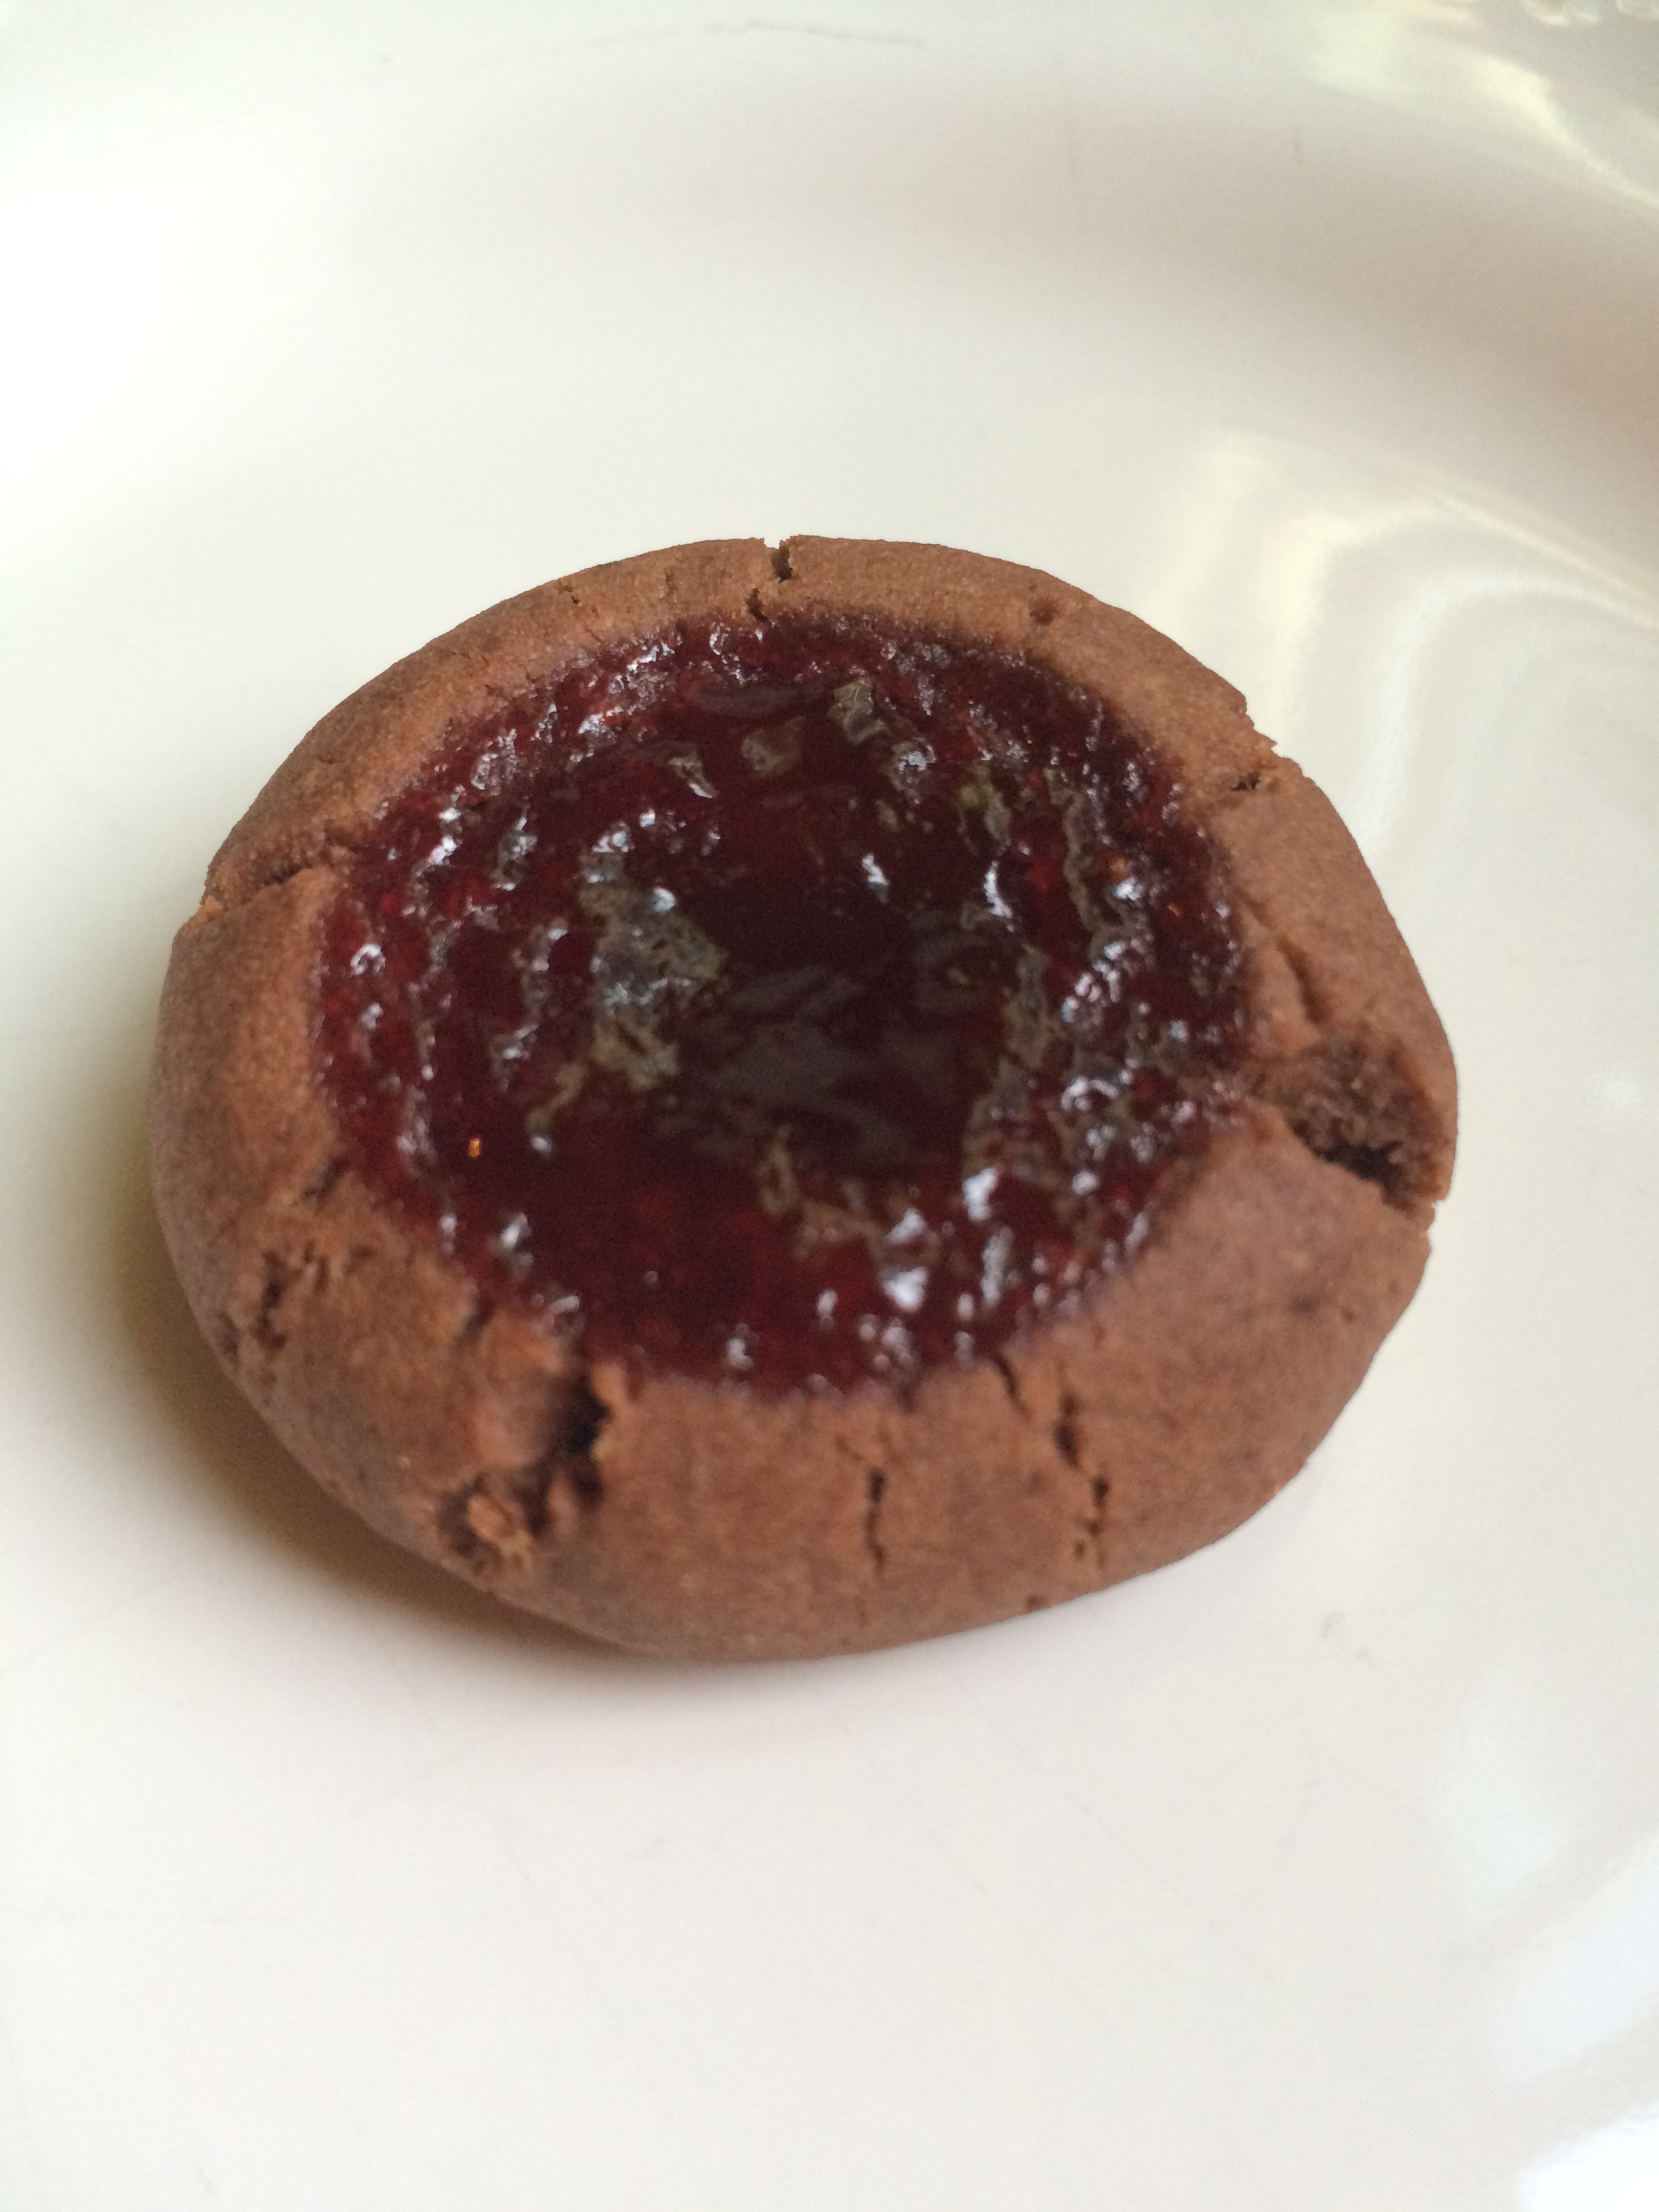
Instead of wasting my dough – because I don’t ever toss dough or batter unless has gone terribly wrong and cannot be fixed – I decided to bake the cookies, then use a dark red-tinted raspberry buttercream filling for little sandwiches. Fair warning: when taking a bite, the filling will absolutely ooze out on all sides, but that sort of adds to the Halloween-themed fun, no?

Ingredients

For the cookies

  • 1 1/2 cups flour
  • 1/4 teaspoon salt
  • 12 tablespoons unsalted butter, softened
  • 1/2 cup sugar
  • 1 egg
  • 1 teaspoon vanilla extract
  • 1/4 teaspoon almond extract

For the blood red buttercream

  • 4 tablespoons unsalted butter, softened
  • 3 heaping tablespoons seedless raspberry jam
  • 1 1/2 cups powdered sugar
  • Red gel food coloring

Preparation

In a small bowl, combine flour and salt; set aside.

In a mixing bowl, cream together butter and sugar until light and fluffy. Add egg and extracts, beating well to combine.

Add flour mixture in two batches, beating well after each.

Divide dough in two portions; wrap in plastic and refrigerate for at least 1 hour.

Preheat oven to 325 degrees. Line three baking sheets with parchment paper.

On a lightly floured surface, roll out dough to 1/8-inch thickness. Using a 2-inch round cutter, cut dough into circles and place about 1 inch apart on prepared sheets.

Bake for 10-11 minutes, until edges are set. Remove from oven and cool on baking sheets for a few minutes, then remove to a wire rack to cool completely before filling.

To make blood red buttercream, in a mixing bowl, beat butter and raspberry jam on medium speed for 2-3 minutes. Mixture will look lumpy; that’s okay. Add powdered sugar and beat until completely combined, scraping the sides of the bowl several times. Add food coloring and beat until fully combined.

Flip cookies over and top half with a generous dollop of filling (about 1/2 tablespoon or so). Top with remaining cookies to make sandwiches. Store in an airtight container at room temperature.


Softened Butter

softenedbutterMany recipes call for softened, or room temperature, butter. The easiest way to bring butter to room temperature is to let it sit at room temperature for about a half-hour to an hour, but I usually quick-soften my butter by cutting it into cubes, then letting it sit out for about 15-30 minutes.

Softened butter should look like the photo here – you should be able to indent it with your finger, but not press all the way through. Think of the consistency of ice cream, rather than the consistency of whipped cream, when judging whether your butter is soft enough, but not too soft.

In many cases, butter must be softened so that it can blend more easily with certain ingredients, like sugar, for example. In other cases, your butter will need to remain cold – like if you’re working with pastry dough – so be sure to check your recipe before you start. If you’re incredibly short of time, cut your butter into very small cubes, then place it in your mixing bowl. Beat it on high speed for about 3-4 minutes, scraping the bowl every minute or so, to soften it.

Chocolate Orange Cookies

chocolateorangecookiesSometimes I wonder who first looked at a piece of citrus fruit and thought, “hmm, I’m going to scrape off the outer layer of that skin and bake with it.” Regardless, it was a great idea.

Proper zesting of oranges, lemons, and limes can best be achieved by using a microplane grater, like this one. When zesting, wash your fruit, dry it with a paper towel, and stick to the colored outer layer of your rind, leaving the white pith alone. I usually zest my fruit first, then slice it and juice it; you can always reserve the juice for another time.

This recipe is adapted from Boys Ahoy.

Ingredients

  • 1 1/2 cups flour
  • 1/3 cup cocoa powder
  • 1/2 teaspoon salt
  • 1/2 teaspoon baking soda
  • 1/2 teaspoon baking powder
  • Zest of one large orange
  • 10 2/3 tablespoons butter, softened
  • 1 1/3 cup granulated sugar (reserve 1/3 cup for rolling)
  • 1 egg
  • 1 teaspoon vanilla
  • 1 1/2 tablespoons freshly squeezed orange juice

Preparation

Preheat oven to 350 degrees. Line several baking sheets with parchment paper.

In a medium bowl, combine flour, cocoa powder, salt, baking soda, and baking powder.

In a small bowl, combine 1/3 cup sugar with 1 teaspoon orange zest and mix together very well.

In a mixing bowl, beat butter, sugar, and remaining orange zest until light and fluffy, about 2-3 minutes.

Add egg, vanilla, and 1 tablespoon orange juice and beat until combined.

Add flour mixture in two batches, beating well and scraping the sides of the bowl a few times. Add remaining 1/2 tablespoon orange juice and beat until fully combined.

Using a 1-inch cookie scoop, scoop generous portions of dough and roll into balls. Dip in sugar/zest mixture, coating well.

Place on prepared baking sheets about 2 inches apart and flatten with the bottom of a glass to about 1/2 inch thickness.

Bake for 10-11 minutes, until edges are set but centers are still just slightly puffy.

Remove from oven and allow to cool on the baking sheet for about 5 minutes, then remove to wire racks to cool completely.

Witch Brew Cookies

witchbrewcookies

With just a few weeks to go until Halloween, these fun witch brew cookies are on their way to my goddaughter Mo and her little sister Margo, whose birthday also happens to fall on Halloween. Does this cookie look like something from a witch’s cauldron? I certainly hope so.

A word about spiral cookies: it’s very important to press your layers together firmly as you roll your dough log to avoid the small gaps you can see in the cookie here. This dough is very soft when rolled out, so waxed paper helps in handling a great deal. I found the original recipe for these over at Lady Behind the Curtain and chose not to roll the dough log in sprinkles before I sliced them, but that would definitely add an extra spooky kick (and some nice crunch) to these treats.

Ingredients

  • 2 cups plus 6 tablespoons all purpose flour, divided
  • 1/2 teaspoon baking powder
  • 1/4 teaspoon salt
  • 2/3 cup powdered sugar
  • 1/4 cup sugar
  • 1 1/4 cups butter, cut into cubes and softened
  • 1 1/2 teaspoons vanilla extract
  • Leaf green, lemon yellow, violet, and black gel food coloring

Preparation

In a mixing bowl, combine 2 cups flour with the baking powder, salt, powdered sugar, and sugar. Mix to combine.

Add butter a few cubes at a time, mixing until the texture has the consistency of sand.

Add the vanilla and mix just until a ball forms.

Divide dough into thirds; dough will be very soft.

Add food coloring and 2 tablespoons of flour to each ball, kneading with your hands to combine until you have even coloring. For the electric green color, use leaf green and lemon yellow.

Begin with the green ball; tape a sheet of waxed paper to your counter top and roll the dough ball between it and another sheet of waxed paper. Set aside; repeat this process with the black and violet layers.

Place the green layer, still on its waxed paper, on your counter top and remove the top sheet of waxed paper. Carefully remove the black and violet layers from their waxed paper and place them on top of the green layer.

Roll your layers into a log, pressing firmly as you go and using the bottom layer of waxed paper to help with rolling.

Wrap the log tightly and refrigerate for 2 hours.

Preheat oven to 325 degrees. Line 2 baking sheets with foil or parchment.

Remove dough log from the refrigerator and slice into 1/4 inch cookies.

Bake for 15-17 minutes, until cookies are no longer shiny on top.

Remove from oven and allow to cool for a few minutes on cookie sheets, then remove to a wire rack to cool completely.

Seven Layer Bars

sevenlayerbarsTo say that I’m a picky eater is beyond an understatement. I have both flavor and texture issues, and one might imagine that a seven layer bar would send me running for the hills. On the contrary, I think that the seven layers of unbelievable goodness contained in these bars – oatmeal (rather than graham cracker crust), shredded coconut, semisweet chocolate chips, milk chocolate chips, butterscotch chips, sweetened condensed milk, and chopped walnuts – form a divine flavor and texture profile.

The recipe below is adapted from Half Baked Harvest, and as you can imagine from the list of ingredients, beyond rich. At first I cut them into two-by-two squares, but after I took a bite, I cut each bar into quarters for bite-sized pieces. If you’re serving these at a party, I’d recommend placing each bite into a miniature cupcake liner for easy handling; in addition to being rich, they’re also quite sticky, but completely worth it!

Ingredients

For the oatmeal crust

  • 1 1/4 cups rolled oats
  • 1 cup flour
  • 1/4 cup sugar
  • 1/4 cup packed light brown sugar
  • 1/2 teaspoon baking soda
  • 1/2 teaspoon salt
  • 1/2 cup vegetable oil
  • 1 egg
  • 2 teaspoons vanilla extract
  • 1/2 cup semisweet chocolate chips

For the layers

  • 1 1/3 cups shredded coconut
  • 1/2 cup semisweet chocolate chips
  • 1/2 cup milk chocolate chips
  • 1 cup butterscotch chips
  • 1 14-ounce can sweetened condensed milk
  • 1 cup chopped walnuts

Preparation

Preheat oven to 350 degrees. Line a 9 x 13 Pyrex dish with parchment paper.

In a large bowl, combine oats, flour, brown sugar, sugar, baking soda, and salt, mixing until combined.

Add vegetable oil, egg, and vanilla and mix until dough is completely combined. Stir in chocolate chips.

Press dough into the bottom of the baking dish, making sure that chocolate chips are distributed evenly throughout the dough.

Bake for 5 minutes, then remove from the oven. Sprinkle with shredded coconut, semisweet chocolate chips, milk chocolate chips, and butterscotch chips. Pour sweetened condensed milk evenly over the top, then sprinkle with chopped walnuts.

Bake for 25-28 minutes, until top is golden brown. Remove from oven and cool completely before cutting into bites.

Recipe Basics

spice cupcakesRecipes are the foundation of baking; follow them, and most of the time, you’ll have success. Below are some tips to keep in mind when facing even the most complicated recipes.

Read your recipe.

Before you begin, read your recipe. Read it a few times, in fact. Make sure you have all of the ingredients and equipment you need, and that you have enough time in your day or evening to make what you intend to make.

Fresh ingredients are the best, but you don’t have to buy the most expensive ones. I bake with store-brand flour, sugar, eggs, and butter, McCormick extracts, and a few higher-end spices from Penzey’s or King Arthur Flour. While some bakers believe the highest-grade flours make better treats, I’ve never had any complaints about the cookies, cakes, and pies I’ve created from the store-brand.

And yes, you can substitute…sometimes. Some ingredients can be swapped out for others, but not all are interchangeable. Check out my substitutions page for more info.

Then, follow it.

Much like your chemistry experiments from high school, it takes the right ratios of the right kinds of ingredients to yield certain results. For the best outcomes:

  • Be sure you’re using ingredients at the right temperature. For example, if you need to soften butter or keep it cold, do so. There’s a reason for it, likely relating to texture, and you’ll get the best results if you follow your recipe.
  • Use the right type of measuring cup for the ingredient. Dry and liquid measures are not interchangeable, so if you’re measuring flour, use a dry measuring cup, and if you’re measuring milk, use a liquid measuring cup.
  • When adding wet ingredients – like when adding milk to buttercream frosting – do so in small increments. You can always add more, but you can’t take liquid back out.
  • If your batter or dough seems too runny, you might have to add a bit more flour to stabilize it. This can happen for many reasons; maybe your large eggs were a bit larger than the recipe author’s. If you’re adding more flour, do so slowly, one tablespoon at a time. As with liquid, you can always add more, but you can’t take it back out.

But, don’t be afraid to be creative. 

If your suspect your recipe could use more vanilla, or a different kind of extract, or chopped nuts, go for it. If you think your scones could use a drizzle of powdered sugar glaze, by all means, drizzle away. Disasters rarely result from this manner of creativity, and you never know – you might just invent a new favorite.


Stocking Your Pantry

cocoaI don’t have an actual pantry, but my dream kitchen would have one the size of my current kitchen. I can see it now: shelf upon shelf of jars, containers, bags of chocolate chips, cans of pumpkin, bottles of molasses…well, maybe someday.

In the meantime, I’ve commandeered one cabinet for nearly all of my baking stuff, though I do keep my spices in a separate place. I tend to have everything on the following lists in my pantry cabinet and spice cabinet at any given time.

Pantry Items 

Basics

  • White flour
  • White sugar
  • Light brown sugar
  • Baking soda
  • Baking powder
  • Cream of tartar
  • Cocoa powder
  • Unsweetened baking chocolate
  • Semi-sweet chocolate chips
  • Milk chocolate chips
  • Walnuts
  • Old-fashioned oats
  • Molasses
  • Light corn syrup

What I also usually have

  • Active dry yeast
  • Wheat flour
  • Cake flour
  • Dark brown sugar
  • Bittersweet chocolate chips
  • Toffee pieces
  • Pecans
  • Blanched almonds
  • Canned pumpkin
  • Maple syrup

Spices & Extracts

Basics

  • Vanilla extract
  • Almond extract
  • Cinnamon
  • Ginger
  • Nutmeg
  • Cloves

What I also usually have

  • Vanilla beans
  • Maple flavoring
  • Lemon extract
  • Orange extract
  • Peppermint extract
  • Allspice
  • Mace

Bakeware + Tools

chocolate chip sconesMost people think my kitchen is enormous because I bake all the time, but I promise, it’s very average. On the small side, even. I’ve gotten pretty creative with my storage solutions, because I do have an array of baking pans, prep bowls, and baking tools.

No matter what fancy shops and catalogs will tell you, you really only need a handful of tools for successful baking. In addition to a stand mixer (more on my mixer coming soon!), I recommend the following as a place to start – you can always add in other pans and tools as you go along, and of course you can choose other tools that suit what you bake more often to help you along the way. For example, I do a lot of cookie baking, so I have a few different sizes of cookie scoops.

Bakeware

  • 9 x 13 pan
  • Two 9-inch round pans
  • 10-inch fluted (or Bundt) pan
  • 8-inch (or 9-inch) loaf pan
  • 9-inch pie dish
  • Cookie sheets (I prefer ones without sides)
  • Cooling racks

Baking Tools

  • Dry measuring cups
  • Liquid measuring cups
  • Measuring spoons
  • Rubber spatulas
  • Turner spatula (like a pancake turner)
  • Offset spatula (for frosting cakes)
  • Rolling pin
  • Whisk
  • Cookie scoops
  • Fine-mesh sieve
  • Chef’s knife
  • Pastry bag, coupler, and piping tips
  • Pastry blender
  • Cookie cutters

Fun & Useful Things to Have

  • Microplane grater, for zesting
  • Citrus reamer, for juicing
  • Melon baller, for coring cupcakes
  • Food scale
  • Food processor

Chocolate Raspberry Thumbprints

chocolateraspberrythumbprintLaura, my cube wall-mate, accepted a new job in our company and is moving to a new office. In case you’re not familiar with the cube wall-mate (CWM), this is the person who sits on the other side of the wall that separates one section of office cubes from another, who you can hear but not see, as opposed to your cube mates, who are in the same cube row as you. Laura has been an awesome CWM; she’s very good at selective eavesdropping, always willing to say “hey, I wasn’t trying to listen in but I couldn’t help hearing and you actually need to talk to so-and-so about that,” has a top-notch sense of humor, and shares my fondness of kooky sayings like “those cookies are the bee’s knees.”

Laura and I have talked extensively about baking – she makes a mean chocolate pots de creme – and she requested a chocolate raspberry combo as her celebratory farewell cookies. And so, we have these chocolate raspberry thumbprints. The original recipe from Good Housekeeping neglected one very important note in preparation…you have to melt your 2 ounces of baking chocolate before you incorporate it into the dough. Which makes me wonder…how many people tried to make this recipe without melting their chocolate?

Farewell, Laura! We shall meet again on social media and in outside-work-life!

Ingredients

  • 2 3/4 cups flour
  • 1/4 teaspoon baking soda
  • 1/4 teaspoon salt
  • 1 cup butter, slightly softened
  • 3/4 cup sugar
  • 1 egg
  • 1 teaspoon vanilla extract
  • 2 ounces unsweetened baking chocolate, melted and slightly cooled
  • 1/4 cup cocoa powder
  • About 1/2 cup seedless raspberry jam

Preparation

Preheat oven to 350 degrees. Line three baking sheets with parchment paper.

In a large bowl, combine flour, baking soda, and salt; set aside.

In a mixing bowl, beat butter on medium speed for 1 minute. Scrape down the sides of the bowl and add sugar; beat until well-combined and fluffy, about 2-3 minutes. Add egg, vanilla, chocolate, and cocoa powder mixing well, scraping the sides of the bowl a few times.

Slowly add flour mixture, beating until fully incorporated.

Using a 1-inch cookie scoop, scoop dough and roll into balls. Place about 2 inches apart on baking sheets.

Using your 1/4 teaspoon measuring spoon, press a thumbprint well into the center of each cookie. Fill with 1/4 teaspoon raspberry jam.

Bake for 14 minutes, until jam is bubbly at the edges. Remove from oven and cool for 1-2 minutes on the baking sheets, then remove to a wire rack to cool completely.

Store in an airtight container at room temperature; if stacking, place waxed paper between the layers.

Pumpkin Bundt Cake

pumpkinbundtIt’s October, the time of Pumpkin Spice Everything. Lattes, cheesecakes, scones, breads, raviolis, even Pop Tarts – you name it, at this time of year, you can find it in the pumpkin or pumpkin spice variety.

Canned pumpkin is a staple in my pantry, stocked year-round for a range of recipes. I buy pumpkin puree – not pie filling – in the large, 29-ounce cans, which leaves plenty for multiple recipes at one time. Earlier this week, I used 15 ounces in some pumpkin chocolate chip bread, so I had 14 ounces – about 1 3/4 cups – left over.

Once open, canned pumpkin will last in the fridge for about 5-7 days, so it’s best to use it up soon. If you’re looking for good ideas, you need 1 cup for pumpkin streusel muffins or pumpkin cupcakes, and can use the remaining 3/4 cup for pumpkin biscotti. You can also use 1 1/2 cups for pumpkin donuts and just mix the remainder into some pancake batter or a smoothie. I wanted to use the rest of my pumpkin up all at once, and I found this pumpkin Bundt recipe at Taste of Home; it originally called for 15 ounces of pumpkin, but my 14 ounces did just fine. Topping-wise, you could dust this with powdered sugar or just leave it plain, but I thought the combination of glaze and spice drizzle gave it a nice extra touch.

Ingredients

For the cake

  • 3 cups flour
  • 2 teaspoons baking soda
  • 1 teaspoon cinnamon
  • 1 teaspoon nutmeg
  • 1/4 teaspoon cloves
  • 1/2 teaspoon salt
  • 2 1/2 cups sugar
  • 1 cup vegetable oil
  • 3 eggs
  • 14 ounces pumpkin puree

For the glaze

  • 1 1/2 cups powdered sugar
  • About 2 1/2 tablespoons milk

For the spice drizzle

  • 1 1/2 cups powdered sugar
  • 1/4 teaspoon cinnamon
  • 1/4 teaspoon cloves
  • 3-4 teaspoons milk

Preparation

Preheat oven to 350 degrees. Generously grease a 10-inch Bundt pan.

In a medium bowl, combine flour, baking soda, cinnamon, nutmeg, cloves, and salt; set aside.

In a large mixing bowl, stir together sugar and oil until very well-combined. Add eggs, 1 at a time, mixing very well after each.

Stir in flour mixture and pumpkin alternatively, stirring until well-combined and smooth. Spoon or pour into prepared pan.

Bake for about 45 minutes, then check with a cake tester or toothpick; continue baking for a few minutes at a time, checking frequently, until the cake tester comes out clean. The original recipe called for 60 minutes of baking time, but my cake baked for about 50 minutes.

Remove from oven and cool cake in pan for 10 minutes. Flip out onto a wire rack to cool completely before glazing and drizzling.

To make the glaze, in a small bowl, combine powdered sugar and 1 teaspoon milk. Continue adding additional milk until the glaze reaches a pourable consistency, then pour or drizzle over cake, allowing to drip down the sides. Allow glaze to set for just a few minutes before adding the spice drizzle.

To make the spice drizzle, combine powdered sugar, cinnamon, nutmeg, and cloves in a small bowl. Add milk 1 teaspoon at a time until the drizzle reaches a drizzly consistency, like thick honey. Spoon into a piping bag and pipe over the glaze, allowing drizzle to drip down the sides (or just drizzle with a spoon). Allow drizzle to set before serving.

Store at room temperature.

pumpkinbundt2Here’s an overhead view of the cake  – pretty, eh?