Cinnamon Roll Cupcakes

cinnamon roll cupcakesI love cinnamon! It is my favorite spice, as I believe I’ve mentioned before. It has a calming effect on me like lavender does, especially when paired with vanilla. And while I didn’t have time this weekend to make cinnamon rolls–in fact, I have never made cinnamon rolls from scratch–I did have time to whip up a batch of cinnamon roll cupcakes.

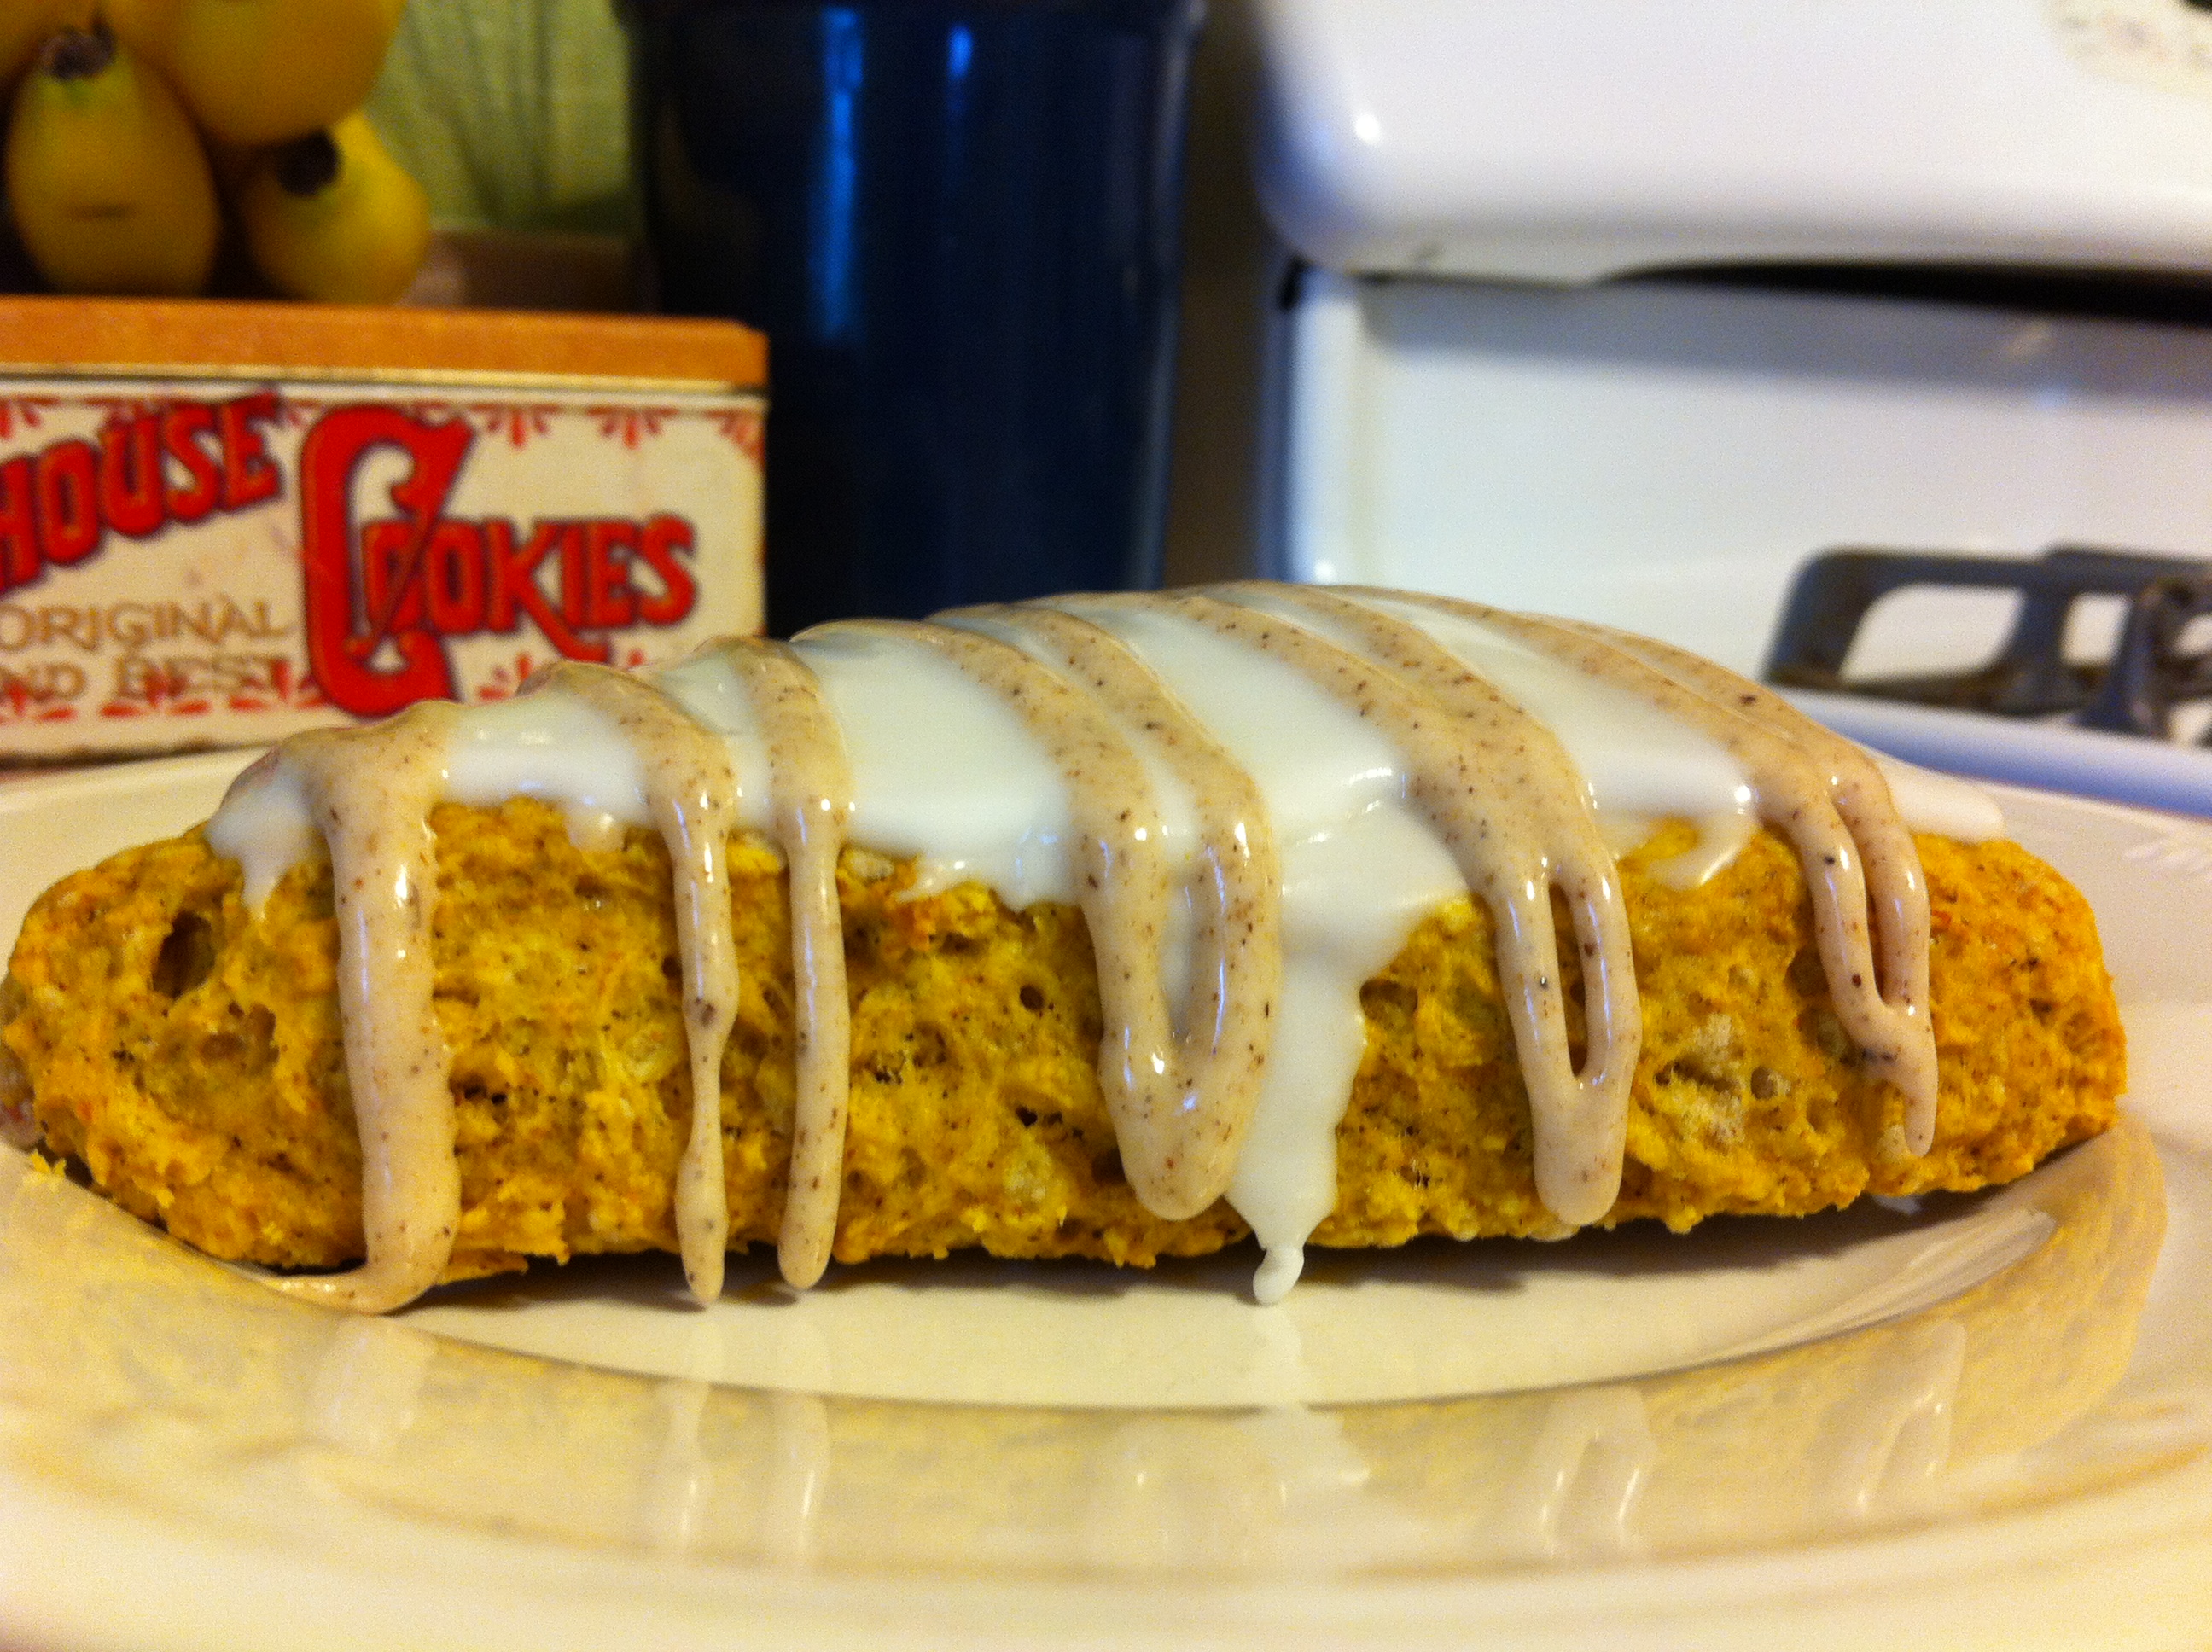
The recipes below are hybrids of several that I found online, including a delicious cinnamon cream cheese frosting that would pair well with pumpkin, apple, or ginger cupcakes. They’re sweet, but not too sweet, and almost muffin-like; I could certainly eat one for breakfast. What’s great is that you don’t actually need the frosting if you’re short on time, or just not into frosting; you could leave the cupcakes plain, or dust them with powdered sugar.

Note: the original recipe that I found claimed to yield 26 cupcakes, but the recipe below that I used yielded 33 cupcakes.

Cinnamon Roll Cupcakes

Ingredients

  • 2 1/2 cups flour
  • 2 1/2 teaspoons baking powder
  • 1/2 teaspoon salt
  • 3/4 cup packed light brown sugar
  • 2 teaspoons cinnamon
  • 1/3 cup finely chopped pecans
  • 2/3 cup butter, at room temperature
  • 1 3/4 cup sugar
  • 2 eggs, at room temperature
  • 2 teaspoons vanilla
  • 1 1/4 cups milk

Preparation

Preheat oven to 350 degrees. Line cupcake pans with paper liners.

In a medium bowl, combine flour, baking powder, and salt; set aside.

In another medium bowl, combine brown sugar, cinnamon, and pecans; mix well and set aside.

In a mixing bowl, beat butter for about 30 seconds; add sugar, about 1/4 cup at a time, beating well until light and fluffy.

Add eggs, one at a time, beating well after each addition. Add vanilla and beat to combine.

Add flour mixture and milk alternatively, beginning and ending with the flour and beating until just combined after each addition. Scrape sides of the bowl often.

Use a 1-inch cookie scoop and drop one level scoop of dough into each cup; top with 1 teaspoon of the brown sugar mixture, then add another scoop of dough, followed by 1/2 teaspoon of the brown sugar mixture.

Bake for at least 20 minutes, until a cake tester comes out clean. Cool completely before frosting.

Cinnamon Cream Cheese Frosting

Ingredients

  • 8 ounces cream cheese, at room temperature
  • 8 tablespoons butter, at room temperature
  • 4 cups powdered sugar
  • 2 teaspoons vanilla
  • 1 1/2  teaspoons cinnamon

Preparation

In a mixing bowl, beat cream cheese and butter until smooth. Add powdered sugar, one cup at a time, mixing well after each addition. Add vanilla and cinnamon and beat well, scraping the sides of the bowl often.

Use a 1-inch cookie scoop and drop scoops of frosting onto each cupcake. Frost with a small offset spatula. Store in the refrigerator, but bring to room temperature before serving.

Buckeye Brownies

buckeye browniesAs a woman who firmly believes in slathering peanut butter on brownies, I was delighted to learn about the buckeye brownie from one of the gals in my office. She’d had one last weekend and described it as the best dessert she’d ever eaten. How can you go wrong with a fudge brownie, topped with a peanut butter layer akin to the center of a buckeye and a layer of chocolate over that? You simply can’t.

Most buckeye brownie recipes I found online called for (gasp) boxed brownie mix. I couldn’t bring myself to use a boxed mix, so I sought a recipe that used vegetable oil, not butter, for the brownie layer. As with cupcakes, vegetable oil yields a moister texture in brownies, and because that’s what is typically called for in boxed mixes anyway, I set out to create my masterpiece.

The recipe below is a hybrid of several scratch-made buckeye brownie recipes, and was very easy to make. I took these into work today for the farewell lunch of another one of the office gals, and they were definitely a big hit. Bear in mind, they are very rich, so small portions are all you need.

Ingredients

For the brownie layer

  • 1 1/3 cups flour
  • 2 cups sugar
  • 3/4 cup cocoa powder
  • 1/2 teaspoon salt
  • 2/3 cup vegetable oil
  • 4 eggs
  • 3 teaspoons vanilla extract

For the peanut butter layer

  • 8 tablespoons butter, softened
  • 1 1/4 cups peanut butter
  • 2 cups powdered sugar

For the chocolate layer

  • 6 tablespoons butter
  • 1 cup milk chocolate chips

Preparation

Preheat oven to 350 degrees. Spray a 9 x 13 baking pan with baking spray.

In a large bowl, combine flour, sugar, cocoa powder, and salt.

In another bowl, combine vegetable oil, eggs, and vanilla; beat lightly to combine, then pour into the dry mixture. Stir well to combine, but be careful not to over-mix. You want all of your dry ingredients to be absorbed, but your batter doesn’t need to be completely smooth; it will thicken and become shiny when it’s ready.

Pour batter into prepared pan and bake for 20-25 minutes, until a cake tester inserted in the center comes out clean.

Allow to cool completely before preparing the peanut butter and chocolate layers as follows. Note: I made the brownie layer the night before the peanut butter and chocolate layers.

In a mixing bowl, combine butter and peanut butter and beat on medium until smooth, about 2 minutes. Add powdered sugar and beat until totally incorporated.

Spread peanut butter filling onto cooled brownies, smoothing out with a small offset spatula to create an even layer.

In a medium saucepan, combine butter and chocolate chips. Melt slowly over low heat, stirring to combine; mixture will thicken as it melts.

When chocolate is completely smooth, immediately pour over peanut butter layer and spread with a small offset spatula to create an even layer.

Allow chocolate layer to harden before serving.

Chocolate Peanut Butter Cupcakes

chocolate pb cupcakesIn the history of the world, has there ever been a more amazing culinary combination than chocolate and peanut butter? Absolutely not.

Granted, these foods are pretty nifty on their own, but putting them together was perhaps one of the best decisions ever made in the kitchen (or in general, for that matter). I think the chocolate-peanut butter combination is such a hit because it has great balance; it’s not too sweet or salty, so you get a bit of both kinds of flavors in one bite.

A few months back, several of the gals in my office and I were discussing the merits of the chocolate covered peanut, and the idea for these cupcakes was born. The recipes below are a combination of a chocolate peanut butter cupcake from Woman’s Day and a few other recipes I found online, but I have to admit that my first attempt at icing, using a different recipe, went totally awry. Though it tasted delicious, the consistency was all wrong, so I quickly substituted the chocolate drizzle icing that appears below for the last dozen cupcake that will go with me to the office tomorrow.

Chocolate Peanut Butter Cupcakes

Ingredients

  • 1 3/4 cups flour
  • 1/2 cup unsweetened cocoa powder
  • 1 teaspoon baking soda
  • 1/2 teaspoon salt
  • 1/2 cup milk
  • 1/2 cup sour cream
  • 12 tablespoons butter, softened
  • 1 1/4 cups sugar
  • 1/2 cup creamy peanut butter
  • 3 eggs

Preparation

Preheat oven to 350 degrees. Line cupcake pans with paper liners.

In a medium bowl, whisk flour, cocoa powder, baking soda, and salt together until well-blended; set aside.

In a small bowl, whisk milk and sour cream together until well-blended; set aside.

In a mixing bowl, combine butter and sugar; beat on medium speed until light and fluffy. Add peanut butter and beat until well-combined.

Add eggs, one at a time, beating well after each.

Add flour mixture and milk mixture alternatively, starting and ending with the flour mixture and beating until just combined. Scrape sides of the bowl often.

Using a two-inch cookie scoop, scoop batter into prepared cupcake pans. Bake for 18-20 minutes, until a cake tester comes out clean.

Cool completely before filling and icing.

Peanut Butter Filling

Ingredients

  • 1/2 cup plus about 3 tablespoons creamy peanut butter
  • 3 tablespoons butter, softened
  • 1 3/4 cups powdered sugar
  • 4 to 5 tablespoons milk

Note: I added more peanut butter to suit my preference, hence the “about 3 tablespoons” above. You can certainly just stick with the 1/2 cup if you like, but I found that additional peanut butter enhanced the filling flavor.

Preparation

In a mixing bowl, beat peanut butter and butter together until smooth.

Add powdered sugar slowly, beating well after each addition.

Add milk, 1 tablespoon at a time, beating until well-combined.

Fit a piping bag with a 1/4 inch plain tip; insert tip into the top of each cupcake and inject the filling. Stop when the top of the cupcake begins to bulge, as you don’t want it to explode!

Chocolate Drizzle Icing

Ingredients

  • 3 tablespoons butter
  • 2 tablespoons unsweetened cocoa powder
  • 1 1/2 cups powdered sugar
  • 1 teaspoon vanilla
  • 2 tablespoons milk
  • chocolate covered peanuts, for garnish

Preparation

In a medium saucepan, melt butter over low heat. Stir in cocoa powder, then remove from heat.

Add powdered sugar, vanilla, and milk and stir well until you reach a very smooth, drizzle consistency.

Using the teaspoon from your measuring spoons, scoop out 1 teaspoon of drizzle icing and spoon over each cupcake, spreading slightly to coat the entire top.

Gently press one chocolate covered peanut into the center of each cupcake; allow icing to harden before serving.

Pumpkin Scones

pumpkin sconeWhen I lived in DC, there was a time when I visited Starbucks every day. There were so many located within easy walking distance of my office between Metro Center and Gallery Place, it was simple to stroll in, order a cup of tea, and peruse the treat offerings behind the glass counter.

The pumpkin scone was a popular surprise; I remember waiting for it in the fall and being delighted to discover it amid the cinnamon swirl coffee cake and black bottom cupcakes. There was a time when I swore off of them, after my friend Kelly and I looked up their calorie content. Let’s just say that one shouldn’t eat a pumpkin scone every day if she wants to keep her waistline (and heart health, and blood sugar levels) in check.

There are many copycat recipes out there, including the one I’ve adapted below from Damn Delicious. My end result was more cakey and tender inside than the somewhat crumbly Starbucks variety, and next time, I’d like to omit the glaze and mix some chocolate chips and pecans into the batter for some interesting texture. Full disclosure: somehow, I omitted the cinnamon in my recipe when I baked these. I don’t know how this happened (perhaps my two weeks away from the kitchen have made me a bit rusty?), but I will definitely use it next time. The scones were delicious, but they could use that extra spicy kick.

Ingredients

For the Scones

  • 2 cups flour
  • 1/3 cup packed brown sugar
  • 1 teaspoon cinnamon
  • 1 teaspoon nutmeg
  • 1 teaspoon cloves
  • 1/2 teaspoon ginger
  • 1 teaspoon baking powder
  • 1/2 teaspoon baking soda
  • 1/4 teaspoon salt
  • 8 tablespoons cold butter, cut into chunks
  • 1/2 cup pumpkin puree
  • 3 tablespoons milk
  • 1 egg
  • 2 1/2 teaspoons vanilla extract

For the Glaze

  • 1 1/2 cups powdered sugar
  • About 2 1/2 tablespoons milk

For the Spice Drizzle

  • 1 1/2 cups powdered sugar
  • 1/4 teaspoon cinnamon
  • 1/4 teaspoon cloves
  • 1/4 teaspoon ginger
  • 1 1/2 to 2 tablespoons milk

Preparation

Preheat oven to 400 degrees. Line a baking sheet with parchment paper.

In a large bowl, combine flour, brown sugar, cinnamon, nutmeg, cloves, ginger, baking powder, baking soda, and salt. Add butter and rub into the flour mixture until it resembles coarse crumbs.

In a small bowl, combine pumpkin puree, milk, egg, and vanilla and stir to combine well. Pour over flour/butter mixture and stir with a spatula until a soft dough forms.

Turn dough out onto a lightly floured surface and knead briefly to combine well. Pat down into a 10 x 7 inch rectangle and cut into 8 wedges.

Place wedges on the prepared baking sheet and bake for 10-13 minutes, until a cake tester comes out clean.

Cool completely before glazing.

To prepare the glaze:

Place 1 cup powdered sugar in a small bowl and slowly add about 2 tablespoons milk to reach a consistency that is easy to spread, but not too thin. Spoon 1 tablespoon glaze over each scone and spread with a small offset spatula, allowing excess glaze to drip down the sides.

To prepare the spice drizzle:

Place powdered sugar, cinnamon, cloves, ginger, and nutmeg in a small bowl and add 1 tablespoon milk. Stir to combine, adding additional 1/2 to 1 tablespoon milk to reach a drizzly consistency. Place in a small piping bag fitted with a plain tip and drizzle over scones in a zigzag pattern.

Allow glaze to harden completely before serving.


Lemon Raspberry Roulade

lemon raspberry rouladeLemon and raspberry are two of my favorite flavors, even more so when they’re combined in the same treat. For Easter, I decided that I wanted a lemon-based dessert; I found a few recipes for lemon roulade, but most of them involved a cream cheese or marascapone filling. I wanted something a bit lighter, so I chose a scratch-made raspberry filling and I must say, the end result is delicious.

Rolling a cake can be intimidating, but remember, on this blog, we have no fear. The original recipe for the cake portion of this roulade involved allowing the cake to cool completely before filling and rolling it, but I chose to let it cool for just a few minutes before I rolled it in a heavily-powdered-sugared tea towel. I’d recommend rolling it immediately after removing it from the pan just to be on the safe side rather than waiting any time at all. Also, keep a very close eye on your filling; it goes from liquid to thickened in a matter of seconds!

If you’d rather forgo the tangy lemon icing, you could easily dust the roulade with powdered sugar or serve it with fresh whipped cream. But since you’re working with lemons and will likely have a few tablespoons of lemon juice left over, the icing is a nice way to make the most of it.

Part I: Lemon Cake

Ingredients

  • 3/4 cup flour
  • 1/4 teaspoon baking powder
  • 1/4 teaspoon baking soda
  • 1/4 teaspoon salt
  • 2 eggs
  • 3/4 cup sugar
  • 1/4 cup fresh lemon juice
  • zest of 3 small to medium-sized lemons
  • 1 1/2 teaspoons vanilla extract

Preparation

Preheat oven to 375 degrees. Line a 15 x 10 x 1 jelly roll pan with parchment; spray with baking spray and dust with flour. I used a sieve and dusted the flour directly onto the parchment. Lay a thin tea towel on a counter top and dust heavily with powdered sugar.

In a medium bowl, combine flour, baking powder, baking soda, and salt; set aside.

In a mixing bowl, beat sugar and eggs on medium-high speed for 3 minutes until thickened and light in color.

Add lemon juice, lemon zest, and vanilla and beat until combined.

With the mixer running on low, add flour and beat until just combined.

Pour batter into prepared pan and gently spread with an offset spatula to distribute the batter in one even layer.

Bake for 10-12 minutes, until edges are just golden and cake springs back when touched.

Remove from oven and immediately flip onto a cooling rack; remove parchment paper and quickly flip cake onto the prepared tea towel. Roll up quickly from the short end, placing on a cooling rack to cool completely before filling.

Part II: Raspberry Filling

Ingredients

  • 1 1/2 cups frozen raspberries, pulsed in a food processor to crumb-like texture
  • 1/2 cup sugar
  • 1 tablespoon lemon juice
  • 2 tablespoons cornstarch
  • 1 – 2 tablespoons water

Preparation

In a medium saucepan, combine raspberries, sugar, and lemon juice. Heat until raspberries begin to liquefy; quickly place in the bowl of a food processor and puree. Return to heat; cook until mixture reaches a low boil.

In a small glass measuring cup, place cornstarch and add 1 tablespoon water; mixture will thicken and almost harden immediately, so add another 1/2 to 1 tablespoon of water to achieve a pourable consistency. Whisk into raspberry mixture and cook at a low boil for 1-2 minutes; mixture will thicken very quickly and become glossy.

Remove from heat and place in a small bowl to cool completely before using. Note: this filling will not be seedless unless you pass the puree through a sieve before returning to the stove and adding the cornstarch and water.

Once both the cake and filling are completely cool, carefully un-roll cake and spread with filling. Re-roll and wrap tightly in plastic wrap; store in the refrigerator overnight to set.

Part III: Tangy Lemon Glaze

Ingredients

  • 1 1/2 cups powdered sugar
  • 3 tablespoons lemon juice
  • 1/2 teaspoon lemon zest

Preparation

In a small bowl, combine 1 cup powdered sugar about 2 tablespoons lemon juice; mix well to completely combine. Add another 1/2 cup powdered sugar and up to 1 more tablespoon lemon juice to achieve a thick drizzling consistency; stir in lemon zest until well-combined.

Unwrap cake and place on a platter or cake plate. Pour glaze down the center of the cake, allowing to drip over the sides, spreading as necessary to cover the entire top of the cake. Allow glaze to harden, then return cake to the refrigerator for storage.


Italian Easter Cookies

italian easter cookiesWhen I first saw these cookies, I thought they were called stracciatella. As it turns out, that’s the name of the blog they’re on; the word stacciatella actually refers to three different foods in Italy: an egg drop soup, a kind of gelato that’s similar to chocolate chip ice cream, and a kind of cheese, not these lovely little Easter cookies. Stracciatella means little shred, and is incredibly similar to the last name of one of my best friends ever, Kate.

Kate and I met in the back row of geometry class in the tenth grade, where neither of us had a clue what was going on. We’re both better with words than numbers, and how either one of us squeaked out of that class with a passing grade is one of life’s great mysteries. Our suffering created a bond though; since that fateful meeting in geometry, we’ve shared countless laughs, adventures, challenges, and desserts. We’re still friends to this day; in fact, Kate was among our guests at this past Monday’s Passover seder.

So, on this Easter Sunday, I give tribute to Kate, and her awesome Italian last name…even if these aren’t really called stracciatella, that’s probably what I’ll always call them. Buona Pasqua!

Ingredients

For the cookies

  • 8 tablespoons butter, at room temperature
  • 3/4 cup sugar
  • 3 eggs
  • 1 teaspoon almond extract
  • 1 teaspoon vanilla extract
  • 1/4 cup milk
  • 3/4 cup vegetable oil
  • 3 3/4 cup flour
  • 5 teaspoons baking powder

For the frosting

  • 4 tablespoons butter, at room temperature
  • 2 cups powdered sugar
  • 3 teaspoons almond extract
  • 1 teaspoon vanilla extract
  • 2-3 tablespoons milk
  • colored sprinkles

Preparation

Preheat oven to 350 degrees. Line several baking sheets with foil.

In a medium bowl, combine flour and baking powder; set aside.

In a mixing bowl, cream together butter and sugar until very light and fluffy.

Add eggs, one at a time, beating well after each addition and scraping the bowl frequently.

Add almond and vanilla extracts, milk, and vegetable oil and beat until well-combined.

Add flour mixture and beat until a soft dough forms.

Scoop 1-inch balls of dough and roll them into balls, then ropes, and form into rings. Place about 1 inch apart on the prepare baking sheets and bake for 8 minutes on the bottom rack of the oven, then 8 minutes on the top rack; the bottoms will be golden brown when they are done.

Cool cookies completely on a wire rack before dipping in frosting.

To make frosting, combine butter, powdered sugar, and almond and vanilla extracts and beat on low, then medium speed, to combine. Add milk 1 tablespoon at a time to reach a slightly drizzly consistency; you don’t want the frosting to be too thick or thin, just thin enough to dip the cookies.

Dip the top of each cookie into the frosting and set on a wire rack, then sprinkle with colored sprinkles if desired.

Store in an airtight container at room temperature.

Peanut Butter Eggs

peanut butter egg 2The Reese’s Peanut Butter egg is my favorite Easter treat, edging out the Cadbury Egg by the slightest of margins. My sister-in-law Kristin and I agree that the best Reese’s holiday offerings are the peanut butter egg at Easter and the peanut butter pumpkin at Halloween because they each yield a maximum amount of peanut butter; the peanut butter tree at Christmas, for example, isn’t really enough.

Many blogs feature homemade peanut butter egg recipes and they’re all relatively the same, involving melted peanut butter, butter, brown sugar, salt, and a yummy chocolate coating made of either semisweet or milk chocolate chips melted with shortening. I’ve used semisweet below, but you could easily use milk chocolate if you prefer. Though I haven’t tried one yet, I suspect they’ll taste like a cross between a buckeye and a peanut butter egg. Time will tell; fortunately, Easter is tomorrow!

The chocolate coating makes way more than enough for all of your eggs; my peanut butter filling yielded 11 eggs but you could easily make them slightly smaller to yield a dozen or more. You’ll definitely have coating left over, which would be great for drizzling on biscotti, butter cookies, or over cupcakes.

Ingredients

  • 1 cup smooth peanut butter
  • 4 tablespoons butter
  • 1/4 packed dark brown sugar
  • 1/4 teaspoon salt
  • 1 1/4 cups powdered sugar, sifted
  • 16 ounces semisweet chocolate chips
  • 2 tablespoons shortening

Preparation

In a medium saucepan, combine peanut butter, butter, brown sugar, and salt. Cook on medium heat until entirely melted and slightly bubbly, stirring frequently.

Remove from heat and add powdered sugar about 1/2 cup at a time, mixing well after each addition to fully incorporate the powdered sugar into the peanut butter mixture. Your end result will be very thick, and this is what you want.

Set filling aside to cool at room temperature until easy to handle; I set mine aside for about an hour.

Using a 2-inch cookie scoop, scoop balls of filling and shape into eggs. Place on a parchment-lined baking sheet and refrigerate for at least 30 minutes to 1 hour to allow filling to harden.

In a medium microwave-safe bowl, combine chocolate chips and shortening; microwave in 30-second intervals until completely melted, stirring after each interval; this takes about 2 minutes or so.

Dip eggs into the chocolate coating and cover completely; I use two forks to pass them back and forth, then shake off the excess. Return to the parchment-covered sheet and place back in the refrigerator to harden. Store in an airtight container in the refrigerator.


Peanut M&M Blondies

peanut m&m blondiesAs a godmother, I believe that my responsibilities to the lovely three-year-old Maureen Elizabeth Mowery include, among various other things, teaching her about how to be a good person, encouraging her to embrace her feisty girlness, and providing her with baked goods at every holiday. I’m fond of creating care packages for her and her family, picking out fun-colored tissue paper for padding and placing all manner of treats inside, like last month’s Rice Krispie shamrocks, last fall’s pumpkin chocolate chip bread, or some other easy-to-ship concoction that can withstand the trip through the mail from Pittsburgh to southern Maryland.

Last night, I realized that I only had a few days left to go until Easter, and I needed something to send to my main gal Mo. Such things happen when you’re two weeks away from your association’s national conference and you’re lucky to be able to put a coherent sentence together…holidays tend to sneak up on you. Anyway, because most Easter-related cookies are sugar cut-outs that aren’t all that conducive to shipping, I sought a sturdier treat idea. Fortunately I had some Easter-colored peanut M&Ms in the treat jar (a jar given to me by Mo’s grandma, my favorite aunt, Aunt Liz), and I did a quick internet search for something that could be made with those. Fortunately, I found a peanut M&M blondie recipe and adapted it just slightly to suit the other ingredients I had on hand.

Note: you could easily substitute the half-cup of dark brown sugar and half a cup of the white sugar for one cup of light brown sugar. Since I didn’t have enough light brown on hand, I did a quick substitution and they turned out just fine. The recipe below is adapted from one found at A Full Measure of Happiness.

Ingredients

  • 2 1/2 cups flour
  • 1/2 teaspoon salt
  • 1/2 teaspoon baking soda
  • 1/2 cup dark brown sugar
  • 1 cup white sugar
  • 12 tablespoons butter, melted
  • 2 eggs
  • 1 1/2 tablespoons vanilla extract
  • 1 12.6-ounce package Easter-colored Peanut M&Ms

Preparation

Preheat oven to 350 degrees. Line a 9 x 13 pan completely with foil and lightly spray with baking spray.

In a large bowl, combine flour, salt, baking soda, dark brown sugar, and white sugar; mix well to combine.

Add melted butter and stir to incorporate slightly; add eggs and vanilla extract and stir well to fully combine.

Add peanut M&Ms and mix with your hands to combine well; using a spoon just wasn’t effective for me.

Press dough into the prepared pan and bake for 23-25 minutes, until a cake tester inserted in the center comes out clean.

Cool in pan for about 10 minutes, then lift out by the foil and place on a wire rack; peel foil back slightly and allow to cool completely.

Once cool, remove foil entirely and cut into bars. Store in an airtight container.

Vanilla Bean Cheesecake (for Passover)

passover cheesecakeI may have gone slightly overboard with the Passover desserts this year. There just seemed like so many interesting options, and I had to try them all. In addition to our toffee chocolate matzoh and truffles on tomorrow night’s seder table, there will be this cheesecake, a leaven-free treat of vanilla bean and almond goodness.

The crust for this lovely dessert is a concoction of almonds, matzoh cake meal, sugar, and melted butter, and the filling is a standard cream cheese and sugar mixture that includes the seeds of two vanilla beans, as well as a dash of almond extract. Garnish-wise, you could pair many foods with this cheesecake; strawberries and raspberries come to mind, as does good old-fashioned whipped cream, or perhaps chocolate curls.

I’m so excited about this cheesecake, I may have to break my sugar fast tomorrow night. Passover is about freedom, after all.

Ingredients

  • 3/4 cup chopped blanched almonds, toasted and cooled
  • 2/3 cup matzoh cake meal
  • 2/3 cup sugar
  • 1/4 teaspoon salt
  • 8 tablespoons butter, melted and slightly cooled
  • 3 8-ounce packages cream cheese
  • 3/4 cup sugar
  • 3 eggs
  • seeds scraped from 2 vanilla beans
  • 1/4 teaspoon almond extract

Preparation

Preheat oven to 350 degrees.

In the bowl of a food processor, combine almonds, matzoh cake meal, sugar, and salt. Pulse until finely ground, then transfer to a medium bowl and drizzle in butter, mixing with a spoon to incorporate evenly. Mix with your hands to combine; you want a sandy texture.

Press the crust mixture into the bottom and 1 inch up the sides of a 9-inch springform pan and bake for 12-15 minutes, until one shade darker in color. Cool completely on a wire rack.

In a mixing bowl, combine cream cheese and sugar and beat for 2 minutes on medium speed to combine, scraping the sides of the bowl as necessary. Add eggs, one at a time, beating well after each addition.

Add vanilla seeds and almond extract and beat until well combined, about 1-2 minutes more.

Place springform pan in a shallow baking dish and pour filling into crust. Bake for 45-50 minutes, until filling is set 1 1/2 inches from the edge but still wobbly in the middle.

Remove from oven and baking dish; set springform pan on a cooling rack and immediately run a knife around the edge of the crust, then remove the side of the pan and allow cheesecake to cool completely. Store in the refrigerator.


Truffles

trufflesI am now a chocolatier. An amateur one for sure, but that still counts, right?

Yesterday, I chopped up an enormous block of bittersweet chocolate with my big scary chef’s knife and made my first-ever batch of real truffles, using only chocolate and heavy cream and butter and flavorings. I had the music from the movie “Chocolat” in my head the whole time and tried my best to channel my inner Vianne Rocher.

Here’s what I’ve learned about working with ganache: once you try to roll it in your hands, all bets for cleanliness are off. It melts immediately, turning one’s hands into a chocolate-coated sticky mess. The end result is worth it, though: according to Mike, these truffles are “like taking a bite out of hot chocolate.” They are super-chocolaty and could of course be flavored and coated with any number of things, but I chose a simple orange extract and cocoa powder enhancement.

Ingredients

  • 12 ounces bittersweet chocolate, chopped
  • 1 cup heavy cream
  • 1 tablespoon butter
  • pinch of salt
  • 1/2 teaspoon vanilla extract
  • 1/2 teaspoon orange extract
  • about 1/4 cup cocoa powder, sifted

Preparation

Place chopped chocolate in a medium heat proof bowl; set aside.

In a medium saucepan, bring heavy cream, butter, and salt to a simmer. Immediately pour over chocolate and let set until chocolate is melted, about 10 minutes. Stir with a spatula until smooth.

Whisk in vanilla extract and orange extract (or just use 1 teaspoon vanilla extract if you don’t have orange), then continue stirring until chocolate is shiny and smooth. Pour into a shallow baking dish and let set overnight.

Line a baking sheet with parchment. Using a one-inch scoop, scoop out chocolate and roll into balls. Beware, this is a messy endeavor: I kept paper towels nearby and wiped my hands several times during the process. Coat each truffle in cocoa powder then place on the parchment-lined baking sheet. Cover with plastic wrap and chill at least 1 hour; once truffles are chilled, place in an airtight container and store in the refrigerator.