 It’s Easter Sunday, but it’s 35 degrees in Pittsburgh this morning. Spring is an unpredictable season here in western Pennsylvania – it could be 75 and beautiful or 28 and snowing, all in the span of a few days. Mother Nature will do what she likes, and we all have to just go with it.
I like to think Mother Nature would enjoy this cake, not only for its buttercream blossoms but also its flavors. The cake itself is orange, with vanilla buttercream and a mixed berry filling. I didn’t feel like making my filling from scratch, so I heated up about 1/2 cup mixed berry preserves, then combined about 1/2 tablespoon of cornstarch with a few teaspoons of water to make a slurry. I stirred the slurry into the preserves and simmered it for about 8-10 minutes to thicken it, then cooled it in the fridge before using it.
Ingredients
For the cake
- 1 cup flour
- 1 teaspoon baking powder
- dash of salt
- 8 tablespoons butter, softened
- 3/4 cup sugar
- 2 eggs
- 1 teaspoon vanilla extract
- zest of 1 Cara Cara orange
- 6 tablespoons milk
For the frosting, filling, and decoration
- 1 cup butter, at room temperature
- 3 cups powdered sugar
- 2 teaspoons vanilla extract
- 1/3 cup Bonne Maman mixed berry preserves, thickened*
- Pink, yellow, fuchsia, and green gel food coloring
*To use preserves as a cake filling, place 1/2 cup preserves in a small saucepan over medium heat. In a small bowl, combine about 1/2 tablespoon cornstarch and 2 teaspoons water to make a slurry, then stir into the preserves. Simmer until thickened – the mixture will reduce as it cooks.
Preparation
Preheat oven to 350 degrees. Lightly grease two 6-inch round cake pans, line each with a parchment circle, and lightly grease the parchment.
In a small bowl, combine flour, baking powder, and salt; set aside.
In a mixer fitted with the paddle attachment, cream together the butter and sugar until very well-blended. Add eggs, vanilla extract, and orange zest and beat well to combine, scraping the sides of your bowl a few times.
Add flour and milk alternatively in two batches, beginning and ending with the flour and beating until completely combined.
Pour batter into prepared pans and bake for 18-22 minutes, until a cake tester comes out clean. Remove from oven and allow cakes to cool in the pan for about 5 minutes, then carefully turn out onto a wire rack to cool completely.
To make the frosting: in a mixing bowl, beat butter on medium speed for 1-2 minutes. Add powdered sugar and beat on low, then medium speed, until the sugar is fully incorporated into the butter. Add vanilla extract and beat on medium speed for another 1-2 minutes. You want a spreadable consistency, but not so soft that your flower petals won’t hold their shape.
Place bottom layer of cake on your cake stand or plate and pipe a border just inside the edge of your cake; fill with thickened preserves. Top with the other cake and frost top and sides, covering with an even layer of frosting. Reserve a small portion of white frosting for flower details and another small portion for leaves; tint the remainder of your frosting to your desired shades and pipe flowers to create your design; I used roses, rosebuds, and five-petal flowers, then chilled them until they set before placing them on the cake. I then used two different sizes of closed-star tips to fill in the gaps with the other blooms and added leaves.
Store cake in an airtight container in the fridge; bring to room temperature before serving. Makes about 4-6 servings, depending on your slice size.
Here’s an overhead view of the cake, for a complete view of the flowers:

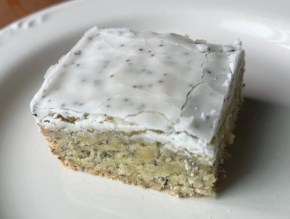 A while back I found a great recipe called Scandinavian blondies in my King Arthur Baking cookie companion, a great combination of lemon and almond flavors (or just almond, if you prefer). I’ve adapted that recipe multiple times to adjust the flavors, most recently using a classic lemon poppy seed combination. They turned out really well, and I’ll definitely make them again.
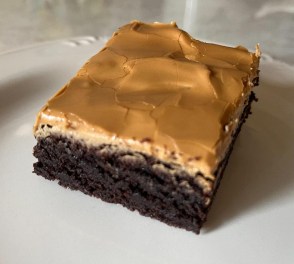 Chocolate and coffee are great flavor friends, and I’ve made many a mocha treat on this blog. A few weeks ago I wanted to bake something simple and easy, so I went with a classic coffee brownie using espresso powder and a simple espresso glaze icing. The end result was a fudgy (yet not too gooey) creation that proved to be very popular in Mike’s office.
 My mom Genny, an occasional subject on this blog, is coming from dinner this evening. She requested something simple – “just hamburgers, or whatever” – and instructed me not to go to any trouble. Well, I can’t have my mom over for Mother’s Day dinner without preparing some kind of dessert.
 This past Christmas I got a lovely baker’s spice set from my cousin Barb and her family that included vanilla sugar. I’d first heard of vanilla sugar in the wonderful book
 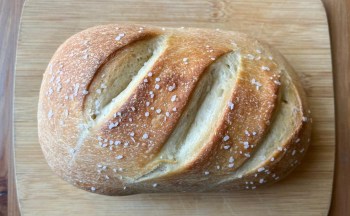 I’m not much of a bread baker, and as I work to build my skills, I have many challenges. One of those challenges is that a lot of bread recipes make one or two loaves, and Mike and I simply aren’t going to eat that much bread. Enter One Dish Kitchen, a collection of small-batch recipes perfect for two. I found
  Our dog Tucker turned two this week. He’s a very sweet boy who loves going for walks (especially hiking at the park), playing with various squeaky toys, and snuggling up to us for quiet time. Tucker came to us from a rescue in Ohio and he didn’t have the easiest start in life, but he’s settled in with us very well. Despite having tons of energy, he can chill out like a pro. He’s napping as I write this.
 While searching for spring cupcake ideas, I came across
  I’ve often wondered who first combined chocolate and peanut butter, and why. Was it an accident, like in that Reese’s commercial from the 80s where someone holding a chocolate bar collided with someone holding an open peanut butter jar? Probably not, but think of all the treats that have come about as a result.
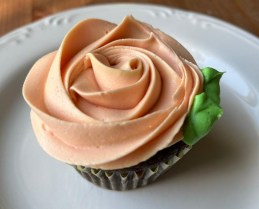 I had big cupcake decorating plans today. And then, facing down my batch, I just couldn’t do it. No flower nail, no multiple shades, no practicing blossoms with my flower tip. I took the easy road instead, using both my Wilton M1 and 4B tips to create something that might, very vaguely, look like flowers. Truth be told, the cupcake pictured here is the best-looking one of the bunch. The others, well…not so much.
