Hot Cocoa Cupcakes

hotcocoacupcakes

I swear by recipes that come on the back of a package, because you know they’re tried and true. This recipe, while not from a package, was featured on the Dixie Crystals sugar website, submitted by a member of their baking community. And you a product maker isn’t going to just slap any old recipe on their website and have it associated with their sugar, so I figured this one would be good – and I was right.

Quantity-wise, the original recipe said it would yield 24 cupcakes, so I cut it in half intending to make just a dozen. My halved recipe still made 24, but amazingly the frosting yielded exactly enough for my total two dozen cupcakes. I altered the frosting recipe to include more vanilla and a teaspoon of milk, because it seemed a bit thick to me. You can top these cupcakes however you like, but I went with mini marshmallows and peppermint sticks, even though there’s no peppermint in the batter.

Ingredients

For the cupcakes

  • 1 cup flour
  • 1 cup sugar
  • 1 teaspoon baking soda
  • 1/2 teaspoon salt
  • 1/4 cup hot cocoa mix
  • 6 tablespoons unsweetened cocoa powder
  • 1 egg
  • 1/2 cup milk
  • 1/2 cup vegetable oil
  • 1/2 cup boiling water

For the frosting

  • 8 tablespoons butter, at room temperature
  • 7-ounce jar marshmallow creme (aka fluff)
  • 3 teaspoons vanilla 
  • 1 teaspoon milk 
  • Miniature marshmallows
  • Peppermint sticks

Preparation

Preheat oven to 325 degrees. Line two 12-cup cupcake tins with paper liners.

In a mixing bowl, whisk together flour, sugar, baking soda, salt, and cocoa mix. Add egg, milk, and vegetable oil and stir to combine; slowly add boiling water and stir until the mixture is smooth.

Fill cupcake wells half full and bake for 30 minutes, or until a cake tester inserted in the center comes out clean. Remove from oven and remove cupcakes from tins; cool completely on a wire rack.

For the frosting, beat butter on medium speed for about 1 minute. Add marshmallow creme and beat to combine, then add powdered sugar and 1 teaspoon vanilla; beat on medium speed to combine. Add 2 additional teaspoons vanilla extract and 1 teaspoon milk to thin the frosting slightly.

Fit a piping bag with a Wilton M1 tip and pipe swirls of frosting onto each cupcake. Add miniature marshmallows and peppermint sticks to the tops if desired. Store in an airtight container at room temperature for 1-2 days.

Makes 24.

Gingerbread Cupcakes

gingerbread cupcakes
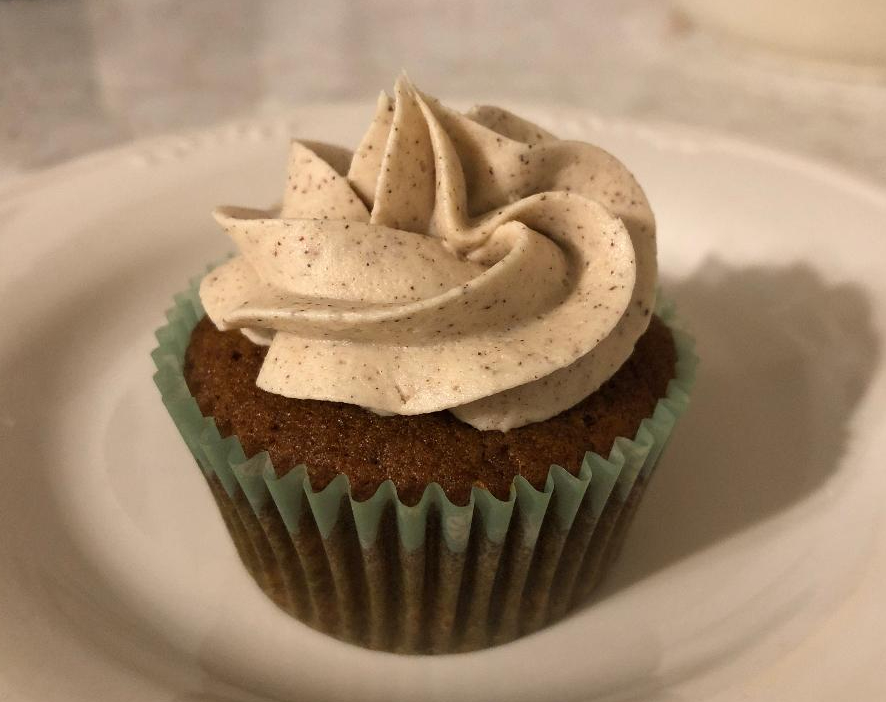
Gingerbread is one of my favorite things about Christmas, and I’ve baked some decent gingerbread treats in previous years. This time I wanted to make a gingerbread cupcake, so I turned to a gingerbread cake recipe I had from several Christmases ago and it turned out really well.

The cinnamon vanilla buttercream I paired with these treats is delicious, but it almost overshadows the gingerbread flavor for me. Next time, I might not frost these at all, but instead dust them with powdered sugar, or just do a drizzle icing with powdered sugar and water to glaze the cupcake tops. 

Ingredients

For the cupcakes

  • 1 1/2 cups all purpose flour
  • 3/4 tsp cinnamon
  • 3/4 tsp ginger
  • 1/4 teaspoon allspice
  • 1/8 teaspoon cloves
  • 1/2 teaspoon baking powder
  • 1/2 teaspoon baking soda
  • 8 tablespoons butter, at room temperature
  • 6 tablespoons brown sugar
  • 1/2 cup molasses
  • 1 egg
  • 1/2 cup water

For the cinnamon buttercream 

  • 8 tablespoons butter, at room temperature
  • 2 1/2 cups powdered sugar
  • 1 1/2 tablespoons vanilla extract
  • 1/2 teaspoon cinnamon
  • 1 tablespoon milk 

Preparation

Preheat oven to 350 degrees. Line two cupcake tins with paper liners; my recipe yielded 17 cupcakes. 

In a medium bowl, combine flour, cinnamon, ginger, allspice, cloves, baking powder, and baking soda; set aside. In a mixing bowl fitted with the paddle attachment, cream together butter and brown sugar until fluffy, about 2-3 minutes, scraping the sides of the bowl well. Add molasses and egg and beat well to combine. Add flour mixture and water alternatively in three batches, starting and ending with the flour and mixing to combine between each.

Fill cupcake wells about half-full with batter and bake for 16 minutes, or until a cake tester comes out clean – just be careful not to over-bake these cupcakes, and gingerbread mixtures can burn easily. Remove from oven and immediately remove cupcakes to wire racks to cool completely.

For frosting, beat butter and powdered sugar on low speed until the sugar completely incorporates into the butter. Add vanilla, cinnamon, and milk and beat to combine completely.

Fit a large piping bag with a Wilton M1 tip and pipe swirls of frosting onto each cupcake; I had literally just enough for my 17 cupcakes, which was amazing. Store in an airtight container at room temperature for 2-3 days. 

Whoville Cookies

grinch cookiesI once saw a meme that read “Even the Grinch had a dog, so if you don’t like dogs, that says a lot about you.” Wisdom from the internet, indeed. I just love How the Grinch Stole Christmas!, because I adore the Grinch. There he is, alone in his cave in the mountains with his dog. Swap out a cave for a cabin, and you’ve pretty much got my dream life. I mean sure, I enjoy spending time with others, but if I had my way, I’d live in a cute little mountain house outside Whoville (distanced enough from the village to still have my space) without batting an eye.

Anyway, these cookies are inspired by the alpine nature of Whoville, and also the Grinch’s “too small” heart, which grows once he realizes that the townsfolk of Whoville will celebrate Christmas even without presents and decorations. The recipe is my Grandma Zella’s almond cookie recipe, which can be baked spritz-style using a cookie press or just rolled into balls. Whatever you choose, this is an easy and fun way to celebrate the season.

Ingredients

  • 1 cup sugar
  • 1 1/4 cups shortening
  • 3 eggs
  • 3 1/4 cups flour
  • 2 teaspoons almond flavor (the imitation kind actually works best, if you can believe it)
  • Green food coloring
  • Powdered sugar
  • Water
  • Red food coloring

Preparation

Preheat oven to 400 degrees.

In a mixing bowl, cream together sugar and shortening. Add eggs, one at a time, beating well after each. Add half the flour, along with the almond flavoring, and beat to combine. Add the remaining flour and beat until well combined.

For spritz-style cookies, fit a cookie press with your desired shape; I used the tree shape. Press onto an unlined, ungreased cookie sheet. Bake for about 6 minutes, until just golden brown on the bottom. Remove from oven and allow to cool for a few minutes on the cookie sheets, then place on a wire rack to cool completely.

For Grinch heart cookies, use a 1-inch cookie scoop and roll the dough into balls. Place on foil-lined cookie sheets and bake for about 13-15 minutes, until bottoms are just golden brown. Remove from oven and allow to cool for a few minutes on the cookie sheets, then place on a wire rack to cool completely.

For heart icing, mix a few tablespoons powdered sugar with just enough water to make a thick but pipeable consistency and tint red. Fit a small piping bag with a small plain tip and pipe hearts onto each cookie.

Store cookies at room temperature in an airtight container for several days – they also freeze well if you haven’t iced them. Makes several dozen, depending on your shapes; my batch made about 5 dozen.

Pumpkin Cake for Two

pumpkin cake
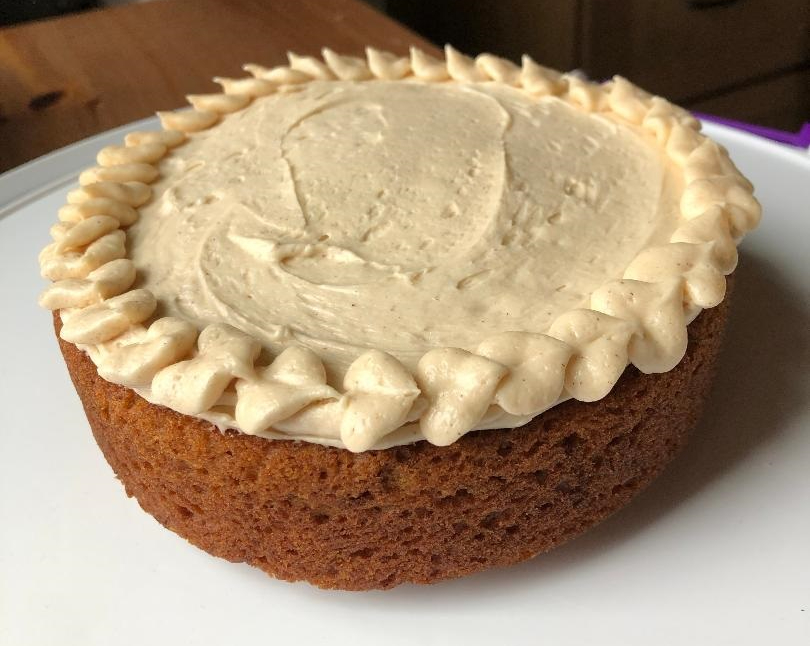
Could you eat an entire pie by yourself? The answer to that question is probably yes. And really, I’m not here to judge. But each year I bake both apple and pumpkin pies for Thanksgiving, and because apple is Mike’s favorite and my mom doesn’t eat much dairy (including the evaporated milk in my pumpkin pie recipe), part of my delicious pumpkin creation goes to waste. Not wanting such a result this year, I chose to bake a little pumpkin cake, perfect for just a few servings. The funny thing is that with the way I frosted it, this cake actually reminds me of a pie.

The original recipe for the cake comes from Carla at Homemade In The Kitchen, a fellow Pittsburgh baker who focuses on small-batch recipes, perfect for just one or two people. I paired her pumpkin cake with some caramel cinnamon buttercream frosting of my own, and I cannot wait to have it for dessert later today. Mike and my mom will enjoy the apple pie I baked yesterday, and Tucker, our new pup, will get some pumpkin puree for his dessert. Everyone wins, and nothing goes to waste. Happy Thanksgiving!

Ingredients

For the cake

  • 1/2 cup flour, sifted
  • 1/2 teaspoon baking powder
  • 1/4 teaspoon baking soda
  • 1/2 teaspoon ground cinnamon
  • 1/4 teaspoon ground nutmeg
  • 1/4 teaspoon ground ginger
  • 1/4 teaspoon salt
  • 1/2 cup pumpkin puree
  • 1/4 cup vegetable oil
  • 1/4 cup packed brown sugar
  • 1/4 cup granulated sugar
  • 1 egg, room temperature
  • 1/2 teaspoon vanilla

For the frosting

  • 4 tablespoons butter, at room temperature
  • 1 1/2 – 1 3/4 cups powdered sugar
  • 2 teaspoons vanilla extract
  • About 1 1/2 tablespoons caramel sauce, to taste
  • Cinnamon to taste

Preparation

Preheat oven to 350 degrees. Grease a 6-inch round cake tin and line the bottom with a parchment circle.

In a medium bowl, stir together flour, baking powder, baking soda, cinnamon, nutmeg, ginger, and salt; set aside. In another medium bowl, whisk together pumpkin, oil, sugars, egg, and vanilla. Gradually add the dry mixture to the pumpkin mixture, stirring to incorporate completely.

Pour into cake tin and bake for 22-27 minutes, until a cake tester inserted in the center comes out clean; the original recipe said to bake for 22-25 minutes, but my cake needed a few more – everyone’s oven is different. Cool in the tin for 15 minutes, then invert on a wire rack to cool completely.

To make the frosting, beat butter on medium speed for 1 minute, then add powdered sugar and beat on low until all of the sugar is incorporated into the butter. Add vanilla and caramel and beat to combine, about 2-3 minutes. Add cinnamon to taste – truth be told, I didn’t measure this, but rather just sprinkled a few dashes into the mixture and tasted it to see when I’d reached my desired flavor. Frost the cake using an offset spatula; if desired, fit a piping bag with a leaf tip and pipe leaf shapes around the edge.

Store in an airtight container at room temperature for about 2 days; pumpkin cake is very moist and can get soggy if kept longer. Makes one 6-inch cake, about four servings.

Molasses Oat Drops

molassesoatdrops
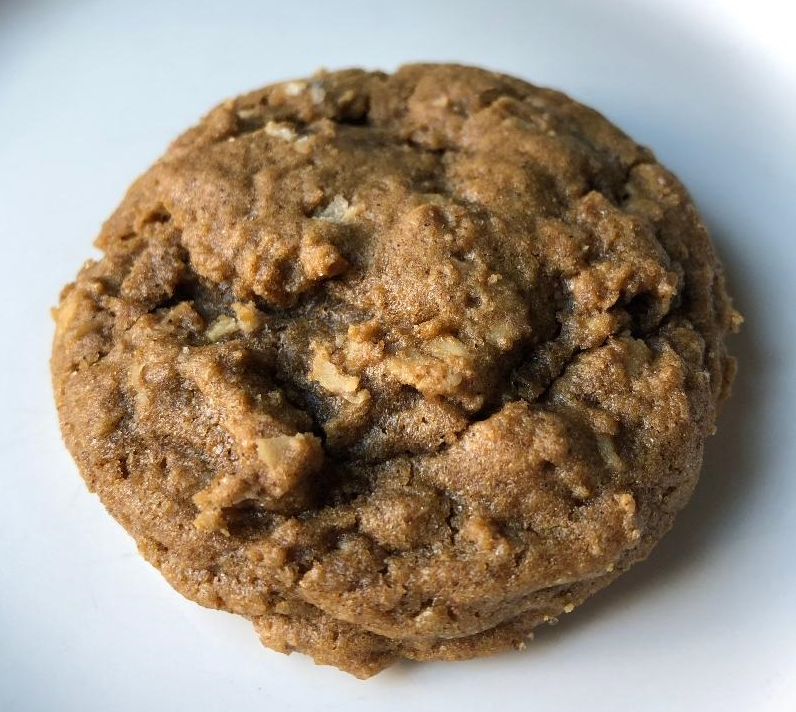
If I had to choose a flavor profile for any treat, molasses and spices would make my top five for sure. Called black treacle in Britain, molasses results from the sugarcane or sugar beet refining process. The good folks at Southern Living have a great explanation of the molasses-making process, as well as the different types of this dark syrup, in this article.

This recipe came from Ambitious Kitchen and was originally made as a sandwich cookie called gingerbread oatmeal cream pies. But once I baked them, I realized that they would be perfectly delicious without a filling of any kind. While I certainly plan to make a sandwich version at some point, these treats stand perfectly on their own; a delicious blend of spices and rich flavor from the blackstrap molasses along with a soft, chewy texture.

Ingredients

  • 1 1/2 cups all-purpose flour
  • 3/4 cup old fashioned rolled oats
  • 1/2 teaspoon baking soda
  • 1 1/2  teaspoons ground ginger
  • 1 teaspoon cinnamon
  • 1 teaspoon allspice
  • 1/4 teaspoon salt
  • 8 tablespoons butter, at room temperature
  • 1 cup packed brown sugar (I used light, but you can also use dark)
  • 1/4 cup blackstrap molasses
  • 1 egg
  • 1 teaspoon vanilla extract

Preparation

In a medium bowl, stir together flour, oats, baking soda, ginger, cinnamon, allspice, and salt; set aside.

In a mixer fitted with the paddle attachment, cream together butter and brown sugar. Add molasses, egg, and vanilla extract and beat until smooth – the mixture may look slightly curdled, but that’s fine. With the mixer running on low, slowly add flour mixture and beat until dough is just combined. Cover and chill for 1 hour.

Preheat oven to 350 degrees. Line several baking sheets with parchment. Remove dough from the fridge and scoop using a 2-inch cookie scoop, placing about 2 inches apart on the baking sheets. Bake for 9-11 minutes, until edges are set and tops are puffy. remove from the oven and allow to cool for several minutes on the baking sheets, then place on a wire rack to cool completely. Store in an airtight container at room temperature; makes about 30 cookies.

Maple Apple Blondies

maple apple blondiesI have a very cool and fulfilling job, but if Better Homes & Gardens ever wants me to work in their test kitchen, I’ll be there in a heartbeat. I’d love to bake all day, coming up with new and interesting recipes. And for me, BH&G recipes are always reliable – I’ve never had them go awry, and that’s something I really value as a baker. Nobody likes kitchen disasters, right?

Adapted from the original BH&G recipe in their 2017 Fall Baking magazine, these blondies take full advantage of seasonal flavors, using pure maple syrup and apples. I chose to enhance the recipe by adding 1/2 teaspoon of apple pie spice to the batter, and as I expected, they turned out incredibly well. 

Ingredients

For the blondies

  • 12 tablespoons butter
  • 2 Fuji apples, peeled and diced (or your favorite baking apple)
  • 1 cup packed light brown sugar
  • 1/2 cup sugar
  • 1/2 cup pure maple syrup
  • 2 eggs
  • 2 teaspoons vanilla
  • 2 cups flour
  • 1 teaspoon baking powder
  • 1/2 teaspoon salt
  • 1/2 teaspoon apple pie spice*
  • 1/4 teaspoon baking soda

For the icing

  • 2 cups powdered sugar
  • 1/4 cup maple syrup
  • 2 tablespoons butter, melted
  • 1-2 tablespoons milk

*No apple pie spice? Make your own! For 1 teaspoon, combine 1/2 teaspoon cinnamon with 1/4 teaspoon nutmeg and 1/8 teaspoon allspice with a dash of cloves.

Preparation

Preheat oven to 350 degrees. Line a 9 x 13 baking tin with foil, extending over the sides, and spray lightly with cooking spray.

In a medium bowl, stir together flour, baking powder, salt, apple pie spice, and baking soda; set aside.

In a medium saucepan, melt 1 tablespoon butter. Add apples and cook on medium heat for about 10-12 minutes, until apples are tender but not mushy. Pour apples into a bowl and set aside.

In the same saucepan, melt remaining butter. Remove from heat and stir in brown sugar, sugar, and maple syrup, until smooth. Add eggs and vanilla, stirring to combine. Add flour mixture and stir until smooth, then stir in apples. Pour into prepared tin and bake for 25-30 minutes, until golden brown. Cool in the tin on a wire rack before icing.

To make icing, stir together powdered sugar, maple syrup, and melted butter; add enough milk to make an easily spreadable icing (I added 1 tablespoon). Pour over bars and spread evenly; allow to set before cutting. Cut into 24 squares; store in an airtight container in the refrigerator for up to 3 days.

Pumpkin Patch Sugar Cut-Outs

IMG_9069To some people, frosting dozens of cut-out cookies might be stressful. But for me, it’s Zen time; this endeavor allows me to be completely focused on one task. And that task, when complete, will bring joy to others. It’s a win-win for my mental health, I’d say.

Yesterday I baked a batch of pumpkin-shaped cut-outs for Halloween and decided to frost them with various shades of orange, along with green and white. They turned out really well, and Mike will take them to work tomorrow for his colleagues to enjoy. Granted, I’m keeping a few back for us – I think the green ones are my favorites.

For the cookies

  • 1 cup butter, softened
  • 2 cups sugar
  • 2 eggs
  • 4 cups flour
  • 2 teaspoons baking powder
  • 1 teaspoon salt
  • 3 teaspoons vanilla
  • 1-2 teaspoons water

For the frosting

  • 3 egg whites*
  • 9 tablespoons shortening
  • Dash of salt
  • 6 cups powdered sugar
  • 2 1/2 teaspoons vanilla extract
  • 1 1/2 teaspoons almond extract
  • Orange, yellow, red, moss green, and brown gel food coloring

Preparation

Stir together flour, baking powder, and salt in a medium bowl; set aside. Cream together butter and sugar until fluffy. Add eggs and beat well. Add vanilla and about half the flour mixture, beating until combined; beat in remaining flour. If necessary, add 1-2 teaspoons of water for a less crumbly dough; you’ll need a more pliable dough to roll and cut later.

Divide dough in half and knead each just slightly until dough sticks together.  Form each half into a disc and wrap in plastic. Refrigerate until just barely firm, about 20-30 minutes.

Preheat oven to 375 degrees. Line several baking sheets with parchment paper. 

Roll dough to 1/8 inch thickness and cut into desired shapes; I used large, medium, and small pumpkin-shaped cutters. Be sure to bake like-sized shapes on one sheet – otherwise you’ll have an uneven bake. 

Bake for 8-10 minutes, until just golden. Remove from oven and allow to cool on cookie sheets for 2-3 minutes before carefully transferring to wire racks to cool completely.

For the frosting, combine egg whites, shortening, salt, and 2 cups powdered sugar in a mixing bowl.  Beat on low speed until combined, then increase speed to medium, then high, and beat for one minute.

Add additional cup powdered sugar and beat on low speed until combined, then on high speed for one minute. Add vanilla and almond extracts.  Beat on high speed for one or two minutes, until very well combined.

Check the frosting’s texture; it should be like very, very soft peanut butter and very easily spreadable.  If necessary, you can add one to two teaspoons of water to thin the frosting and beat well to combine.

Tint to your desired shades; I used a very light orange with just one drop of orange coloring, then darker shades that blended yellow, red, and brown into the already-orange frosting. For the stem colors, use brown for some and moss green for others; the green pumpkins are tinted with a generous amount of moss green coloring. 

Frost to look like pumpkins, using your knife to make the ridges. Allow icing to set before storing cookies between sheets of waxed paper in an airtight container. Makes about 5 dozen, depending on the size of your cutters. 

Peanut Butter Bars with M&Ms

pbbarswithmms
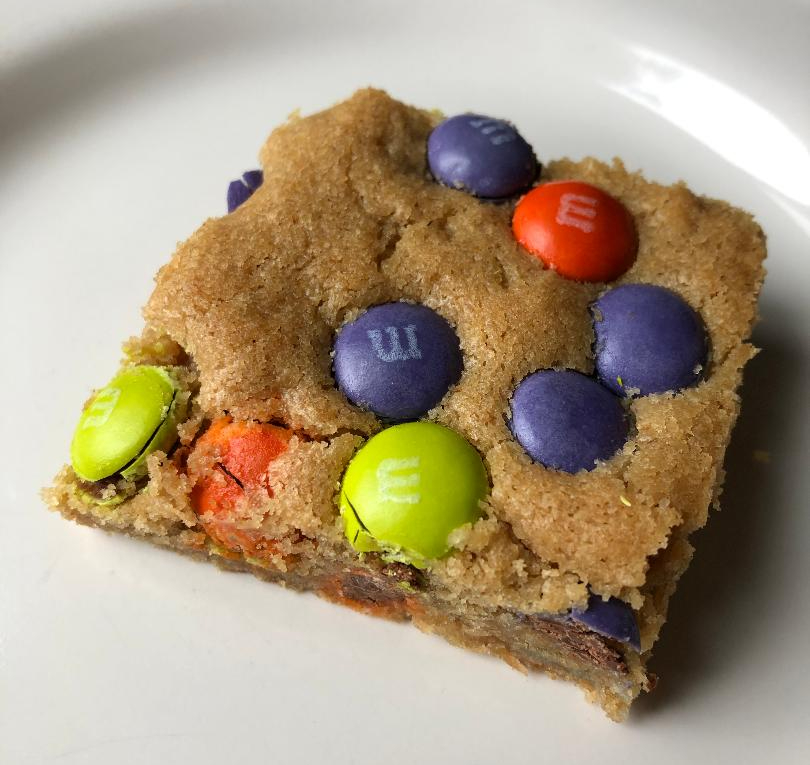
Halloween season means baking for my nieces and nephews, and these peanut butter bars with M&Ms Ghoul Mix candies traveled to North Carolina for my nephew Roman, who is 14. I remember when he was a tiny little person, dressed up as a lion for his day care Halloween parade. Last year (at least I think it was last year), he went as a legionnaire…or a Roman, if you will. Ha! This kid seems to have my sense of humor.

This recipe is incredibly easy to make, and the end result is beyond delicious. The first time I made this, with Reese’s Pieces instead of M&Ms, Mike and I ate the entire pan ourselves. Granted, that wasn’t the smartest decision, but they were just so tasty we couldn’t resist.

Ingredients

  • 12 tablespoons butter, melted and cooled for 3 minutes
  • 2 cups packed light brown sugar
  • 3/4 cup creamy peanut butter
  • 2 eggs plus 1 egg yolk
  • 1 tablespoon vanilla extract
  • 2 cups flour
  • 1 teaspoon baking powder
  • 1 teaspoon salt
  • 10-ounce bag M&Ms Ghoul Mix, divided

Preparation

Preheat oven to 350 degrees. Line a 9 x 13 pan with parchment paper.

In a large bowl, whisk melted butter and brown sugar together until smooth. Whisk in peanut butter, then eggs, egg yolk, and vanilla until well-combined.

Add flour, baking powder, and salt and stir together using a rubber spatula; batter will be very thick. Stir in about 1 cup M&Ms, then spread batter into the baking pan, flattening as best you can to create an even layer. Sprinkle remaining M&Ms on top.

Bake for 30 minutes, then insert a cake tester in the center; blondies are done if the cake tester comes out clean or with just a few moist crumbs. Be careful not to over-bake these; peanut butter treats tend to dry out if they’re baked too long.

Remove from oven and cool completely in the pan; lift out using parchment paper and cut into 24 squares. Store in an airtight container at room temperature for several days; if shipping, back well in an airtight container with layers of waxed paper to prevent breakage.

Joe Frogger Cookies

froggersJoe Frogger cookies have a long history, dating all the way back to 1700s  Massachusetts. According to various sources, Joseph and Lucretia Brown owned Black Joe’s Tavern, and Lucretia originally baked these treats in a skillet, so they were pancake-sized. Some say these cookies were called froggers because they were as large as the lily pads in the nearby pond, while others believed the batter looked like a frog when it hit the skillet. Whatever the reason, I wonder why they’re not called Lucretia Froggers, since she’s the one who invented them. The patriarchy, man. It’ll get you every time.

Regardless of why they’re called what they’re called, they are absolutely delicious. They’re quite large – I baked no more than five or six on one baking sheet at a time – and made with molasses, rum, and warm spices. Really, how can you go wrong with such amazing ingredients? The recipe below comes from my trusty King Arthur Flour Cookie Companion, though the size in the original recipe is “somewhere in size between a table tennis ball and golf ball.” I just used my 2-inch scoop, and it worked really well.

Ingredients

  • 2 cups flour
  • 1 1/2 teaspoons ginger
  • 1/2 teaspoon cloves
  • 1/2 teaspoon nutmeg
  • 1/4 teaspoon allspice
  • 1/2 teaspoon salt
  • 1/4 teaspoon baking soda
  • 8 tablespoons butter
  • 1/2 cup light brown sugar
  • 2/3 cup molasses
  • 3 tablespoons dark rum

Preparation

In a medium mixing bowl, whisk together flour, ginger, cloves, nutmeg, allspice, salt, and baking soda; set aside. In a medium saucepan set over low heat, melt butter, brown sugar, molasses, and rum, stirring until smooth. Pour into flour mixture and stir to completely combine; the batter will be very thin, like cake batter, but will firm up once chilled. Chill the batter for about 1 hour, until firm enough to scoop – it will still be quite sticky.

Preheat oven to 375 degrees. Line three baking sheets with parchment paper. Using a 2-inch cookie scoop, scoop dough into prepared sheets, leaving at least 2 inches between them. Lightly spray your fingers with baking or cookie spray and press to flatten slightly; the cookie dough is very sticky, so it helps to grease your fingers.

Bake for 10-11 minutes, until edges are set but centers still look a bit puffy. Remove from oven and allow to cool on wire racks for several minutes; the cookies are very fragile when they’re first out of the oven. Once cookies are firm enough, remove them to a wire rack to cool completely. My recipe made 17 cookies, but the original was supposed to yield 16.

Dutch Apple Pie Squares

dutchappleconcoctionThere’s a pretty big difference between sliced apples and diced apples. Slicing means to cut, while dicing means to cut into small, uniform pieces. And if I’d read the King Arthur Flour Dutch Apple Pie Bar recipe correctly, I would have diced, rather than sliced, my Granny Smiths. Eh, live and learn.

The funny thing is that I thought I’d done something wrong when I poured my filling into my baking pan, but I went with it anyway. The good news is that Mike thinks this concoction is absolutely delicious, though the bad news is that it’s definitely not something I can slice into squares and send to work with him. Not that he’s upset about this; apple pie is one of Mike’s favorite things ever, and this is essentially a rectangular apple pie. Next time, I’ll dice my apples and see how it goes.

Ingredients

For the crust

  • 1 1/2 cups flour
  • 3/4 teaspoon salt
  • 8 tablespoons unsalted butter, cold
  • 1 egg, beaten
  • 2 tablespoons ice water

For the filling

  • 2 tablespoons flour
  • 1/2 cup sugar
  • Pinch of nutmeg
  • 1/2 teaspoon cinnamon
  • 1/4 teaspoon salt
  • 6 Granny Smith Apples, sliced*
  • 2 teaspoons vanilla extract
  • 1/2 cup heavy cream

For the topping

  • 1 1/2 cups flour
  • 3/4 cup sugar
  • 1/4 teaspoon salt
  • 1 teaspoon cinnamon
  • 8 tablespoons butter, melted
  • 1 teaspoon vanilla extract
  • 1/2 teaspoon almond extract

Preparation

Preheat oven to 425 degrees. Lightly spray a 9×13 baking tin with baking spray and set aside.

To make the crust, whisk together flour and salt in a large bowl. Cut cold butter into pieces and rub (or cut in with a pastry blender) into the flour mixture until the mix looks like coarse crumbs. Drizzle beaten egg over the top and toss with a fork to combine. Add ice water 1 tablespoon at a time, tossing to combine until the dough starts to clump together. If you take a handful and it sticks together, you’ve added enough water.

Roll out your dough to a rectangle, large enough to fit in your baking tin; I roll my crust between two sheets of parchment to make it easier to handle. Prick all over with a fork, then bake crust for 10-12 minutes, until just set.

In another large bowl, combine flour, sugar, nutmeg, cinnamon, and salt. Add apples and toss to coat, then add vanilla extract and heavy cream, stirring to combine. To make the topping, combine flour, sugar, salt, and cinnamon in a medium bowl and stir in melted butter, then vanilla and almond extract. Stir until fairly even crumbs form.

Pour filling over crust, then sprinkle with topping. Bake for 15 minutes, then reduce the temperature to 350 degrees and bake for another 30-35 minutes, until the topping is golden brown and the filling is bubbly. Remove from oven and cool in the tin; if you actually dice your apples you could slice this into squares for individual servings, but I’m just leaving mine in one rectangular slab and Mike will cut slices in whatever size he likes. I suspect this would be delicious when served warm, with some vanilla ice cream and caramel sauce.